1. Introduction
The ÜnnLInk 4K 60Hz HDMI Ethernet Extender (Model A0741) allows you to extend a 4K@60Hz HDMI signal up to 200 feet (60 meters) over a single Cat5e/6 UTP cable. This device supports HDCP2.2, HDMI 2.0, bidirectional IR control, and Power over Cable (PoC), simplifying installation by requiring only one power adapter for either the transmitter or receiver unit. It also features an HDMI loop out on the transmitter and supports one-to-many receiver configurations, making it suitable for various home and professional audio-visual setups.
2. Package Contents
Please verify that all items listed below are included in your package. If any items are missing or damaged, please contact customer support.
- 1 x HDMI Transmitter Unit
- 1 x HDMI Receiver Unit
- 1 x DC 12V Power Adapter
- 2 x IR Transmitter Cables
- 2 x IR Receiver Cables
- 1 x User Manual
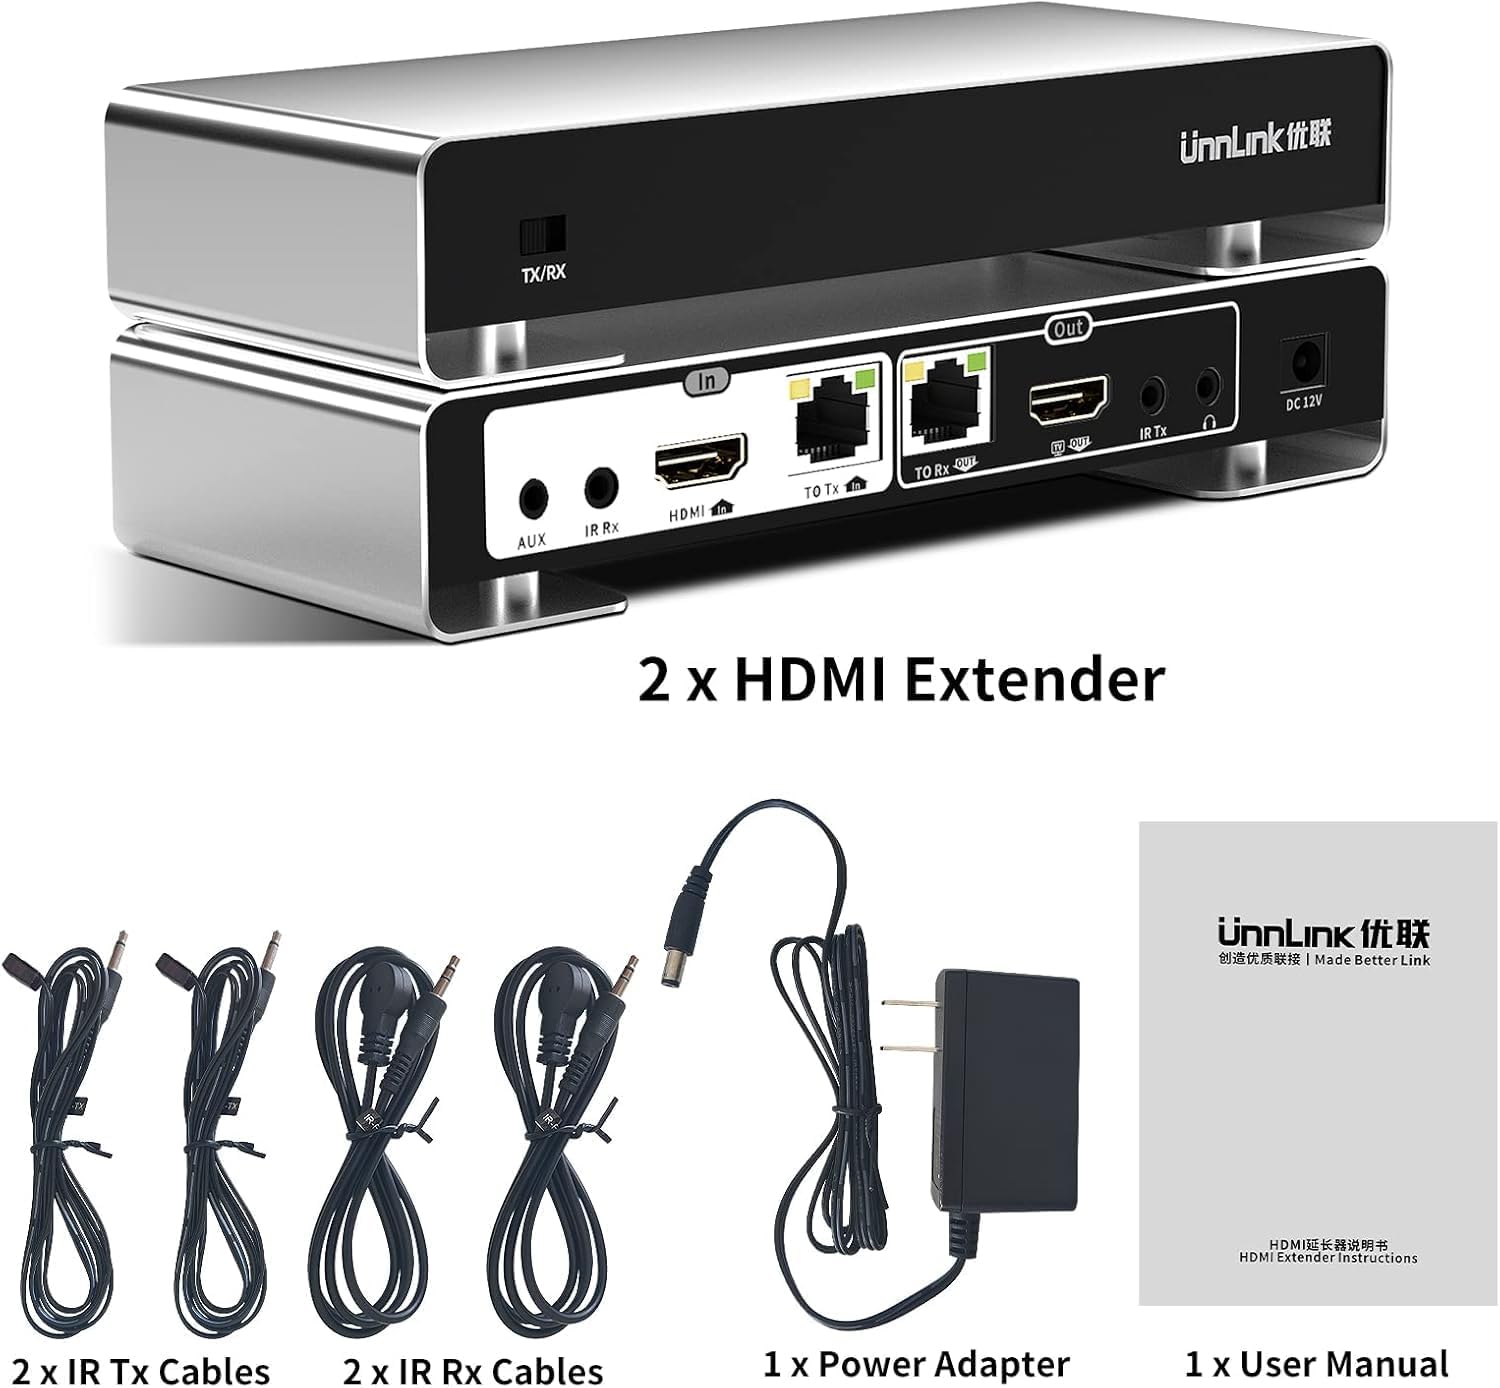
Image 2.1: Package contents of the ÜnnLInk HDMI Extender. This includes the transmitter and receiver units, a power adapter, two IR TX cables, two IR RX cables, and the user manual.
3. Product Overview
The ÜnnLInk HDMI Extender units are identical in appearance and functionality, with a switch to designate them as either a Transmitter (TX) or a Receiver (RX). Each unit features various ports for connectivity.
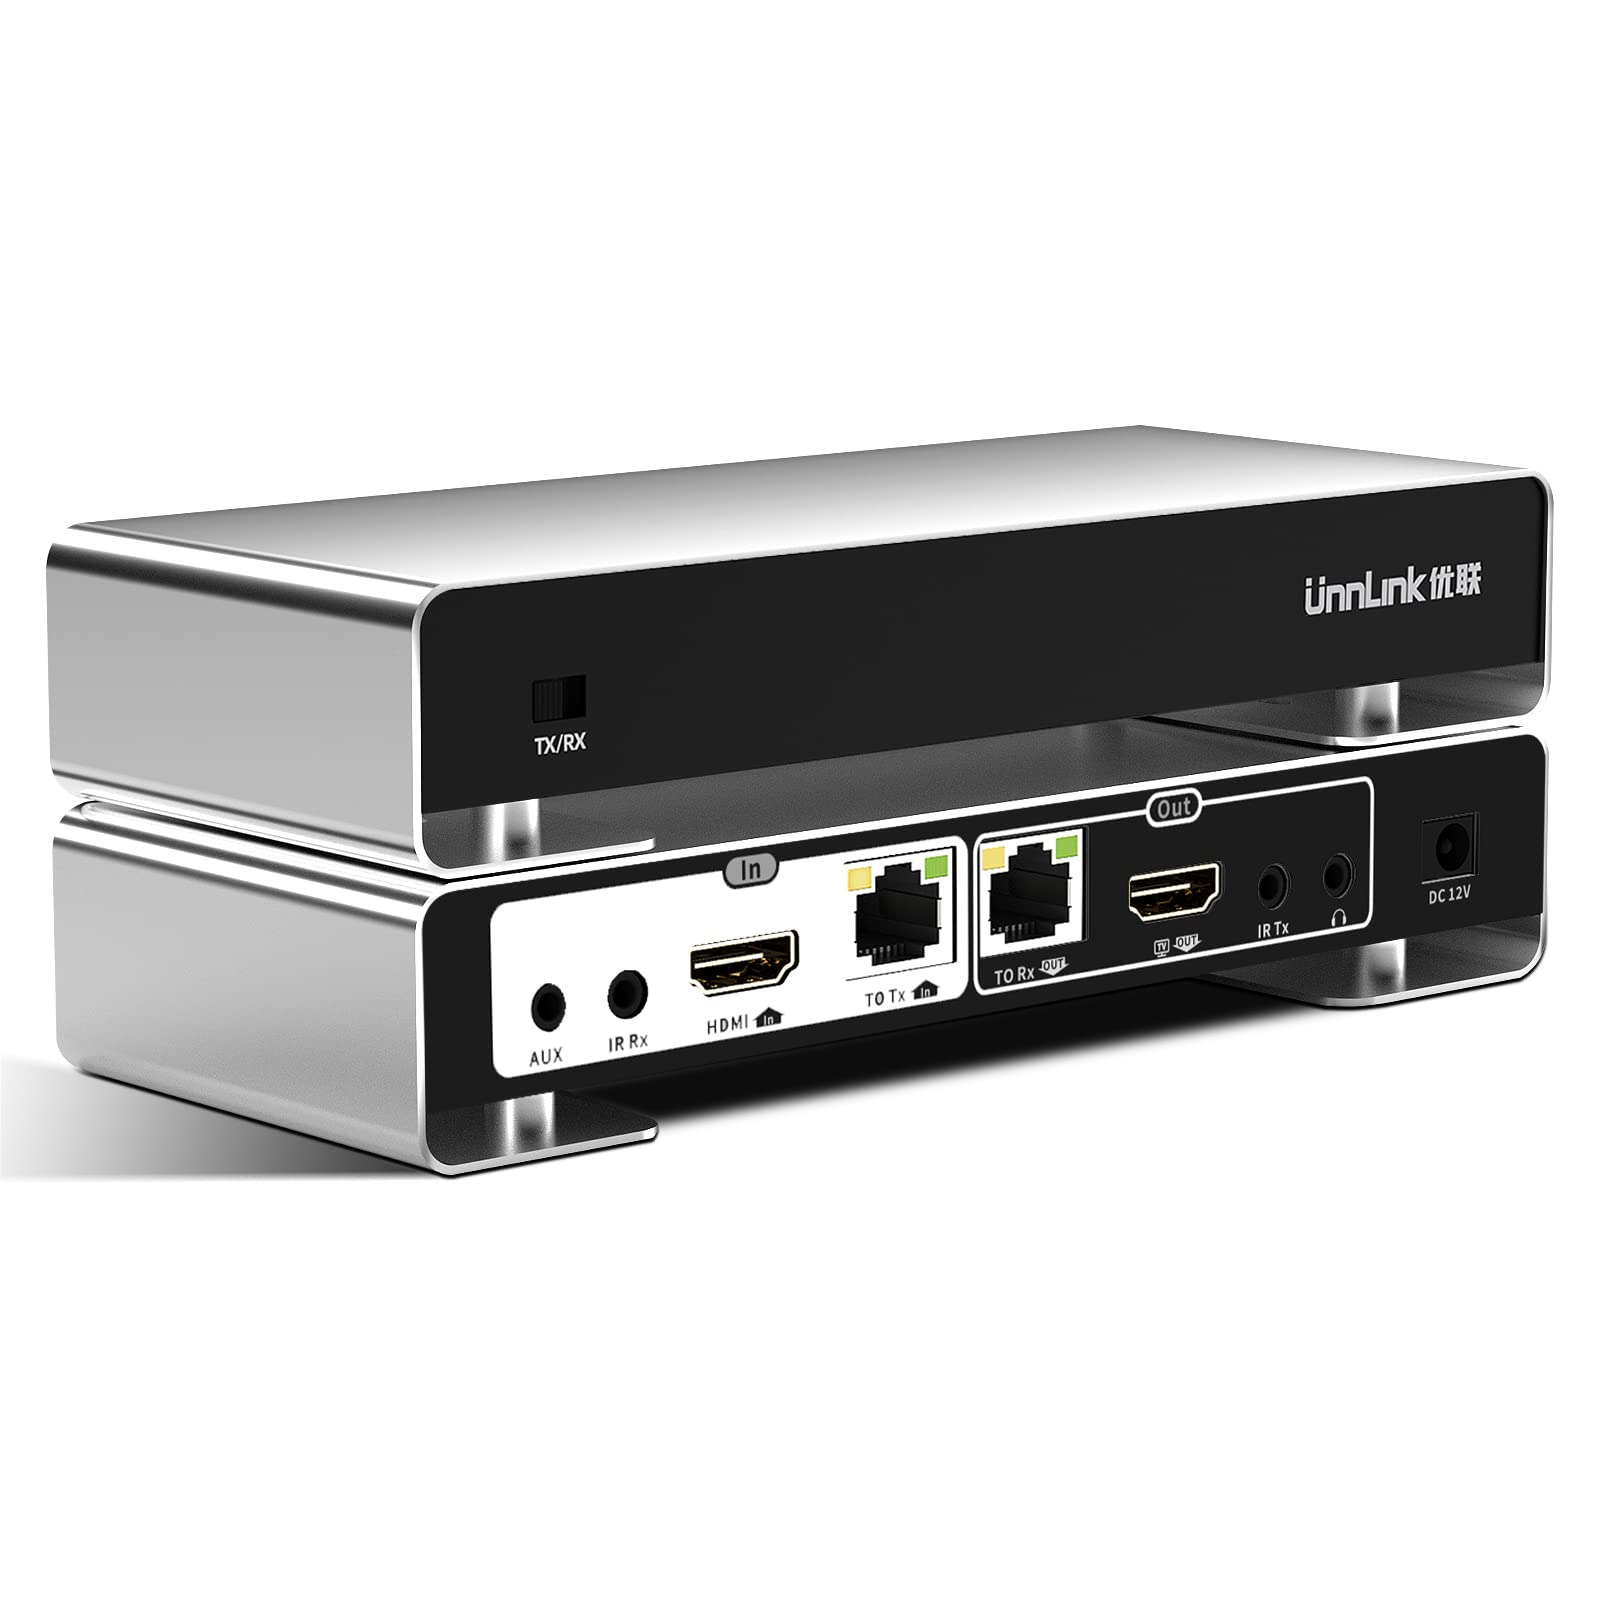
Image 3.1: Detailed diagram of the ÜnnLInk HDMI Extender unit, highlighting the TX/RX switch and all input/output ports.
3.1. Components and Ports
- TX/RX Switch: Toggles the unit between Transmitter (TX) and Receiver (RX) mode.
- AUX (3.5mm Audio In/Out): For connecting external audio devices.
- IR Rx: Infrared receiver port for connecting the IR receiver cable.
- HDMI In: HDMI input port for connecting the HDMI source (on TX unit).
- TO Tx / TO Rx (Ethernet Ports): RJ45 ports for Cat5e/6 cable connection between TX and RX units. 'TO Tx' is for transmitting Ethernet, 'TO Rx' is for receiving Ethernet.
- HDMI Out: HDMI output port for connecting to a display (on RX unit) or for local display (on TX unit, loop out).
- IR Tx: Infrared transmitter port for connecting the IR blaster cable.
- DC 12V: Power input port for the included power adapter.
4. Setup Instructions
Follow these steps to set up your ÜnnLInk HDMI Extender for optimal performance.
4.1. Basic Connection (One Transmitter to One Receiver)
- Prepare Units: Designate one unit as the Transmitter (TX) and the other as the Receiver (RX) by setting the TX/RX switch accordingly. Ensure the switch is firmly in position.
- Connect HDMI Source to TX: Connect your HDMI source device (e.g., Blu-ray player, laptop, gaming console) to the HDMI In port of the Transmitter unit using an HDMI cable.
- Connect HDMI Display to RX: Connect your HDMI display device (e.g., TV, monitor, projector) to the HDMI Out port of the Receiver unit using an HDMI cable.
- Connect Cat5e/6 Cable: Connect the TO Tx Ethernet port on the Transmitter unit to the TO Rx Ethernet port on the Receiver unit using a single Cat5e/6 UTP cable. Ensure the cable is of good quality and properly terminated.
- Connect Power: Connect the included DC 12V power adapter to the DC 12V port on either the Transmitter or the Receiver unit. Due to PoC (Power over Cable) functionality, only one unit requires external power.
- Optional IR Connection: If using IR control, connect the IR Transmitter cable to the IR Tx port on the Transmitter unit and position the IR blaster near your source device's IR sensor. Connect the IR Receiver cable to the IR Rx port on the Receiver unit and position the IR receiver to face your remote control.
- Power On: Power on all connected devices (HDMI source, display, and extender unit).

Image 4.1: Basic connection diagram for one transmitter and one receiver setup.
4.2. Power over Cable (PoC)
The PoC feature allows the extender system to be powered by a single power adapter connected to either the Transmitter or the Receiver unit. The power is then transmitted over the Cat5e/6 cable to the other unit, simplifying wiring.

Image 4.2: Illustration of the PoC function, showing power supplied to one unit and transferred to the other via the Ethernet cable.
4.3. One-to-Many Receiver Connection
This extender supports cascading multiple receivers from a single transmitter. This allows one HDMI source to be displayed on multiple screens.
- Connect the HDMI source to the Transmitter (TX) unit as described in Section 4.1.
- Connect the TO Tx Ethernet port of the Transmitter to the TO Rx Ethernet port of the first Receiver unit.
- Connect the TO Tx Ethernet port of the first Receiver unit to the TO Rx Ethernet port of the second Receiver unit.
- Continue this cascading connection for additional Receiver units as needed.
- Connect HDMI displays to the HDMI Out ports of each Receiver unit.
- Ensure power is supplied to at least one unit in the chain; PoC will distribute power to the others. For longer chains, it may be beneficial to power multiple units.

Image 4.3: Setup for connecting one transmitter to multiple receivers in a cascaded configuration.
5. Operating Instructions
Once the extender is properly set up, operation is straightforward.
5.1. Basic Operation
After all connections are made and power is supplied, the extender will automatically detect the HDMI signal and transmit it to the connected display(s). No additional configuration is typically required for basic video extension.
5.2. Bidirectional IR Control
The bidirectional IR feature allows you to control your HDMI source device from the remote display location, or control the display device from the source location.
- To control the source device from the display location: Point your remote control at the IR Receiver cable connected to the RX unit. The signal will be transmitted via the Cat5e/6 cable to the TX unit, and the IR Blaster cable connected to the TX unit will relay the command to your source device.
- To control the display device from the source location: Point your remote control at the IR Receiver cable connected to the TX unit. The signal will be transmitted via the Cat5e/6 cable to the RX unit, and the IR Blaster cable connected to the RX unit will relay the command to your display device.
5.3. HDMI Loop Out
The Transmitter unit includes an HDMI Loop Out port. This allows you to connect a local display near your HDMI source, while simultaneously sending the signal to a remote display via the extender. This is useful for monitoring the source content or for having a display in two different rooms.
6. Specifications
| Model Number | A0741 |
| HDMI Version | HDMI 2.0 |
| HDCP Version | HDCP 2.2 |
| Supported Resolutions | Up to 4K@60Hz (4:4:4) |
| Transmission Distance | Up to 200ft (60m) over Cat5e/6 UTP cable |
| IR Control | Bidirectional |
| Power Supply | DC 12V (PoC supported) |
| Color | Silver |
7. Troubleshooting
If you encounter issues with your ÜnnLInk HDMI Extender, please refer to the following common troubleshooting steps:
- No Video/Audio Output:
- Check all connections: Ensure all HDMI cables, Cat5e/6 cable, and power adapter are securely plugged into their respective ports.
- Verify TX/RX switch: Confirm that one unit is set to Transmitter (TX) and the other to Receiver (RX).
- Check power indicator: Ensure the power indicator light on the unit(s) is on. If not, check the power adapter and outlet.
- Test cables: Try using different HDMI and Cat5e/6 cables to rule out faulty cabling.
- Reduce cable length: If using a very long Cat5e/6 cable, try a shorter one to see if the issue is signal degradation.
- Restart devices: Power cycle the HDMI source, extender units, and display.
- Poor Picture Quality (Flickering, Distortion):
- Check Cat5e/6 cable quality: Ensure you are using a high-quality Cat5e or Cat6 UTP cable. Lower quality or damaged cables can cause signal issues.
- Cable termination: Verify that the RJ45 connectors on the Cat5e/6 cable are properly terminated (T568B standard is recommended).
- Interference: Keep the Cat5e/6 cable away from strong electromagnetic interference sources.
- Resolution compatibility: Ensure your display supports the output resolution from the HDMI source.
- IR Control Not Working:
- Check IR cable connections: Ensure IR TX and IR RX cables are correctly plugged into their respective ports.
- Position IR blasters/receivers: Make sure the IR blaster is directly facing the IR sensor of the device you want to control, and the IR receiver is positioned to pick up signals from your remote.
- Remote control battery: Check if your remote control has fresh batteries.
If these steps do not resolve the issue, please contact ÜnnLInk customer support for further assistance.
8. Maintenance
To ensure the longevity and optimal performance of your ÜnnLInk HDMI Extender, follow these maintenance guidelines:
- Cleaning: Use a soft, dry cloth to clean the exterior of the units. Avoid using harsh chemicals or abrasive cleaners.
- Environment: Store and operate the device in a cool, dry place, away from direct sunlight, excessive heat, humidity, and dust.
- Ventilation: Ensure adequate airflow around the units to prevent overheating. Do not block ventilation openings.
- Cable Management: Avoid bending or kinking HDMI and Ethernet cables excessively, as this can damage the internal wires and affect signal quality.
- Power Disconnection: Disconnect the power adapter from the unit and the wall outlet when the device is not in use for extended periods.
9. Warranty and Support
ÜnnLInk products are designed for reliability and performance. For any product-related inquiries or technical assistance, please refer to the following:
9.1. Customer Support
ÜnnLInk offers 24/7 online support to assist you with any questions or issues you may encounter. Please refer to the contact information provided with your purchase or visit the official ÜnnLInk website for support options.
9.2. Product Warranty
This product comes with a standard manufacturer's warranty. Please retain your proof of purchase for warranty claims. Details regarding the warranty period and terms are typically included in the packaging or available on the ÜnnLInk website. Extended protection plans may also be available for purchase separately.