YIAOSUA 710-0451
YIAOSUA Snow Blower Skid Shoe Bolt Kit User Manual
Model: 710-0451
Brand: YIAOSUA
1. Introduction
This manual provides essential information for the installation, maintenance, and troubleshooting of your YIAOSUA 710-0451 Stainless Steel Mounting Carriage Bolt Nuts kit. This kit is designed to replace worn or damaged skid shoe hardware on various snow blower models, ensuring proper function and protection for your equipment.
The kit includes high-quality stainless steel components for durability and resistance to corrosion, crucial for outdoor power equipment exposed to harsh winter conditions.
2. Package Contents
Upon opening the package, please verify that all components are present and undamaged:
- 8 x Carriage Bolts (5/16-18 x 3/4")
- 8 x Washers
- 8 x Flange Nylon Lock Nuts (5/16-18)

Image: The complete YIAOSUA Snow Blower Skid Shoe Bolt Kit, showing eight carriage bolts, eight washers, and eight flange nylon lock nuts.
3. Product Specifications
| Model Number | 710-0451 |
| Material | Stainless Steel |
| Bolt Dimension | 5/16-18 x 3/4" Carriage Bolt |
| Nut Type | 5/16-18 Flange Nylon Lock Nut |
| Color | Silver |
| Package Quantity | 8 sets (bolts, washers, nuts) |
4. Compatibility
This bolt kit is compatible with a wide range of snow blower models and brands. Please verify your snow blower's specific requirements before installation.
Known compatible brands and part numbers include:
- Brands: Craftsman, Troy-Bilt, MTD, Yard-Man, Yard Machines, Huskee, Bolens
- MTD/Cub Cadet/Yardman Part Numbers: 784-5580, 736-0242, 712-04063
- Other Compatible Part Numbers: GW-37002, 73-031, Rotary 8828, 780-420, Oregon 73-031

Image: A snow blower in operation, illustrating the application of the skid shoe bolt kit.
5. Installation (Setup)
Proper installation of the skid shoe bolts is crucial for the performance and longevity of your snow blower's skid shoes. Always refer to your snow blower's specific service manual for detailed instructions, as procedures may vary slightly by model.
Required Tools:
- Wrench or Socket Set (appropriate size for 5/16-18 nuts)
- Safety Gloves
- Safety Glasses
Installation Steps:
- Safety First: Ensure the snow blower is turned off, the engine is cool, and the spark plug wire is disconnected to prevent accidental starting. Wear safety gloves and glasses.
- Positioning: Tilt the snow blower back so it rests on its handles, allowing easy access to the bottom of the auger housing and skid shoes.
- Remove Old Hardware: If replacing existing hardware, use a wrench or socket to loosen and remove the old nuts, bolts, and washers securing the skid shoes. Discard any damaged components.
- Clean Mounting Area: Clean any debris, rust, or ice from the skid shoe mounting holes on the auger housing.
- Attach Skid Shoe: Align the new skid shoe (if replacing) or the existing skid shoe with the mounting holes on the auger housing.
- Insert Carriage Bolt: Insert the new 5/16-18 x 3/4" carriage bolt through the skid shoe and the corresponding hole in the auger housing from the outside in. The square shoulder of the carriage bolt should seat firmly into the square hole of the skid shoe or housing to prevent rotation.
- Add Washer and Nut: On the inside of the auger housing, place a washer over the threaded end of the carriage bolt, followed by a 5/16-18 flange nylon lock nut.
- Tighten Securely: Hand-tighten the nut, then use a wrench or socket to fully tighten it. The nylon insert in the lock nut provides resistance to loosening from vibration, ensuring a secure fit. Do not overtighten, but ensure the skid shoe is held firmly in place without wobbling.
- Repeat: Repeat steps 5-8 for all remaining skid shoe mounting points.

Image: A detailed view of the individual carriage bolts, washers, and lock nuts, ready for assembly.
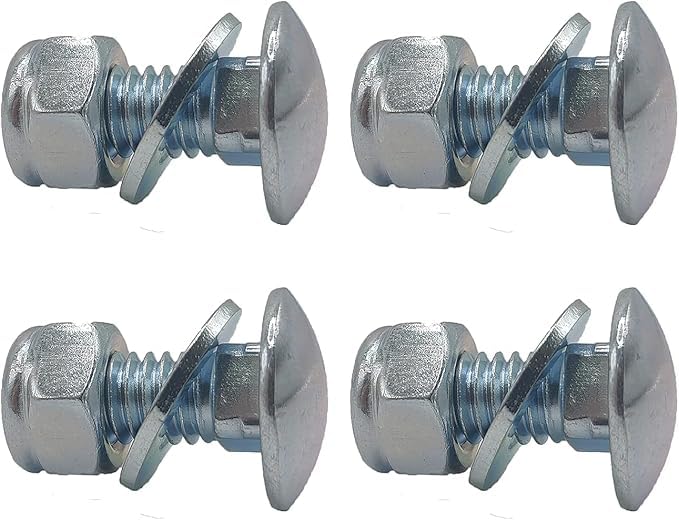
Image: A close-up of an assembled carriage bolt, washer, and flange nylon lock nut, demonstrating the correct order of components.
6. Operating Considerations
While this kit is a replacement part, proper installation directly impacts the operation of your snow blower. Ensure the skid shoes are correctly adjusted to the desired height for your surface (e.g., concrete, gravel) to prevent damage to the auger and the surface itself.
After installation, perform a visual inspection to confirm all bolts are securely fastened and the skid shoes are level and properly positioned before operating the snow blower.

Image: A person operating a snow blower, highlighting the importance of properly functioning skid shoes for effective snow removal.
7. Maintenance
Regular inspection and maintenance of your skid shoe hardware will extend its lifespan and ensure optimal performance of your snow blower.
- Periodic Inspection: Before each snow season, and periodically during heavy use, inspect the skid shoe bolts, washers, and nuts for signs of wear, corrosion, or loosening.
- Tightness Check: Re-tighten any loose nuts to prevent the skid shoes from shifting or falling off during operation. The nylon lock nuts are designed to resist loosening, but extreme vibration can still affect them over time.
- Corrosion Check: Although made of stainless steel, prolonged exposure to salt and moisture can still cause surface discoloration or minor corrosion. Clean the hardware as needed.
- Replacement: If any bolt, washer, or nut shows significant wear, bending, stripping, or severe corrosion, replace the entire set to maintain structural integrity.
8. Troubleshooting
Here are some common issues and their solutions related to the skid shoe bolt kit:
| Problem | Possible Cause | Solution |
|---|---|---|
| Bolt does not fit into the hole. | Incorrect bolt size or hole is obstructed. | Verify the bolt dimensions (5/16-18). Clear any debris or rust from the mounting hole. If the hole is too small, this kit may not be compatible with your specific snow blower model. |
| Nut loosens frequently. | Insufficient tightening or damaged nylon insert. | Ensure the nut is tightened securely. If it continues to loosen, the nylon insert may be compromised; replace the nut. |
| Skid shoe wobbles after installation. | Nuts not tightened sufficiently or worn skid shoe. | Re-tighten all nuts. Inspect the skid shoe itself for excessive wear or damage that might prevent a snug fit. |
| Corrosion on hardware. | Exposure to harsh elements (e.g., road salt). | Clean the hardware regularly. While stainless steel is corrosion-resistant, it is not entirely immune to extreme conditions. Consider applying a protective coating if operating in highly corrosive environments. |
9. Warranty and Support
YIAOSUA is committed to providing high-quality replacement parts. For specific warranty information or technical support regarding your 710-0451 Snow Blower Skid Shoe Bolt Kit, please refer to the product packaging or contact YIAOSUA customer service directly.
For general inquiries or to explore other YIAOSUA products, visit the official YIAOSUA store on Amazon: YIAOSUA Store.