1. Product Overview
This instruction manual provides essential information for the proper installation, operation, and maintenance of your AmeriLite LED Tube Chrome Square Projector Headlight Set. These headlights are designed to enhance visibility and the aesthetic appeal of your vehicle, meeting or exceeding strict OEM requirements.
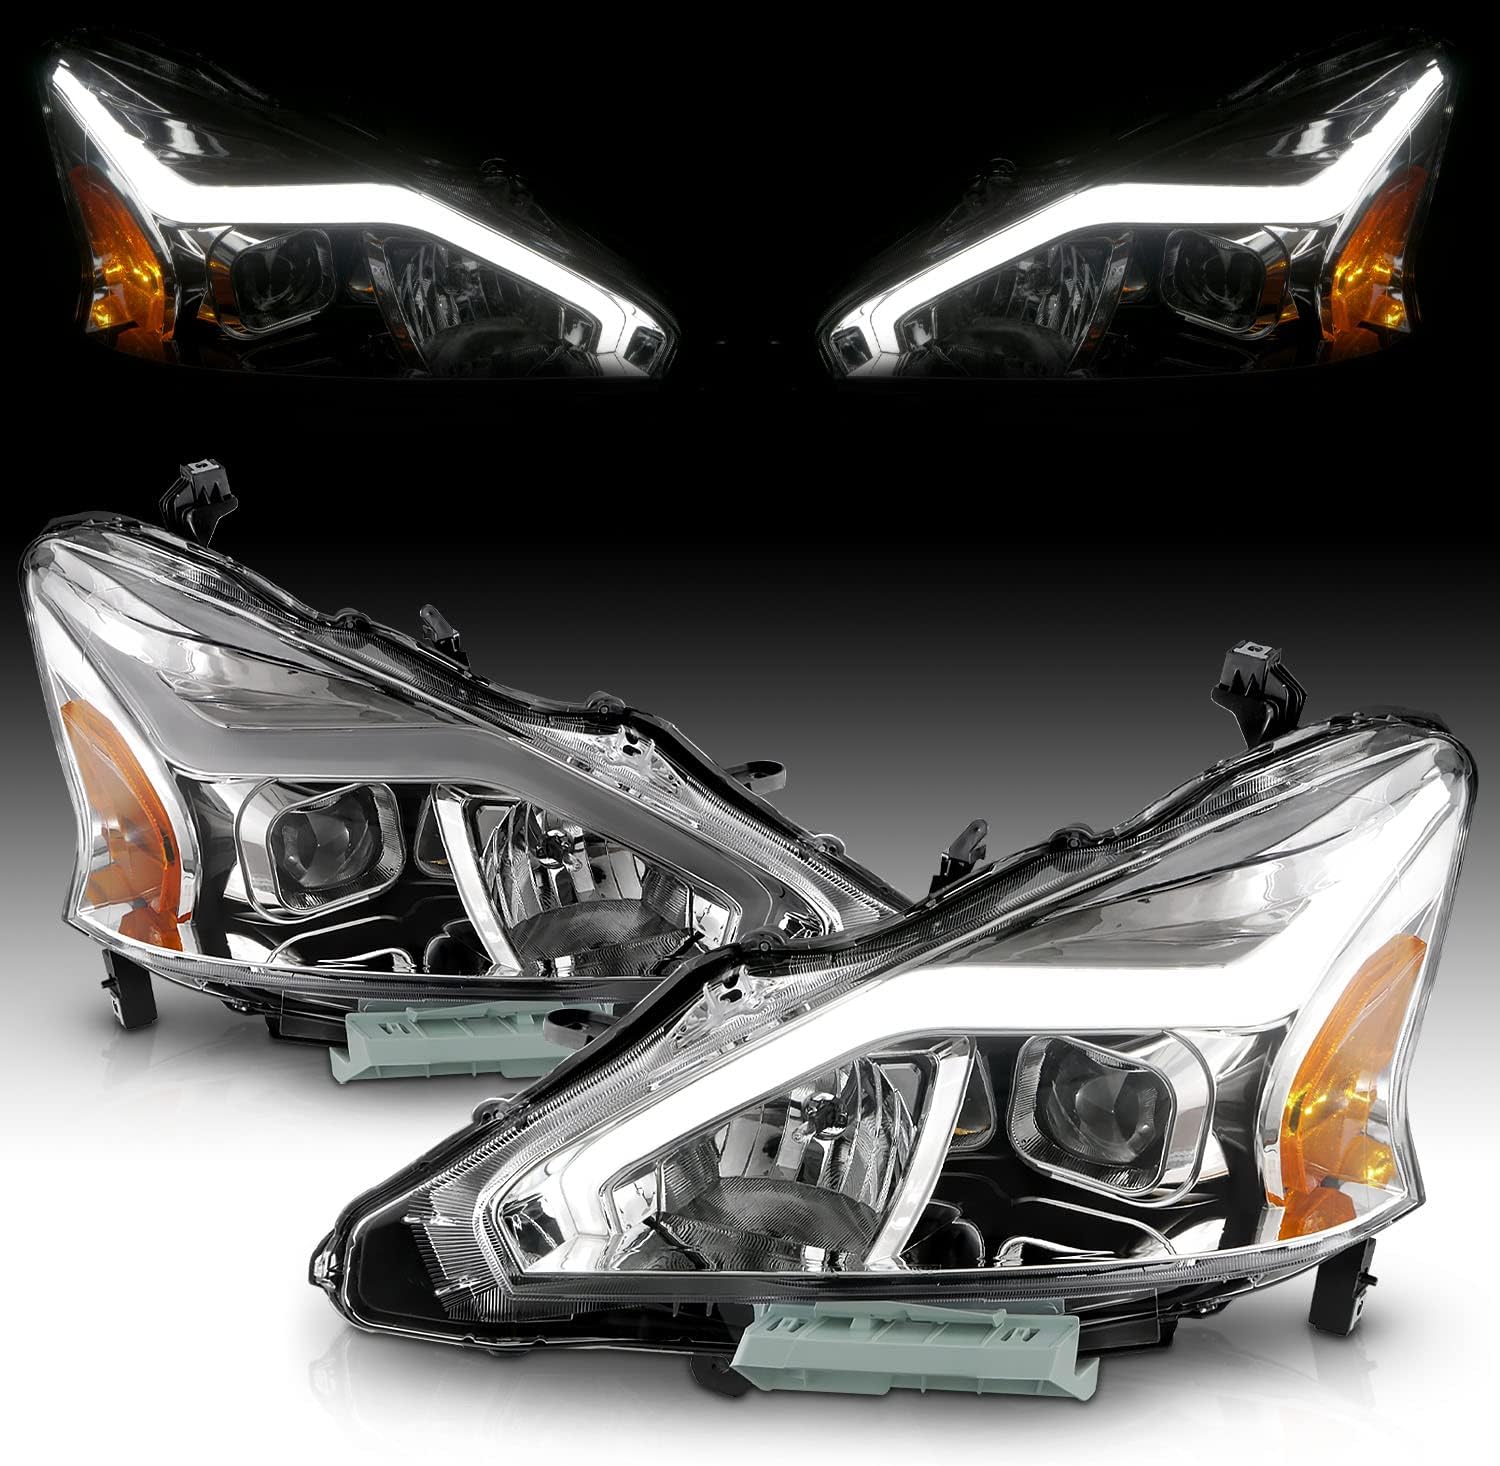
Image 1.1: AmeriLite LED Tube Chrome Square Projector Headlights installed on a red 2013-2015 Nissan Altima Sedan. This image shows the complete headlight assembly from the front, highlighting its design and fit on the vehicle.
2. Compatibility
- Fits: 2013, 2014, 2015 Nissan Altima 4-Door Sedan models.
- NOT Compatible with: 2-Door Coupe Trims.
- Do NOT Fit: Models equipped with factory Xenon HID Headlights.
3. Package Contents
The complete set includes the following components:
- One (1) Driver Side Headlight Assembly
- One (1) Passenger Side Headlight Assembly
- Low Beam H9 Bulbs (pre-installed or included)
- High Beam H1 Bulbs (pre-installed or included)
- Running Light Connectors
- Low Beam Connectors
- High Beam Connectors
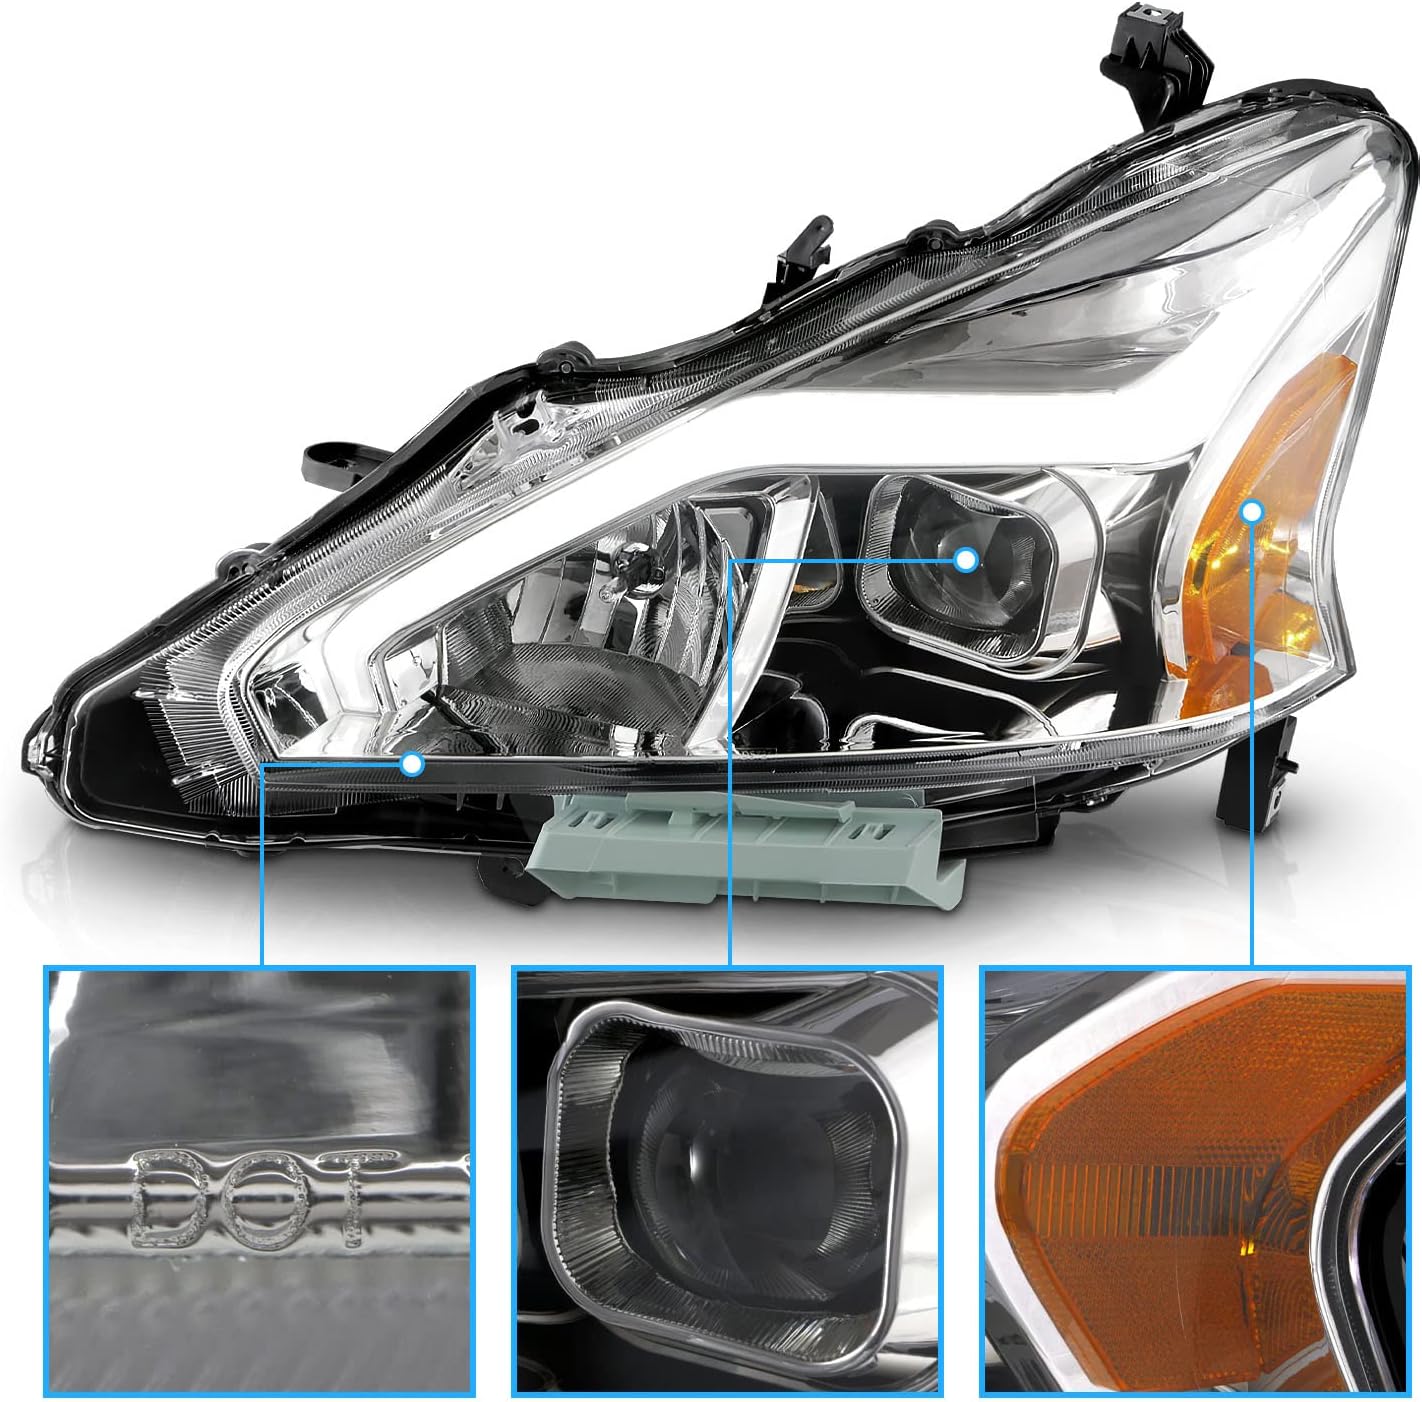
Image 3.1: Diagram illustrating the various components of the headlight assembly, including the running light, high beam, low beam, reflector, crystal clear lens, chrome housing, and the included H9 (low beam) and H1 (high beam) bulbs.
4. Features
- DOT & SAE Compliant: Meets or exceeds all regulatory standards in the U.S. & Canada for safety and performance.
- Direct OEM Replacement: Designed for easy installation without the need for modifications.
- High Quality Construction: Manufactured by OEM approved manufacturers using materials that meet or exceed strict OEM requirements.
- Light Source: Utilizes both LED (for tube/running lights) and Halogen (for main beams) technology.
- Special Feature: Waterproof design ensures durability and performance in various weather conditions.
- Lens Material: Durable Polycarbonate for clear visibility and resistance to impact.
- Voltage: 12 Volts.

Image 4.1: A detailed view of the headlight, highlighting the DOT (Department of Transportation) and SAE (Society of Automotive Engineers) compliance markings, the projector lens for focused light output, and the amber reflector for turn signal visibility.

Image 4.2: The headlight with its high-intensity LED tube illuminated, demonstrating the bright and modern appearance of the running lights.
5. Specifications
| Specification | Detail |
|---|---|
| Manufacturer | AmeriLite |
| ASIN | B0B96KHC69 |
| Manufacturer Reference | 02-AZ-NA13-PCC-P-G2-A |
| Color | Chrome Housing, Clear Lens |
| Specific Uses for Product | Head Lights |
| Light Source Type | LED, Halogen |
| Vehicle Service Type | Car |
| Model Year Compatibility | 2013, 2014, 2015 Nissan Altima Sedan |
| Special Feature | Waterproof |
| Voltage | 12 Volts |
| Auto Part Position | Front |
| Lens Material | Polycarbonate |
| Unit Count | 2.0 Count (Pair) |
| Assembly Required | No |
| OEM Equivalent Part Numbers | 199, 260603TA0A, 260103TA0A |
6. Installation
These headlights are designed as a direct OEM replacement, requiring no modification for installation. However, professional installation is highly recommended to ensure correct alignment, wiring, and functionality.
Installation Steps (General Guidance):
- Preparation: Ensure the vehicle is turned off and the battery is disconnected.
- Access: Depending on your vehicle model, you may need to remove the front bumper or other components to access the existing headlight assemblies.
- Removal: Disconnect the wiring harnesses from the old headlight assembly. Unbolt and carefully remove the old headlight unit.
- New Headlight Placement: Position the new AmeriLite headlight assembly into the vehicle's headlight housing.
- Connection: Connect the running light, low beam, and high beam connectors to the corresponding vehicle wiring harnesses. Ensure all connections are secure.
- Securing: Bolt the new headlight assembly into place.
- Repeat: Perform the same steps for the other side.
- Testing: Reconnect the battery. Test all headlight functions (low beam, high beam, running lights, turn signals) before reassembling any removed vehicle components.
- Alignment: Have the headlights professionally aimed to ensure proper light distribution and avoid blinding oncoming traffic.
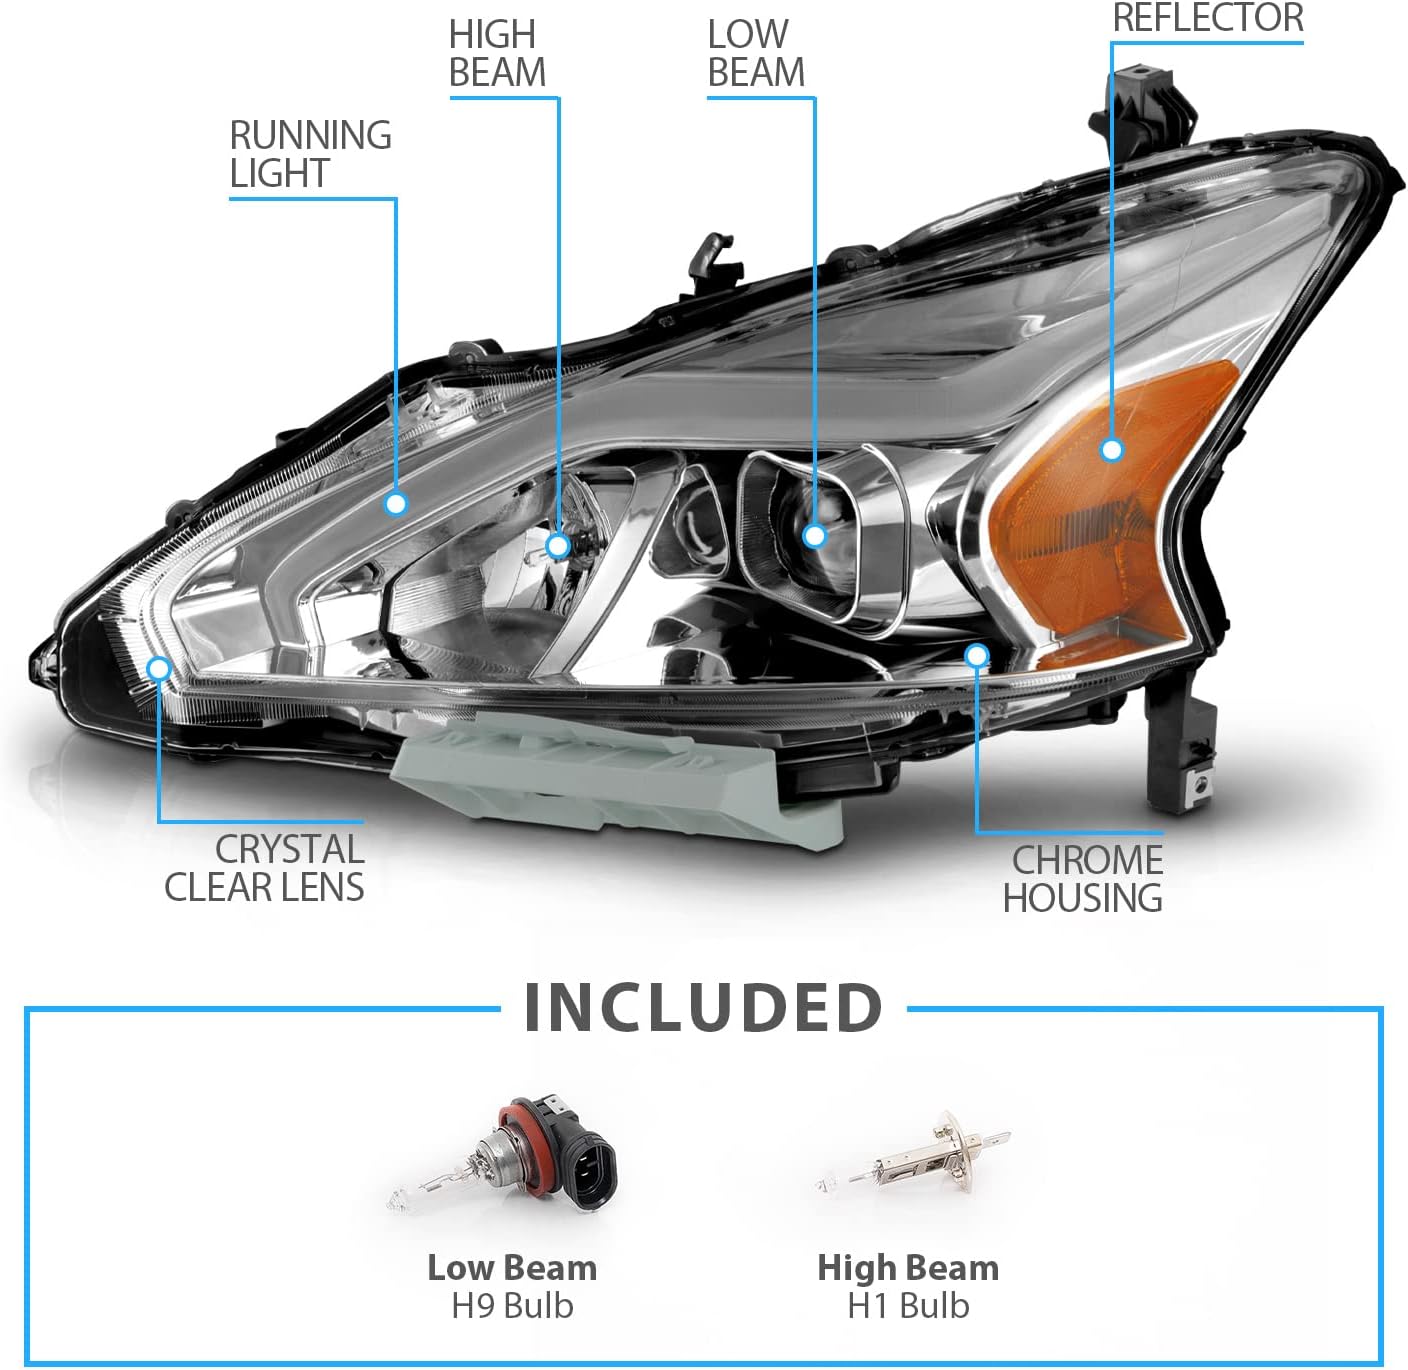
Image 6.1: This image displays the various connectors on the rear of the headlight assembly, including the running light connector, low beam connector, and high beam connector, illustrating the plug-and-play design.
7. Operation
Once installed, operate your AmeriLite headlights using your vehicle's standard headlight controls. The LED tube functions as a running light, providing enhanced daytime visibility and a distinct appearance. The halogen bulbs provide the main illumination for low and high beams.
- Running Lights: Activate automatically with the vehicle's ignition or when the parking lights are on, depending on your vehicle's configuration.
- Low Beams: Provide standard illumination for night driving.
- High Beams: Offer maximum illumination for dark roads when no oncoming traffic is present.
- Turn Signals: The amber reflector section functions as the turn signal indicator.
8. Maintenance
To ensure the longevity and optimal performance of your headlights, follow these maintenance guidelines:
- Cleaning: Regularly clean the headlight lenses with a soft cloth and mild automotive soap or glass cleaner. Avoid abrasive cleaners or harsh chemicals that can damage the polycarbonate lens.
- Inspection: Periodically inspect the headlight assemblies for any signs of damage, cracks, or moisture intrusion. Ensure all wiring connections remain secure.
- Bulb Replacement: If a halogen bulb burns out, replace it with a new H9 (low beam) or H1 (high beam) bulb of the correct wattage. Refer to your vehicle's owner's manual for specific bulb replacement procedures, or consult a professional.
9. Troubleshooting
If you experience issues with your headlights, consider the following:
- Headlight Not Working: Check the vehicle's fuses related to the headlights. Ensure all electrical connectors are firmly seated.
- Dim or Flickering Lights: This could indicate a loose connection, a failing bulb, or an issue with the vehicle's electrical system. Inspect connections and consider replacing bulbs.
- Moisture Inside Lens: Small amounts of condensation can occur due to temperature changes and typically dissipate. If significant moisture or water accumulation is present, inspect the housing for cracks or improper sealing.
- Uneven Light Pattern: Headlights may require professional aiming after installation.
For persistent issues, it is recommended to consult a qualified automotive technician.
10. Warranty and Support
Your AmeriLite Headlight Set is backed by:
- 30-Days Money Back Guarantee: For returns or refunds within 30 days of purchase.
- 90 Days Limited Warranty: Covers manufacturing defects for 90 days from the date of purchase.
For warranty claims, technical support, or further assistance, please contact AmeriLite customer service through the retailer where the product was purchased or directly via their official support channels.


