1. Important Safety Information
Please read all instructions carefully before using the AIRSEE G7 Professional Electric Nail Drill. Failure to follow these safety guidelines may result in injury or damage to the device.
1.1 Check Before Using
- Inspect the cord and device for any damage before each use. Do not use if the cord is damaged or if the device is not functioning correctly.
- Only connect this device to a voltage system that matches the specifications on the device. Using improper voltage can damage the device and will void the warranty.
- Use only the original power cord, adapter, or charger provided with the device.
- The handpiece of this nail drill is specifically designed for this model and is not compatible with other AIRSEE nail drills or other brands. Do not connect the handpiece to a different nail drill.
1.2 Notes for Using
- Always turn off the power after use.
- Do not use crooked or damaged nail drill bits, and only replace the bit when the power is off.
- Adjust the speed gradually, avoiding sudden changes. Immediately stop using the device if there are any unusual movements or noises.
- Misuse, dropping or excessive force may cause device damage.
- Individuals under the age of 18 require parental consent and supervision to use this device.
- Do not operate in wet or moist conditions.
- Do not touch any rotating part while the device is working.
2. Product Overview
The AIRSEE G7 Professional Electric Nail Drill is a high-performance, rechargeable, and portable e-file designed for various nail care tasks, including shaping, smoothing, buffing, and product removal. It features a powerful motor, long-lasting battery, and user-friendly design.

Figure 2.1: AIRSEE G7 Professional Electric Nail Drill and included accessories, including the main unit, handpiece, various drill bits, and sanding bands.

Figure 2.2: Key features of the AIRSEE G7 Nail Drill, highlighting its 35000 RPM, stepless speed control, 40W high power, reversible rotation, extended battery life, and quiet, low-heat operation.
3. Specifications
| Feature | Specification |
|---|---|
| Model Name | G7 |
| Item Model Number | NS-2039 |
| Brand | AIRSEE |
| Product Dimensions | 3.85"L x 1"W x 5.8"H (Main Unit) |
| Weight | 2.13 Pounds |
| Power Source | Battery Powered |
| Battery Capacity | 2000 mAh |
| Charging Time | 2.5 Hours |
| Working Time | Up to 15 Hours |
| RPM Range | 0-35000 RPM (Stepless Speed Regulation) |
| Handpiece Motor | 400 g.cm high-torque motor |
| Handpiece Weight | 0.37 lb (ultra-light) |
4. Setup
4.1 Charging the Device
Before first use, fully charge the AIRSEE G7 nail drill. Connect the provided power adapter to the charging port on the main unit and plug it into a suitable power outlet. The LCD screen will display the remaining battery capacity and blink while charging. Charging is complete when the blinking stops and the battery icon shows full.

Figure 4.1: The main unit displaying battery charge status on the LCD screen during charging. A full charge takes approximately 2.5 hours.
4.2 Installing/Replacing Nail Drill Bits
Ensure the device is turned off before installing or replacing any drill bits. The handpiece features a mechanical locking system for secure bit attachment.
- Rotate to Unlock: Gently twist the handpiece collar to the unlock position (indicated by an arrow or icon).
- Remove Current Bit: If a bit is already installed, pull it straight out from the handpiece.
- Insert Desired Bit: Insert the shank of the new drill bit fully into the opening of the handpiece.
- Rotate to Lock: Twist the handpiece collar back to the lock position to secure the bit firmly in place. Ensure the bit is securely seated before operation.

Figure 4.2: Visual guide for installing and replacing drill bits in the handpiece, demonstrating the unlock and lock mechanism.
5. Operating Instructions
5.1 Power On/Off and Speed Adjustment
To turn on the device, rotate the ON/OFF speed adjustable knob. Continue rotating the knob clockwise to gradually increase the speed from 0 to 35000 RPM. The current RPM will be displayed on the smart LCD screen. To decrease speed, rotate the knob counter-clockwise. To turn off the device, rotate the knob fully counter-clockwise until it clicks off.

Figure 5.1: The smart LCD display provides real-time RPM information, aiding in precise control during manicure procedures.

Figure 5.2: The ON/OFF speed adjustable knob allows for seamless equipment switch and precise speed control.
5.2 Forward/Reverse Rotation
The AIRSEE G7 features a forward/reverse switch for versatile operation, accommodating both left-handed and right-handed users. To change the rotation direction, toggle the FWD/REV switch located on the main unit. It is recommended to stop the drill bit rotation before changing direction to prevent damage to the motor.

Figure 5.3: The Forward/Reverse switch provides flexibility for users, ensuring comfortable operation regardless of dominant hand.
5.3 Recommended Speed Ranges for Applications
- 0-15,000 RPM: Ideal for removing dead skin and cuticle, grinding, shaping, and polishing natural nails.
- 15,000-25,000 RPM: Suitable for acrylic nails or artificial applications.
- 25,000-35,000 RPM: For more professional nail art work and heavy-duty tasks.
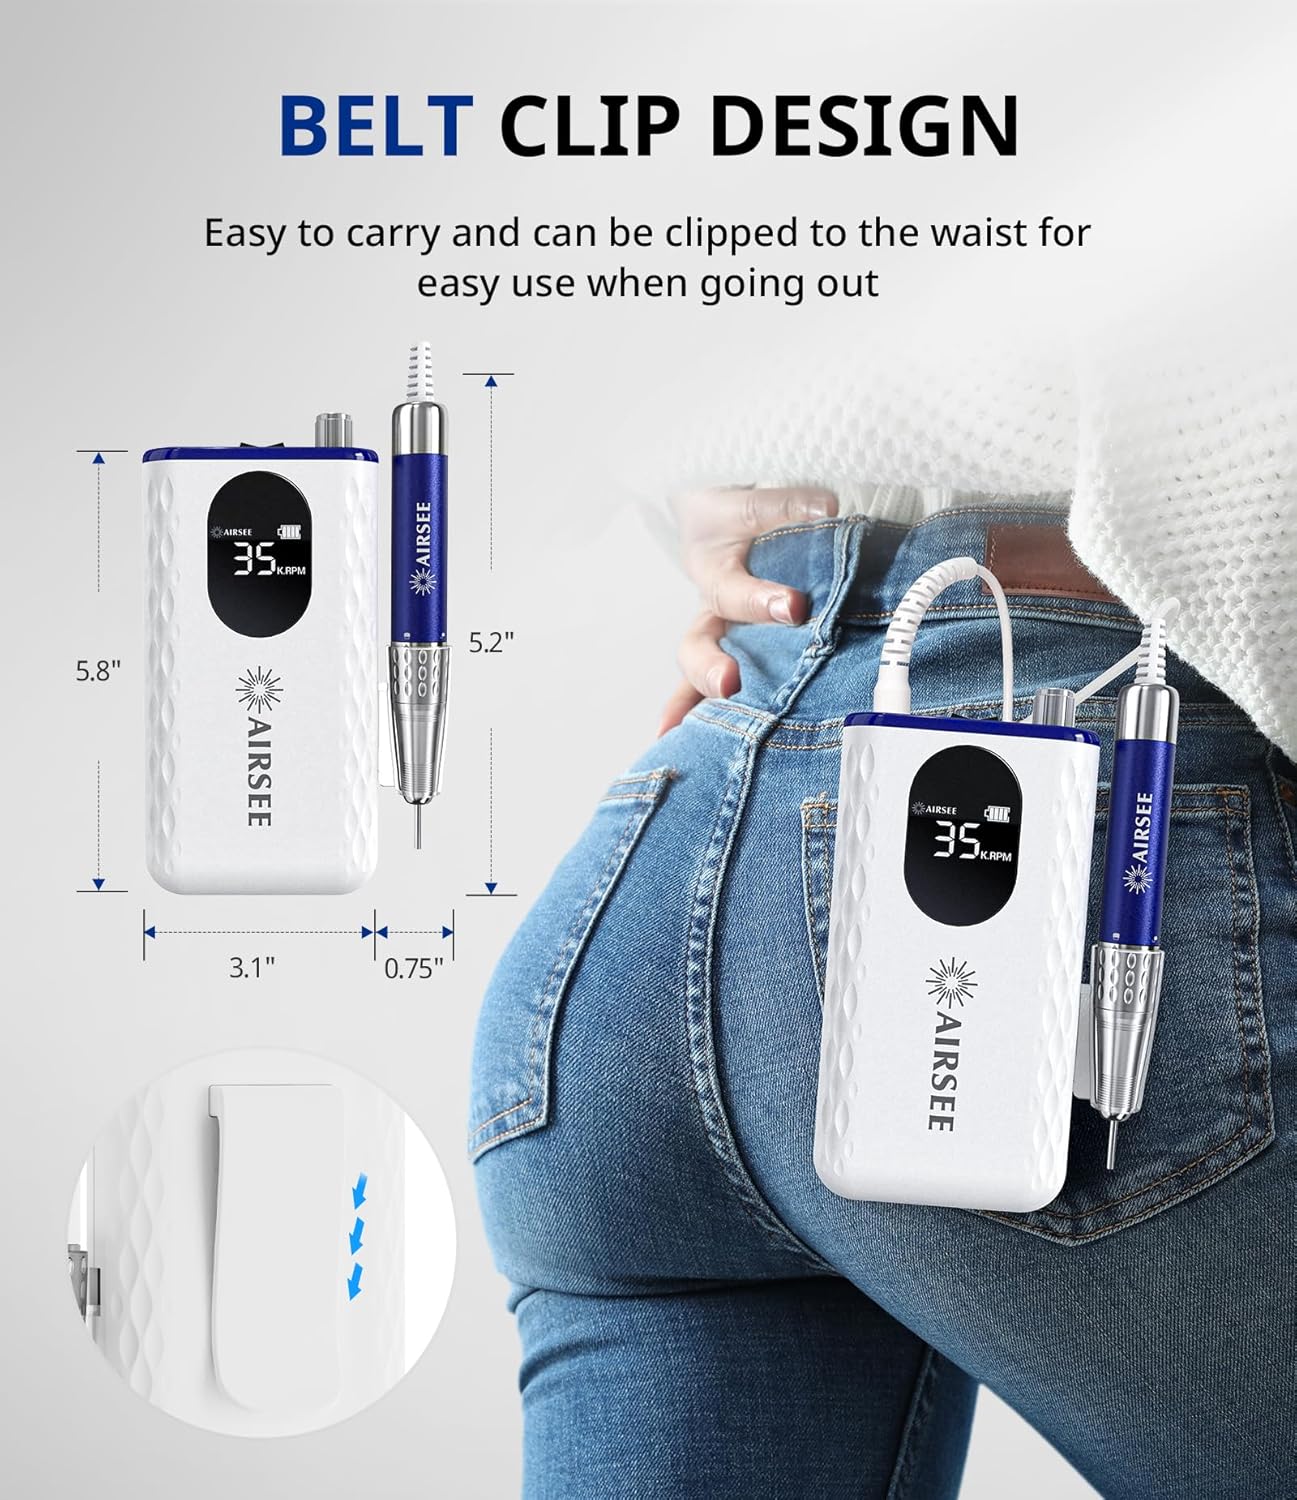
Figure 5.4: The AIRSEE G7 Nail Drill being used for professional manicure work, demonstrating its versatility.
5.4 Using the Belt Clip
The main unit is equipped with a belt clip, allowing for easy portability and hands-free operation. Simply clip the device to your waist or belt for convenient access during use.

Figure 5.5: The belt clip design allows for compact carrying, making the device highly portable for professionals and home users alike.
5.5 Official Product Video: Nail Drill in Use
Video 5.1: This video demonstrates the AIRSEE G7 nail drill in action, showcasing its quiet operation and effectiveness during nail preparation. Note: This video is provided by a customer and shows the product in use.
6. Maintenance
6.1 Cleaning the Device
Regular cleaning ensures optimal performance and longevity of your nail drill. After each use, gently wipe the handpiece and main unit with a soft, dry cloth to remove any dust or debris. For more thorough cleaning, a cloth lightly dampened with rubbing alcohol can be used, ensuring no liquid enters the internal components. Do not submerge the device in water or use harsh chemicals.
6.2 Bit Care and Storage
Clean drill bits after each use to prevent buildup and maintain their effectiveness. Use a small brush to remove dust from the bit surface. Store all drill bits in a clean, dry container to prevent damage and contamination. Avoid dropping bits, as this can cause them to become crooked or dull.

Figure 6.1: A variety of multi-scene nail bits included with the drill, each designed for specific tasks such as surface work, cuticle care, and polishing.
6.3 Storage
When not in use, store the AIRSEE G7 nail drill in a cool, dry place, away from direct sunlight and extreme temperatures. Keep it out of reach of children and pets.
7. Troubleshooting
| Problem | Possible Cause | Solution |
|---|---|---|
| Drill not turning on | Low battery; Power switch off; Loose connection. | Charge the device fully; Ensure the ON/OFF knob is rotated to the 'on' position; Check all cable connections. |
| Handpiece stops or slows down during use | Low battery; Bit not properly secured; Excessive pressure applied. | Recharge the device; Ensure the drill bit is locked securely; Reduce pressure during operation. |
| Excessive vibration or noise | Damaged or bent drill bit; Bit not inserted correctly; Internal issue. | Replace the drill bit; Re-insert the bit, ensuring it is fully seated and locked; If problem persists, contact customer support. |
| Device overheating | Prolonged continuous use at high speed; Blocked ventilation. | Allow the device to cool down; Ensure ventilation areas are clear; Reduce usage time or speed. |
8. Warranty and Support
AIRSEE products are designed for quality and reliability. For warranty information, product registration, or technical support, please refer to the warranty card included in your product packaging or visit the official AIRSEE website. Please retain your proof of purchase for warranty claims.
Contact Information:
- Brand Store: AIRSEE Official Store on Amazon
- For further assistance, please contact AIRSEE customer service.


