1. Introduction
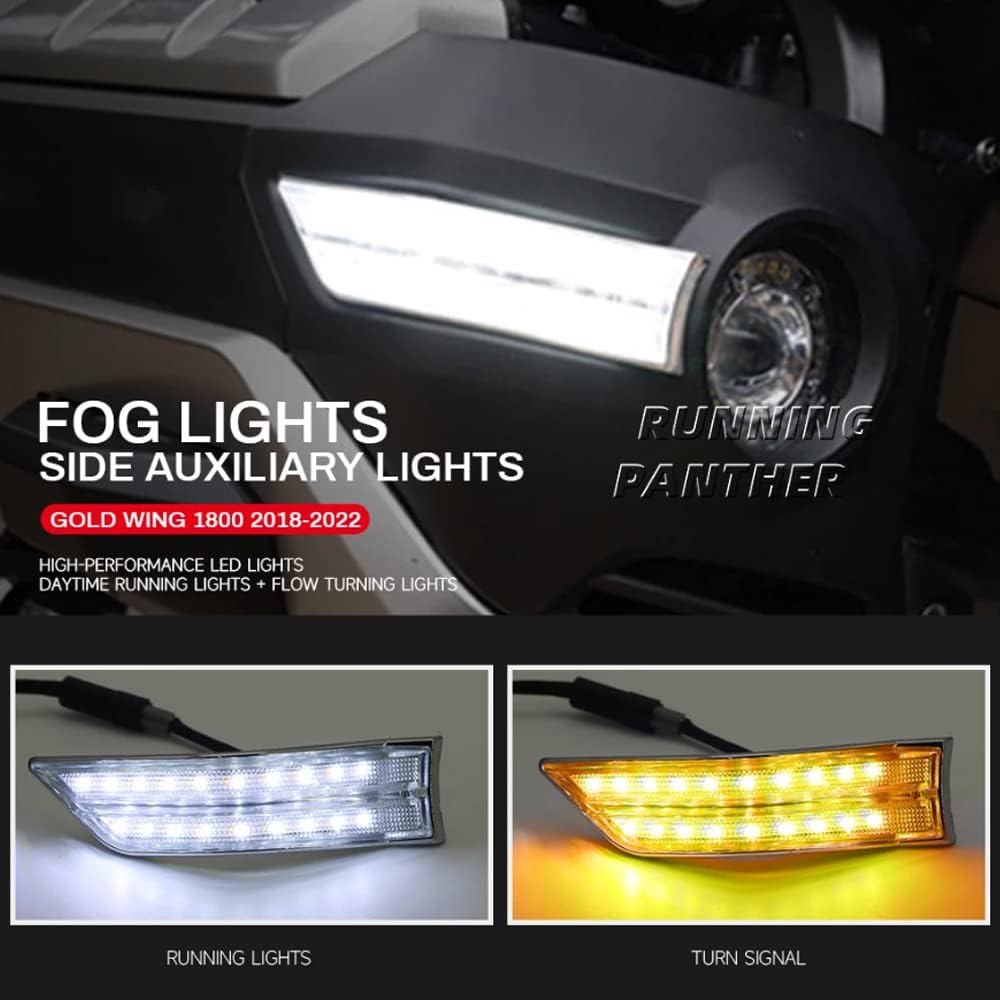
This manual provides detailed instructions for the installation, operation, and maintenance of your new RUNNING PANTHER LED Fog Lamp and Side Auxiliary Lamp. Designed for perfect compatibility with Honda Goldwing GL1800 models from 2018-2022, these lamps enhance visibility and safety, especially in challenging weather conditions like haze and rain.
Please read this manual thoroughly before installation and use to ensure proper function and safety.
2. Safety Information
- Always disconnect the motorcycle's battery before beginning any electrical installation to prevent electrical shock or damage.
- If you are unsure about any part of the installation process, seek assistance from a qualified motorcycle technician.
- Ensure all connections are secure and properly insulated to prevent short circuits and water ingress.
- Do not modify the product in any way, as this may void the warranty and compromise safety.
- Verify local regulations regarding auxiliary lighting before operating on public roads.
3. Package Contents
Verify that all items listed below are included in your package:
- LED Fog Lamps (Pair)
- 480000 Harness (for turn signal function)
- Installation Hardware (screws, clips, etc. - if applicable)
4. Setup and Installation
The RUNNING PANTHER LED Fog Lamps are designed for a plug-and-play installation. Follow these steps carefully:
- Preparation: Park your motorcycle on a stable, level surface. Turn off the engine and remove the key. Disconnect the negative terminal of the battery.
- Accessing Installation Area: Carefully remove any fairings or covers necessary to access the fog lamp mounting locations and wiring harness connection points on your Honda Goldwing GL1800. Refer to your motorcycle's service manual for specific panel removal instructions.
- Mounting the Lamps: Securely attach the new LED Fog Lamps to the designated mounting points on your motorcycle. Ensure they are firmly in place and properly aligned.
- Connecting the Harness: Connect the provided 480000 harness to the motorcycle's existing wiring. This harness is crucial for enabling the turn signal function of the lamps. Ensure all connectors click into place securely.
- Testing: Before reassembling all panels, reconnect the battery and test the functionality of the fog lamps. Verify both the constant illumination and the turn signal function (if connected via the 480000 harness).
- Reassembly: Once confirmed working, carefully reassemble all removed fairings and covers.


5. Operating Instructions
Once installed, the LED Fog Lamps operate in conjunction with your motorcycle's existing lighting system:
- Fog Lamp Function: The lamps will illuminate when your motorcycle's fog lights or auxiliary lights are activated.
- Turn Signal Function: If the 480000 harness is correctly connected, the lamps will also function as turn signals, flashing in sync with your motorcycle's indicators.
- Waterproof Design: The lamps feature a waterproof design, ensuring reliable operation in various weather conditions.
6. Maintenance
To ensure the longevity and optimal performance of your LED Fog Lamps, follow these simple maintenance guidelines:
- Cleaning: Clean the lamp lenses regularly with a soft, damp cloth and mild soap. Avoid abrasive cleaners or solvents that could damage the lens.
- Inspection: Periodically check the wiring and connections for any signs of wear, corrosion, or looseness. Ensure the lamps are securely mounted.
- Damage: If the lamps or wiring appear damaged, discontinue use and replace them to maintain safety and functionality.
7. Troubleshooting
If you encounter any issues with your LED Fog Lamps, refer to the table below for common problems and solutions:
| Problem | Possible Cause | Solution |
|---|---|---|
| Lamps do not turn on. | Loose or incorrect wiring connection. Blown fuse. Faulty lamp. | Check all wiring connections. Inspect motorcycle's fuse box and replace any blown fuses. Test lamps with a multimeter or contact support. |
| Turn signal function not working. | 480000 harness not connected or faulty. Incorrect wiring for turn signal. | Ensure the 480000 harness is correctly and securely connected. Verify wiring according to installation instructions. |
| Lamps flicker or dim. | Loose connection. Insufficient power supply. | Check all wiring connections for tightness. Ensure motorcycle's electrical system is providing adequate power. |
8. Specifications
Detailed specifications for the RUNNING PANTHER LED Fog Lamp and Side Auxiliary Lamp:
| Feature | Detail |
|---|---|
| Manufacturer | RUNNING PANTHER |
| Brand | RUNNING PANTHER |
| Item Weight | 9.3 ounces |
| Item Model Number | RP-cd8003PL |
| Exterior | Chrome |
| Manufacturer Part Number | RP-cd8003P001 |
| Position | Right |
| Special Features | Waterproof |
| UPC | 768492451570 |
| Compatibility | Honda Goldwing GL1800 (2018-2022) |
9. Warranty and Support
For warranty information or technical support, please contact RUNNING PANTHER directly through their official website or the retailer from whom you purchased the product. Keep your purchase receipt as proof of purchase.


