Thank you for purchasing the OFANTOP 132cm Modern Ceiling Fan. This manual provides detailed instructions for safe installation, operation, and maintenance of your new ceiling fan. Please read this manual thoroughly before installation and keep it for future reference.
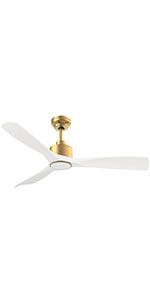
Image 1.1: The OFANTOP 132cm Modern Ceiling Fan, featuring a sleek black motor housing and three dark wood-grain blades, with an integrated LED light kit.
2. Safety Instructions
Always follow basic safety precautions when installing and operating electrical appliances to reduce the risk of fire, electric shock, and personal injury.
Read all instructions before beginning installation.
Ensure the power is disconnected at the circuit breaker before installation or servicing.
All wiring must be in accordance with national and local electrical codes. If you are unsure about wiring, consult a qualified electrician.
The mounting structure must be capable of supporting the fan's weight (approximately 7.91 kg).
Do not operate the fan with damaged blades or housing.
Keep hands, clothing, and other objects clear of the fan blades when the fan is in operation.
This fan is suitable for both indoor and outdoor (patio/porch) use, with an IP44 rating for protection against splashing water.
3. Package Contents
Verify that all components are present before beginning installation:
Motor Housing Assembly (with integrated LED light)
Fan Blades (3)
Downrods (15cm and 25cm options)
Mounting Bracket
Remote Control with Wall Mount
Hardware Pack (screws, washers, wire nuts)
User Manual
4. Setup and Installation
Follow these steps for proper installation of your ceiling fan.
4.1 Pre-Installation
Before installation, ensure the electrical box is securely mounted to the building structure and can support the fan's weight. Confirm that the power supply is turned off at the main circuit breaker.
4.2 Mounting the Bracket
Attach the mounting bracket to the ceiling electrical box using the provided screws. Ensure the bracket is firmly secured.
Image 4.1: Diagram illustrating flat ceiling mounting for the fan.
Image 4.2: Diagram illustrating sloped ceiling mounting, supporting angles up to 15 degrees.
4.3 Assembling the Fan
Insert the chosen downrod (15cm or 25cm) into the motor housing.
Carefully lift the fan assembly and hang it on the mounting bracket.
Connect the electrical wires according to the wiring diagram (typically black to black, white to white, and green/bare copper to ground).
Attach the fan blades to the motor housing using the provided screws. Ensure all screws are tightened securely.
Image 4.3: Detailed dimensions of the ceiling fan, showing its 132cm (52 inch) span and various height options with different downrods.
5. Operating Instructions
Your OFANTOP ceiling fan offers multiple control options for convenience.
5.1 Remote Control Operation
The included remote control allows full functionality of the fan and light. Install 2 AAA batteries (not included) into the remote.
Fan Speed: Select from 6 wind speeds (1-6) to adjust airflow.
Light Control: Turn the LED light ON/OFF.
Dimming: Adjust the brightness of the LED light.
Color Temperature: Cycle through Cool White (6000K), Natural Light (4500K), and Warm Light (3000K).
Timer: Set the fan to turn off automatically after 1, 4, or 8 hours.
Reverse Function: Toggle between summer (downward airflow) and winter (upward airflow) modes.
Image 5.1: The ceiling fan in a living room setting, highlighting the remote control and its key features: 6 wind speeds, reversible function, and timer settings.
Image 5.2: Illustration of the dimmable LED light feature, showing the fan's light output at Cool White (6000K), Natural Light (4500K), and Warm Light (3000K).
5.2 Smart Control (App & Voice)
This smart ceiling fan can be controlled via a dedicated mobile application and voice commands through Amazon Alexa or Google Assistant. Ensure your fan is connected to a 2.4GHz Wi-Fi network for initial setup. After setup, it can operate on 5GHz.
App Control: Download the OFANTOP smart home app (refer to the app store for specific app name). Follow in-app instructions to pair your fan.
Voice Control: Once paired with the app, enable the OFANTOP skill/action in your Alexa or Google Home app to control the fan with voice commands.
Image 5.3: Visual representation of the multiple control options available for the fan, including remote control, smart app, and voice control via Alexa and Google Assistant.
5.3 Reverse Function Explained
The reversible function allows you to optimize air circulation for different seasons.
Summer Mode: Blades rotate counter-clockwise, pushing cool air downwards, creating a refreshing breeze.
Winter Mode: Blades rotate clockwise, drawing cool air up towards the ceiling and circulating warm air downwards, helping to distribute heat more evenly.
Image 5.4: Diagram illustrating the fan's reversible function, showing downward airflow for summer cooling and upward airflow for winter heat circulation.
6. Maintenance
Regular maintenance ensures optimal performance and longevity of your ceiling fan.
Cleaning: To avoid scratching the finish, clean the fan with a soft, damp cloth. Do not use abrasive cleaners or solvents.
Blade Cleaning: Dust the blades regularly to prevent dust buildup, which can affect balance and performance.
Tightening Screws: Periodically check all screws on the fan and mounting hardware to ensure they are tight. Loose connections can cause noise or wobbling.
Light Source: The integrated LED light source is designed for long life. If replacement is ever needed, consult a qualified technician.
7. Troubleshooting
If you encounter issues with your fan, refer to the following common problems and solutions:
Problem
Possible Cause
Solution
Fan does not start
No power to the fan Loose wire connections Remote control battery low/dead
Check circuit breaker and wall switch. Verify all wire connections are secure (ensure power is off first). Replace remote control batteries.
Tighten all blade screws. Ensure blades are installed correctly and are not bent. Use a balancing kit if necessary. Tighten mounting bracket screws.
Noisy operation
Loose screws Motor hum Blades hitting an obstruction
Check and tighten all screws. A slight hum from the DC motor is normal, especially at higher speeds. Ensure fan is securely mounted. Ensure nothing is obstructing the blades' path.
Light does not work
Loose wire connection Light switch off LED module issue
Check light wire connections. Ensure light is turned on via remote or app. If problem persists, contact customer support.
Remote control not working
Batteries dead/incorrectly inserted Remote not paired
Replace batteries, ensuring correct polarity. Refer to pairing instructions in the full manual (if applicable).
8. Specifications
Feature
Specification
Brand
OFANTOP
Model Number
7068
Dimensions (L x W x H)
132 x 132 x 29.5 cm (52 inch diameter)
Weight
7.91 Kilograms
Power
35 Watts
Voltage
230 Volts (DC)
Noise Level
30 dB
Number of Blades
3
Motor Type
DC Motor
Speed Settings
6 Speeds
Light Type
Dimmable LED (3000K/4500K/6000K)
Control Methods
Remote Control, Smart APP, Voice (Alexa, Google Assistant)
Timer Function
1H, 4H, 8H
Reversible Function
Yes (Summer/Winter Mode)
IP Rating
IP44 (Suitable for outdoor patios/porches)
Airflow (CFM)
Up to 6335 CFM (High Speed)
Ceiling Mount Type
Flat or Sloped (up to 15°)
9. Warranty and Support
OFANTOP is committed to providing high-quality products. For any questions, technical assistance, or warranty claims, please contact OFANTOP customer support through the retailer's platform or the official brand website. Please have your model number (7068) and purchase information ready when contacting support.
Related Documents -
How to Connect Ofantop Smart Ceiling Fan with Smart Life App A step-by-step guide on how to connect your Ofantop Smart Ceiling Fan to the Smart Life App, including downloading the app, registering an account, pairing the fan, and controlling its features.
Kogan 132cm DC Motor Ceiling Fan with Remote User Guide Comprehensive user guide for the Kogan 132cm DC Motor Ceiling Fan (Model KA52DCMCFFC) with remote control. Includes installation, operation, safety warnings, and troubleshooting.
Kogan DC Motor Ceiling Fan with Remote (132cm) User Guide Comprehensive user guide for the Kogan 132cm DC Motor Ceiling Fan with Remote (Models KA52DCMCFFW & KA52DCMCFFB), covering installation, operation, safety, cleaning, and troubleshooting.
Kogan 132cm DC Motor Ceiling Fan with Remote User Guide User guide for the Kogan 132cm DC Motor Ceiling Fan with Remote (Models KA52DCMCFFW & KA52DCMCFFB), covering safety warnings, components, installation, operation, cleaning, specifications, and troubleshooting.
Ask a question about this manual
Ask about setup, troubleshooting, compatibility, parts, safety, or missing instructions. Manuals+ will review the question and use this page’s manual context to help answer it.