Fafeicy ATS25X1
Fafeicy ATS25X1 Multiband Radio Receiver User Manual
Model: ATS25X1
1. Introduction
Thank you for choosing the Fafeicy ATS25X1 Multiband Radio Receiver. This portable radio features a 2.4-inch color touchscreen, multiple interfaces, and supports various frequency bands including FM, LW, MW, SW, and SSB. This manual provides essential information for setting up, operating, and maintaining your device to ensure optimal performance and longevity.
2. Safety Information
Please read and understand all safety instructions before using the device. Keep this manual for future reference.
- Do not expose the device to extreme temperatures, direct sunlight, or high humidity.
- Avoid dropping or subjecting the device to strong impacts.
- Do not attempt to disassemble or modify the device. Repairs should only be performed by qualified personnel.
- Keep the device away from water and other liquids.
- Use only the provided USB cable for charging.
- Ensure proper ventilation when operating the device.
3. Package Contents
Verify that all items listed below are included in your package:
- ATS25X1 Full Band Radio Receiver
- USB Cable
- Antenna
- Touch Pen
- Foot Pad (set of 4)
- Cleaning Cloth

Image: Fafeicy ATS25X1 Multiband Radio Receiver and its included accessories.
4. Product Overview
4.1 Front Panel

Image: Front view of the ATS25X1 radio, highlighting the display and tuning knob.
The front panel features the 2.4-inch color touchscreen display and the main tuning knob. The display shows frequency, mode, signal strength, and various control options.
4.2 Rear Panel

Image: Rear view of the ATS25X1 radio, detailing the connectivity ports.
The rear panel includes the antenna connector (ANT), USB Type-C port for charging and data, a 3.5mm stereo audio output (phone head), and the power ON/OFF switch.
4.3 Side View
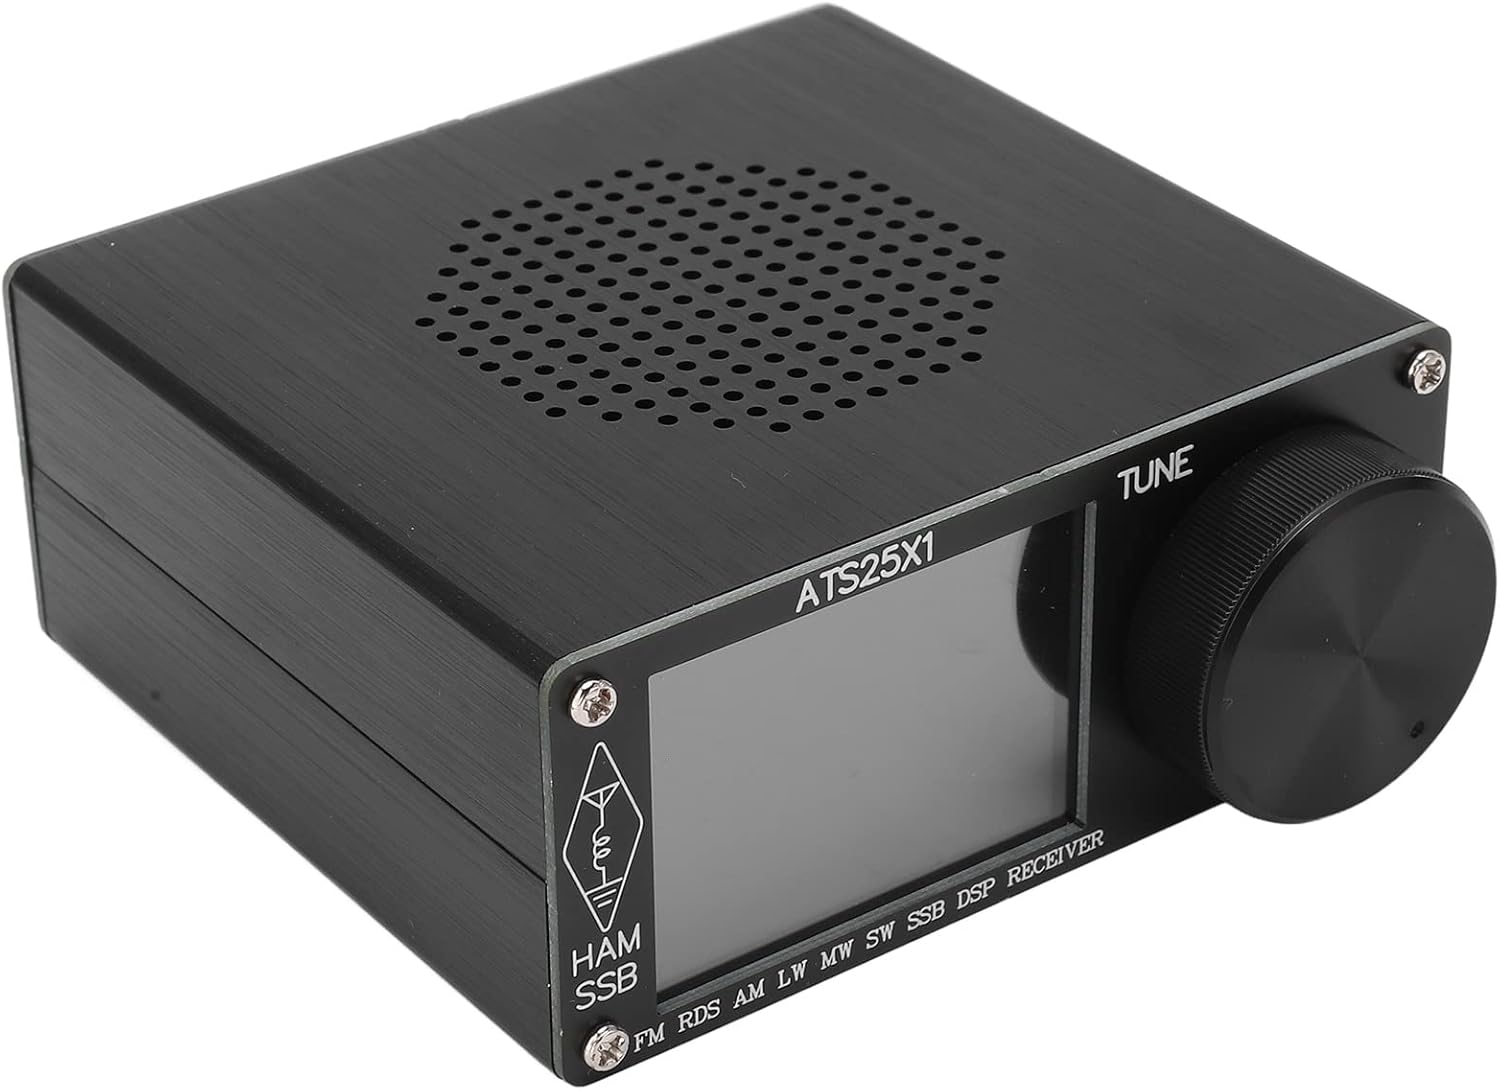
Image: Side view of the ATS25X1 radio, showing the speaker grille.
The side of the radio features a speaker grille for audio output.
5. Setup
5.1 Attaching the Antenna
To receive radio signals, the included antenna must be properly attached.
- Locate the BNC connector on the rear panel of the radio.
- Align the antenna's BNC connector with the radio's connector.
- Push down and twist clockwise until the antenna is securely locked in place.
- Extend the telescopic antenna to its full length for optimal reception.

Image: ATS25X1 radio with the telescopic antenna attached.
5.2 Charging the Battery
The ATS25X1 has a built-in rechargeable lithium battery. Charge the device before first use and whenever the battery indicator shows low power.
- Connect the provided USB Type-C cable to the USB port on the rear panel of the radio.
- Connect the other end of the USB cable to a compatible USB power adapter (not included) or a computer USB port.
- The charging indicator light will illuminate during charging. It will turn off or change color when charging is complete.
5.3 Initial Power On
After charging, you can power on your radio:
- Locate the Power ON/OFF switch on the rear panel.
- Slide the switch to the 'ON' position. The screen will light up.
- The radio is now ready for operation.
Video: This video demonstrates the unboxing and initial setup of the ATS25X1 Full Band Radio Receiver, including attaching components and powering on the device.
6. Operating Instructions
The ATS25X1 features a user-friendly touchscreen interface for most operations.
6.1 Navigating the Touchscreen
Tap on the icons and buttons displayed on the 2.4-inch color touchscreen to access various functions and settings.
6.2 Tuning Frequencies
Use the large tuning knob on the front panel to adjust the frequency. Rotate clockwise to increase frequency and counter-clockwise to decrease. The step size can often be adjusted via the touchscreen.
6.3 Selecting Bands and Modes
The radio supports multiple bands and modes. Tap the 'BAND' or 'MODE' options on the touchscreen to cycle through available options such as FM, AM, LW, MW, SW, and SSB (LSB/USB).
6.4 Direct Frequency Entry
For precise tuning, use the number pad function on the touchscreen to directly enter a desired frequency.
6.5 Adjusting Volume
The tuning knob also controls the volume. A short tap on the knob may switch between tuning and volume control, or a dedicated volume control might be available on the touchscreen.
7. Key Features
- Various Interfaces: Supports Type-C interface for program upgrades, 3.5mm stereo audio output, and a 3.5mm audio FM antenna interface.
- Color Touchscreen: Equipped with a 2.4-inch color display for clear data readability and enhanced user experience.
- Convenient Tuning: Features radio search function, direct frequency entry via number pad, and quick HAM band channel access.
- Large Capacity Lithium Battery: Built-in large capacity lithium battery ensures extended usage without frequent recharging.
8. Maintenance
Proper care will extend the life of your ATS25X1 radio.
- Cleaning: Use the provided cleaning cloth or a soft, dry cloth to wipe the screen and body of the radio. Do not use abrasive cleaners or solvents.
- Storage: When not in use for extended periods, store the radio in a cool, dry place, away from direct sunlight and extreme temperatures.
- Battery Care: For optimal battery life, avoid fully discharging the battery frequently. Charge the device regularly, even if not in use.
9. Troubleshooting
If you encounter issues with your ATS25X1 radio, refer to the table below for common problems and solutions.
| Problem | Possible Cause | Solution |
|---|---|---|
| Poor Reception / Static | Weak signal, unextended antenna, interference, poor front-end filtering. | Ensure antenna is fully extended. Try repositioning the radio. Consider using an external antenna for better signal reception, especially for HF bands. Move away from sources of electronic interference. |
| Software/Firmware Issues (e.g., incorrect tuning steps, memory errors) | Outdated or buggy firmware. | Check the manufacturer's website for firmware updates. If you are tech-savvy, firmware updates may be available from community sources. |
| Memory Function Not Working Correctly | Software bug, incorrect saving procedure. | Ensure you are following the correct steps for saving and recalling frequencies. A firmware update may resolve this issue. Try restarting the radio. |
| Display Frequency Inaccurate | Calibration issue, software bug. | Some firmware versions may have a slight frequency offset. If available, use the BFO setting to fine-tune. A firmware update might correct this. |
| Radio Mutes During AM Tuning | Software behavior. | This may be a characteristic of the current firmware. Check for updates that address this behavior. |
| S-Meter Appears Useless | Software implementation. | The S-meter functionality may be limited by the current software. This might be improved with future firmware updates. |
10. Technical Specifications
| Feature | Specification |
|---|---|
| Model | ATS25X1 |
| Material | Aluminum Alloy |
| Battery | 602035 Lithium battery 3.7V 2000mAh (built-in) |
| Display | 2.4-inch Color Touchscreen LCD |
| FM Frequency | 64 - 108 MHz (with RDS functions) |
| LW Frequency | 153 - 500 KHz |
| MW Frequency | 520 - 1710 KHz |
| SW Frequency | 1730 - 30000 KHz |
| SSB Frequency | 1730 - 30000 KHz |
| AM Bandwidth Support | 1 - 6 KHz |
| SSB Bandwidth Support | 0.5 - 4 KHz |
| Audio Output Power | 1.5W |
| Connectivity | USB Type-C, 3.5mm Audio |
| Special Feature | Portable |
11. Warranty and Support
Your Fafeicy ATS25X1 Multiband Radio Receiver is covered by a standard manufacturer's warranty. Please refer to the product packaging or your purchase documentation for specific warranty terms and conditions.
For technical support, troubleshooting assistance, or warranty claims, please contact your retailer or the manufacturer directly. Contact information can typically be found on the product packaging or the official Fafeicy website.
Ask a question about this manual
Ask about setup, troubleshooting, compatibility, parts, safety, or missing instructions. Manuals+ will review the question and use this page’s manual context to help answer it.