1. Introduction
The Rowenta X-Plorer Series 75 S is an advanced robotic vacuum cleaner designed to provide thorough and effortless cleaning for your home. Featuring precise laser navigation, customizable mapping, and a powerful 4-in-1 cleaning system, it vacuums and mops simultaneously. This manual provides detailed instructions for setting up, operating, maintaining, and troubleshooting your device to ensure optimal performance and longevity.

Figure 1: Top view of the Rowenta X-Plorer Series 75 S Robot Vacuum Cleaner with its accompanying smartphone application interface.
2. Safety Information
Please read all safety instructions carefully before using the appliance. Keep this manual for future reference.
- Do not operate the robot near open flames or heat sources.
- Ensure the charging base is placed on a flat, stable surface and is connected to a power outlet.
- Keep hair, loose clothing, fingers, and all parts of the body away from openings and moving parts.
- Do not use the robot to pick up large objects, sharp objects, or liquids.
- Supervise children and pets when the robot is operating.
- Only use accessories and replacement parts recommended by Rowenta.
3. Package Contents
Verify that all components are present in the packaging:
- Rowenta X-Plorer Series 75 S Robot Vacuum Cleaner
- Charging Base
- Power Adapter
- Side Brushes (2x)
- Motorized Brush
- Aqua Force System (Water Tank and Mop Pad)
- User Manual
4. Product Overview
Familiarize yourself with the main components of your robot vacuum cleaner.

Figure 2: Side view of the robot vacuum cleaner, showing its compact design and side brush.
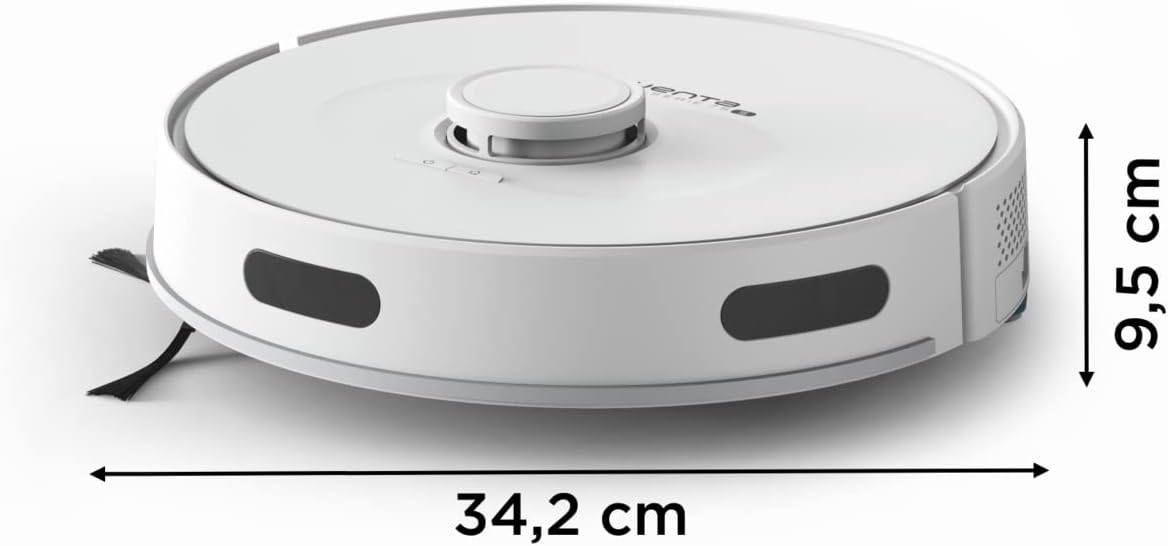
Figure 3: The robot vacuum cleaner measures 34.2 cm in length and width, with a height of 9.5 cm, allowing it to clean under most furniture.
5. Setup
5.1 Charging the Robot
- Place the charging base against a wall in an open area, ensuring there are no obstacles within 1 meter to the sides and 2 meters in front.
- Connect the power adapter to the charging base and plug it into a wall outlet.
- Place the robot on the charging base. Ensure the charging contacts align. The indicator light will show charging status.
- Allow the robot to fully charge before its first use (approximately 4-6 hours).
5.2 App Installation and Connection
- Download the official Rowenta X-Plorer app from your smartphone's app store (iOS or Android).
- Create an account or log in.
- Follow the in-app instructions to connect your robot to your home Wi-Fi network. Ensure your phone is connected to a 2.4 GHz Wi-Fi network during setup.
- Once connected, you can control the robot, schedule cleanings, and view maps from your smartphone.
5.3 Initial Mapping
The robot uses Smart Exploration 8.0 laser technology to map your home precisely.
- For the first cleaning cycle, allow the robot to clean your entire home without interruption to create an accurate map.
- Clear any obstacles like loose cables, small rugs, or fragile items that might hinder the robot's movement.
- The robot will automatically return to its charging base once the mapping and cleaning are complete.

Figure 4: The robot utilizes laser technology for precise navigation and mapping of your home environment.
6. Operating Instructions
6.1 Cleaning Modes
The Rowenta X-Plorer Series 75 S offers various cleaning modes:
- Auto Mode: The robot intelligently cleans the entire mapped area.
- Spot Mode: Cleans a specific small area intensively.
- No-Go Zones: Define areas on the map that the robot should avoid.

Figure 5: The robot performs a 4-in-1 cleaning action, combining side brushes, a motorized brush, powerful suction, and mopping for comprehensive cleaning.
6.2 Scheduling Cleanings
Use the smartphone app to set up daily or weekly cleaning schedules. You can customize the time and cleaning mode for each scheduled session.
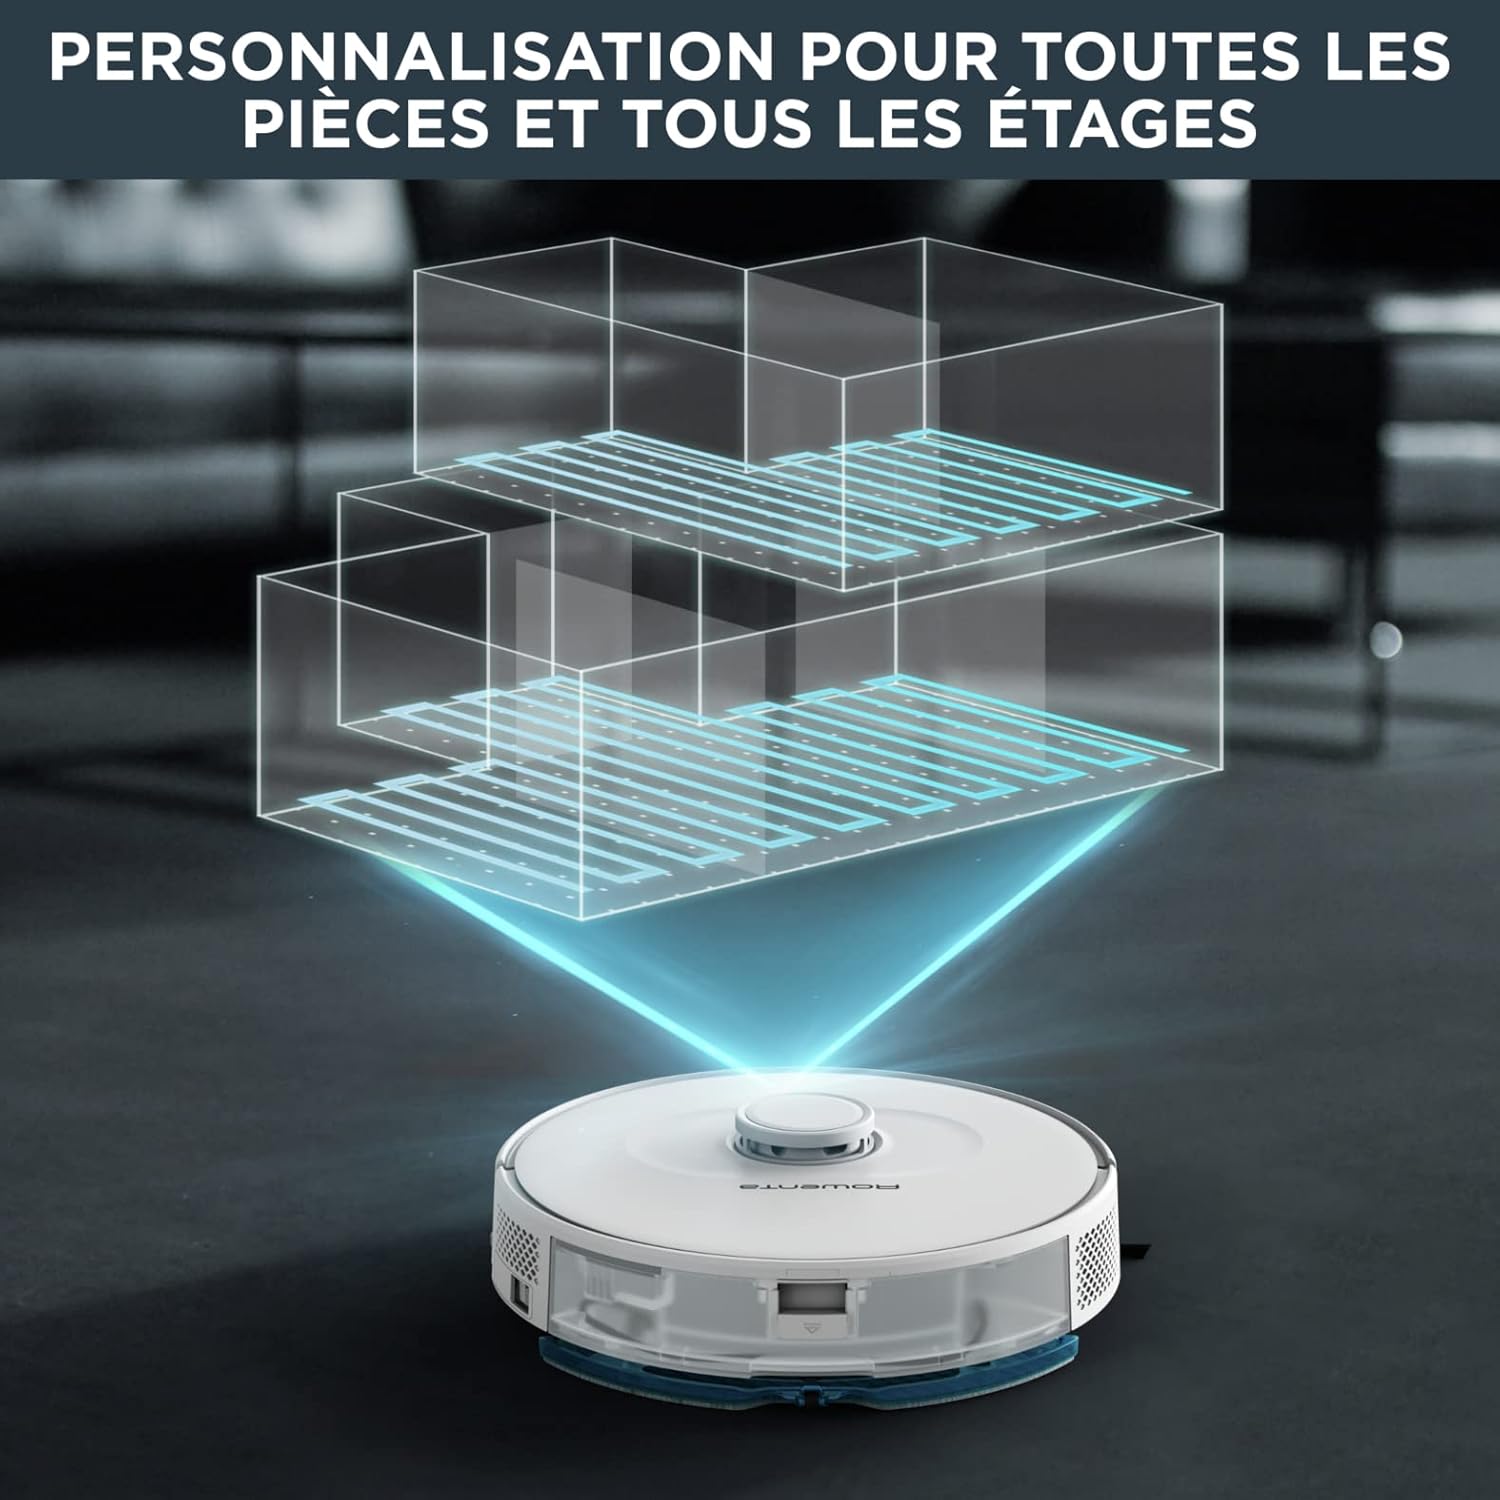
Figure 6: The robot supports customizable mapping for multiple rooms and even different floors, allowing for personalized cleaning routes.
6.3 Voice Assistant Integration
The robot is compatible with Amazon Alexa and Google Home. Link your Rowenta account in the respective voice assistant app to control your robot with voice commands, such as "Start cleaning" or "Return to base."
6.4 Aqua Force System (Vacuum and Mop)
The Aqua Force system allows the robot to vacuum and mop simultaneously.
- Fill the water tank with clean water. Do not use detergents or cleaning solutions not approved by Rowenta.
- Attach the mop pad securely to the water tank.
- Slide the Aqua Force system into the designated slot on the robot.
- The robot will automatically dispense water and mop while vacuuming.

Figure 7: The robot's Aqua Force system allows for simultaneous vacuuming and mopping, with adjustable water flow for different floor types.
6.5 Carpet Boost Function
The robot automatically detects carpets and increases suction power for deeper cleaning on these surfaces. This feature ensures optimal cleaning performance across different floor types.

Figure 8: The robot demonstrates a high climbing capacity, able to traverse obstacles and carpets up to 18mm in height.
7. Maintenance
Regular maintenance ensures your robot vacuum cleaner operates efficiently.
7.1 Emptying the Dustbin
- Press the dustbin release button and pull out the dustbin.
- Open the dustbin lid and empty its contents into a trash can.
- Rinse the dustbin with water if necessary, ensuring it is completely dry before reinserting.
7.2 Cleaning Brushes
- Remove the main brush cover and lift out the main brush.
- Use the cleaning tool (if provided) or scissors to remove tangled hair and debris from the main brush.
- Pull off the side brushes and remove any hair or debris. Reattach them securely.
7.3 Cleaning Filters
- Remove the filter from the dustbin.
- Tap the filter gently to remove dust. Do not wash the HEPA filter with water.
- Replace the filter every 3-6 months, depending on usage.
7.4 Cleaning the Water Tank and Mop Pad
- Empty any remaining water from the tank after each use.
- Remove the mop pad and wash it by hand or machine. Allow it to air dry completely.
- Clean the water tank thoroughly to prevent mold or odor buildup.
8. Troubleshooting
Refer to the table below for common issues and their solutions.
| Problem | Possible Cause | Solution |
|---|---|---|
| Robot does not turn on | Low battery; Power switch off | Charge the robot; Ensure power switch is ON |
| Robot not charging | Charging contacts dirty; Charging base not powered | Clean charging contacts on robot and base; Check power connection to base |
| Poor cleaning performance | Dustbin full; Brushes tangled; Filter clogged | Empty dustbin; Clean brushes; Clean or replace filter |
| Robot gets stuck frequently | Obstacles in path; Uneven surfaces | Clear cables and small objects; Define no-go zones for problematic areas |
| App connection issues | Incorrect Wi-Fi password; Router issues; Robot too far from router | Re-enter Wi-Fi password; Restart router; Move robot closer to router |
9. Technical Specifications
| Feature | Specification |
|---|---|
| Model Number | RR8567WH |
| Dimensions (L x W x H) | 34.2 x 34.2 x 9.5 cm |
| Item Weight | 3.45 kg |
| Dustbin Capacity | 0.3 litres |
| Noise Level | 70 dB (Quiet mode available) |
| Battery Life | Up to 120 minutes (for up to 120 m²) |
| Navigation Technology | Smart Exploration 8.0 Laser Technology |
| Connectivity | Wi-Fi, Smartphone App, Amazon Alexa, Google Home |
| Special Features | Smart Mapping, Auto Mop Washing, Obstacle Avoidance, Pet Hair Pick Up, Carpet Boost |
10. Warranty and Support
Rowenta is committed to providing high-quality products and support. The company ensures the availability of spare parts for most of its products for up to 15 years after purchase, promoting repairability and sustainability.


Figures 9, 10, 11: Rowenta's commitment to 15-year repairability, its manufacturing origin in France, and its affiliation with Groupe SEB.
For warranty claims, technical assistance, or to purchase spare parts, please visit the official Rowenta website or contact their customer support. Keep your proof of purchase for warranty validation.