Introduction
Thank you for choosing the CATTLEMAN CUISINE 5-in-1 Panini Press Grill Sandwich Maker. This versatile appliance is designed to provide multiple cooking functions, including contact grilling, panini pressing, full grilling, full griddling, and half grill/half griddle options. Featuring removable non-stick plates, an integrated meat thermometer, and powerful 1600W heating, this unit offers efficient and convenient cooking for a variety of meals.
Please read this manual thoroughly before operating the appliance to ensure safe and optimal performance. Keep this manual for future reference.

Image: The CATTLEMAN CUISINE 5-in-1 Panini Press Grill Sandwich Maker shown with two sandwiches being prepared.
Important Safety Instructions
When using electrical appliances, basic safety precautions should always be followed to reduce the risk of fire, electric shock, and injury to persons.
- Read all instructions before use.
- Do not touch hot surfaces. Use handles or knobs.
- To protect against electrical shock, do not immerse cord, plugs, or the appliance body in water or other liquid.
- Close supervision is necessary when any appliance is used by or near children.
- Unplug from outlet when not in use and before cleaning. Allow to cool before putting on or taking off parts, and before cleaning the appliance.
- Do not operate any appliance with a damaged cord or plug, or after the appliance malfunctions or has been damaged in any manner. Contact customer service for examination, repair, or adjustment.
- The use of accessory attachments not recommended by the appliance manufacturer may cause injuries.
- Do not use outdoors.
- Do not let cord hang over edge of table or counter, or touch hot surfaces.
- Do not place on or near a hot gas or electric burner, or in a heated oven.
- Extreme caution must be used when moving an appliance containing hot oil or other hot liquids.
- Always attach plug to appliance first, then plug cord into the wall outlet. To disconnect, turn any control to "off", then remove plug from wall outlet.
- Do not use appliance for other than intended use.
Product Components
The CATTLEMAN CUISINE 5-in-1 Panini Press Grill includes the following items:
- 1 x Contact Grill with US plug
- 1 x Smart Probe (Meat Thermometer)
- 2 x Reversible Grill Plates (one smooth side, one striped side)
- 1 x Instruction Manual

Image: All components included in the package: the main grill unit, two reversible plates, the smart probe, and the manual.
Setup
- Unpacking: Carefully remove all packaging materials and promotional labels from the grill.
- Initial Cleaning: Before first use, wipe the exterior of the grill with a damp cloth. Wash the removable grill plates and drip tray in warm, soapy water, then rinse and dry thoroughly.
- Placement: Place the grill on a stable, flat, heat-resistant surface, away from walls or cabinets to allow for proper ventilation.
- Install Grill Plates: Ensure the grill is unplugged and cool. Insert the reversible grill plates into their designated slots until they click securely into place. You can choose either the ribbed or smooth side facing up depending on your cooking needs.
- Install Drip Tray: Slide the drip tray into the slot at the front base of the grill. Ensure it is fully inserted to collect any excess grease or liquids during cooking.

Image: Illustration of removing the drip tray and grill plates for cleaning or installation.
Operating Instructions
Control Panel Overview

Image: Detailed view of the control panel with labels for each button and display area.
- Both Grill: Activates heating for both upper and lower grill plates.
- Upper Grill: Activates heating for only the upper grill plate.
- Lower Grill: Activates heating for only the lower grill plate.
- Time Display: Shows the set cooking time.
- Upper Plate Temperature Display: Shows the temperature of the upper plate.
- Lower Plate Temperature Display: Shows the temperature of the lower plate.
- Temperature Probe Display: Shows the internal temperature detected by the smart probe.
- Start: Initiates the cooking process after settings are configured.
- Cancel: Stops the current cooking process.
- 360° Rotating Knob: Used to select and adjust temperature (80°C-230°C / 5°C step) and time (30s-60min / 30s step). Press the knob to switch between temperature and time adjustment modes.
General Operation
- Power On: Plug the appliance into a standard 120V electrical outlet. The LCD display will illuminate.
- Select Heating Mode: Press "Both Grill", "Upper Grill", or "Lower Grill" depending on your cooking needs.
- Set Temperature: Rotate the 360° knob to adjust the desired cooking temperature (range 175°F - 450°F). The temperature will be displayed on the LCD screen.
- Set Time (Optional): Press the 360° knob to switch to time adjustment mode. Rotate the knob to set the desired cooking time (range 30 seconds - 60 minutes).
- Preheating: Press the "Start" button. The grill will begin preheating. The screen will display "pre" statically during preheating and flash "pre" with an audible tone when preheating is complete. It is recommended to put food in after preheating. Merging two grill plates together can speed up the preheating process. If the temperature is set too high, preheating may take longer. Consider starting at 400°F and increasing if needed.
- Cooking: Once preheating is complete, place your food on the grill plates. Close the lid if using as a contact grill or panini press.
- Finish Cooking: When cooking is complete, press "Cancel" and unplug the appliance.
5-in-1 Cooking Versatility
This appliance offers five distinct cooking configurations:
- Contact Grill: Use both plates closed for quick cooking of sandwiches, paninis, and thinner cuts of meat.
- Panini Press: Similar to contact grill, ideal for pressing sandwiches and achieving grill marks.
- Full Grill: Open the grill 180 degrees flat to use both plates as a large grilling surface for multiple items like steaks, vegetables, or skewers.
- Full Griddle: Open the grill 180 degrees flat and use the smooth side of the plates for cooking pancakes, eggs, or tortillas.
- Half Grill/Half Griddle: Open the grill 180 degrees flat, using one plate with the ribbed side up and the other with the smooth side up to cook different types of food simultaneously.

Image: Visual representation of the five cooking modes and the 180-degree opening capability.
Using the Smart Meat Thermometer
The included smart probe allows for precise internal temperature monitoring of your food.
- Connect Probe: Insert the smart probe into the designated port on the side of the grill.
- Insert into Food: Carefully insert the metal tip of the probe into the thickest part of the food you are cooking, avoiding bone.
- Select Mode: The grill offers 5 setting modes for the probe function. These include preset temperatures for different doneness levels (e.g., Medium Rare, Medium, Medium Well, Well Done) and a DIY mode for custom temperature settings.
- Monitor Temperature: The internal temperature of the food will be displayed on the LCD screen (Temperature Probe Display).
- Alert: When the food reaches the set target temperature, the grill will beep to notify you.

Image: The built-in meat thermometer in use, with display options for various doneness levels.
Maintenance and Cleaning
Proper cleaning and maintenance will extend the life of your CATTLEMAN CUISINE grill.
- Always Unplug and Cool: Before cleaning, always ensure the grill is unplugged from the power outlet and has completely cooled down.
- Remove Grill Plates: Press the release buttons on the side of the grill to detach the removable grill plates.
- Clean Grill Plates: The non-stick grill plates are dishwasher safe. Alternatively, they can be washed by hand with warm, soapy water and a non-abrasive sponge. Rinse thoroughly and dry completely before reattaching.
- Clean Drip Tray: Remove the drip tray and empty any collected grease. Wash it with warm, soapy water, rinse, and dry. The drip tray is also dishwasher safe.
- Clean Exterior: Wipe the exterior of the grill base with a damp cloth. Do not use abrasive cleaners or scouring pads, as they may damage the finish. Never immerse the main unit in water or any other liquid.
- Storage: Store the clean and dry grill in a cool, dry place. The foldable bracket on the base allows for efficient grease drainage and can be used to reduce smoke during cooking, and also helps with compact storage.

Image: Close-up views of the thermal probe, detachable drip tray, and foldable stand.
Troubleshooting
If you encounter any issues with your grill, please refer to the following common solutions:
- Grill Not Turning On: Ensure the power cord is securely plugged into a working electrical outlet. Check if the outlet itself is functioning by plugging in another appliance.
- Slow Preheating: Preheating time can vary based on the set temperature. If the temperature is set very high (e.g., 450°F), it may take longer. Try setting it to 400°F initially and then increasing if necessary. Ensure both grill plates are merged together during preheating to speed up the process.
- Food Not Cooking Evenly: Ensure the grill plates are properly installed and making full contact with the heating elements. For contact grilling, ensure the food is evenly distributed and the lid is properly closed.
- Temperature Display Mode: To switch the temperature display mode (e.g., Fahrenheit to Celsius), press and hold the 360° knob for 5 seconds while the unit is in standby mode.
- Excessive Smoke: Ensure the drip tray is clean and properly inserted. Excessive grease or food residue on the plates can cause smoke. The foldable bracket can be used to accelerate grease drainage and reduce smoke.
- Grill Stopped Working: If the grill unexpectedly stops functioning, unplug it immediately. Allow it to cool completely before attempting to restart. If the issue persists, contact customer support. Do not attempt to repair the appliance yourself.
Specifications
| Brand | CATTLEMAN CUISINE |
| Model Number | CTMCS-US-LS-GC02F |
| Wattage | 1600 watts |
| Voltage | 120 Volts |
| Material | Stainless Steel |
| Product Dimensions | 16.92"D x 16.73"W x 9.06"H |
| Item Weight | 11.02 Pounds |
| Special Features | 5-in-1 Functionality, Removable Plates, Meat Thermometer, Smokeless Design |
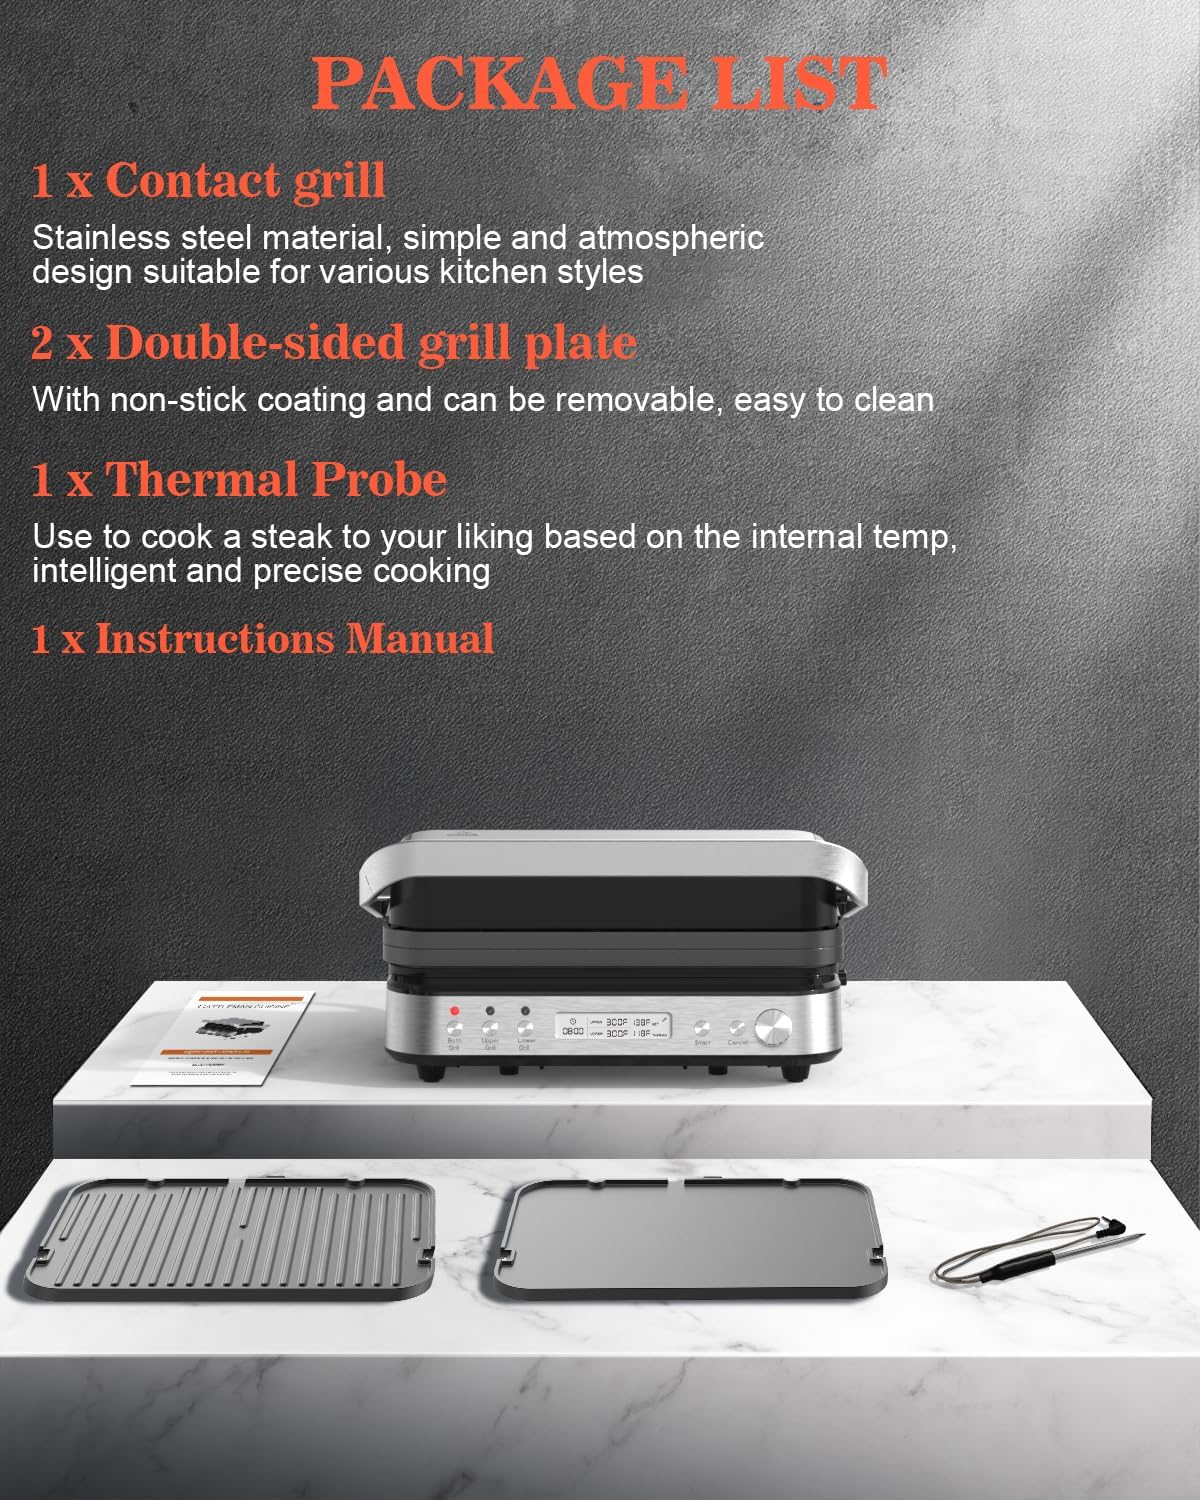
Image: Detailed dimensions and specifications of the grill and its components.
Warranty and Support
For warranty information, please refer to the documentation included with your purchase or contact CATTLEMAN CUISINE customer support. Keep your purchase receipt as proof of purchase.
If you have any questions, require technical assistance, or need to report an issue with your product, please contact CATTLEMAN CUISINE customer support through the retailer's platform or the official brand website.


