1. Introduction
This manual provides instructions for the assembly, operation, and maintenance of your SUPERJARE Bakers Rack with Power Outlet, Model EU80919HC. This multi-functional kitchen storage unit is designed to enhance organization and provide convenient power access for small appliances.

Image 1.1: Overview of the SUPERJARE Bakers Rack with Power Outlet.
Video 1.1: Product demonstration of the SUPERJARE Bakers Rack with Power Outlet, showcasing its features and use in a kitchen environment.
2. Safety Information
- Read all instructions carefully before assembly and use.
- Keep small parts away from children during assembly to prevent choking hazards.
- Ensure all screws and fasteners are securely tightened before using the rack. Periodically check for tightness.
- Do not overload shelves. Refer to the 'Specifications' section for weight capacities.
- Place the rack on a flat, stable surface. Use the adjustable feet to ensure stability.
- For electrical safety, do not exceed the rated capacity of the power outlet. Avoid spilling liquids near the power outlet.
- Always turn off the power switch on the outlet when not in use or before cleaning.
- Do not attempt to modify the electrical components of the rack.
3. Package Contents
Verify that all components are present before beginning assembly:
- P2 Particleboard shelves
- Metal frame components
- Power outlet unit with switch and 6.5-foot power cord
- 6 S-shaped hooks
- Wire basket (slide-out)
- Adjustable feet
- Assembly hardware (screws, wrench, etc.)
- Instruction manual
4. Assembly Instructions
Follow the step-by-step instructions provided in the included assembly guide. Ensure all parts are correctly oriented before tightening screws. An Allen wrench is typically provided for assembly.
Key Assembly Features:
- X-Brace Installation: The X-shaped metal braces on the back of the rack provide structural stability. Ensure they are securely attached to prevent wobbling.
- Adjustable Feet: The rack includes adjustable feet to compensate for uneven floors, ensuring the unit remains level and stable.
- S-Hooks: Six S-shaped hooks are provided for hanging kitchen utensils, towels, or other items. These can be placed on the side bars of the rack.

Image 4.1: X-brace for stability.

Image 4.2: Adjustable foot for leveling.

Image 4.3: S-hooks for hanging.
5. Operating Instructions
Using the Integrated Power Outlet:
The bakers rack features a built-in power outlet with two AC outlets and a power switch. This allows for convenient powering of small kitchen appliances directly on the rack.
- Plug the rack's main power cord into a standard wall outlet.
- Connect your small appliances (e.g., coffee maker, toaster, microwave) to the two AC outlets on the rack.
- Use the integrated power switch to turn the outlets on or off. This provides a central control for connected devices.

Image 5.1: Detail of the power outlet with switch.
Utilizing Storage Features:
- Top Perch: The elevated top shelf is suitable for spices, small decorative items, or plants.
- Main Tabletop: Provides a spacious surface for larger appliances like microwaves or coffee machines.
- Open Shelves: Multiple open shelves offer versatile storage for cookware, dishes, or pantry items.
- Slide-Out Wire Basket: Ideal for storing fruits, vegetables, or other items that benefit from air circulation.
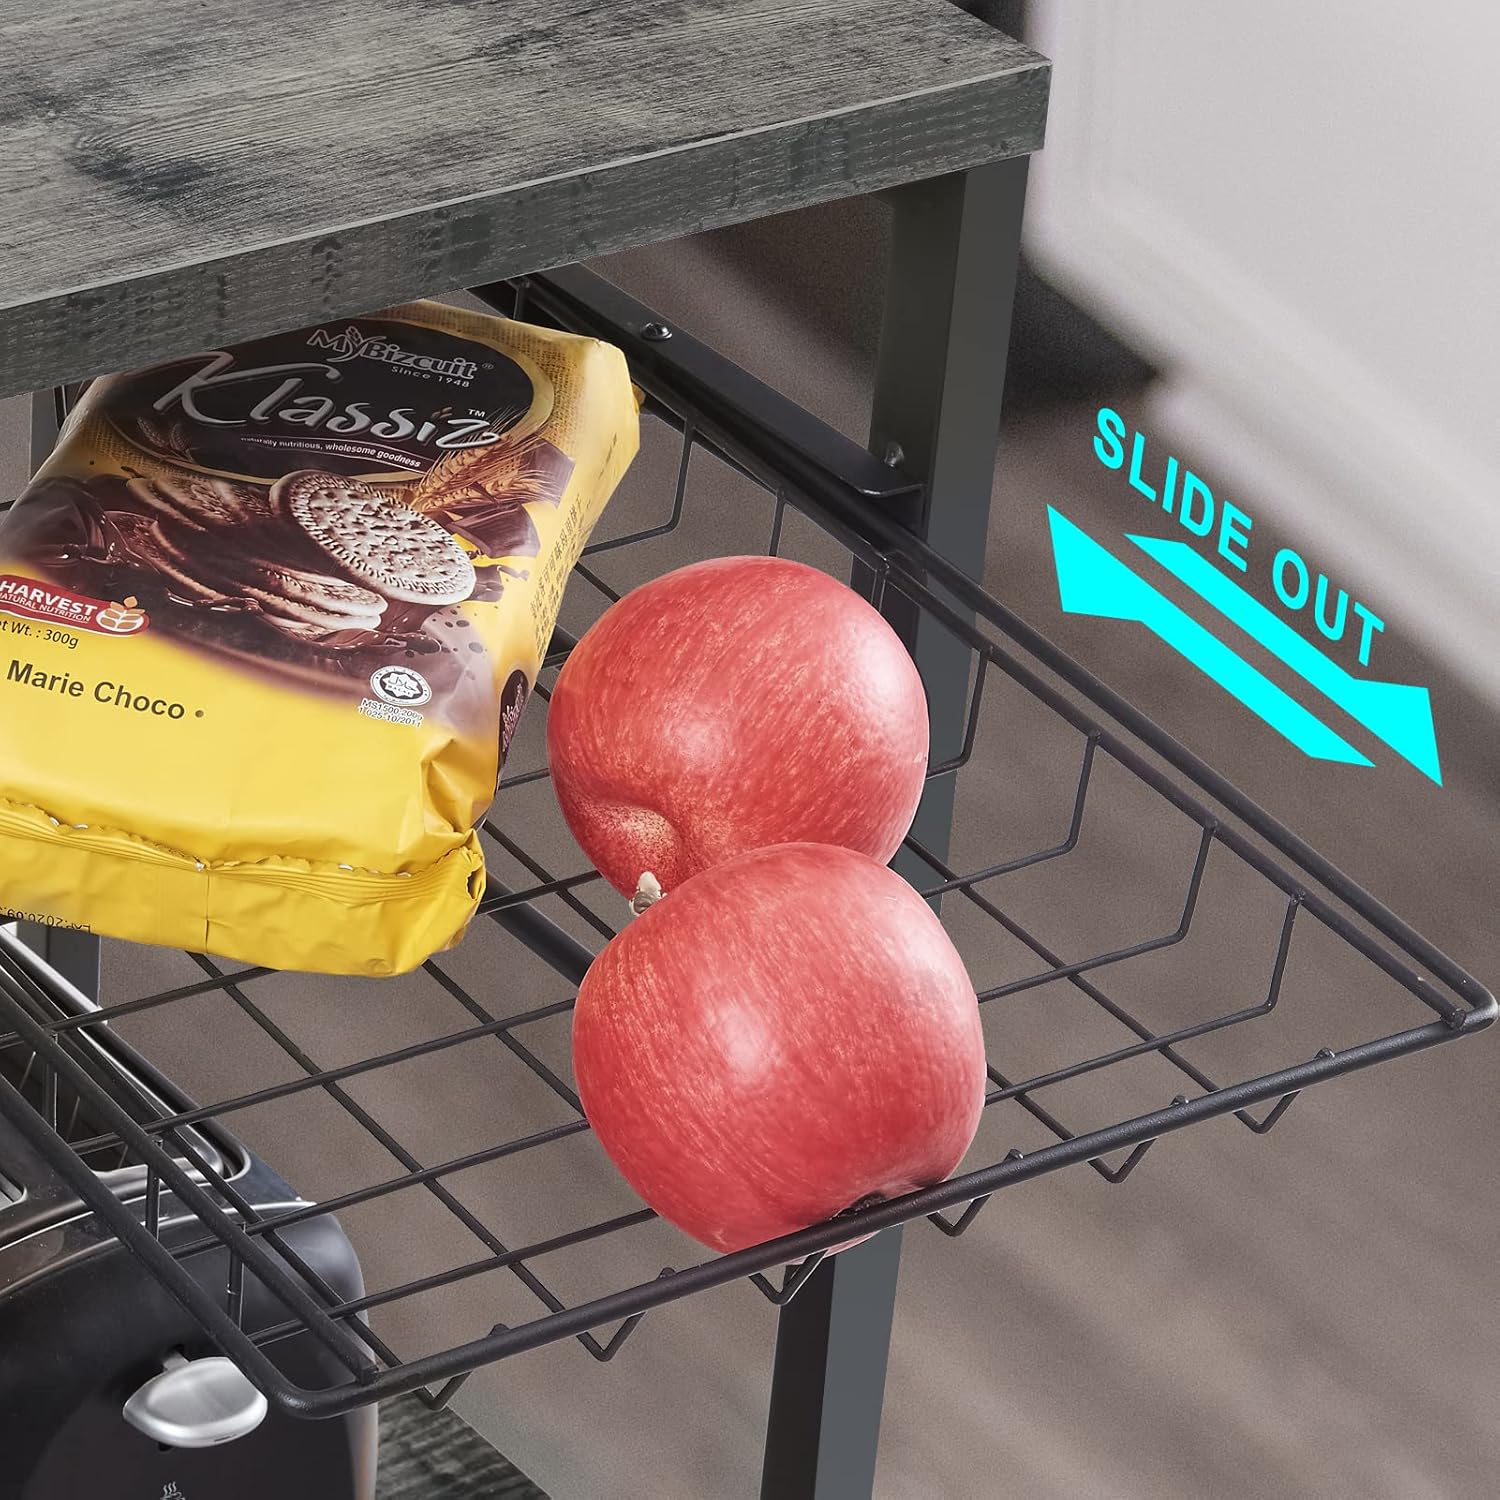
Image 5.2: Slide-out wire basket.

Image 5.3: Top perch and side hooks.
6. Maintenance and Care
- Cleaning: Wipe surfaces with a soft, damp cloth. Avoid abrasive cleaners or harsh chemicals that may damage the finish.
- Spills: Immediately wipe up any spills, especially near the power outlet, to prevent damage or electrical hazards.
- Fasteners: Periodically check all screws and bolts to ensure they remain tight. Re-tighten as necessary to maintain stability.
- Electrical Components: Inspect the power cord and outlets for any signs of damage. If damage is observed, discontinue use and contact customer support.
7. Troubleshooting
Power Outlet Not Working:
- Ensure the rack's main power cord is securely plugged into a functional wall outlet.
- Check that the power switch on the rack's outlet is in the 'ON' position.
- Verify that the appliance plugged into the rack's outlet is functioning correctly by testing it in a different wall outlet.
- If the outlet has a reset button, press it.
Rack is Unstable/Wobbly:
- Ensure the rack is placed on a level surface.
- Adjust the leveling feet at the bottom of the rack until it is stable.
- Check all assembly screws and bolts and tighten any that are loose.
- Ensure the X-braces are properly installed and tightened.
8. Specifications
| Feature | Detail |
|---|---|
| Model Number | EU80919HC |
| Material | P2 Particleboard, Metal |
| Color | Charcoal Gray |
| Product Dimensions | 15.7"D x 35.4"W x 52"H |
| Number of Shelves | 6 |
| Shelf Type | Tiered Shelf |
| Shelf Weight Capacity | 120 Pounds (Main Shelf) |
| Special Feature | Integrated Charging Station (2 AC Outlets, 1 Switch) |
| Power Cord Length | 6.5 Feet |
| Assembly Required | Yes |

Image 8.1: Product dimensions.
9. Warranty and Support
For warranty information, product support, or to report any issues, please contact SUPERJARE customer service. Keep your purchase receipt and model number (EU80919HC) handy for faster service.
Contact information can typically be found on the manufacturer's website or through your retailer.