Introduction
This manual provides comprehensive instructions for the installation, operation, and maintenance of the BAIJAC Replacement Tension Assembly. This component is specifically designed for compatibility with Singer 2500, 2517, and 2600 Series sewing machines, including models 2601, 2602, 2603, 2604, and 2605. The tension assembly plays a critical role in regulating the upper thread tension, which is essential for forming balanced and consistent stitches.
Please read these instructions carefully before attempting any installation or adjustment to ensure proper function and to prevent damage to your sewing machine.
Safety Information
- Always unplug your sewing machine from the power outlet before performing any installation, cleaning, or maintenance.
- Use appropriate tools for installation and removal. Avoid excessive force.
- Keep small parts away from children.
- If you are unsure about any step, consult a qualified sewing machine technician.
Package Contents
Verify that your package contains the following item:
- 1 x BAIJAC Replacement Tension Assembly (Complete Unit)
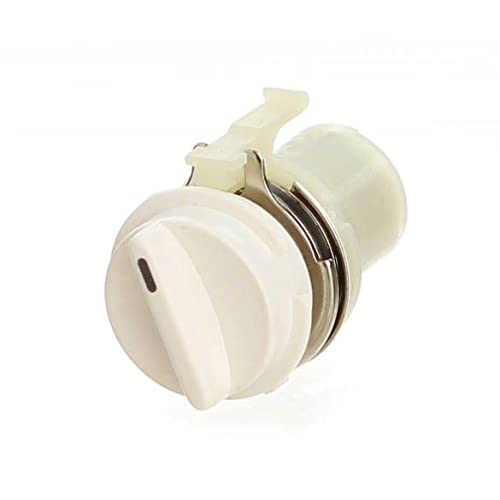
Image showing the complete BAIJAC Replacement Tension Assembly, including the tension discs, spring, and adjustment dial.
Setup and Installation
Follow these steps to replace your sewing machine's tension assembly:
- Prepare the Machine: Ensure your sewing machine is unplugged from the power source. Raise the presser foot and needle to their highest positions.
- Locate the Old Assembly: Identify the existing upper thread tension assembly on your sewing machine. It is typically located on the front or side of the machine head, near the thread path.
- Remove the Old Assembly:
- Depending on your specific Singer model, you may need to remove a faceplate or cover to access the assembly.
- Carefully unscrew any retaining screws that hold the tension assembly in place. Note the position of any washers or springs.
- Gently pull the old tension assembly straight out from its mounting point.
- Install the New Assembly:
- Align the new BAIJAC Replacement Tension Assembly with the mounting hole. Ensure the tension discs, tension spring, and adjustment dial are correctly oriented. The tension release pin (a small wire or lever that separates the discs when the presser foot is raised) should align with its corresponding mechanism.
- Push the new assembly firmly into place.
- Secure it with the retaining screws removed earlier. Do not overtighten.
- Test and Adjust: Once installed, plug in your sewing machine. Thread the machine as usual. Perform a few test stitches on a scrap piece of fabric to check the tension. Adjust the tension dial as needed (refer to the "Operating" section).
Operating (Adjusting Thread Tension)
Proper thread tension is crucial for balanced stitches. The BAIJAC Tension Assembly allows you to fine-tune the upper thread tension.
- Understanding Tension:
- Balanced Stitch: The upper and lower threads interlock evenly between the two layers of fabric.
- Too Loose Upper Tension: The upper thread lies straight on the top of the fabric, and the bobbin thread appears as loops on the top. Turn the tension dial to a higher number.
- Too Tight Upper Tension: The bobbin thread lies straight on the bottom of the fabric, and the upper thread appears as loops on the bottom. Turn the tension dial to a lower number.
- Adjusting the Dial: The tension assembly features a numbered dial. Turning the dial to a higher number increases tension, while turning it to a lower number decreases tension. Make small adjustments and test on scrap fabric.
- General Guideline: Start with the tension dial set to the middle number (e.g., 3 or 4 on a dial from 0-9) and adjust from there.
Maintenance
Regular maintenance ensures the longevity and optimal performance of your tension assembly.
- Cleaning Tension Discs: Lint and thread fibers can accumulate between the tension discs, affecting tension consistency.
- With the presser foot raised (to open the tension discs), use a small brush or a piece of dental floss to gently clean between the discs.
- Ensure no debris remains.
- Inspection: Periodically inspect the tension assembly for any visible damage, such as bent springs or worn discs. Replace the assembly if significant damage is observed.
Troubleshooting
If you encounter issues with your sewing machine's thread tension after installing the BAIJAC Replacement Tension Assembly, consider the following:
| Problem | Possible Cause | Solution |
|---|---|---|
| Loose stitches / Loops on top fabric | Upper tension too loose, incorrect threading, lint in tension discs. | Increase upper tension (higher number). Re-thread the machine carefully. Clean tension discs. |
| Tight stitches / Loops on bottom fabric | Upper tension too tight, bobbin tension too loose. | Decrease upper tension (lower number). Check bobbin tension (refer to your sewing machine's manual for bobbin tension adjustment). |
| Thread breaking | Upper tension too tight, poor quality thread, incorrect needle, burrs on thread path. | Decrease upper tension. Use good quality thread. Ensure correct needle size/type. Inspect thread path for rough spots. |
| Skipped stitches | Incorrect needle, bent needle, incorrect threading, timing issues. | Replace needle. Re-thread machine. If problem persists, consult a technician. |
Note: Always ensure the presser foot is raised when threading the upper thread to allow the thread to seat correctly between the tension discs.
Specifications
- Product Type: Replacement Thread Tension Assembly
- Brand: BAIJAC
- Compatibility: Singer 2500 Series, Singer 2517 Series, Singer 2600 Series (including models 2601, 2602, 2603, 2604, 2605)
- ASIN: B0B86NV1J
- Manufacturer: BAIJAC