
AutoForever 60 Gallon Sandblaster Cabinet
AutoForever 60 Gallon Air Sandblasting Cabinet Instruction Manual
Model: 60 Gallon Sandblaster Cabinet
1. Introduction
This manual provides essential information for the safe and effective operation, assembly, and maintenance of your AutoForever 60 Gallon Air Sandblasting Cabinet. Please read this manual thoroughly before initial use to ensure proper handling and to prevent injury or damage to the equipment.
The AutoForever 60 Gallon Air Sandblasting Cabinet is designed for efficient surface treatment, including the removal of paint, rust, and oxidation from various workpieces. It is suitable for applications requiring high-density surface preparation.

Image 1.1: Front view of the AutoForever 60 Gallon Air Sandblasting Cabinet.

Image 1.2: Overview of the sandblasting cabinet's capabilities, highlighting rust removal and surface cleaning.
2. Safety Instructions
WARNING: Failure to follow these safety instructions may result in serious injury or property damage.
- Always wear appropriate Personal Protective Equipment (PPE), including safety glasses, gloves, and a respirator, when operating the sandblasting cabinet.
- Ensure adequate ventilation in the work area to prevent accumulation of dust and abrasive particles.
- Do not exceed the recommended air pressure of 125 PSI. Refer to the specifications section for detailed pressure requirements.
- Use only approved abrasive media. Never use silica sand for blasting, as it can cause severe respiratory issues. Refer to the operation section for suitable media types.
- Disconnect the air supply before performing any maintenance, cleaning, or changing abrasive media.
- Keep children and unauthorized personnel away from the operating area.
- Inspect the cabinet, hoses, and connections for damage or leaks before each use. Repair or replace damaged components immediately.
- Ensure the cabinet is placed on a stable, level surface.
3. Components Overview
The AutoForever 60 Gallon Air Sandblasting Cabinet includes the following key components:
- Steel Cabinet Body: Powder-coated for rust and corrosion resistance.
- Viewing Window: Equipped with rubber glass and a built-in LED tube for enhanced visibility. Includes a removable plastic film to protect the glass.
- Integrated Gloves: Oversized rubber gloves for operating the blast gun safely inside the cabinet.
- Sandblaster Gun: For directing abrasive media.
- Ceramic Nozzles: Four included for various blasting needs.
- Side Access Door: For easy loading and unloading of workpieces and cabinet cleaning.
- Exhaust Port: Built-in for dust management.
- Air Filter: Helps prevent dust leakage.
- Sealant Material: For ensuring a tight seal during assembly.
- Work Surface Tray: Removable mesh-design for holding workpieces.
- Drain Plug: For easy cleaning and media removal.

Image 3.1: Key features including the power switch, internal gloves, and media drain.
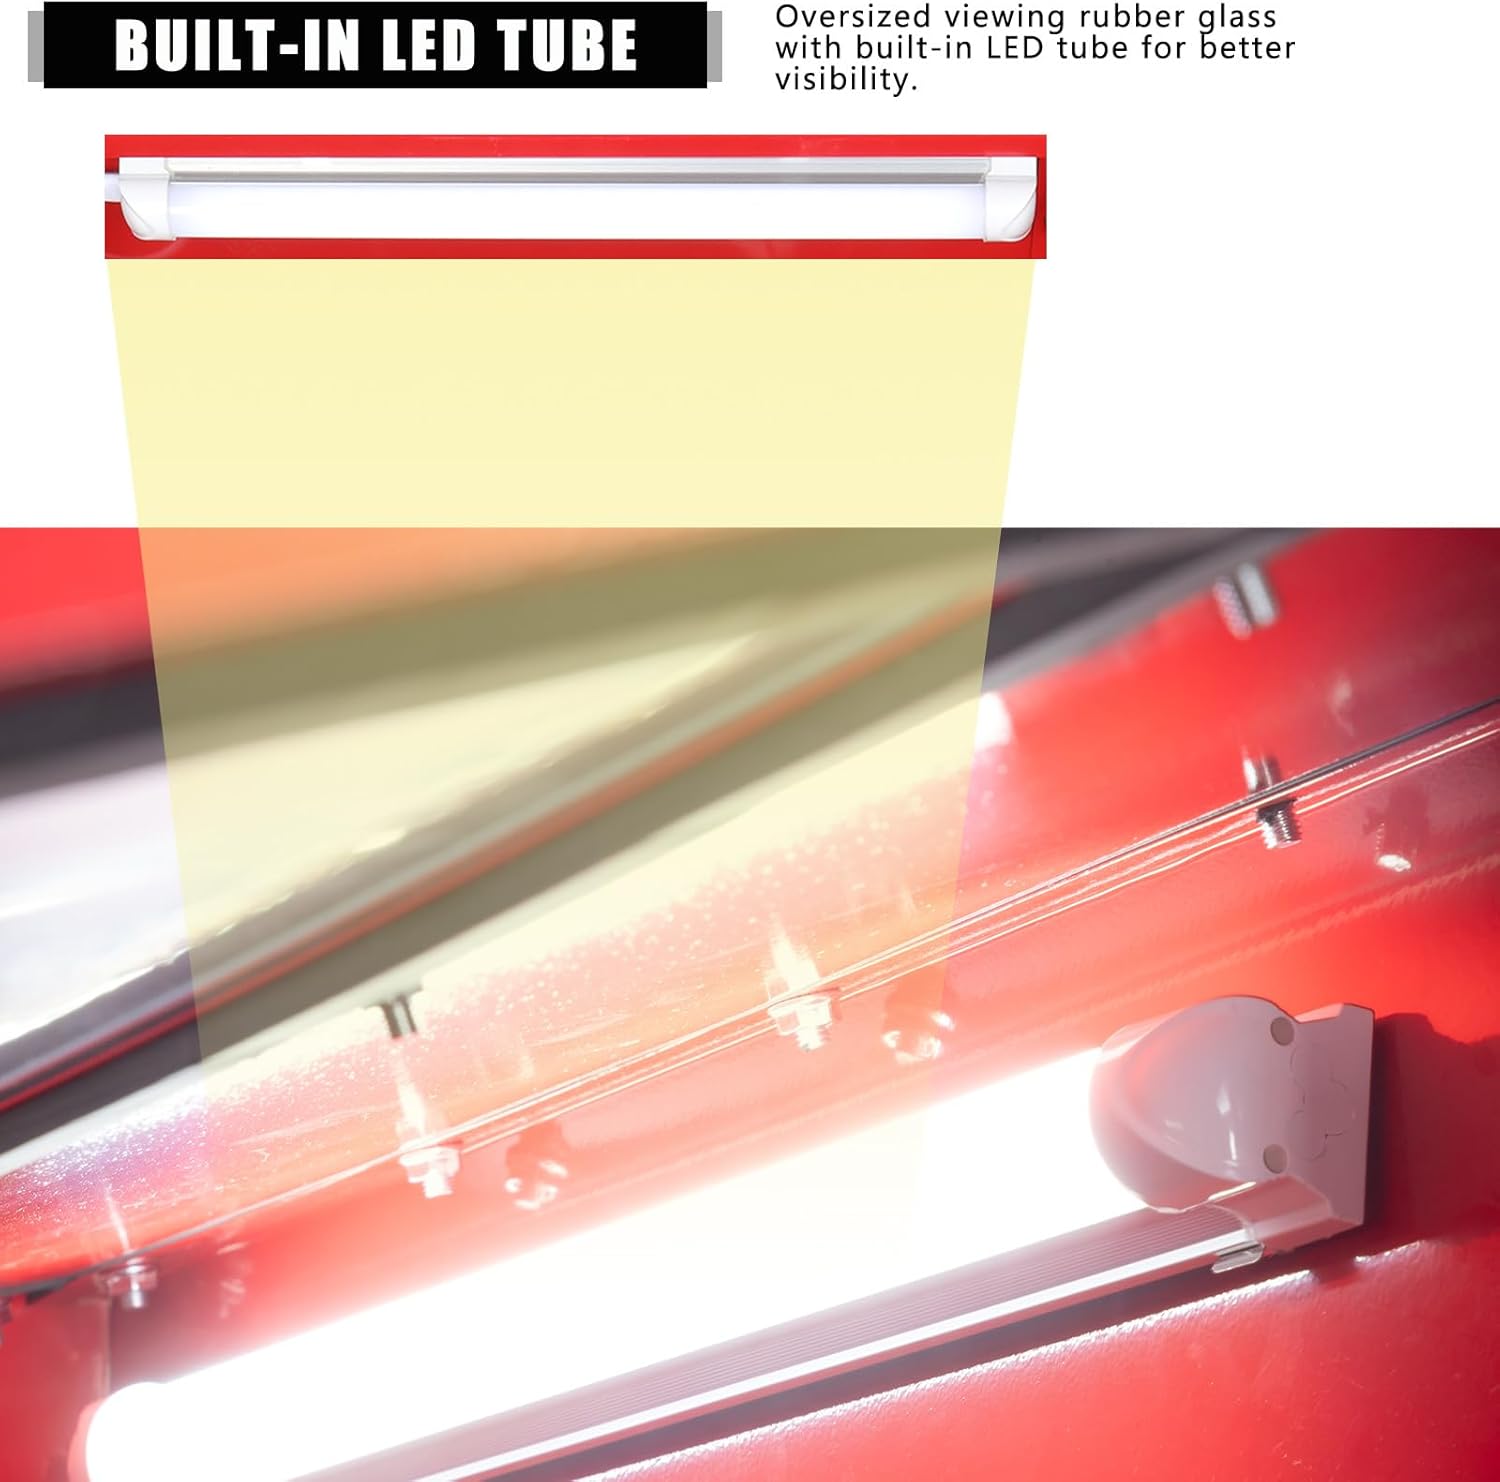
Image 3.2: The built-in LED tube provides illumination for better visibility during operation.
4. Assembly and Initial Setup
Follow these steps for assembling your sandblasting cabinet. It is recommended to have assistance during assembly.
- Unpack Components: Carefully remove all parts from the packaging. Verify that all components listed in the packing list are present and undamaged.
- Assemble the Stand: Attach the four sturdy legs to the cabinet base using the provided hardware. Ensure all bolts are tightened securely.
- Mount the Cabinet: Place the main cabinet body onto the assembled stand. Secure it with the appropriate fasteners.
- Install Viewing Window: Ensure the viewing window is properly seated and sealed. Apply the removable plastic film to protect the glass from abrasive media.
- Connect Gloves: Insert the oversized rubber gloves into the designated openings on the front of the cabinet. Ensure they are securely fastened to prevent leaks.
- Install LED Tube: Mount the built-in LED tube inside the cabinet for illumination. Connect its power supply as per instructions.
- Apply Sealant: Apply the provided sealant material to all seams and joints, especially around the viewing window, doors, and air connections, to ensure superior sealing and prevent dust leakage. Allow adequate drying time.
- Connect Air Supply: Connect your air compressor to the cabinet's air inlet. Ensure all air connections are tight and leak-free.
- Initial Leak Check: Before adding abrasive media, connect the air supply and pressurize the cabinet to a low pressure. Check all seams and connections for air leaks. Apply additional sealant if necessary.
5. Operating Instructions
Proper operation ensures efficient blasting and extends the life of your cabinet.
- Select Abrasive Media: Choose appropriate abrasive media for your task. Suitable media include glass beads, silicon carbide, alumina, crushed walnut shells, and other non-silica blasting media.
- Load Media: Open the side access door and pour the selected abrasive media into the hopper at the bottom of the cabinet. Do not overfill.
- Prepare Workpiece: Place the workpiece to be blasted onto the mesh work surface tray inside the cabinet. Close and secure the side access door.
- Connect Air Compressor: Ensure your air compressor is connected and set to the recommended pressure (60-125 PSI). The average air consumption is 270 liters/min at 6 bar.
- Activate Lighting: Turn on the built-in LED tube for clear visibility inside the cabinet.
- Begin Blasting: Insert your hands into the rubber gloves. Grasp the sandblaster gun and direct it towards the workpiece. Press the trigger to begin blasting. Maintain a consistent distance and angle for even results.
- Monitor Progress: Observe the blasting process through the viewing window. The exhaust system and air filter will help manage dust.
- Finish Blasting: Release the trigger to stop blasting. Allow dust to settle before opening the side access door.
- Remove Workpiece: Carefully remove the treated workpiece from the cabinet.
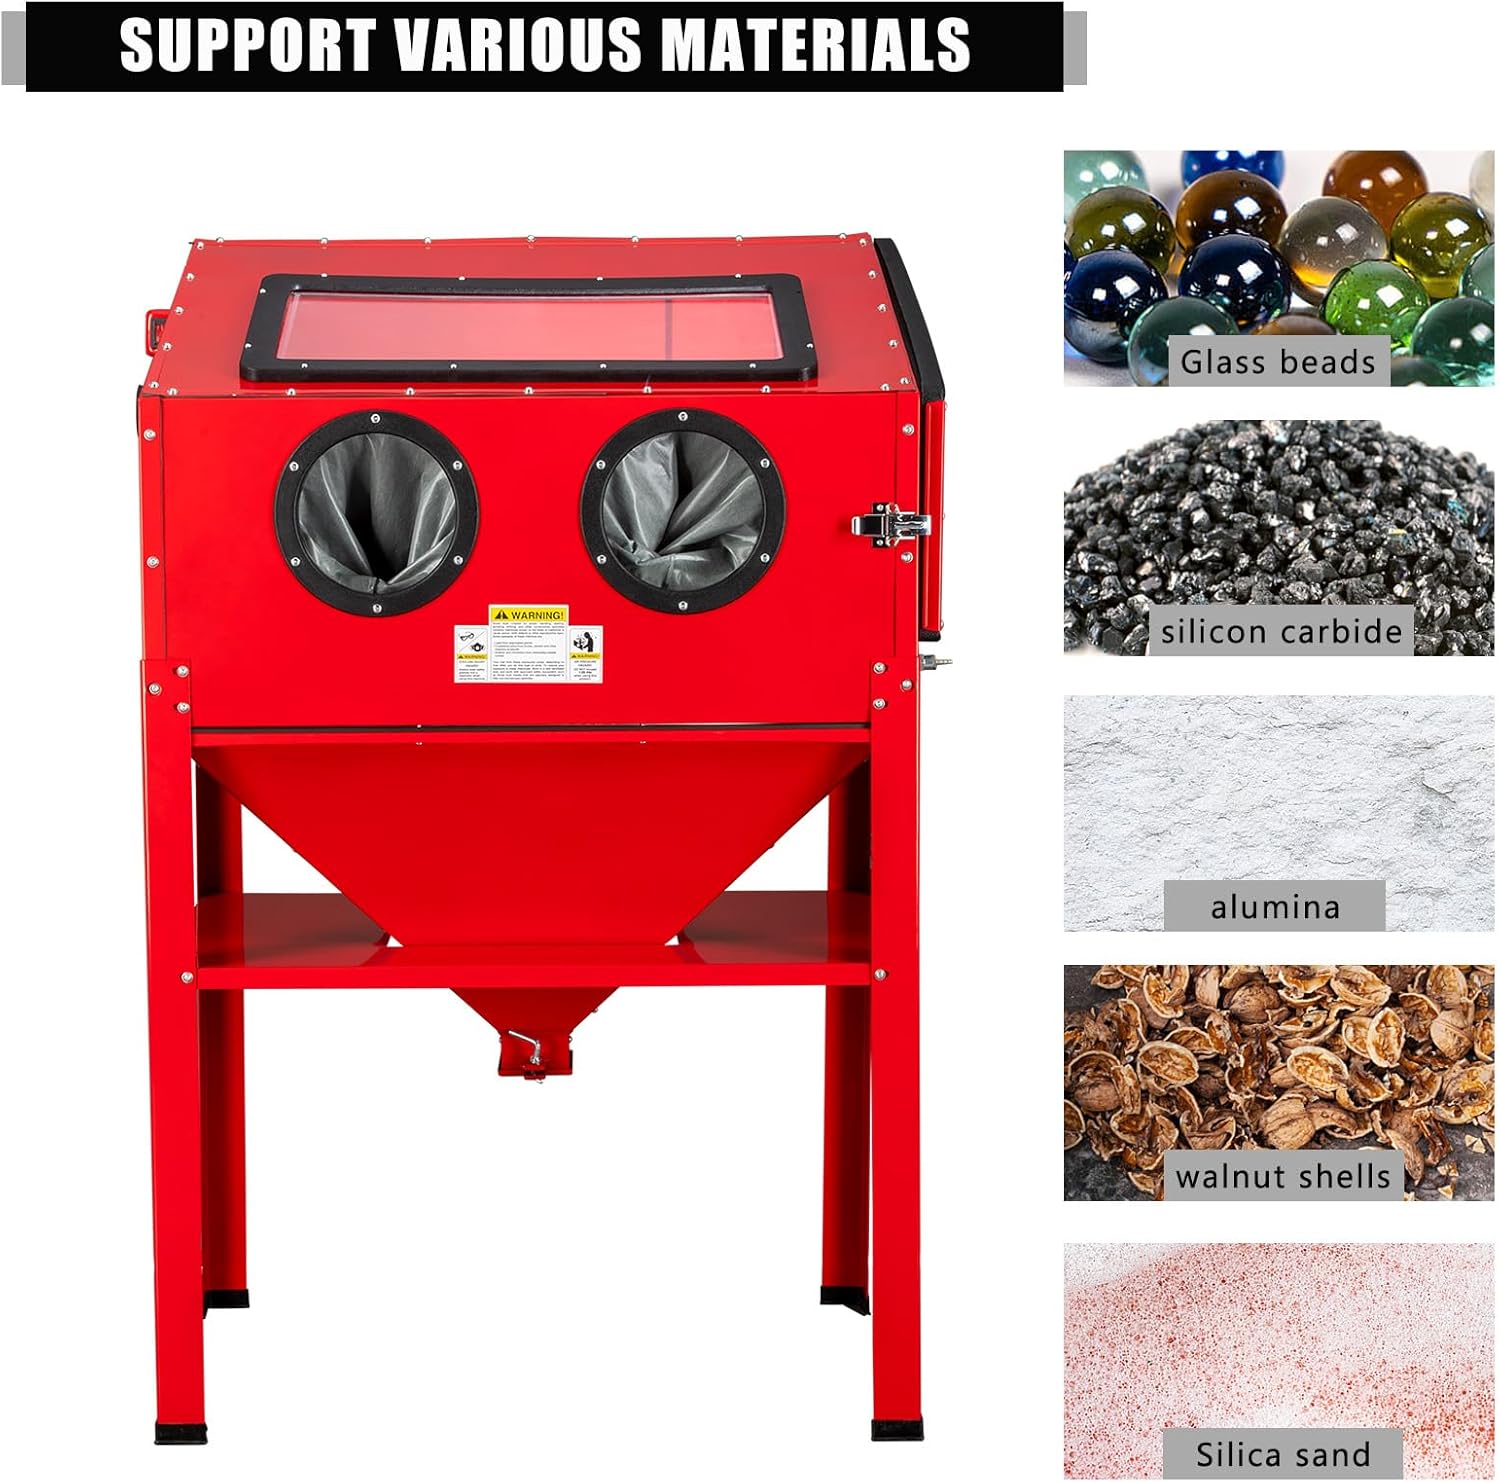
Image 5.1: Examples of compatible abrasive media for the sandblasting cabinet.

Image 5.2: Further illustration of supported abrasive materials like glass beads, silicon carbide, alumina, walnut shells, and silica sand.
6. Maintenance
Regular maintenance ensures optimal performance and longevity of your sandblasting cabinet.
- Daily Cleaning: After each use, empty the abrasive media from the hopper using the drain plug. Clean the interior of the cabinet to remove fine dust and debris.
- Inspect Seals: Regularly check all seals, especially around the doors and viewing window, for wear or damage. Replace worn seals to maintain a dust-free environment.
- Nozzle Replacement: Ceramic nozzles will wear down over time. Replace them when you notice a decrease in blasting efficiency or a change in the blast pattern.
- Air Filter Maintenance: Clean or replace the air filter periodically to ensure efficient dust extraction and prevent clogging.
- Viewing Window Protection: Replace the protective plastic film on the viewing window as it becomes scratched or opaque to maintain clear visibility.
- Hose Inspection: Check the blast hose and air lines for cracks, kinks, or wear. Replace any damaged hoses immediately.
- Lubrication: Periodically lubricate hinges and latches on the access doors.
7. Troubleshooting
This section addresses common issues you might encounter and their potential solutions.
| Problem | Possible Cause | Solution |
|---|---|---|
| Poor blasting performance | Low air pressure, worn nozzle, clogged media, incorrect media type | Check air compressor pressure, replace nozzle, clear media path, use recommended media |
| Dust leakage from cabinet | Worn seals, loose connections, clogged air filter | Inspect and replace seals, tighten connections, clean or replace air filter |
| Reduced visibility through window | Scratched protective film, excessive dust inside cabinet | Replace protective film, clean interior of cabinet, ensure exhaust is functioning |
| Sandblaster gun not firing | No air supply, clogged nozzle, media too damp | Check air connection, clear nozzle, ensure media is dry |
8. Specifications
| Feature | Detail |
|---|---|
| Model | 60 Gallon Sandblaster Cabinet |
| Brand | AutoForever |
| Capacity | 60 Gallons |
| Material | Steel (Powder-coated) |
| Recommended Air Pressure | 60-125 PSI |
| Average Air Consumption | 270 liter/min @ 6 bar |
| Working Area (L x W x H) | 33 x 21.65 x 14.56 inches (83.82 x 54.99 x 36.98 cm) |
| Viewing Window (L x W) | 21.25 x 9.84 inches (53.98 x 24.99 cm) |
| Product Dimensions | 35.82 x 24.6 x 7.87 inches |
| Nozzles Included | 4 Ceramic Nozzles |
| Features | Built-in LED tube, Oversized rubber gloves, Side access door, Air filter, Drain plug |
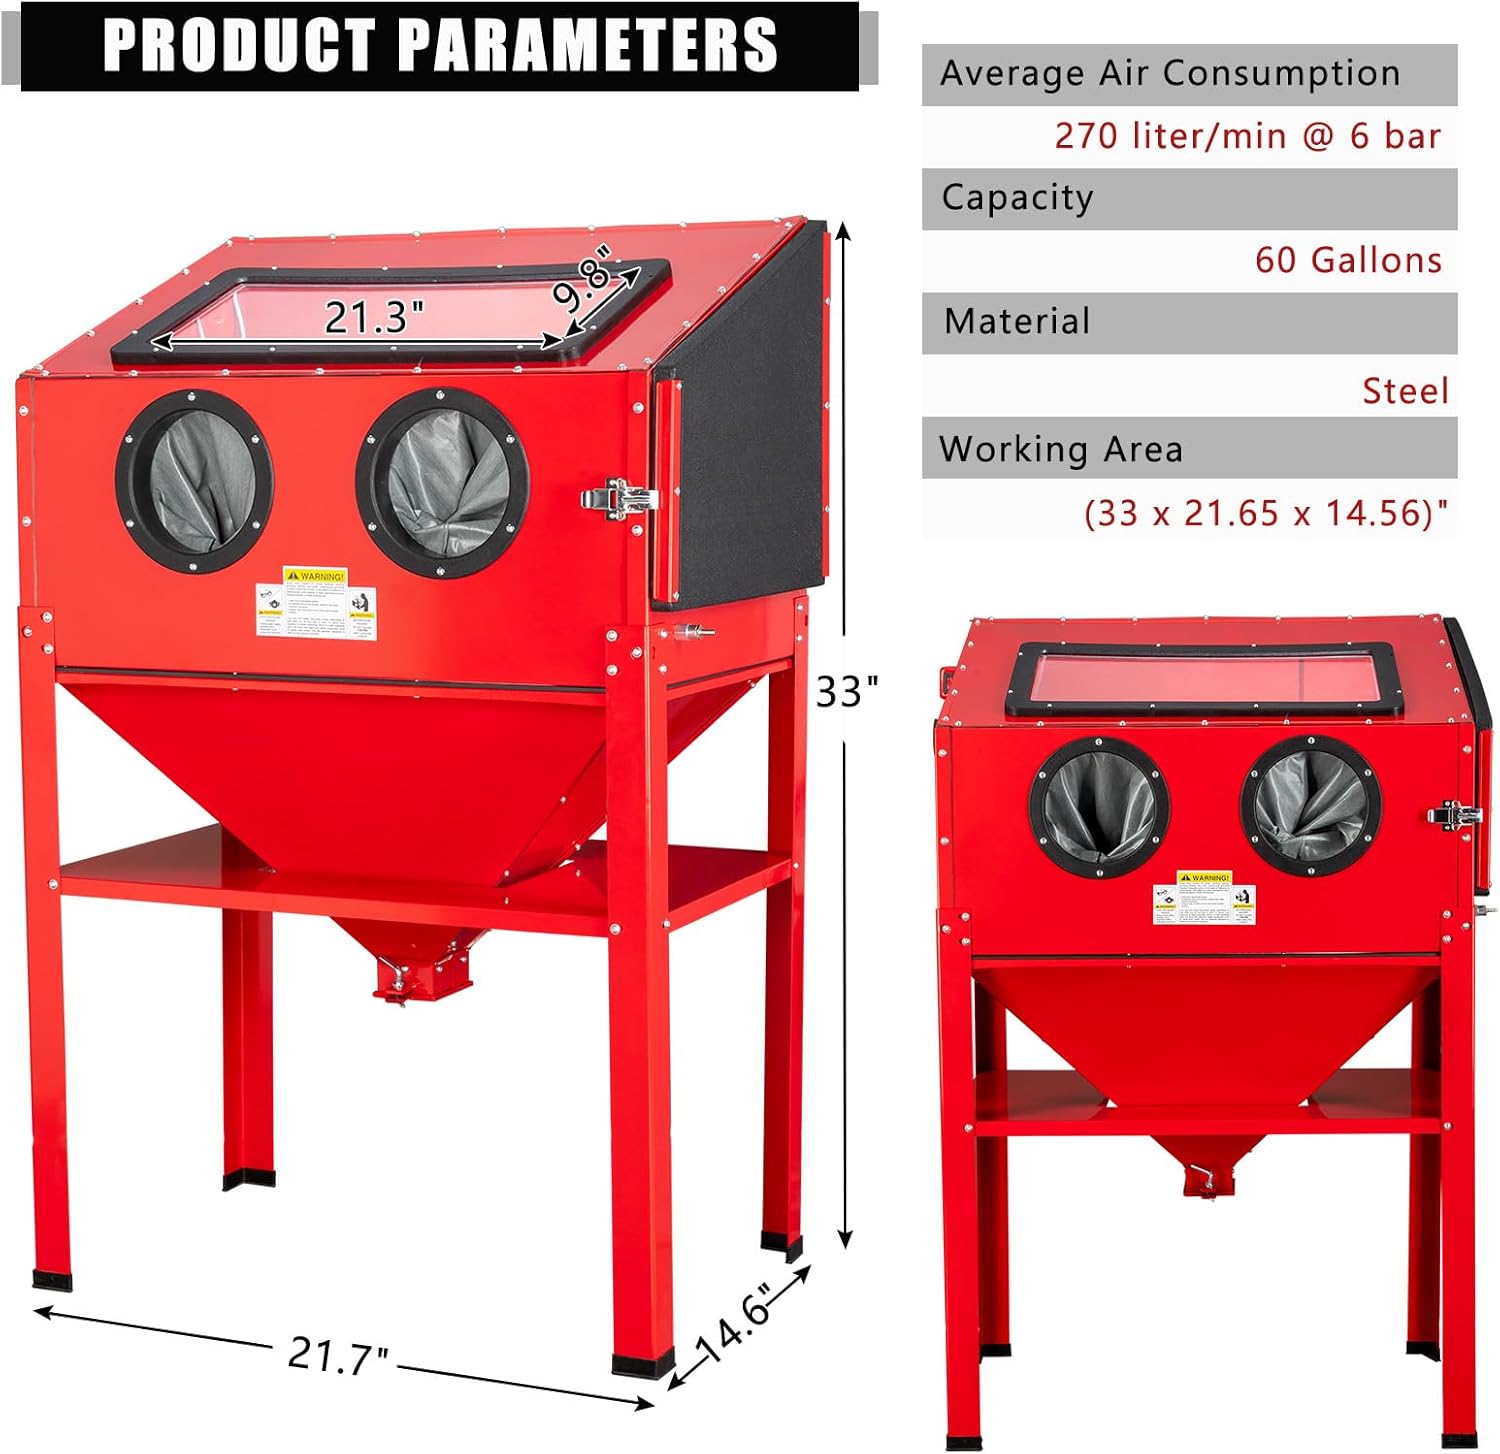
Image 8.1: Visual representation of key product dimensions and specifications.

Image 8.2: Detailed view of air consumption and capacity specifications.
9. Warranty Information
For specific warranty details, please refer to the product packaging or contact AutoForever customer support. Generally, products are covered against manufacturing defects for a limited period from the date of purchase. Keep your proof of purchase for warranty claims.
10. Customer Support
If you have any questions, require technical assistance, or need to report a problem with your AutoForever 60 Gallon Air Sandblasting Cabinet, please contact AutoForever customer support through the retailer's platform or the official AutoForever website.
For online support and resources, visit: AutoForever on Amazon
Ask a question about this manual
Ask about setup, troubleshooting, compatibility, parts, safety, or missing instructions. Manuals+ will review the question and use this page’s manual context to help answer it.