1. Introduction
This manual provides essential information for the safe operation, maintenance, and troubleshooting of your RYOBI 18V ONE+ HP Compact Brushless 1/2" Hammer Drill Kit, model PSBHM01K. Please read and understand all instructions before using the tool to ensure safe and effective performance.
2. General Safety Information
Always follow basic safety precautions when using power tools to reduce the risk of fire, electric shock, and personal injury.
- Work Area Safety: Keep your work area clean and well-lit. Cluttered or dark areas invite accidents. Do not operate power tools in explosive atmospheres, such as in the presence of flammable liquids, gases, or dust.
- Electrical Safety: Avoid body contact with earthed or grounded surfaces. Do not expose power tools to rain or wet conditions.
- Personal Safety: Always wear eye protection. Use hearing protection when operating the tool for extended periods. Dress properly; avoid loose clothing or jewelry. Secure long hair.
- Tool Use and Care: Do not force the power tool. Use the correct power tool for your application. Disconnect the battery pack from the power tool before making any adjustments, changing accessories, or storing power tools.
- Battery Tool Use and Care: Recharge only with the charger specified by the manufacturer. Use power tools only with specifically designated battery packs.
3. Product Overview
The RYOBI 18V ONE+ HP Compact Brushless 1/2" Hammer Drill is designed for versatile drilling and driving applications, including concrete, brick, and block. Its compact size and brushless motor provide enhanced performance and runtime.

Figure 1: Front view of the RYOBI 18V ONE+ HP Compact Brushless 1/2" Hammer Drill, showcasing its compact design and key features.

Figure 2: The RYOBI 18V ONE+ HP Compact Brushless 1/2" Hammer Drill shown with its included 18V Lithium-Ion battery and charger, illustrating the complete kit.
4. Setup
4.1. Battery Installation and Charging
The drill operates on an 18V ONE+ Lithium-Ion battery. Ensure the battery is fully charged before first use.
- Charging the Battery: Connect the charger to a standard power outlet. Slide the battery pack onto the charger until it clicks into place. The charger indicator lights will show the charging status. Refer to the charger's specific manual for detailed light indications.
- Installing the Battery: Align the battery pack with the base of the drill handle. Slide the battery into the drill until it locks securely into place. Ensure it is fully seated before operation.
- Removing the Battery: Press the battery release latches on the sides of the battery pack and pull the battery out of the drill.
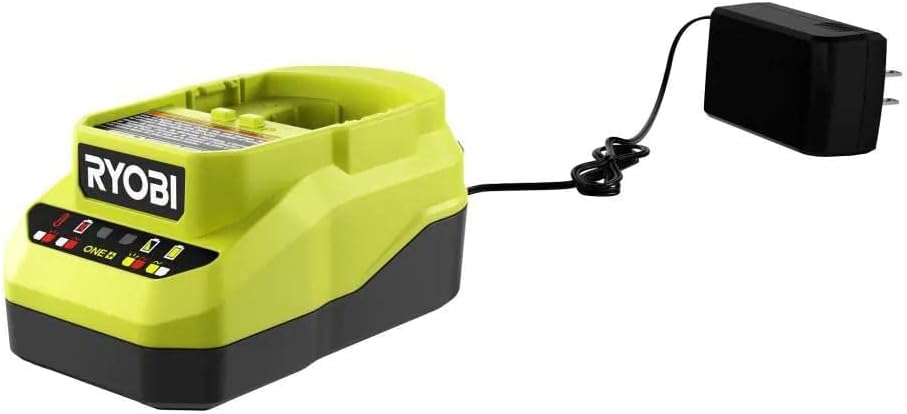
Figure 3: Close-up view of the RYOBI 18V ONE+ battery charger, indicating charging status lights and power input.
4.2. Installing Drill Bits
The drill features a 1/2 inch single sleeve ratcheting chuck for quick bit changes.
- Ensure the drill is off and the battery pack is removed to prevent accidental starting.
- Grasp the rear portion of the chuck with one hand and rotate the front portion counter-clockwise until the chuck jaws are open wider than the drill bit shank.
- Insert the drill bit into the chuck jaws. Ensure the bit is centered and fully seated.
- Rotate the front portion of the chuck clockwise to tighten the jaws firmly around the drill bit. The ratcheting mechanism will provide a secure grip.
5. Operating Instructions
5.1. Powering On/Off
The drill is activated by pressing the trigger switch. The speed is variable based on trigger pressure.
- To turn on, depress the trigger switch.
- To turn off, release the trigger switch.
- The on-board LED worklight illuminates when the trigger is pressed, providing visibility in dimly lit areas.
5.2. Speed Settings
The drill features a two-speed gearbox for optimal performance across various applications.
- Low Speed (0-450 RPM): Use for driving screws, larger drilling diameters, or applications requiring higher torque.
- High Speed (0-1,700 RPM): Use for smaller drilling diameters and applications requiring faster drilling.
- To change speed, slide the speed selector switch located on top of the drill. Ensure the drill is stopped before changing speeds.
5.3. Clutch and Mode Selection
The 24-position clutch allows for precise torque control when driving screws, preventing overtightening or stripping. The mode selector allows switching between drilling and hammer drilling functions.
- Driving Mode: Rotate the clutch collar to the desired torque setting (1-24). Lower numbers provide less torque, higher numbers provide more.
- Drill Mode: Rotate the clutch collar to the drill icon for standard drilling without clutch action.
- Hammer Mode: Rotate the clutch collar to the hammer icon for hammer drilling. This mode provides 0 - 27,200 BPM for drilling into concrete, brick, and block.
5.4. Forward/Reverse Rotation
The forward/reverse selector switch is located above the trigger. Push it to the left for forward rotation (drilling/driving) and to the right for reverse rotation (removing screws/bits). Center position locks the trigger for safety.

Figure 4: A user operating the RYOBI 18V ONE+ HP Compact Brushless 1/2" Hammer Drill to drill into a brick wall, demonstrating its hammer drill function.
6. Maintenance
Regular maintenance ensures the longevity and optimal performance of your tool.
- Cleaning: Keep the tool's air vents clear and free of debris. Use a clean, dry cloth to wipe down the exterior. Do not use solvents or harsh chemicals.
- Battery Care: Store battery packs in a cool, dry place away from direct sunlight and extreme temperatures. Do not store battery packs in a discharged condition.
- Inspection: Periodically inspect the chuck for wear and ensure all screws are tight. If any parts are damaged, have them replaced by a qualified service technician.
7. Troubleshooting
Refer to the table below for common issues and their solutions.
| Problem | Possible Cause | Solution |
|---|---|---|
| Drill does not start | Battery not charged or improperly installed; Forward/reverse switch in center (locked) position. | Charge battery and ensure proper installation; Move forward/reverse switch to forward or reverse position. |
| Reduced power or runtime | Battery charge is low; Battery is old or damaged. | Recharge battery; Replace battery if necessary. |
| Bit slips in chuck | Chuck not tightened sufficiently; Bit shank is dirty or damaged. | Retighten chuck firmly; Clean or replace bit. |
| Overheating | Prolonged heavy use; Blocked air vents. | Allow tool to cool down; Clear air vents. |
8. Specifications
| Feature | Detail |
|---|---|
| Model Number | PSBHM01K |
| Voltage | 18 Volts |
| Motor Type | Brushless |
| Chuck Size | 1/2 inch |
| No-Load Speed (Low) | 0-450 RPM |
| No-Load Speed (High) | 0-1,700 RPM |
| Blows Per Minute (BPM) | 0-27,200 BPM (Hammer Mode) |
| Maximum Torque | 400 in./lbs. |
| Clutch Settings | 24 Positions |
| Tool Length | 6.7 inches |
| Item Weight | 2.75 pounds (tool only) |
| Included Components | Battery, Charger, Drill Bits, Case |
9. Warranty and Support
RYOBI power tools are backed by a manufacturer's warranty. For specific warranty details, registration, or to locate authorized service centers, please refer to the official RYOBI website or contact their customer support directly. Keep your purchase receipt as proof of purchase for warranty claims.
For further assistance or technical support, please visit the RYOBI official website or contact their customer service line.