1. Safety Information
Please read these instructions carefully before installation and use. Retain this manual for future reference.
- Electrical Safety: All electrical connections must be in accordance with local codes, ordinances, or the National Electric Code (NEC). If you are unfamiliar with proper electrical wiring connections, obtain the services of a qualified electrician.
- Power Disconnection: Always disconnect power at the main circuit breaker before installing, cleaning, or servicing this fixture.
- Bulb Requirements: Use only E12 base bulbs, maximum 60 watts per bulb. Do not exceed the recommended wattage. Bulbs are not included.
- Proposition 65 Warning: This product may contain chemicals known to the State of California to cause cancer and birth defects or other reproductive harm. Wash hands after handling.
- Fixture Handling: Handle the fixture with care to avoid damage to the metal frame or electrical components.
2. Package Contents
Verify that all components are present before beginning installation.
- Chandelier Frame with 4-Light Lampholder
- Adjustable Chain
- Ceiling Canopy
- Mounting Hardware Kit
- Instruction Manual
3. Product Specifications
| Brand | Maxax |
| Model Number | MX19118-4BG-P |
| Color | Black (with Gold accents) |
| Material | Metal |
| Dimensions (L x W x H) | 17.3"L x 17.3"W x 59.5"H (Adjustable Height) |
| Item Weight | 6.4 Pounds |
| Number of Light Sources | 4 |
| Bulb Base | E12 (Candelabra) |
| Max Wattage per Bulb | 60 Watts |
| Voltage | 110 Volts |
| Installation Type | Ceiling Mount (Pendant) |
| Required Assembly | Yes |
The chandelier features a modern cage design with a black finish and gold accents, suitable for various indoor settings.
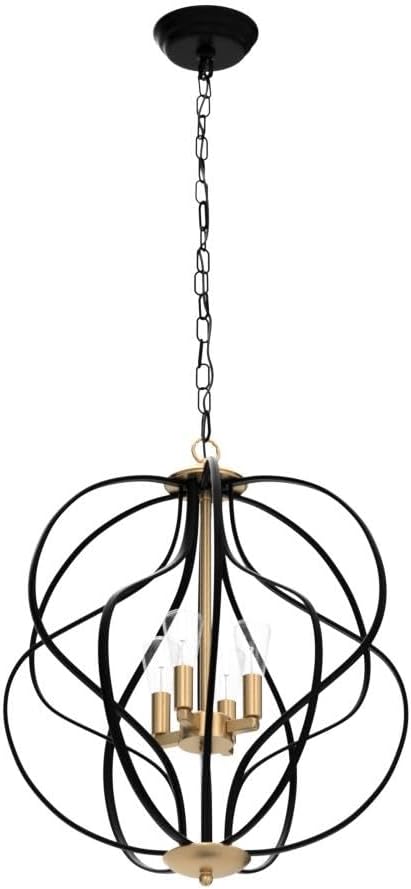
Figure 1: Chandelier Dimensions and Features. The diagram illustrates the 17.3" diameter, 17.7" fixture height, and 36.6" chain length, highlighting adjustable height and sloped ceiling compatibility.
4. Installation Instructions
4.1 Before You Begin
- Turn off the electricity at the main fuse box or circuit breaker before installation.
- Ensure you have all necessary tools (screwdriver, wire strippers, electrical tape, etc.) and safety equipment (gloves, safety glasses).
- Unpack the fixture carefully and check for any damage or missing parts.
4.2 Step-by-Step Installation
- Prepare the Mounting Plate: Attach the mounting plate to the junction box in your ceiling using the provided screws. Ensure it is securely fastened.
- Adjust Chain Length: Determine the desired hanging height for your chandelier. The chain length is adjustable. Open a link on the chain to remove excess links if needed.
- Wire Connections: Connect the fixture's wires to your household wiring. Typically, black to black (live), white to white (neutral), and bare copper or green to bare copper or green (ground). Secure connections with wire nuts and electrical tape.
- Secure the Canopy: Tuck the wires into the junction box and raise the ceiling canopy to cover the mounting plate. Secure the canopy to the mounting plate using the provided screws or nuts.
- Install Bulbs: Screw four E12 base bulbs (not included) into the lampholders. Do not exceed 60 watts per bulb.
- Power On: Restore power at the main circuit breaker and test the light fixture.

Figure 2: Key Components for Installation. This image highlights the ceiling-mounted design, adjustable chain and wire, sturdy metal bottom, and the E12/Candelabra bulb base.

Figure 3: Top Connection Detail. A close-up view of the chandelier's upper section, illustrating the connection point for the adjustable chain.
5. Operating Instructions
This chandelier is designed for simple operation.
- Power On/Off: Operate the chandelier using a standard wall switch connected to the fixture's circuit.
- Dimmable Functionality: This fixture is dimmable. To utilize this feature, ensure you use dimmable E12 bulbs and a compatible dimmer switch (both sold separately).
- Bulb Type: The chandelier requires four E12 candelabra base bulbs. For optimal performance and desired light output, select bulbs with appropriate color temperature and brightness.
Video 1: Maxax Modern Cage Chandelier Overview. This official product video from the seller provides a brief visual demonstration of the chandelier.
6. Maintenance
Regular maintenance will help preserve the appearance and functionality of your chandelier.
- Cleaning: Always turn off the power before cleaning. Use a soft, dry cloth to wipe down the metal frame. Do not use abrasive cleaners, solvents, or polishes as they may damage the finish.
- Bulb Replacement: Ensure the fixture is cool before attempting to replace bulbs. Carefully unscrew old bulbs and screw in new E12 base bulbs, adhering to the maximum 60-watt limit.
- Inspection: Periodically check all connections and mounting hardware to ensure they remain secure.
7. Troubleshooting
If you encounter issues with your chandelier, refer to the following common problems and solutions:
| Problem | Possible Cause | Solution |
|---|---|---|
| Light does not turn on | No power to the fixture Loose wire connection Faulty bulb | Check circuit breaker and wall switch Verify all wire connections are secure (power off first) Replace bulb(s) |
| Light flickers | Loose bulb Incorrect bulb type (non-dimmable with dimmer) Faulty dimmer switch | Tighten bulbs Ensure dimmable bulbs are used with a dimmer Consult an electrician to check or replace the dimmer switch |
| Fixture is unstable | Mounting hardware not secure | Ensure mounting plate and canopy are tightly secured to the ceiling junction box |
If problems persist after attempting these solutions, please contact customer service.
8. Warranty and Support
Maxax is committed to providing quality products and customer satisfaction.
- Manufacturer Warranty: This product comes with a 2-year manufacturer warranty. Please retain your proof of purchase for warranty claims.
- Customer Service: If you have any questions, require assistance with installation, or need to report a defect, please feel free to contact our exclusive customer service team. Refer to your purchase documentation for contact details.
9. Product Overview
The Maxax Modern Cage Chandelier is designed to enhance various indoor spaces with its distinctive style and functional lighting. Its adjustable chain allows for customization of hanging height, making it suitable for different ceiling heights and room types.

Figure 4: Chandelier in a Dining Room. The chandelier provides ambient lighting over a dining table.

Figure 5: Chandelier in a Kitchen. The fixture complements a modern kitchen island or dining area.

Figure 6: Detailed View of Cage Design. A close-up showing the intricate black metal cage and gold accents of the chandelier.