Introduction
This manual provides detailed instructions for the setup, operation, maintenance, and troubleshooting of your NiPoGi AK1 PRO Mini PC. The AK1 PRO is a compact desktop computer powered by an 11th Generation Intel Celeron N5105 processor, designed for efficient daily tasks, multimedia playback, and business applications. It features 12GB DDR4 RAM, a 256GB M.2 SSD, 4K UHD video output, dual display support, Dual Band WiFi, and Bluetooth 4.2.
What's in the Box
Please check the contents of your package upon arrival. The standard package includes:
- 1 x NiPoGi AK1 PRO Mini PC (12GB RAM, 256GB ROM)
- 1 x EU Power Adapter
- 1 x HDMI Cable
- 1 x VESA Bracket with Screws
- 1 x User Manual
Product Overview
The NiPoGi AK1 PRO Mini PC is designed with various ports for connectivity and expansion. Familiarize yourself with the layout below.
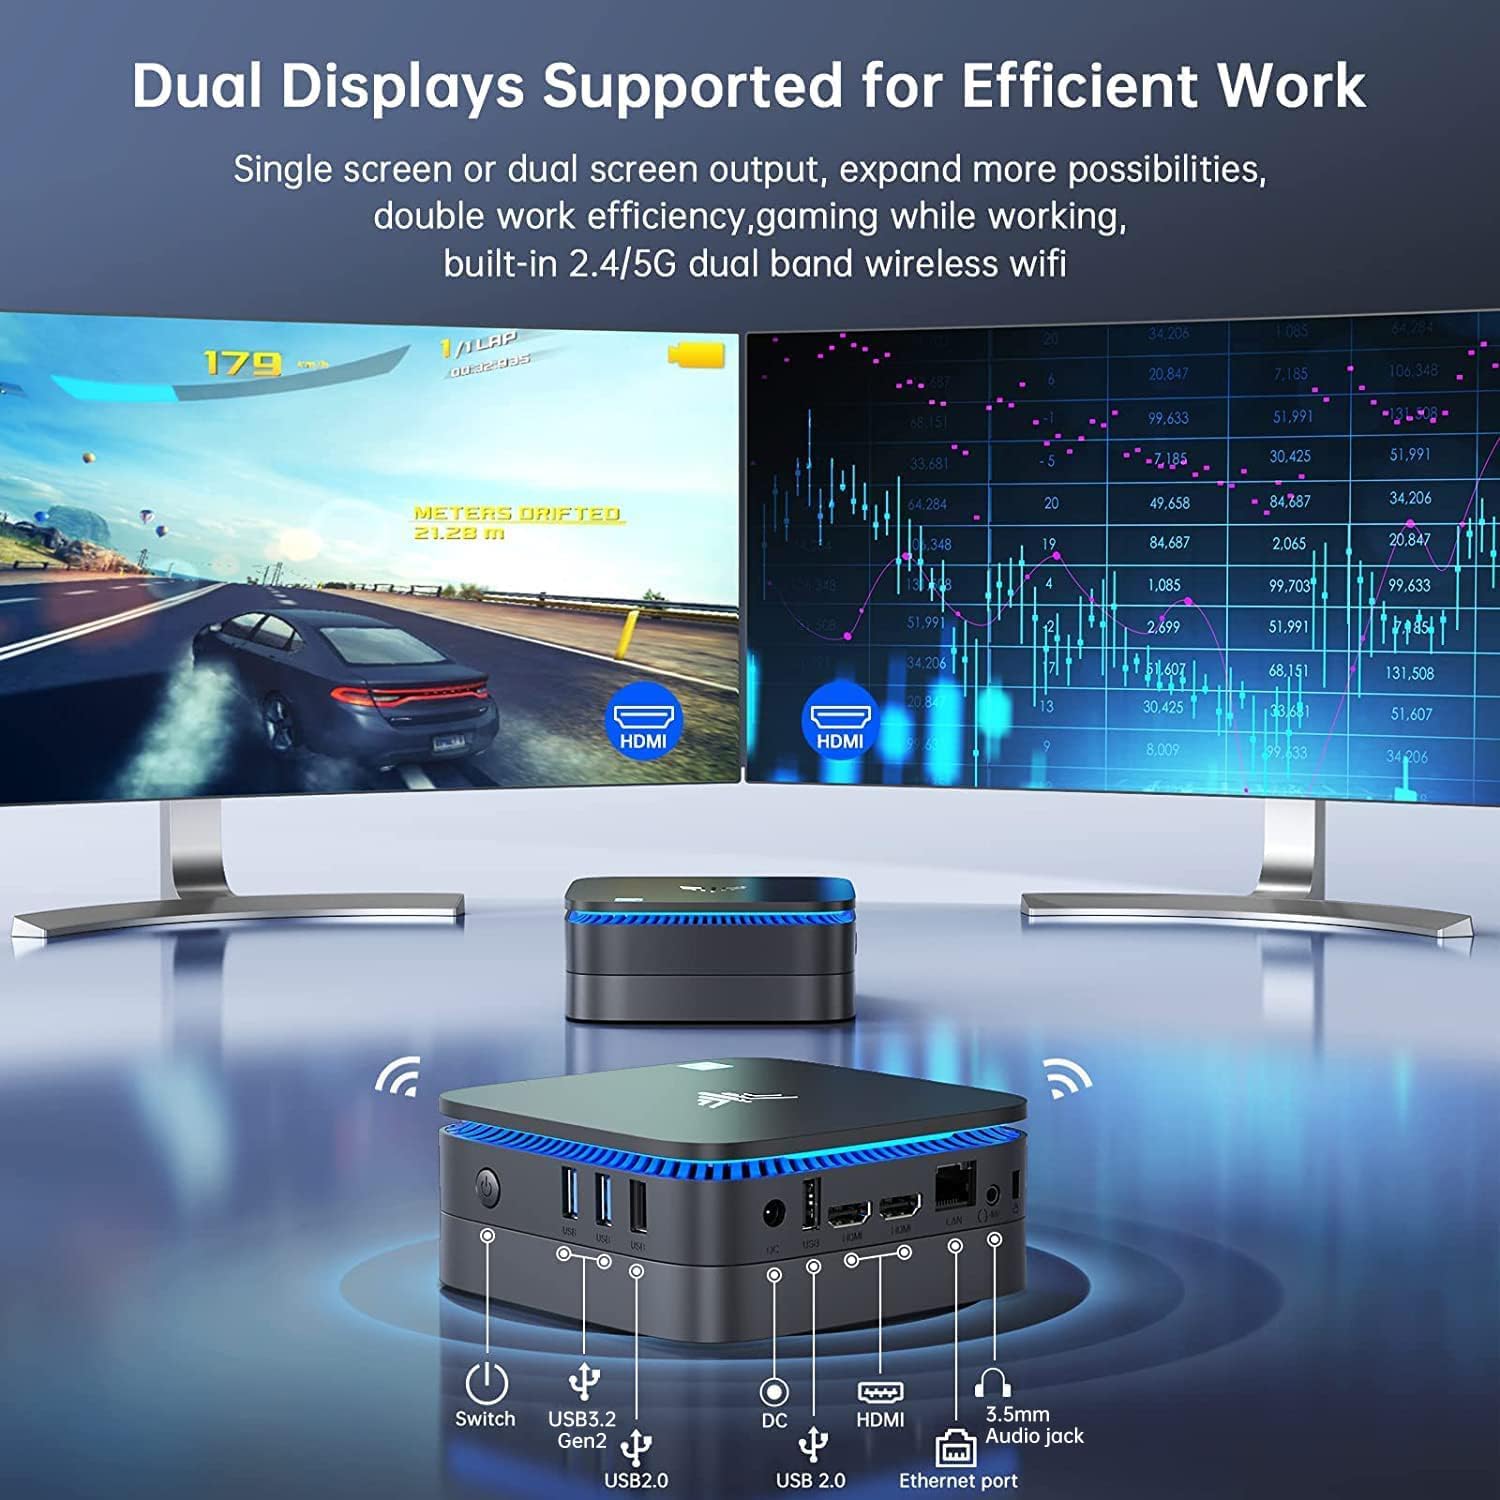
Image: Front and rear view of the NiPoGi AK1 PRO Mini PC, highlighting its various ports and compact design. The front features the power button and USB ports, while the rear includes HDMI, Ethernet, and additional USB ports.
Port Layout:
- Front: Power Button, 2 x USB 3.0 ports, 2 x USB 2.0 ports
- Rear: DC Power Input, 2 x HDMI ports, 1 x RJ45 Gigabit Ethernet port, 1 x 3.5mm Audio Jack
Key Features:
- Processor: 11th Gen Intel Celeron N5105 Quad-Core (up to 2.9 GHz)
- Graphics: Intel UHD Graphics, supporting 4K UHD (4096x2160@60Hz)
- Memory: 12GB DDR4 RAM
- Storage: 256GB M.2 SSD (expandable with 2.5-inch SSD/HDD up to 2TB)
- Connectivity: Dual Band 2.4GHz+5GHz WiFi, Gigabit Ethernet, Bluetooth 4.2
- Display Output: Dual HDMI for dual screen setup
- Operating System: Pre-installed OS
Setup Guide
Follow these steps to set up your NiPoGi AK1 PRO Mini PC for the first time.
- Connect to a Display: Use the provided HDMI cable to connect the Mini PC to your monitor or TV. The AK1 PRO supports dual displays, so you can connect two monitors via the two HDMI ports.
- Connect Peripherals: Plug in your USB keyboard and mouse into the available USB ports.
- Connect to Power: Connect the EU power adapter to the DC input port on the Mini PC, then plug the adapter into a power outlet.
- Power On: Press the power button located on the front of the Mini PC. The device will boot up, and the blue light will illuminate.
- Initial OS Setup: Follow the on-screen instructions to complete the operating system setup, including language, region, and network configuration.
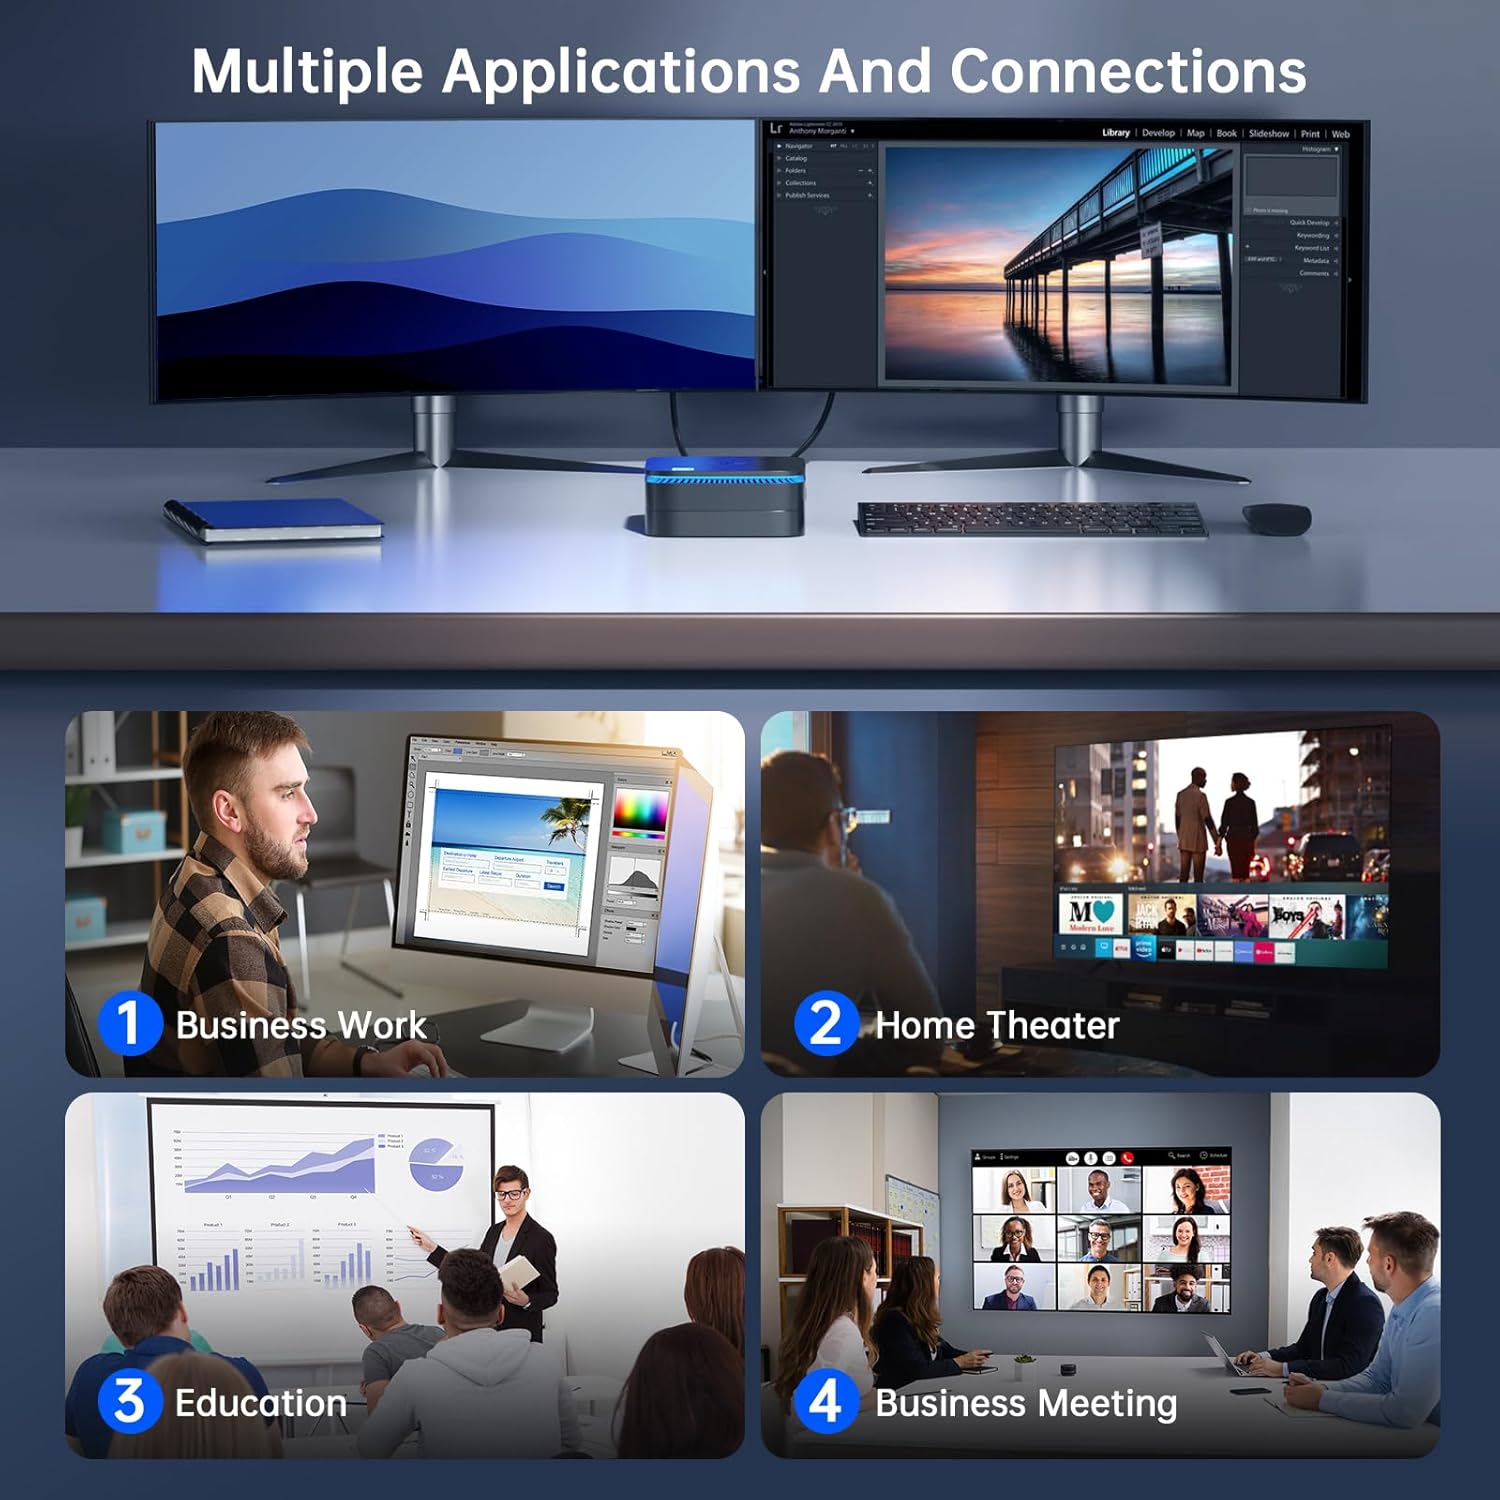
Image: The NiPoGi AK1 PRO Mini PC demonstrating multiple applications and connections, including business work, home theater, education, and business meetings, showcasing its versatility.
Operating Instructions
Basic Operation:
- Power On/Off: Press the front power button to turn the PC on. To turn off, use the operating system's shutdown function or press and hold the power button for a few seconds for a forced shutdown (not recommended for regular use).
- Restart: Use the operating system's restart function.
- Sleep Mode: The PC can enter sleep mode to save power. Wake it up by moving the mouse or pressing a key on the keyboard.
4K UHD Video Playback:
The integrated Intel UHD Graphics supports 4K UHD resolution (4096x2160@60Hz), providing a clear visual experience for movies, streaming, and presentations.

Image: A person enjoying 4K HD video playback on a large display, powered by the NiPoGi AK1 PRO Mini PC, highlighting its multimedia capabilities and wireless Bluetooth support.
Dual Display Configuration:
Connect two monitors to the two HDMI ports for an extended desktop experience. This can enhance productivity for work or provide a more immersive entertainment setup. Configure display settings within your operating system.
Storage Expansion
The NiPoGi AK1 PRO Mini PC comes with a 256GB M.2 SSD. For additional storage, you can install a 2.5-inch SSD or HDD (not included) in the removable base, supporting up to 2TB.
Installation Steps:
- Ensure the Mini PC is powered off and disconnected from the power adapter.
- Carefully open the bottom cover of the Mini PC.
- Insert your 2.5-inch SSD/HDD into the designated slot in the removable base.
- Secure the drive with screws if necessary (check the base for mounting points).
- Reattach the bottom cover.
- After powering on, you may need to initialize and format the new drive through your operating system's disk management tools.

Image: A visual tutorial demonstrating how to install a 2.5-inch SSD or HDD into the NiPoGi AK1 PRO Mini PC by opening the bottom cover and inserting the drive into the expansion bay.
VESA Mount Installation
The included VESA bracket allows you to mount the Mini PC to the back of a compatible monitor or TV, saving desk space and creating an all-in-one computing solution.
Installation Steps:
- Attach the VESA bracket to the back of your monitor using the provided screws. Ensure your monitor has standard VESA mounting holes.
- Slide the NiPoGi AK1 PRO Mini PC onto the VESA bracket until it clicks securely into place.
- Connect all necessary cables (power, HDMI, peripherals) to the Mini PC.

Image: The NiPoGi AK1 PRO Mini PC shown mounted on the rear of a computer monitor using a VESA bracket, illustrating how it can transform into an all-in-one computer and save desk space.
Maintenance
Proper maintenance ensures the longevity and optimal performance of your Mini PC.
- Cleaning: Regularly clean the exterior of the Mini PC with a soft, dry cloth. Use compressed air to clear dust from ventilation openings to prevent overheating.
- Software Updates: Keep your operating system and drivers updated to ensure security and performance.
- Environmental Conditions: Operate the Mini PC in a well-ventilated area, away from direct sunlight, excessive heat, and moisture.
- Power Management: Use the provided power adapter. Avoid frequent abrupt power cuts.
Troubleshooting
If you encounter issues with your Mini PC, refer to the following common troubleshooting steps.
- No Power:
- Ensure the power adapter is securely connected to both the Mini PC and a working power outlet.
- Verify the power outlet is functional by plugging in another device.
- No Display:
- Check that the HDMI cable is firmly connected to both the Mini PC and the monitor.
- Ensure the monitor is powered on and set to the correct input source (HDMI 1, HDMI 2, etc.).
- Try a different HDMI cable or monitor if available.
- No Internet Connection (Wi-Fi/Ethernet):
- For Wi-Fi, ensure the Wi-Fi adapter is enabled in the operating system and you are connected to the correct network with the correct password.
- For Ethernet, ensure the Ethernet cable is securely connected to both the Mini PC and your router/modem. Check router status.
- Restart your router/modem and the Mini PC.
- Slow Performance:
- Close unnecessary applications running in the background.
- Ensure there is sufficient free space on your primary drive.
- Check for and install any pending operating system updates.
- Monitor CPU and RAM usage through Task Manager (Windows) to identify resource-intensive processes.
Specifications
Detailed technical specifications for the NiPoGi AK1 PRO Mini PC.
| Feature | Detail |
|---|---|
| Brand | NiPoGi |
| Model Series | AK1PRO N5105/12GB RAM+256GB ROM |
| Processor | Intel Celeron N5105 (11th Gen, Quad-Core, up to 2.9 GHz) |
| Graphics Coprocessor | Intel UHD Graphics |
| RAM | 12GB DDR4 |
| Storage | 256GB M.2 SSD (Expandable with 2.5" SSD/HDD up to 2TB) |
| Operating System | OS |
| Connectivity | Dual Band Wi-Fi (802.11a/b/g/n/ac), Bluetooth 4.2, Gigabit Ethernet |
| USB Ports | 2 x USB 3.0, 2 x USB 2.0 |
| HDMI Ports | 2 (supports dual display, 4K UHD resolution) |
| Audio | 1 x 3.5mm Audio Jack |
| Dimensions | 12.8 x 12.8 x 5.15 cm (approx. 5.04 x 5.04 x 2.05 inches) |
| Weight | 274 grams |
| Color | Black |
Warranty and Support
NiPoGi provides comprehensive support and warranty services for your Mini PC.
Contact Support:
- Amazon Orders: Log in to Amazon, go to "Your Account", then "Your Orders", and select "Ask Product Question" for assistance.
- Email Support: support@inipogi.com
- Phone Support: +44 808 175 2348 (Monday-Friday, 9am-5pm EST)
NiPoGi offers maintenance points for exchange or repair of your mini PC during the warranty period. Please retain your proof of purchase for warranty claims.

Image: Information regarding NiPoGi's "All-Around Protection" plan, including contact methods for support via Amazon, email, and phone, and details about maintenance services.


