Hilitand 2.5in/3.5in Internal HDD Enclosure
Hilitand 2.5in/3.5in Trayless Hot Swap Mobile Rack Backplane User Manual
Model: 2.5in/3.5in Internal HDD Enclosure
1. Introduction
This user manual provides detailed instructions for the installation, operation, and maintenance of your Hilitand 2.5in/3.5in Trayless Hot Swap Mobile Rack Backplane. This enclosure allows for quick and easy access to 2.5-inch and 3.5-inch SATA hard drives and SSDs, supporting high-speed data transfer and hot-swapping capabilities.
2. Package Contents
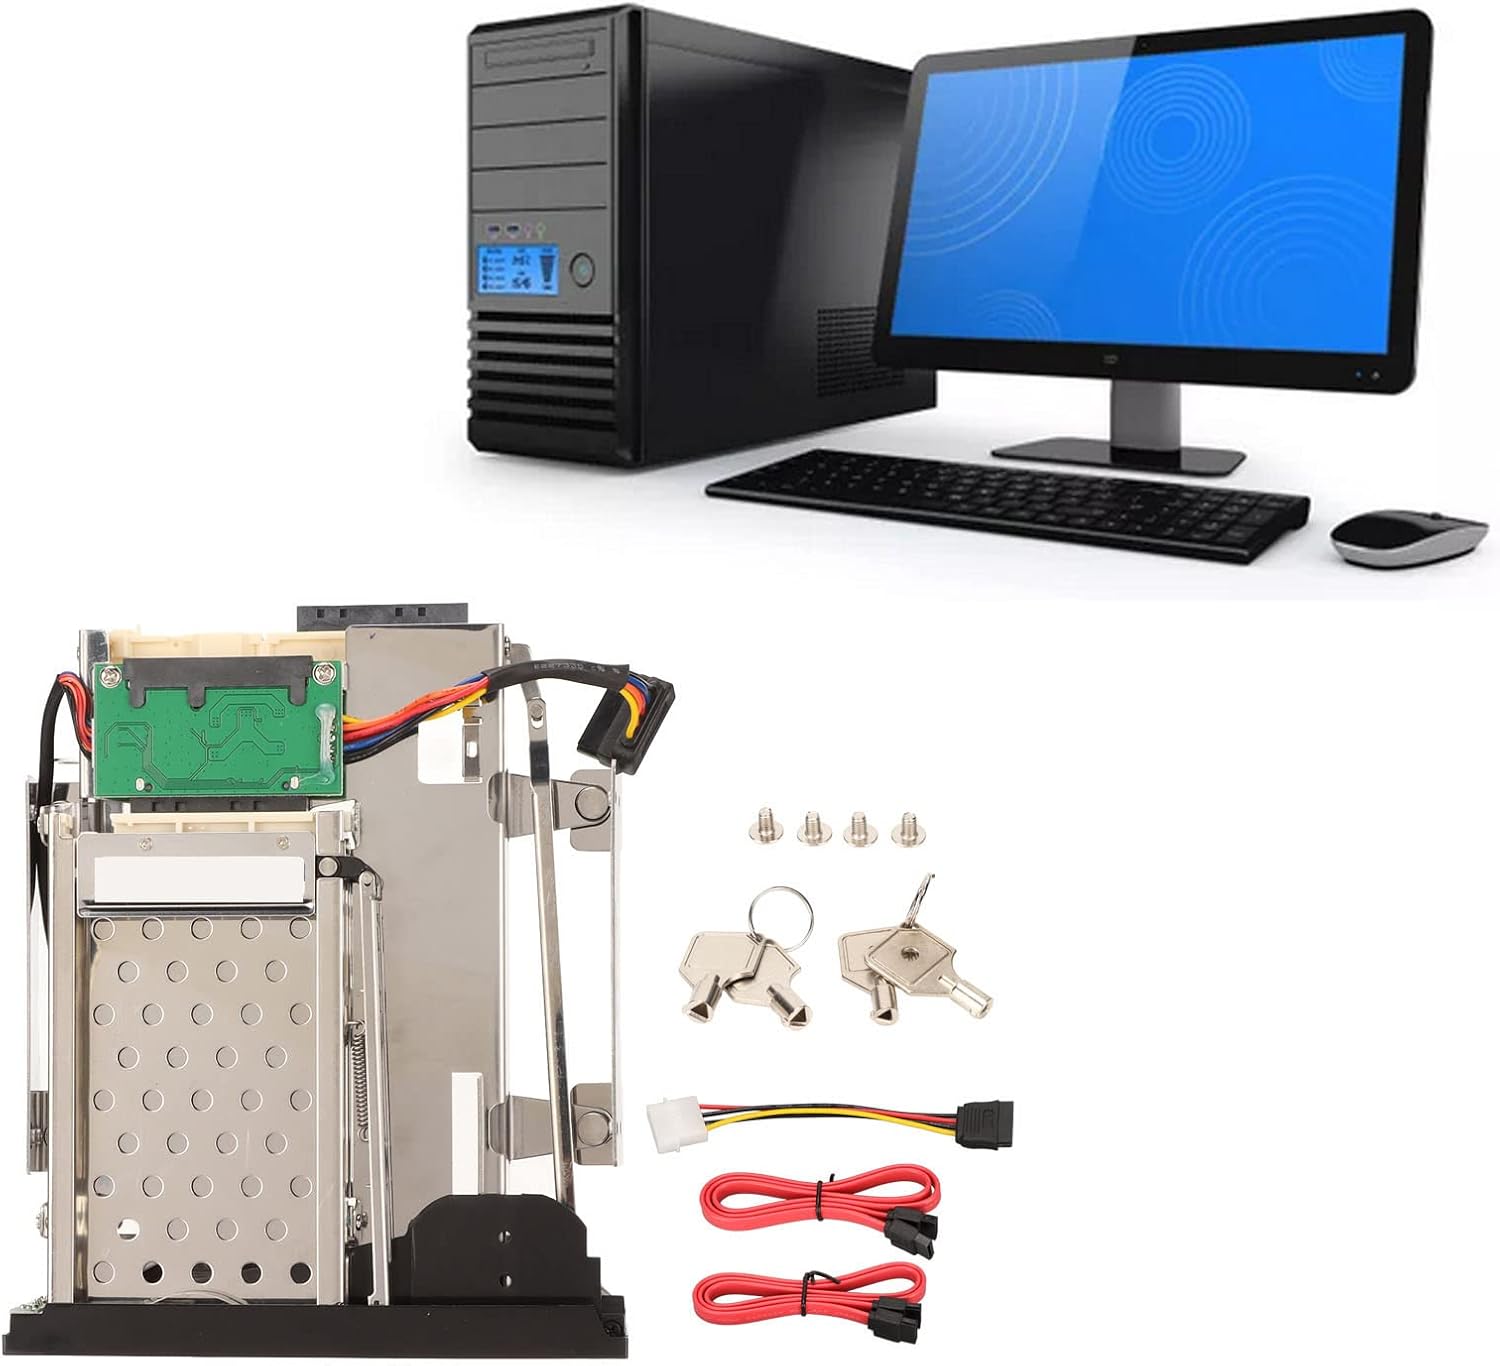
The image displays the Hilitand 2.5in/3.5in Internal HDD Enclosure alongside its complete set of accessories. These include two red SATA data cables, one power cable, a set of four screws, and two keys for the drive bay locks. This visual representation helps users verify all components are present upon unboxing.
- 1 x 2.5in 3.5in Internal HDD Enclosure
- 2 x SATA Data Cable
- 1 x Power Cable
- 4 x Screw
- 4 x Key
- 1 x User Manual (this document)
3. Product Features

This image visually emphasizes the core features of the 2.5in Internal HDD Enclosure, such as its 6Gbps transmission speed, compatibility with SATA I/II/III, and hot-swap capability. It also highlights the trayless design for easy installation and removal of drives, and universal compatibility with 2.5-inch and 3.5-inch STAT hard drives.
- Trayless Bay Design: Fully compatible with all 2.5-inch and 3.5-inch hard drives, allowing for quick and easy data access without the need for trays.
- 6Gbps Transfer Speed: Supports SATA I/II/III interfaces, providing transfer speeds up to 6Gbps for optimal performance (actual speed depends on hard drive).
- Hot Swappable: Designed for installation in a 5.25-inch floppy drive bay, offering trouble-free insertion and improved drive mechanism for secure connections.
- Efficient Heat Dissipation: Constructed from aluminum alloy and ABS material, ensuring optimal operating temperature for drives. Features a built-in cooling fan for excellent heat dissipation.
- Versatile Application: Ideal for various uses including server computers, cloud computing storage, desktop PCs, media backup, and security systems.
4. Specifications
| Attribute | Detail |
|---|---|
| Item Type | 2.5in 3.5in Internal HDD Enclosure |
| Material | Aluminum Alloy, ABS |
| Interface | SATA I/II/III |
| Applicable Hard Disk | 1 x 2.5in HDD/SSD and 1 x 3.5in HDD/SSD |
| Transfer Rate | Up to 6Gbps (depending on Hard Drive Speed) |
| Max Hard Drive Thickness | 2.5in Hard Drives Up to 9.5mm Thick and 3.5in Hard Drives Up to 26mm Thick |
| Supported Hard Disk Capacity | Unlimited |
| Applicable Installation Space | 5.25inch Floppy Drive Bay |
| System Requirements | Windows, OS X |
5. Setup and Installation
Follow these steps to properly install the Hilitand 2.5in/3.5in Trayless Hot Swap Mobile Rack Backplane into your computer system.

This image provides a clear top-down perspective of the Hilitand hot-swap bay, illustrating its internal structure and the placement of the SATA data and power connectors. This view is helpful for understanding how the device connects to your system's motherboard and power supply.
- Prepare Your PC Case: Ensure your PC case has an available 5.25-inch drive bay. Remove any front panel covers or existing drive bay fillers.
- Insert the Enclosure: Gently slide the Hilitand enclosure into the 5.25-inch drive bay from the front of your PC case until it is flush with the front panel.
- Secure the Enclosure: Use the provided screws to secure the enclosure to the drive bay rails on both sides. Ensure it is firmly in place to prevent movement.
- Connect Power Cable: Connect the included power cable to the power input on the back of the enclosure and to an available power connector from your power supply unit (PSU).
- Connect SATA Data Cables: Connect the two included SATA data cables to the SATA ports on the back of the enclosure. Connect the other ends of these cables to available SATA ports on your motherboard.
- Cable Management: Route the cables neatly within your PC case to ensure proper airflow and prevent interference with other components.
- Close PC Case: Once all connections are secure, close your PC case and power on your computer.
Installation Video Guide:
This video demonstrates the assembly and connection process for the Hilitand 2.5in/3.5in Trayless Hot Swap Mobile Rack Backplane, showing how to connect the power and data cables and prepare the unit for installation into a PC case.
6. Operating Instructions
The Hilitand enclosure is designed for easy and secure hard drive management.

This image displays the front panel of the Hilitand enclosure, featuring two drive bays. Both bays are shown in the closed position, secured by their respective key locks. This illustrates the ready-to-use state of the enclosure before inserting drives.

This image shows the front of the Hilitand enclosure with the 3.5-inch drive bay open. The trayless mechanism is visible, demonstrating how a hard drive would be inserted directly into the bay without needing a separate tray. The 2.5-inch bay remains closed.
- Inserting a Hard Drive:
- Unlock the desired drive bay using one of the provided keys.
- Press the eject button or lever to open the drive bay door.
- Align your 2.5-inch or 3.5-inch SATA HDD/SSD with the bay connector and gently slide it in until it clicks into place. Ensure the drive is fully seated.
- Close the drive bay door and lock it with the key to secure the drive.
- Removing a Hard Drive (Hot Swap):
- Before removing a drive, ensure all data transfer to and from the drive has ceased. It is recommended to safely eject the drive through your operating system if possible.
- Unlock the drive bay using the key.
- Press the eject button or lever. The drive will partially eject.
- Gently pull the drive out of the bay.
- Power Switch: The enclosure features an ON/OFF switch on the front panel for convenient power control of the installed drives.
7. Maintenance
Proper maintenance ensures the longevity and optimal performance of your Hilitand HDD enclosure.
- Keep the enclosure clean and free from dust. Use a soft, dry cloth for cleaning. Avoid liquid cleaners.
- Ensure adequate ventilation around your PC case to support the enclosure's heat dissipation.
- Do not obstruct the air vents on the enclosure or your PC case.
- Handle hard drives carefully when inserting or removing them to prevent damage to the drive or the enclosure's connectors.
8. Troubleshooting
If you encounter issues with your Hilitand HDD enclosure, refer to the following common problems and solutions.
| Problem | Possible Cause | Solution |
|---|---|---|
| Hard drive not detected. |
|
|
| Slow data transfer speed. |
|
|
| Drive bay door not opening/closing smoothly. |
|
|
9. Warranty and Support
Hilitand products are designed for reliability and performance. For warranty information and technical support, please refer to the purchase platform or contact Hilitand customer service directly. Keep your proof of purchase for warranty claims.
For further assistance, you may visit the Hilitand Store on Amazon.