1. Introduction
Welcome to the instruction manual for your RoWood Owl Clock 3D Wooden Puzzle, Model LA-LK503. This self-assembly kit allows you to construct a functional owl-shaped clock featuring a precise quartz movement and an integrated 30-minute wind-up timer. This manual provides detailed guidance for assembly, setup, operation, and maintenance to ensure a rewarding building experience and proper functionality of your finished clock.
2. Product Overview
The RoWood Owl Clock is a meticulously designed 3D wooden puzzle. Once assembled, it serves as both a decorative piece and a functional timepiece. Key features include:
- Owl-shaped Design: An intricate design resembling an owl, with visible mechanical gears.
- Quartz Movement Clock: Provides accurate and silent timekeeping. Requires one 1.5V AA battery (not included).
- 30-Minute Wind-up Timer: Located on the back, this mechanical timer can be set for countdowns.
- Pendulum Mechanism: A classic ticking pendulum operates via a wind-up mechanism.
- No Glue Required Assembly: Pieces connect using mortise and tenon joints, ensuring a clean build.
- Precision Laser-Cut Parts: Ensures all 221 wooden pieces fit together accurately.

Figure 2.1: Assembled RoWood Owl Clock.

Figure 2.2: Detailed features of the Owl Clock, including the retro-style design, 3D dial, chronograph, and alarm functions.

Figure 2.3: Close-up of the Roman Numerals Dial.
3. Package Contents
Before beginning assembly, please verify that all components are present and undamaged. The package should contain:
- 221 Laser-cut wooden pieces
- Assembly Instruction Manual
- Clock mechanism (quartz movement)
- Pendulum components
- Small accessories (e.g., springs, screws for clock mechanism)
Note: One 1.5V AA battery is required for the clock mechanism and is NOT included in the package.
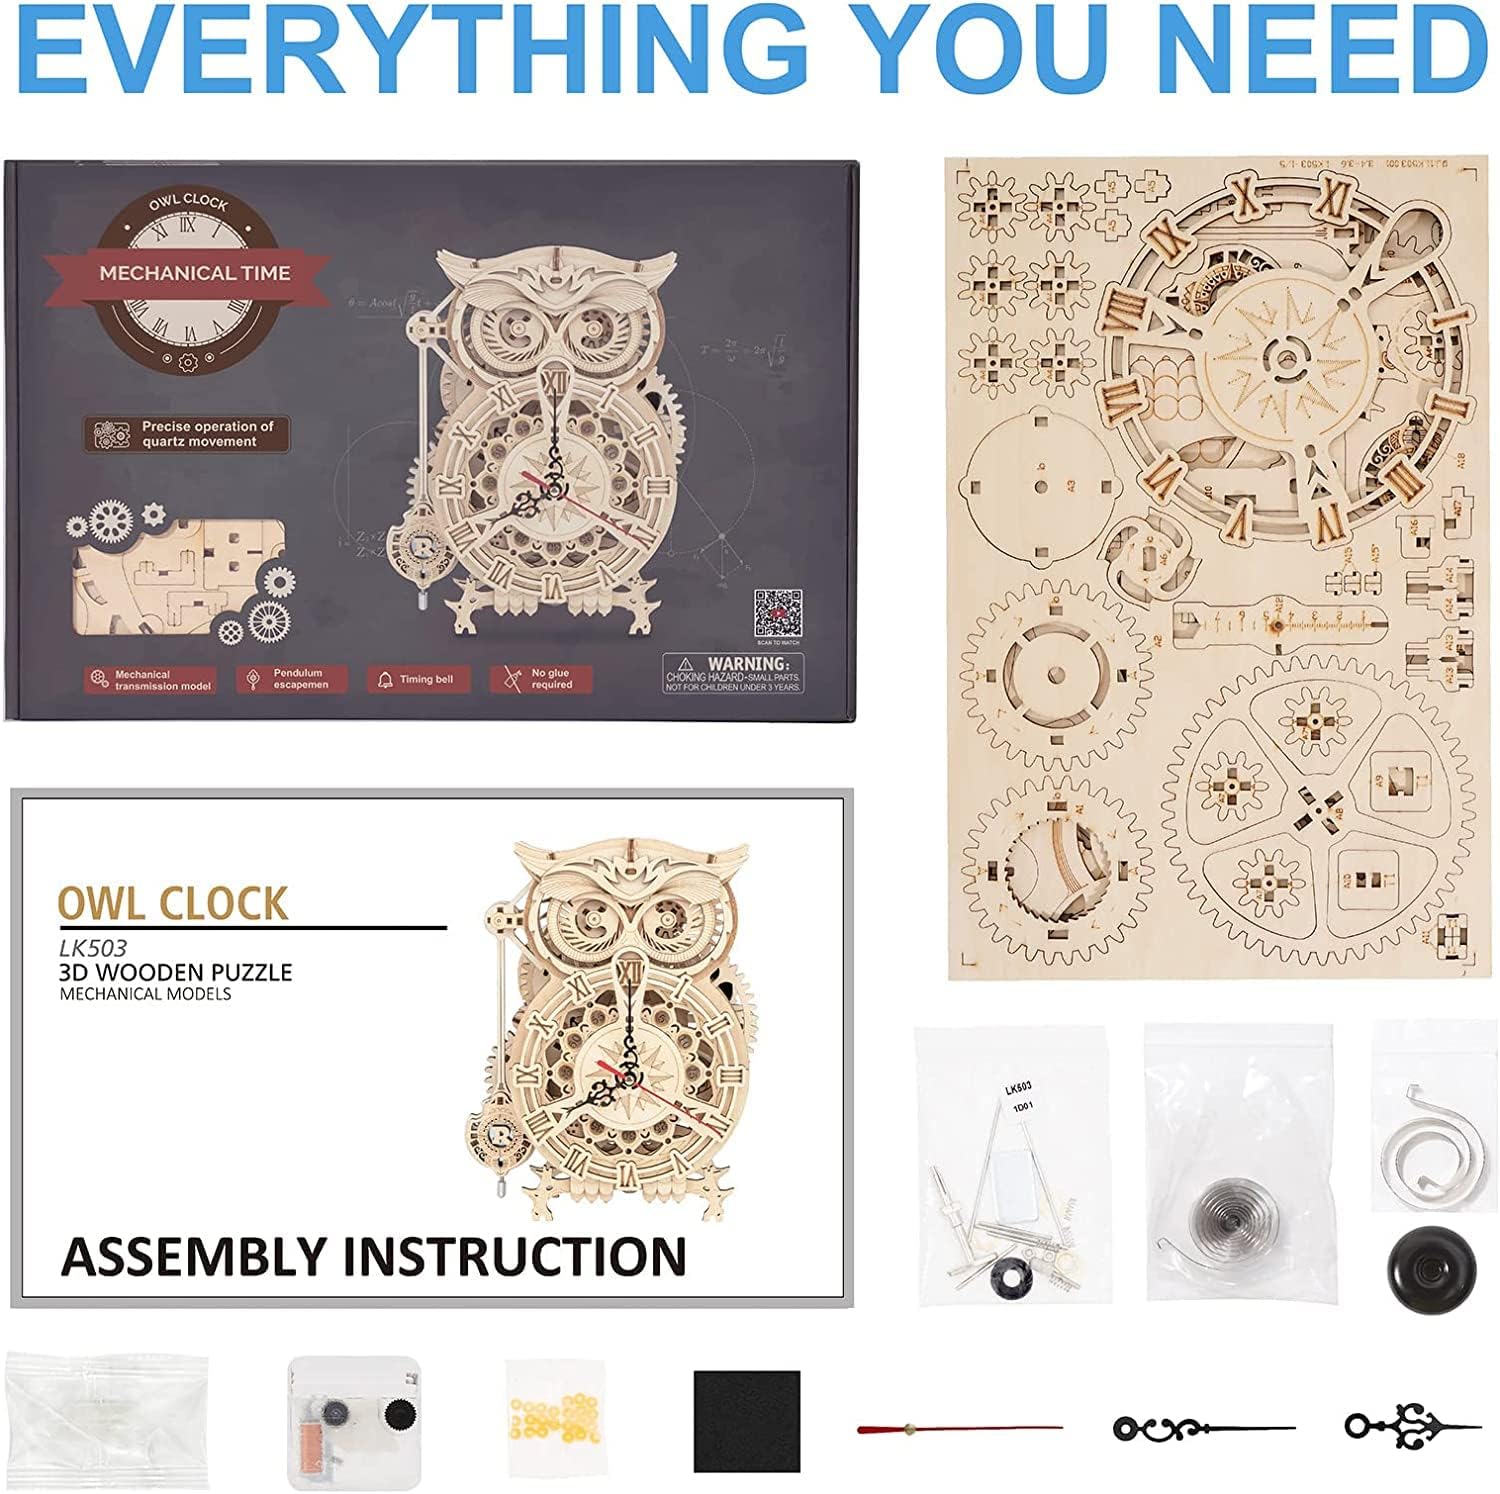
Figure 3.1: Package Contents.
4. Assembly Instructions
The RoWood Owl Clock is designed for self-assembly without the need for glue, utilizing precise mortise and tenon joints. Follow the step-by-step instructions provided in the included manual carefully. Each wooden piece is laser-cut for accuracy, ensuring a smooth assembly process.
- Preparation: Lay out all wooden sheets and identify the parts according to the manual. Gently detach pieces from the sheets.
- Step-by-Step Assembly: Follow the numbered steps in the manual. Pay close attention to the orientation of each piece.
- Mortise and Tenon Joints: Pieces are designed to interlock. Apply gentle pressure to connect them. Do not force pieces if they do not fit; recheck the instructions.
- Mechanical Components: Assemble the gears and other mechanical parts as instructed. Ensure they move freely before proceeding.
- Clock Mechanism Installation: Install the quartz clock movement and hands as shown in the final steps.

Figure 4.1: Assembly in progress.
Video 4.1: Overview of the ROKR Owl Clock 3D Wooden Puzzle assembly and features.
Video 4.2: Demonstration of the ROKR Owl Clock LK503, highlighting its clock and timer functions.
5. Setup
After successful assembly, follow these steps to set up your Owl Clock:
- Battery Installation: Locate the battery compartment for the quartz clock movement. Insert one 1.5V AA battery, ensuring correct polarity (+/-).
- Setting the Time: Use the small dial or crown on the back of the clock mechanism to set the correct time.
- Pendulum Attachment: Attach the pendulum to its designated hook or slot as per the assembly instructions.
6. Operating Instructions
Your RoWood Owl Clock has two primary functions:
6.1. Clock Function
The main clock face displays the current time using a silent quartz movement. Once the battery is installed and the time is set, the clock will operate continuously.
6.2. 30-Minute Timer Function
The integrated 30-minute timer is located on the back of the owl clock. To use it:
- Wind the Timer: Use the winding key or knob on the timer mechanism to set the desired countdown duration, up to 30 minutes.
- Pendulum Operation: The pendulum will begin to swing, indicating the timer is active. It will tick as it counts down.
- Timer Completion: Once the set time has elapsed, the timer will sound an alert.
7. Maintenance
To ensure the longevity and proper functioning of your RoWood Owl Clock, follow these maintenance guidelines:
- Cleaning: Dust the wooden model regularly with a soft, dry cloth. Avoid using liquid cleaners or abrasive materials.
- Battery Replacement: Replace the 1.5V AA battery in the quartz movement when the clock stops or begins to lose time.
- Environmental Conditions: Keep the clock in a dry environment, away from direct sunlight, extreme temperatures, and high humidity to prevent warping or damage to the wood.
- Handle with Care: Although sturdy, the wooden components can be delicate. Avoid dropping or applying excessive force to the model.
8. Troubleshooting
If you encounter any issues with your Owl Clock, refer to the following common problems and solutions:
- Clock Not Working:
- Check if the 1.5V AA battery is correctly installed and not depleted. Replace if necessary.
- Ensure the clock hands are not obstructed or touching each other.
- Timer Not Functioning:
- Ensure the timer mechanism is fully wound.
- Verify that all timer components were assembled correctly and move freely.
- Pieces Not Fitting:
- Refer back to the assembly instructions to confirm the correct piece and orientation.
- Do not force pieces; gentle pressure should be sufficient for mortise and tenon joints.
For any persistent issues or damaged parts, please contact customer support.
9. Specifications
| Feature | Detail |
|---|---|
| Model Number | LA-LK503 |
| Assembled Dimensions (L x W x H) | 20.6 x 12.8 x 26.5 cm (8.1 x 5 x 10.4 inches) |
| Number of Pieces | 221 |
| Material | Wood |
| Power Source (Clock) | 1 x 1.5V AA Battery (not included) |
| Timer Duration | 30 minutes (wind-up) |
| Assembly Method | Mortise and Tenon (no glue required) |
| Educational Value | Creative thinking, Animal recognition |

Figure 9.1: Product Dimensions.
10. Warranty and Support
RoWood is committed to customer satisfaction. We offer free replacement for any damaged parts. Should you encounter any problems during assembly or operation, or if you require assistance, please do not hesitate to contact our customer service team. We aim to respond to all inquiries within 12 hours to provide guidance and support.
For further assistance, please visit our official website or contact us through the platform where you purchased the product.