
1. Product Overview
This manual provides detailed instructions for the safe and efficient operation of your HCK 15-inch Kegerator 2-in-1 Beverage Refrigerator, Model K90. Please read this manual thoroughly before initial use and retain it for future reference.
The HCK K90 is a versatile appliance designed for both keg dispensing and general beverage refrigeration. Its compact design allows for flexible placement, while precise temperature control ensures optimal cooling for various beverages.
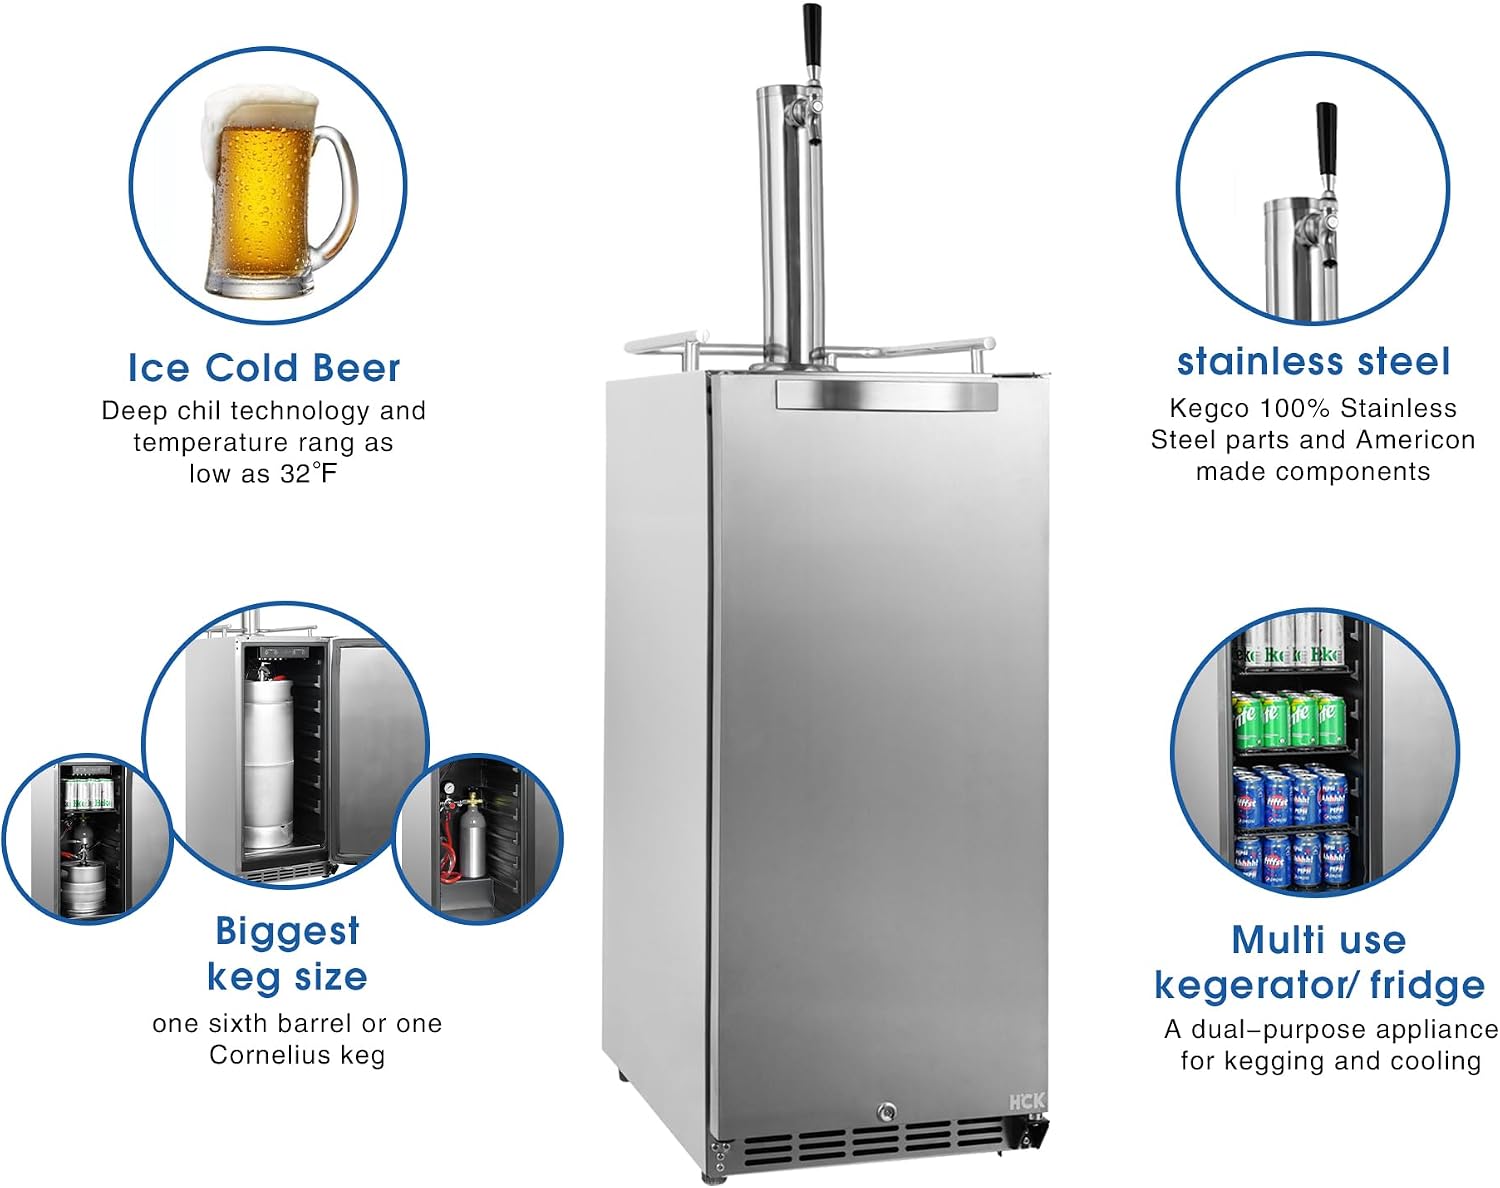
Figure 1.1: HCK 15-inch Kegerator highlighting key features such as stainless steel components, ice-cold beer capability, largest keg size compatibility, and its multi-use functionality as a kegerator or refrigerator.
Key Features:
- Multi-purpose Design: Functions as both a kegerator for beer dispensing and a refrigerator for storing food and drinks.
- Compact Capacity: Accommodates one 1/6 barrel or one Cornelius keg (3.18 cu. ft. capacity). Can hold up to 96 standard 12-ounce cans with shelves installed.
- Precise Temperature Control: Energy-efficient compressor-based cooling system with a temperature range of 32°F to 50°F (0°C to 10°C).
- Complete Accessory Set: Includes a stainless steel draft tower, CO2 tank (empty), guard rail, drip tray, four casters, safety lock, and three wire shelves.
- Reversible Door: The door can be configured to open from either the left or right side.
2. Setup and Installation
2.1 Unpacking and Initial Placement
- Carefully remove all packaging materials.
- Place the unit on a flat, stable surface. Ensure there is adequate ventilation around the unit (at least 2-4 inches of space on the sides and back).
- Allow the kegerator to stand upright for at least 24 hours before plugging it into a power outlet. This allows the refrigerant to settle.
2.2 Caster Installation
The unit comes with four casters for easy mobility. To install:
- Carefully tilt the unit to access the bottom. It is recommended to have assistance to prevent damage or injury.
- Screw the casters into the designated holes at each corner of the base. Ensure they are securely tightened.
- Return the unit to an upright position.
2.3 Door Reversal (Optional)
The door hinge is reversible. Refer to the detailed diagram in the included printed manual for specific steps on how to reverse the door swing direction.
2.4 Internal Configuration: Kegerator vs. Refrigerator Mode
The HCK K90 can be configured for keg dispensing or as a standard beverage refrigerator.
- For Kegerator Mode: Remove the internal wire shelves to accommodate a 1/6 barrel or Cornelius keg.
- For Refrigerator Mode: Install the three wire shelves to maximize storage for cans and bottles.

Figure 2.1: Interior view demonstrating the capacity for 96 standard 12-ounce cans or one 1/6 barrel/Cornelius keg.
2.5 Dispensing System Assembly
Assemble the stainless steel draft tower, CO2 tank (ensure it is filled by a certified supplier), regulator, and beer lines according to the diagrams in your printed manual. Connect the CO2 tank to the regulator and then to the keg coupler. Connect the beer line from the keg coupler to the draft tower.
Video 2.1: An overview of the HCK 15-inch Kegerator, demonstrating its features and potential uses. This video provides a visual guide to the product's design and functionality, which can assist in understanding the setup process.
3. Operation
3.1 Powering On and Temperature Control
- After the 24-hour settling period, plug the unit into a grounded 110V AC outlet.
- The digital control panel is located at the top front of the unit. Use the '+' and '-' buttons to adjust the desired temperature between 32°F and 50°F (0°C and 10°C).
- The display will show the current internal temperature. Allow several hours for the unit to reach the set temperature.

Figure 3.1: Digital temperature control panel for adjusting cooling settings and the integrated key lock for security.
3.2 Dispensing Beer (Kegerator Mode)
- Ensure the CO2 tank is open and the regulator is set to the appropriate pressure for your beer type (typically 10-12 PSI).
- Place a glass under the tap.
- Pull the tap handle forward to dispense beer. Push it back to close.
- Monitor the CO2 tank pressure regularly to ensure consistent dispensing.
3.3 Door Lock Operation
Insert the key into the lock located on the lower front of the door. Turn the key to the left to unlock and to the right to lock the door.
4. Maintenance
4.1 Cleaning the Interior and Exterior
- Always unplug the unit before cleaning.
- Clean the interior with a mild detergent and warm water. Wipe dry with a soft cloth.
- For the stainless steel exterior, use a stainless steel cleaner and polish with a soft cloth. Avoid abrasive cleaners.
- Periodically clean the condenser coils at the back of the unit with a soft brush or vacuum cleaner to maintain efficiency.
4.2 Drip Tray Cleaning
The built-in drip tray is removable for easy cleaning.
- Lift the drip tray from its position on top of the unit.
- Wash with warm, soapy water.
- Rinse thoroughly and dry before replacing.

Figure 4.1: The removable drip tray designed for easy cleaning and maintenance.
4.3 Defrosting
This unit features an automatic defrost system, minimizing the need for manual defrosting. If excessive ice buildup occurs, unplug the unit and allow the ice to melt naturally. Ensure the drip tray is in place to collect water.
4.4 CO2 Tank Replacement
When the CO2 tank is empty, turn off the CO2 supply, disconnect the regulator, and replace the tank with a full one. Ensure all connections are secure and leak-free before resuming operation.
5. Troubleshooting Guide
| Problem | Possible Cause | Solution |
|---|---|---|
| Unit does not operate | No power; circuit breaker tripped; unit not plugged in. | Check power supply, ensure plug is secure, reset circuit breaker. |
| Unit not cooling sufficiently | Temperature set too high; door not closed properly; condenser coils dirty; unit overloaded. | Adjust temperature setting; ensure door is sealed; clean condenser coils; do not block air vents. |
| Beer not dispensing | Empty CO2 tank; CO2 supply turned off; keg coupler not properly engaged; beer line blockage. | Replace CO2 tank; open CO2 valve; re-engage coupler; clean beer lines. |
| Excessive noise | Unit not level; components vibrating; normal compressor operation. | Ensure unit is level; check for loose parts; some compressor noise is normal. |
| Water on floor or inside unit | Drip tray overflowing or not in place; door seal compromised; drain blocked. | Empty and properly place drip tray; check door gasket for damage; clear any drain blockages. |
6. Product Specifications
| Feature | Detail |
|---|---|
| Model Name | K90 |
| Product Dimensions (D x W x H) | 23.62" x 14.88" x 34.05" |
| Capacity | 3.18 cubic feet (holds 1/6 barrel or 1 Cornelius keg, or 96 x 12oz cans) |
| Temperature Range | 32°F to 50°F (0°C to 10°C) |
| Defrost System | Automatic |
| Voltage | 110 volts AC |
| Annual Energy Consumption | 277 kWh/year |
| Refrigerant | R600a or R290 |
| Material | Stainless Steel Door |
| Special Features | Door Lock, Reversible Door, Casters |
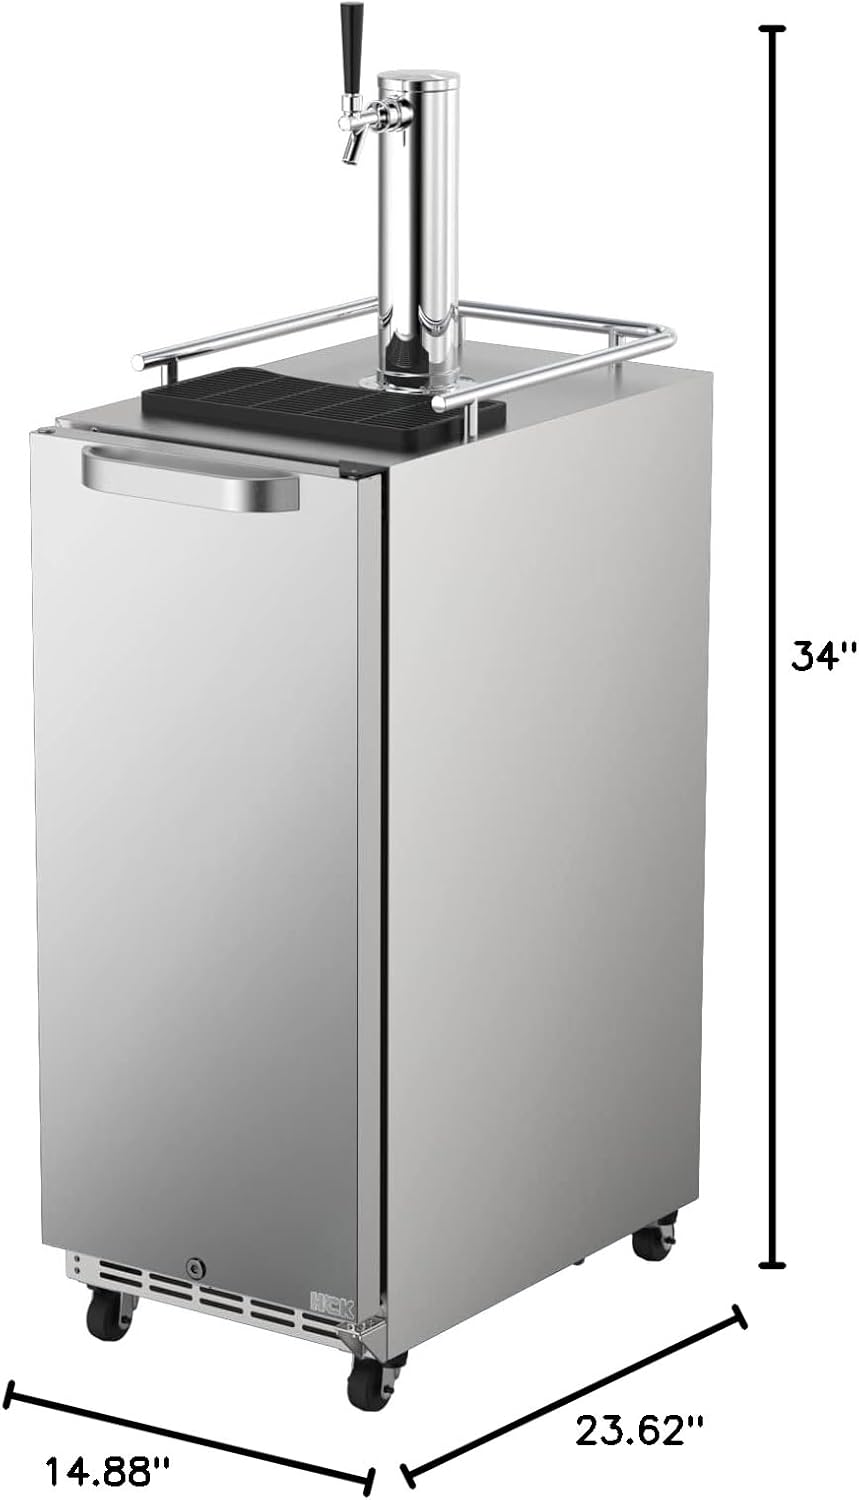
Figure 6.1: Product dimensions: 23.62 inches Deep, 14.88 inches Wide, and 34.05 inches High.

Figure 6.2: Energy Guide label indicating an estimated yearly energy cost of $33 and 277 kWh per year.
7. Warranty and Support
7.1 Warranty Information
The HCK K90 Kegerator comes with a 1-year factory warranty on non-consumable components and a 3-year warranty on the compressor. This warranty covers defects in materials and workmanship under normal use.
Please retain your proof of purchase for warranty claims.
7.2 Customer Support
If you require further assistance, have questions about your product, or need to make a warranty claim, please contact HCK customer support. Refer to the contact information provided with your product packaging or visit the official HCK website for support details.

