1. Introduction
Thank you for choosing the Generic TA8131 Digital Light Meter. This device is designed for precise measurement of illumination (lux/Fc) in various environments. Its split design allows for flexible sensor placement, making it ideal for photography, environmental testing, and general light measurement applications. Please read this manual thoroughly before operation to ensure safe and correct use.
2. Product Features
- Mini lux meter with stable, safe, and reliable measurement.
- Wide measurement range of 0-100,000 lux with automatic/manual range shift.
- Measuring unit is switchable: Lux or Fc.
- MAX / MIN / Data Hold functions for enhanced accuracy.
- LCD display with backlight for easy operation in low-light conditions.
- Data recording capacity for up to 50 measurement data sets.
3. Safety Information
To ensure safe operation and to obtain the best performance from the meter, please observe the following safety precautions:
- Do not operate the meter in environments with explosive gas, vapor, or dust.
- Avoid exposing the meter to direct sunlight, high temperatures, or high humidity.
- Keep the meter dry. Do not immerse it in water or other liquids.
- Remove batteries if the meter will not be used for an extended period to prevent leakage.
- Clean the meter with a soft, dry cloth. Do not use abrasive cleaners or solvents.
- Do not attempt to modify or disassemble the meter. Refer all servicing to qualified personnel.
4. Package Contents
Upon unpacking, please verify that all items listed below are present and undamaged:
- 1 x Digital Light Meter (Main Unit)
- 1 x Protective Bag
- 1 x User Manual
5. Device Overview
The TA8131 Digital Light Meter consists of a main display unit and a separate photoreceptor sensor connected by a coiled cable. This split design allows for flexible positioning of the sensor to accurately measure light without obstructing the display.

Figure 5.1: Rear view of the main unit and the photoreceptor sensor. The main unit shows a battery compartment and a serial number label. The sensor has a coiled cable for extension.
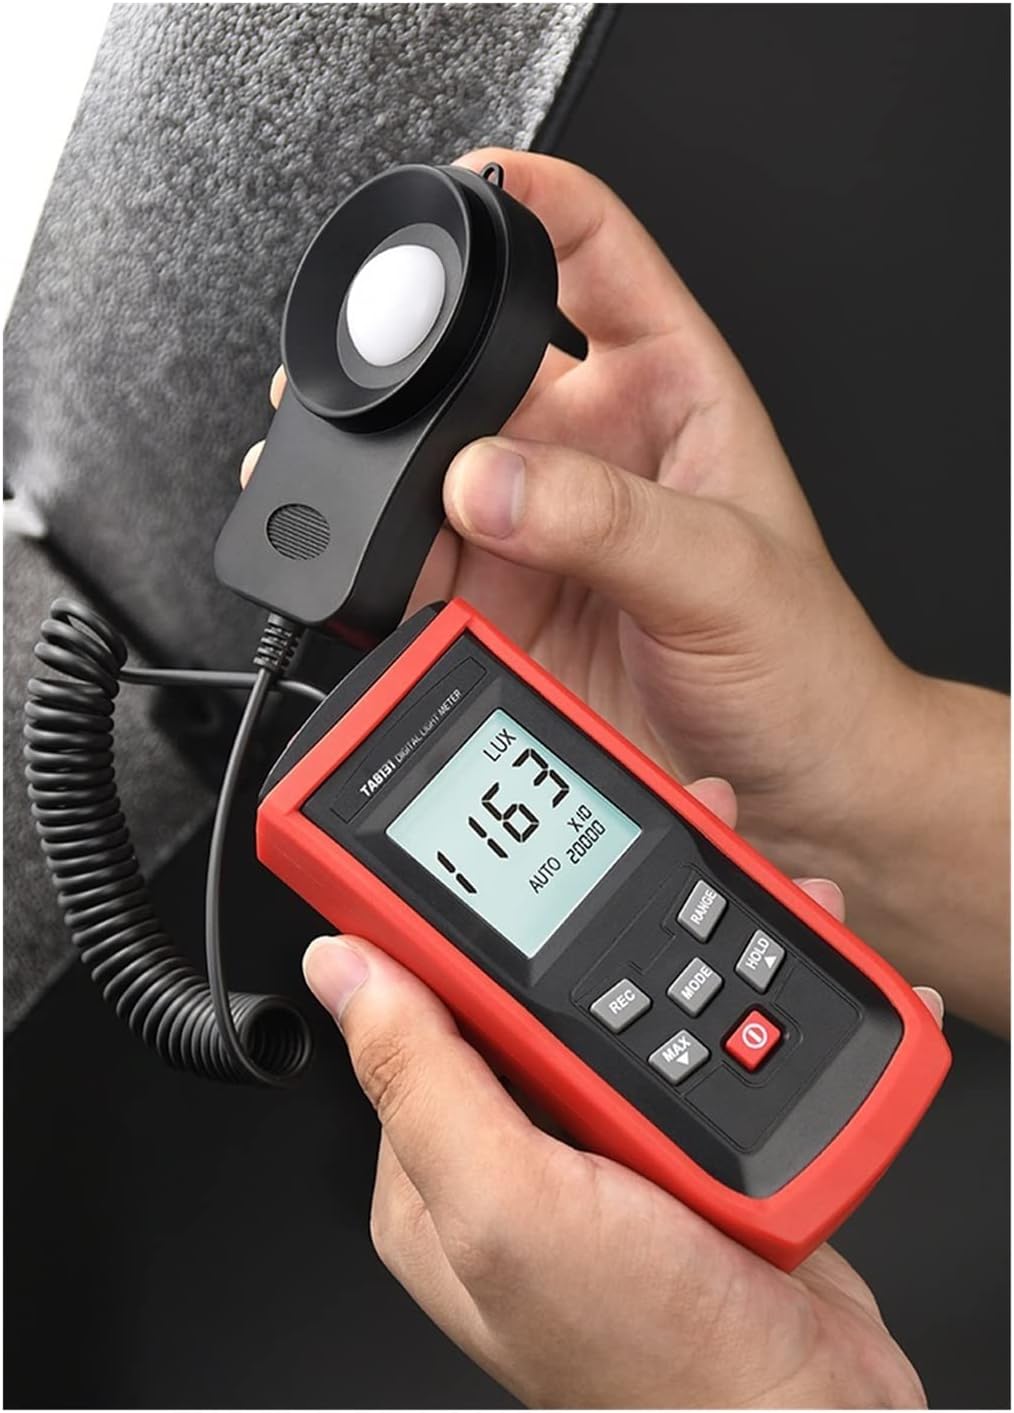
Figure 5.2: Front view of the TA8131 in use. The main unit features an LCD display showing a light reading of '163 LUX' and control buttons for various functions. The separate sensor is held nearby.
5.1 Main Unit
- LCD Display: Shows measurement readings, units (Lux/Fc), and function indicators (MAX, MIN, HOLD, AUTO, RANGE).
- Control Buttons:
- POWER (Red button): Turns the meter on or off.
- MODE: Switches between Lux and Fc units.
- RANGE: Toggles between automatic and manual measurement ranges.
- HOLD: Freezes the current reading on the display.
- MAX/MIN: Displays the maximum or minimum recorded value.
- REC: Activates data recording mode.
5.2 Photoreceptor Sensor
The sensor contains a photodiode with an additional filter, designed to meet CIE Photopic Spectral Response standards. It is connected to the main unit via a coiled cable that can extend up to 1300mm (51.18 inches) for flexible measurement positioning.

Figure 5.3: The extended cable of the photoreceptor sensor, demonstrating its reach for versatile light measurement.
6. Setup
6.1 Battery Installation
- Locate the battery compartment cover on the back of the main unit.
- Slide the cover open.
- Insert two (2) AAA batteries, observing the correct polarity (+/-) as indicated inside the compartment.
- Replace the battery compartment cover securely.
Note: Batteries are not included in the package. Please use fresh AAA alkaline batteries for optimal performance.
6.2 Sensor Connection
The photoreceptor sensor is permanently connected to the main unit via a coiled cable. No additional connection steps are required. Ensure the cable is not excessively stretched or kinked during use to prevent damage.
7. Operating Instructions
7.1 Power On/Off
Press the red POWER button to turn the meter on. Press and hold the POWER button again to turn the meter off.
7.2 Taking a Measurement
- Turn on the meter. The LCD will display the current light intensity.
- Position the photoreceptor sensor at the location where you wish to measure light. Ensure the sensor's dome is facing the light source.
- Read the measurement value on the LCD display.
7.3 Unit Selection (Lux/Fc)
Press the MODE button to switch between Lux and Foot-candle (Fc) units. The selected unit will be displayed on the LCD.
7.4 Range Selection (Auto/Manual)
The meter defaults to automatic range selection. To switch to manual range, press the RANGE button. Repeatedly pressing RANGE will cycle through available manual ranges (e.g., 200, 2000, 20000, 100000 Lux). To return to auto-ranging, press and hold the RANGE button until "AUTO" appears on the display.
7.5 Data Hold Function
Press the HOLD button to freeze the current reading on the display. The "HOLD" indicator will appear. Press HOLD again to release the data hold function and resume live measurements.
7.6 MAX/MIN Measurement
Press the MAX/MIN button to display the maximum recorded light intensity since the meter was turned on. Press it again to display the minimum recorded light intensity. A third press will return to live measurement. The "MAX" or "MIN" indicator will be shown on the display.

Figure 7.1: The meter displaying the minimum recorded value in auto-range mode.
7.7 Data Recording
The meter can store up to 50 sets of measurement data.
- Press the REC button to enter data recording mode. The "REC" indicator will appear.
- Each time you press REC, the current measurement will be saved. The display may briefly show the record number.
- To exit recording mode, press and hold the REC button.

Figure 7.2: The meter's capability to store up to 50 data sets.

Figure 7.3: Illustration of the automatic data recording feature, showing multiple readings being stored.
8. Maintenance
8.1 Cleaning
Wipe the meter's casing and sensor with a soft, dry cloth. Do not use abrasive materials, solvents, or harsh chemicals, as these may damage the plastic components or the sensor's optical surface.
8.2 Battery Replacement
When the low battery indicator appears on the LCD, replace the batteries promptly to ensure accurate readings. Refer to Section 6.1 for battery installation instructions.
8.3 Storage
If the meter is not used for an extended period, remove the batteries to prevent leakage. Store the meter in its protective bag in a cool, dry place, away from direct sunlight and extreme temperatures.
9. Troubleshooting
- No Display / Meter Does Not Turn On:
- Check if batteries are installed correctly with proper polarity.
- Replace with fresh AAA batteries.
- Inaccurate Readings:
- Ensure the sensor's dome is clean and unobstructed.
- Verify the correct unit (Lux/Fc) is selected.
- Check if the meter is in the appropriate measurement range (Auto or Manual).
- Avoid measuring in rapidly changing light conditions if stable readings are required.
- "OL" or Overload Display:
- The measured light intensity exceeds the current range. Switch to a higher manual range or enable auto-ranging.
10. Specifications

Figure 10.1: Detailed product specifications for the TA8131 model.
| Parameter | Specification (TA8131) |
|---|---|
| Model | TA8131 (Split model) |
| Measuring Range | 200Lux, 2000Lux, 20000Lux, 100000Lux (20/200/2000/10000 Fc) |
| Resolution | 0.1Lux (for 200Lux range); 1Lux (for other ranges) |
| Accuracy | ±3% rdg ± 10dgts (<10,000 lux) ±4% rdg ± 10dgts (>10,000 lux) |
| Total Accuracy | For C.I.E Standard Lighting A (2856K) |
| Sampling Rate | 2 times/second |
| Repeatability | ±2% |
| Range Selection | Automatic / Manual measurement |
| Data Recording | 50 measurement data sets (delayed recording function) |
| Spectral Response | Meets CIE Photopic |
| Photoreceptor | Photodiode with additional filter lens |
| Unit Selection | Lux / Fc |
| Data Retention Function | Yes (HOLD) |
| Max/Min Records | Yes |
| LCD Display | Max Display 1999 (4-digit LCD display) |
| LCD Size | 35*32MM |
| Battery | 2 x AAA (not included) |
| Product Size (Main Unit) | 125*55*30MM |
| Sensor Size | 87*55*20MM |
| Weight | Approximately 180g |
11. Warranty and Support
This product is covered by the standard manufacturer's warranty. For warranty claims, technical support, or service inquiries, please contact the retailer or manufacturer directly. Please retain your purchase receipt as proof of purchase.
