1. Introduction
Thank you for choosing the Abovsare Digital Wall Clock. This versatile clock features a large LED display, remote control, automatic brightness adjustment, and multiple functions including time, date, day of the week, temperature, and alarm. This manual provides detailed instructions for setup, operation, and maintenance to ensure optimal performance.

Figure 1: Abovsare Digital Wall Clock with large orange LED display.
2. Package Contents
- Abovsare Digital Wall Clock
- Remote Control
- USB Power Cable (Note: Power adapter not included. Use a 5V/1A or 5V/2A adapter.)
- User Manual
- Mounting Accessories (e.g., pins/screws for wall mounting)
3. Setup
3.1 Powering On
The clock requires continuous power via the included USB cable. Connect the USB cable to a compatible 5V/1A or 5V/2A USB power adapter (not included) and plug it into a power outlet. The clock is not battery operated for primary function.
Memory Function: The clock has a built-in memory function. Install 2 AAA batteries (not included) into the battery compartment on the back of the clock to retain time settings during a power outage. This ensures that you do not need to reset the time after a power interruption.

Figure 2: Rear view of the clock, highlighting the battery compartment for memory function.
3.2 Placement Options
The Abovsare Digital Wall Clock offers flexible placement options:
- Desktop Placement: The clock can be placed on any flat surface, such as a desk, nightstand, or shelf.
- Wall Mounting: Use the provided mounting accessories to securely hang the clock on a wall. Ensure the wall can support the clock's weight and that the power cable can reach an outlet.

Figure 3: The clock is suitable for both desktop and wall mounting.
4. Operating Instructions
4.1 Display Features
The 13-inch large LED display shows the following information:
- Time: Large, high-contrast digits for easy readability.
- Date: Month and day.
- Week: Day of the week (Mon-Sun).
- Temperature: Displays in Celsius or Fahrenheit.

Figure 4: Detailed view of the 13-inch large LED display.
4.2 Remote Control
All settings and operations can be easily managed using the included remote control. This eliminates the need to remove the clock from its position for adjustments.

Figure 5: Remote control for convenient operation.
4.3 Brightness Adjustment
The clock features 10 levels of adjustable brightness. You can manually adjust the brightness using the remote control. Additionally, a built-in automatic dimming sensor adjusts the display brightness based on ambient light conditions.
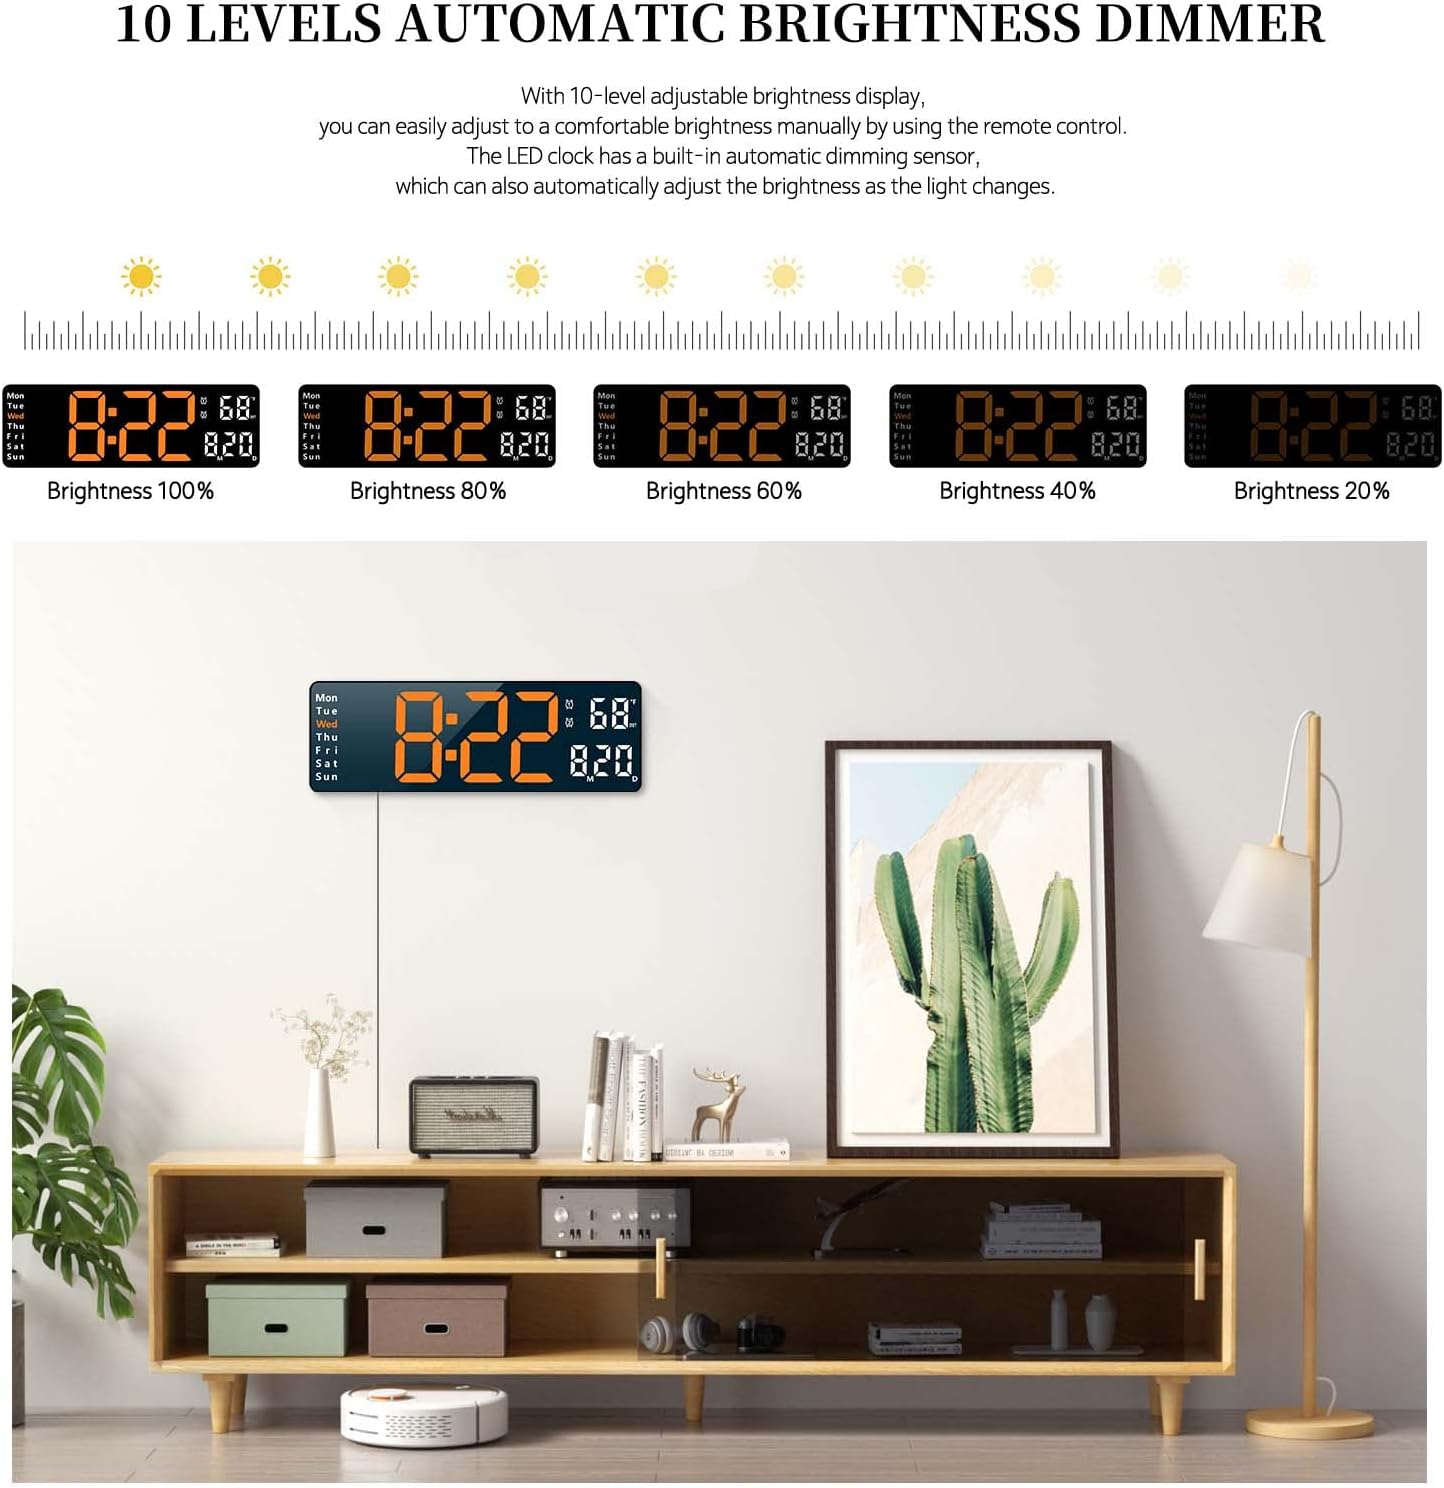
Figure 6: Visual representation of the 10-level automatic brightness dimmer.
4.4 Alarm Settings
You can set two separate alarms to accommodate different schedules. Refer to the remote control's 'AL-1 SET' and 'AL-2 SET' buttons for setting and activating alarms.
4.5 Timer Function
The clock includes a count-up and count-down timer function, supporting up to 99 minutes and 99 seconds. This feature is useful for various activities, such as cooking or exercise.

Figure 7: Count-up and count-down timer display.
5. Maintenance
- Clean the display and casing with a soft, dry cloth. Avoid abrasive cleaners or solvents.
- Ensure the clock is placed in a dry environment, away from direct sunlight or extreme temperatures.
- Replace the memory backup batteries (AAA) periodically to ensure time retention during power outages.
6. Troubleshooting
- Clock not powering on: Ensure the USB cable is securely connected to both the clock and a functional 5V/1A or 5V/2A power adapter, and that the adapter is plugged into a live power outlet.
- Time/Date not retained after power loss: Check if the AAA backup batteries are installed correctly and are not depleted. Replace if necessary.
- Remote control not working: Ensure the remote's battery is functional and that there are no obstructions between the remote and the clock's sensor.
- Colon blinking: Some users have noted the colon between hours and minutes blinks. This is a design feature and not an indication of a fault.
- Timer function issues: Ensure you are pressing the 'OK' button within a few seconds after inputting the time for the timer to start. If issues persist, try resetting the clock.
7. Specifications
| Feature | Description |
|---|---|
| Brand | Abovsare |
| Model | B0B7FDGZ3S |
| Color | Black Case + Orange Digit |
| Display Type | Digital LED |
| Product Dimensions | 12.6"W x 4.1"H |
| Power Source | Corded Electric (USB, 5V/1A or 5V/2A adapter required) |
| Special Features | Large LED display, 10-level automatic brightness dimmer, count-up/count-down function, memory function, remote control, two alarms, date, week, temperature display |
| Mounting Type | Tabletop or Wall Mounted |
| Material | Acrylonitrile Butadiene Styrene (ABS) |
8. Warranty and Support
For warranty information and customer support, please refer to the product packaging or contact Abovsare customer service directly. Keep your purchase receipt for any warranty claims.