1. Introduction
This manual provides detailed instructions for the installation, operation, and maintenance of your Hoimpro H_BTOF_00046_01_BK_PU Black Waterfall Bathroom Faucet. Please read these instructions carefully before installation and retain this manual for future reference. Proper installation and care will ensure optimal performance and longevity of your faucet.
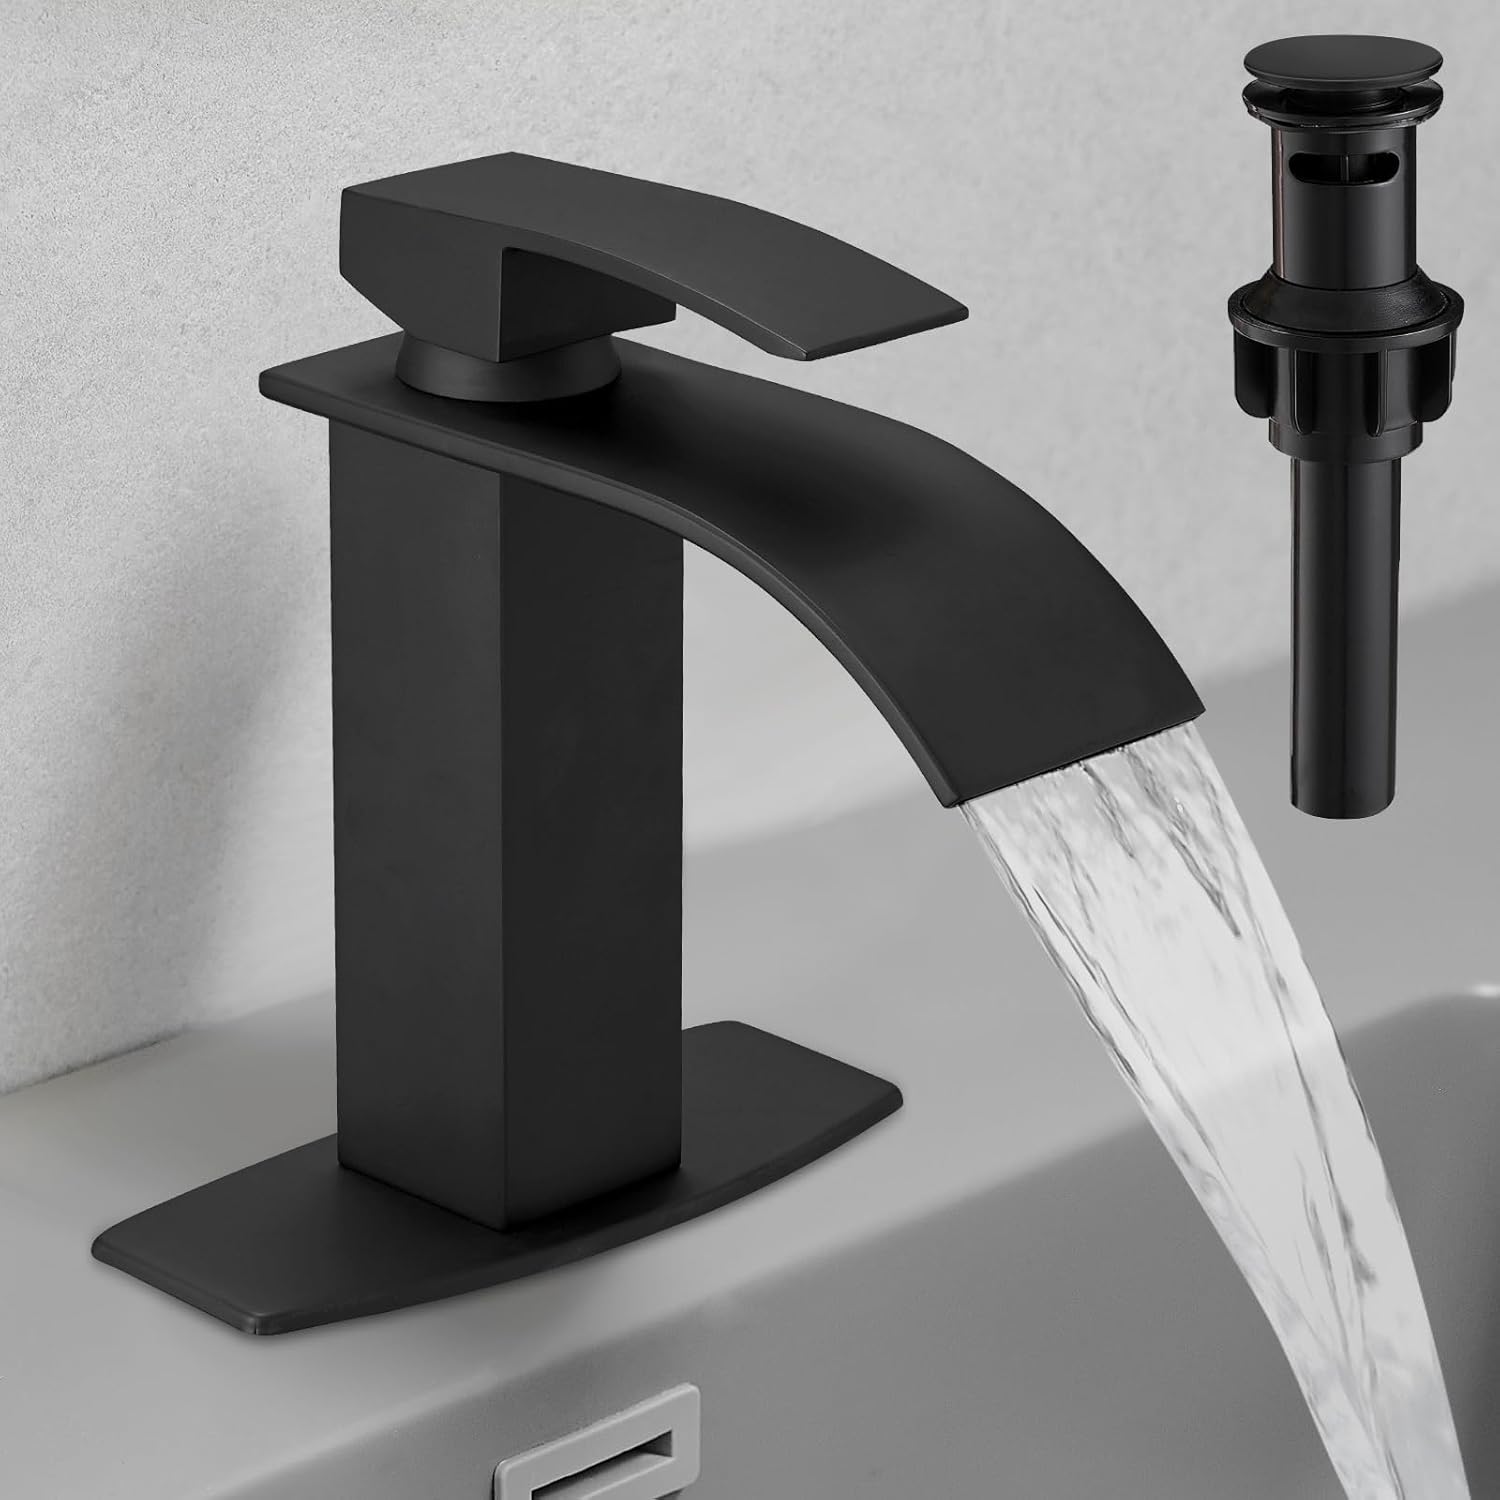
Figure 1: Hoimpro Black Waterfall Bathroom Faucet with Pop-up Drain
2. Product Components
Verify that all components are present before beginning installation. If any parts are missing or damaged, please contact Hoimpro customer support.
- Waterfall Faucet Body (Matte Black)
- Pop-up Drain Assembly (Matte Black)
- 6-inch Deck Plate (for 3-hole installations)
- Hot and Cold Water Supply Lines (cUPC certified)
- Mounting Hardware (gaskets, nuts)

Figure 2: Key Faucet Components

Figure 3: Stainless Steel Braided Supply Lines

Figure 4: Pop-up Drain Assembly
3. Specifications
| Feature | Specification |
|---|---|
| Model Name | H_BTOF_00046_01_BK_PU |
| Material | SUS304 Stainless Steel (faucet body), Zinc (handle) |
| Finish | Matte Black |
| Mounting Type | Deck Mount (1 or 3 Hole) |
| Number of Handles | 1 |
| Spout Height | 4.4 Inches (11.18 cm) |
| Spout Reach | 4.4 Inches (11.18 cm) |
| Product Dimensions | 6.77"D x 2.44"W x 7.44"H (17.2cm D x 6.2cm W x 18.9cm H) |
| Item Weight | 2.83 pounds (1.28 kg) |
| Hole Size Requirement | 0.99 - 1.6 inches (2.5 - 4.0 cm) for faucet, 1.7 - 2.3 inches (4.3 - 5.8 cm) for drain |
| Basin Thickness | 1.4 - 1.97 inches (3.5 - 5.0 cm) for drain |
4. Setup and Installation
Before installation, ensure your water supply is turned off. It is recommended to have basic plumbing knowledge or consult a professional plumber.
4.1 Required Tools (Not Included)
- Adjustable Wrench
- Phillips Head Screwdriver
- Plumber's Putty or Silicone Sealant
- Teflon Tape
- Safety Glasses
4.2 Installation Steps
- Prepare the Sink: Clean the sink surface where the faucet will be installed. Ensure the pre-drilled hole size meets the specifications (0.99-1.6 inches). For 3-hole sinks, use the included 6-inch deck plate.
- Install the Faucet:
- If using the deck plate, place it over the sink holes.
- Insert the faucet body through the hole(s) in the sink/deck plate.
- From underneath the sink, secure the faucet using the rubber washer and mounting nut. Tighten firmly but do not overtighten.
- Connect Water Supply Lines:
- Attach the hot and cold supply lines to the corresponding inlets on the faucet body. Hand-tighten, then use a wrench for a quarter turn.
- Connect the other ends of the supply lines to your hot and cold water shut-off valves. Use Teflon tape on the valve threads for a watertight seal.
- Install the Pop-up Drain:
- Apply plumber's putty or silicone sealant around the flange of the pop-up drain.
- Insert the drain assembly into the sink drain hole.
- From underneath, secure the drain with the rubber washer and locking nut. Ensure the drain is properly aligned and sealed to prevent leaks.
- Test for Leaks: Turn on the main water supply slowly and check all connections for leaks. If leaks occur, tighten connections as needed.
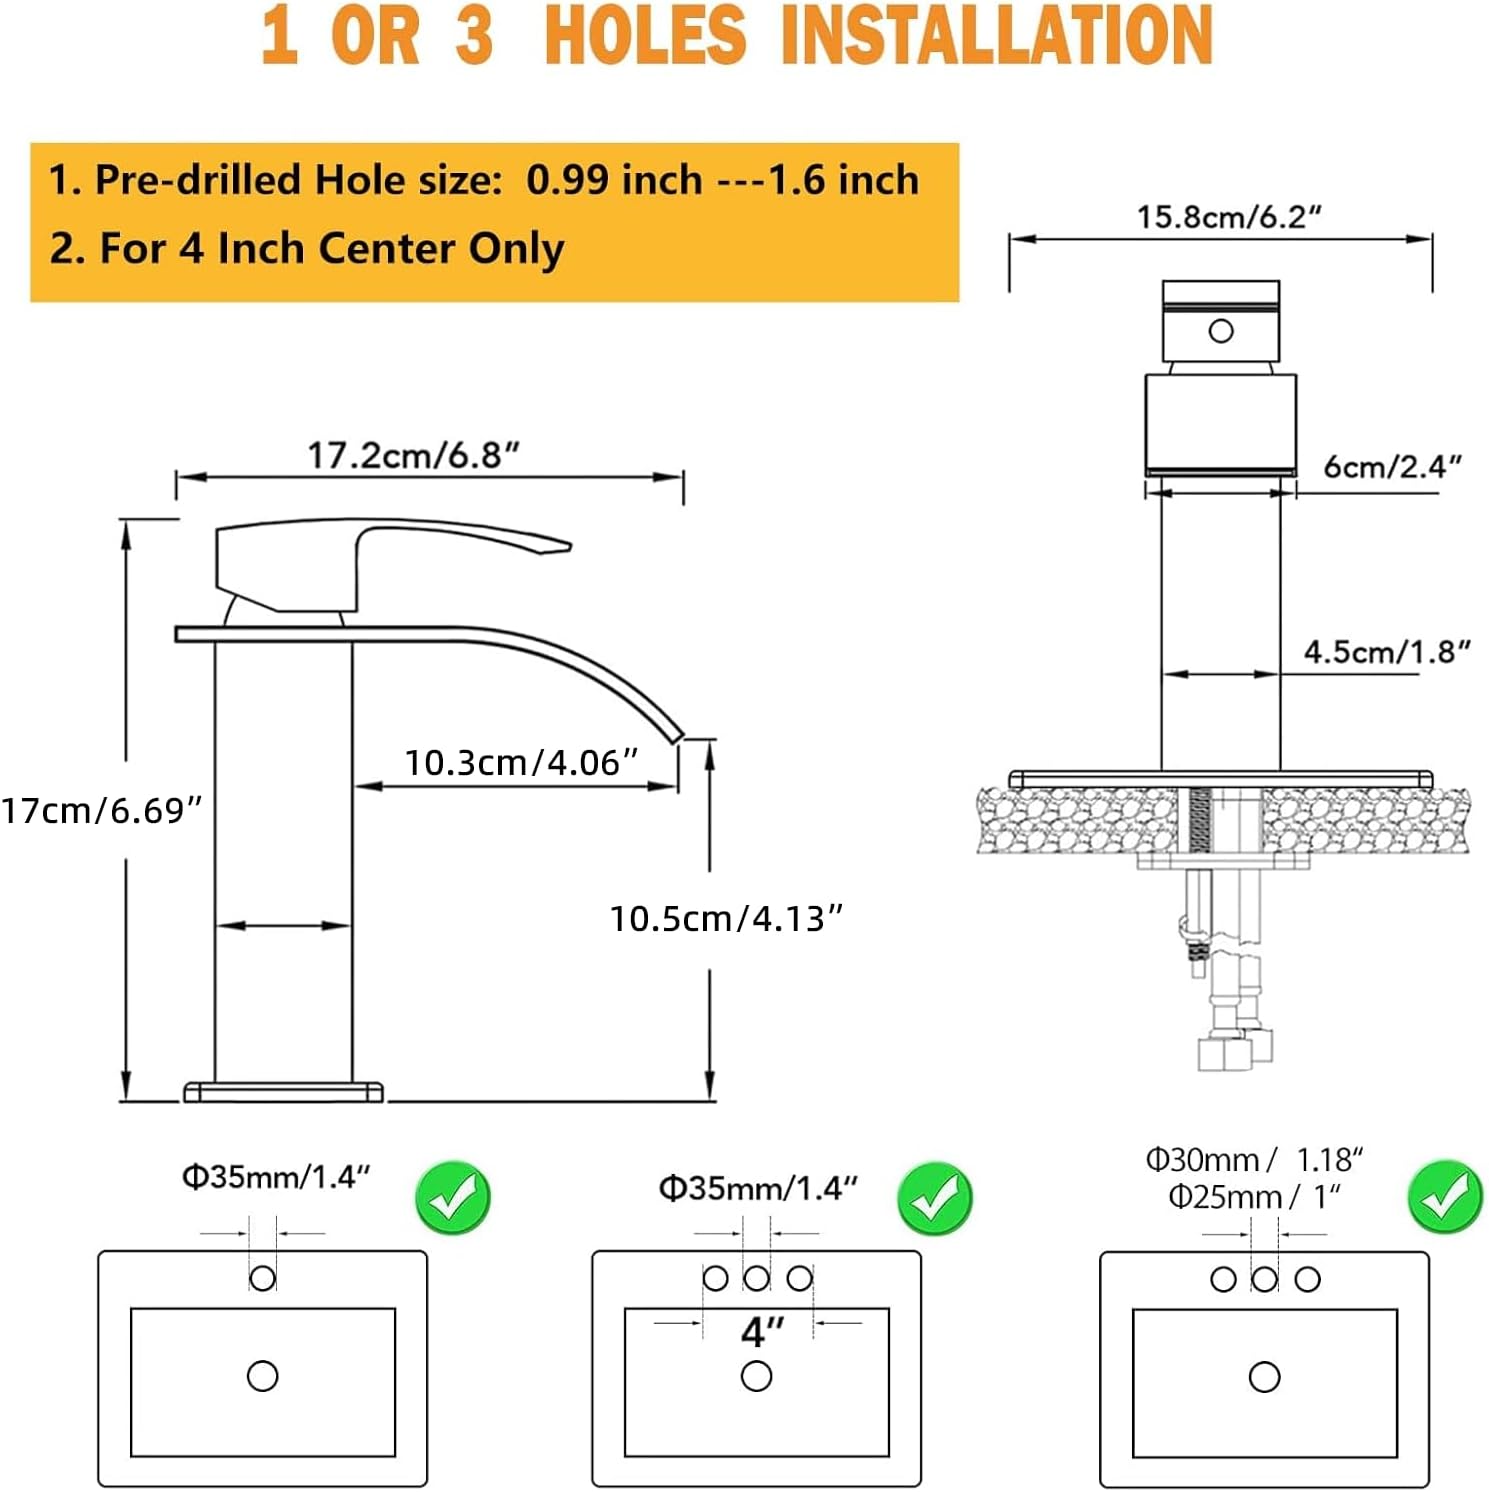
Figure 5: Installation Dimensions and Hole Configurations

Figure 6: Deck Plate for 3-Hole Installation
5. Operation
The Hoimpro waterfall faucet features a single handle for controlling both water flow and temperature.
- Water Flow: Lift the handle to increase water flow. Push down to decrease or stop flow.
- Water Temperature: Move the handle to the left for hot water and to the right for cold water. Adjust the handle position to achieve the desired temperature.
- Waterfall Spout: The unique waterfall design provides a gentle, broad stream of water. Note that high water pressure may cause splashing in some sink designs. Adjust the flow rate as needed.
- Pop-up Drain: Press the top of the drain to open or close it.
6. Maintenance
Regular cleaning and maintenance will preserve the finish and functionality of your faucet.
6.1 Cleaning the Finish
- Clean the matte black finish with a soft, damp cloth and mild soap.
- Avoid abrasive cleaners, harsh chemicals, or scouring pads, as these can damage the finish.
- Rinse thoroughly with clean water and dry with a soft cloth to prevent water spots.
6.2 Drain Maintenance
- Periodically remove the pop-up drain stopper and clean any accumulated debris or hair to prevent clogging.
- The drain is designed for rapid filtering and anti-clogging, but regular cleaning is still recommended.
7. Troubleshooting
This section addresses common issues you might encounter with your faucet.
| Problem | Possible Cause | Solution |
|---|---|---|
| Low Water Pressure | Partially closed shut-off valves, clogged aerator, kinked supply lines. | Ensure shut-off valves are fully open. Clean the aerator. Check supply lines for kinks. |
| Leaks from Faucet Base | Loose mounting nut, improperly seated gasket. | Tighten mounting nut. Ensure gaskets are correctly positioned. Apply plumber's putty or silicone if necessary. |
| Leaks from Supply Lines | Loose connections, missing Teflon tape. | Tighten supply line connections. Apply Teflon tape to valve threads. |
| Water Splashing Excessively | High water pressure, sink design. | Reduce the water flow using the handle. Consider adjusting the main water supply valve if consistently too high. |
| Drain Not Sealing Properly | Improperly installed drain, debris. | Re-install drain ensuring proper alignment and sealant. Clean any debris from the drain mechanism. |
8. Warranty and Support
Hoimpro stands behind the quality of its products. While specific warranty details are not provided in this manual, please retain your proof of purchase. For any product inquiries, technical assistance, or warranty claims, please contact Hoimpro customer support through the retailer where the product was purchased or visit the official Hoimpro website.
For additional support, you may refer to the Hoimpro store on Amazon: Hoimpro Store