1. Introduction
This instruction manual provides important information for the proper installation, operation, and maintenance of your COOSPIDER Aquarium UV Filter Green Clean Machine, Model CTUV-H5P. This submersible filter is designed to help maintain clear and healthy aquatic environments for fish tanks ranging from 40 to 100 gallons. It integrates a water pump, UV sterilization, air supply, and wave-making functions.

Figure 1: COOSPIDER Aquarium UV Filter Green Clean Machine.
2. Product Features
- UV Sterilization: Equipped with a built-in 254nm wavelength UV light to clarify water and reduce green algae, contributing to a crystal clear tank.
- Separate Switches: Independent controls for the water pump and the UV light, allowing flexible operation.
- Air Supply: Creates air bubbles to oxygenate the water, simulating natural aquatic conditions.
- Wave Maker Function: Generates water movement to improve circulation within the aquarium.
- Pre-Filter: Includes a pre-filter sponge to protect fish and prevent larger debris from entering the main unit.
- Easy UV Light Check: A visible indicator allows users to confirm the UV light is operating without disassembling the unit.
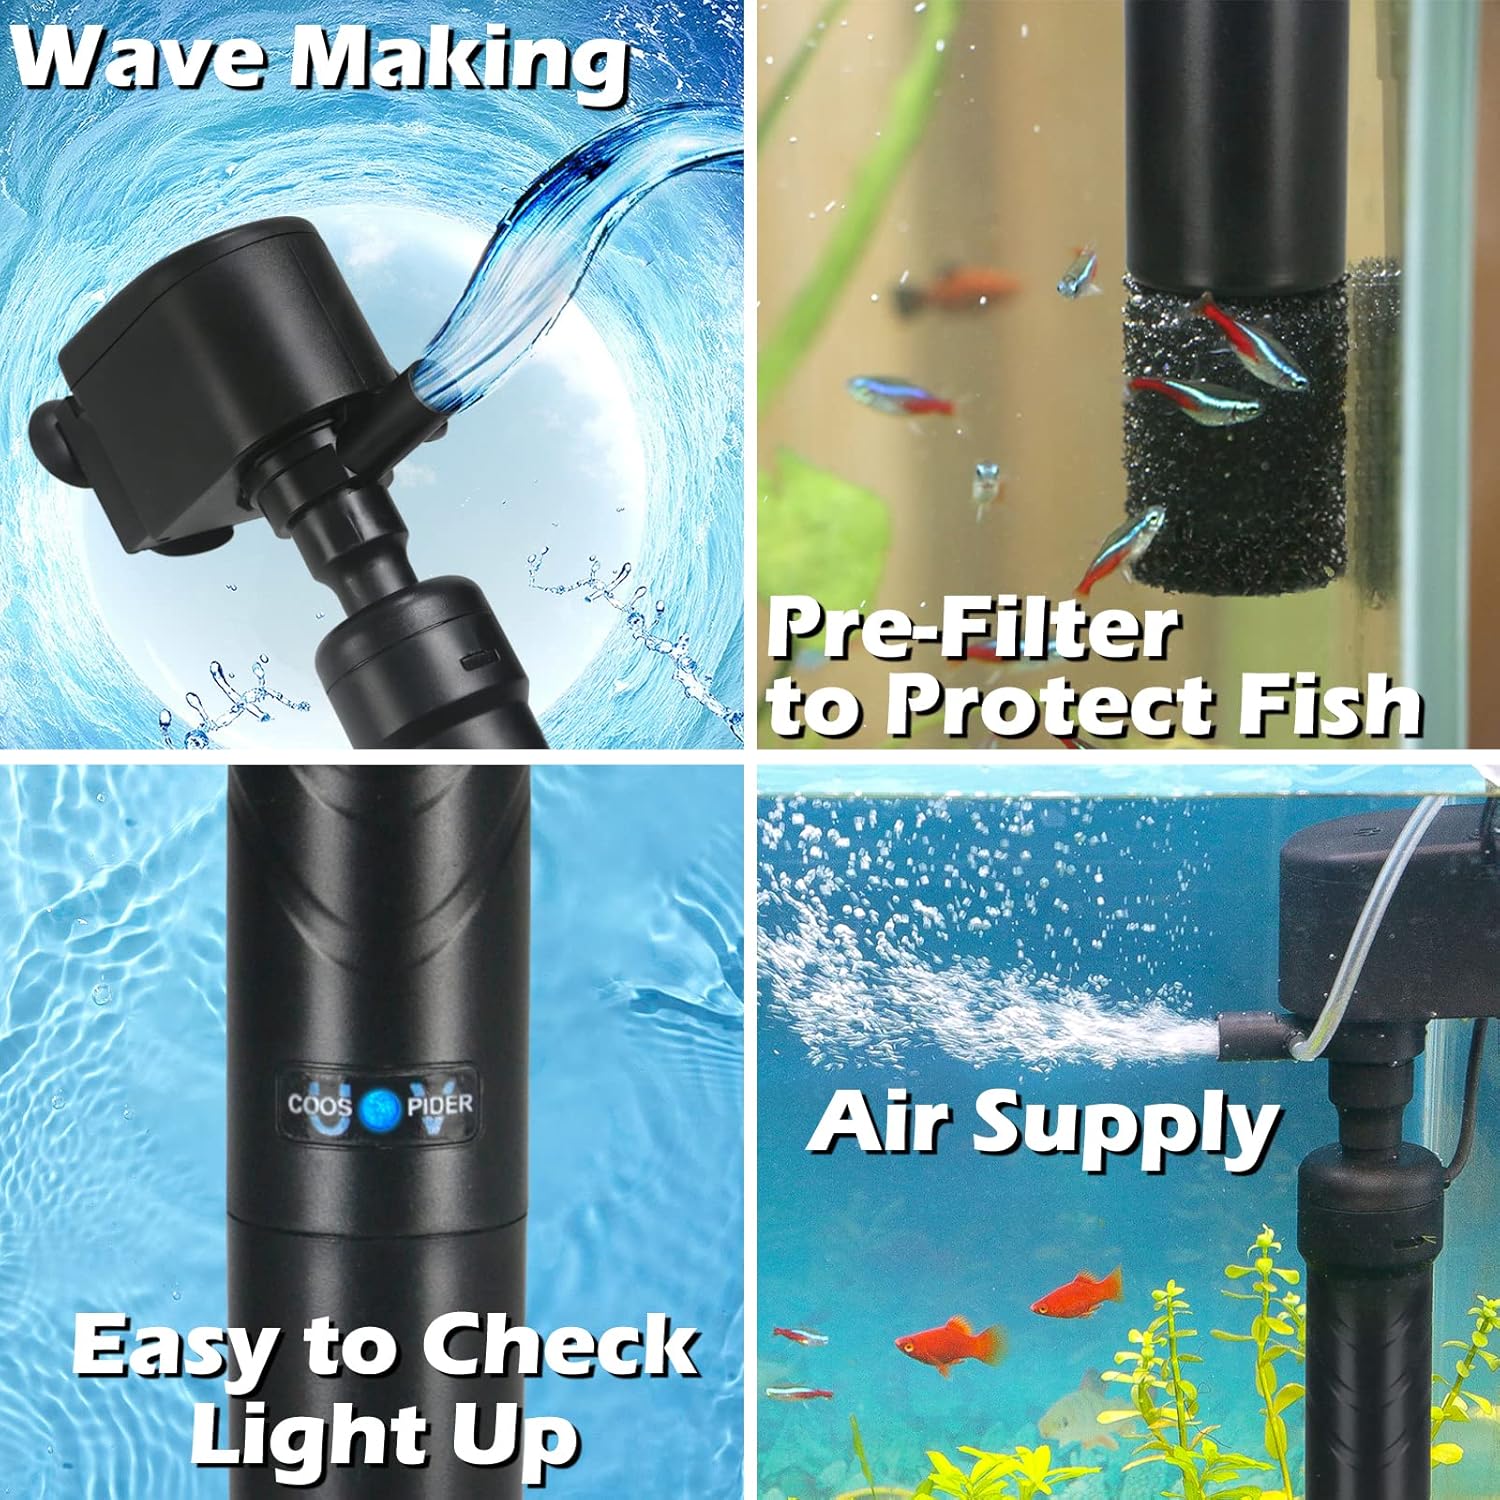
Figure 2: Key features of the COOSPIDER Aquarium UV Filter.

Figure 3: UV sterilization mechanism for clear water.
3. Safety Information
- Always unplug the unit from the power outlet before performing any maintenance, cleaning, or when handling the filter.
- Ensure your hands are dry when plugging or unplugging the unit.
- Do not operate the UV light outside of water. Direct exposure to UV light can be harmful to eyes and skin.
- This product is designed for submersible use only.
- Keep out of reach of children.
- Inspect the power cord and plug for any damage before each use. Do not use if damaged.
4. Package Contents
Please verify that all components are present and in good condition:
- COOSPIDER Aquarium UV Filter Unit (Model CTUV-H5P)
- Air Hose (14 inches)
- Suction Cups for mounting
- Instruction Manual

Figure 4: Product and packaging.
5. Installation and Setup
- Unpack: Carefully remove all components from the packaging.
- Inspect: Check the filter unit, power cords, and air hose for any signs of damage.
- Attach Air Hose: Connect the provided air hose to the air intake nozzle on the filter unit. Ensure a secure fit.
- Mounting: Attach the suction cups to the filter unit. Submerge the filter completely in your aquarium water. Press the suction cups firmly against the inside glass of the tank to secure the unit. Ensure the filter is positioned vertically and is fully submerged at all times during operation.
- Power Connection: Plug the water pump power cord into a suitable electrical outlet. Then, plug the UV light power cord into a separate outlet. The unit features separate switches for the pump and UV light.

Figure 5: Air hose attachment.

Figure 6: Suction cups for secure mounting.
6. Operating Instructions
- Power On: Once installed and fully submerged, plug in both power cords.
- Water Pump Operation: The water pump will begin circulating water immediately upon being plugged in.
- UV Light Operation: Use the separate switch on the UV light power cord to turn the UV light ON or OFF. A blue indicator light on the unit will confirm if the UV light is active.
- Air Supply Adjustment: The air supply feature will activate when the pump is running and the air hose is connected.
- Wave Making: The water outlet design facilitates water movement for wave-making.
- For optimal water clarity, it is recommended to operate the filter continuously.

Figure 7: UV light indicator.
7. Maintenance
Regular maintenance is crucial for the longevity and efficiency of your filter.
- Weekly/Bi-weekly Cleaning: The filter material (pre-filter sponge) should be cleaned every 1-2 weeks. Unplug the unit, remove it from the tank, and rinse the sponge thoroughly with old aquarium water (not tap water, to preserve beneficial bacteria).
- Monthly Replacement: Replace the filter material once a month to ensure optimal filtration.
- Impeller Cleaning: Periodically check and clean the impeller to prevent blockages and maintain pump performance. Unplug the unit, disassemble the pump head, and carefully remove any debris from the impeller.
- UV Lamp Replacement: The UV lamp has a limited lifespan. Replace it when the indicator light no longer illuminates or if you notice a decrease in water clarity despite regular filter cleaning. Refer to the specifications for compatible replacement lamps.

Figure 8: Impeller for water circulation.
8. Troubleshooting
| Problem | Possible Cause | Solution |
|---|---|---|
| Filter not running / No water flow |
|
|
| UV light not illuminating |
|
|
| Water remains cloudy/green |
|
|
| Reduced air bubbles |
|
|
9. Specifications
| Feature | Detail |
|---|---|
| Model Name | CTUV-H5P (H5P) |
| Brand | COOSPIDER |
| Recommended Tank Size | 40-100 Gallons |
| Flow Rate | 300 GPH (Gallons Per Hour) |
| UV Wavelength | 254 nm |
| Item Weight | 1.53 pounds |
| Product Dimensions (LxWxH) | 2.8 x 2.1 x 14.6 inches |
| Material | Aluminum, Plastic, Stainless Steel |
| Style | Submersible |
| Pump Wire Length | 4.5 ft |
| Lamp Wire Length | 5.5 ft |
| Air Hose Length | 14 inches |
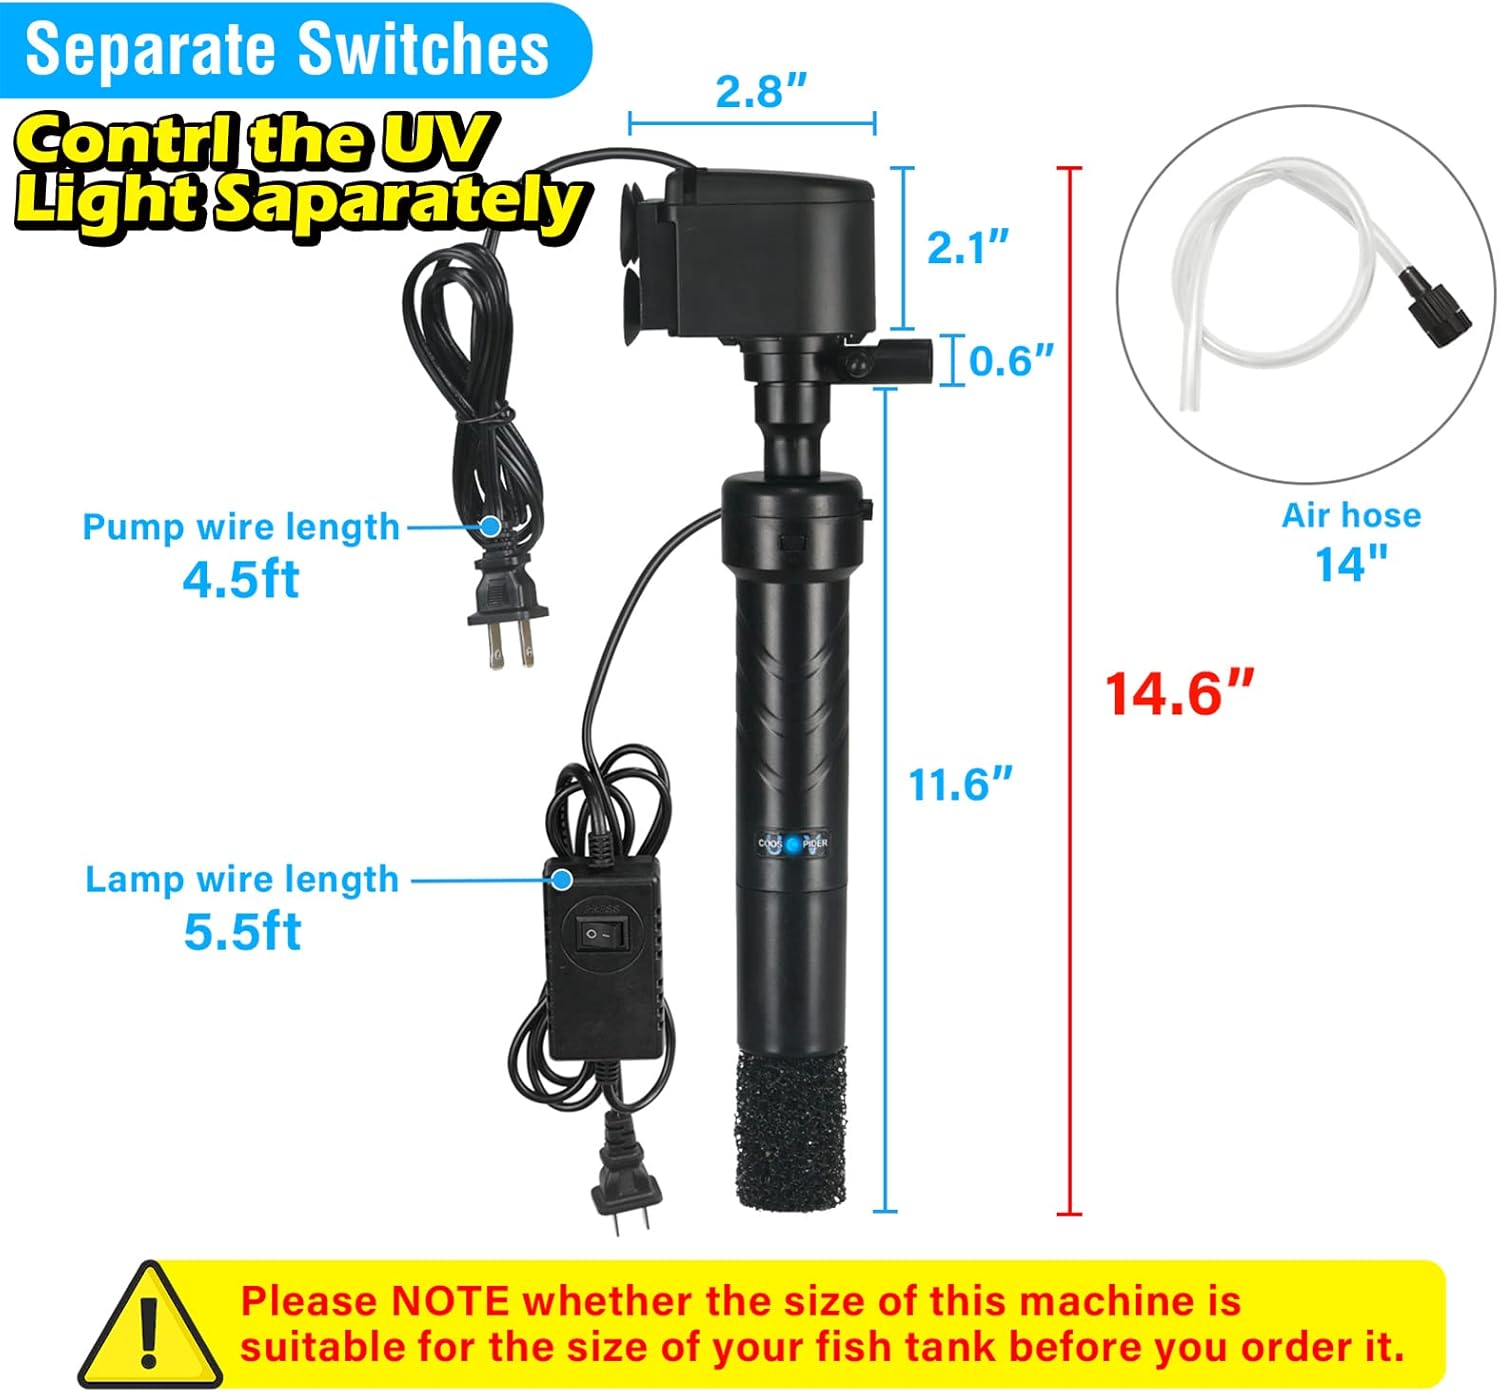
Figure 9: Product dimensions.
10. Warranty and Support
Warranty: This product comes with a 180-day manufacturer's warranty from the date of purchase. This warranty covers defects in materials and workmanship under normal use.
Customer Support: For technical assistance, troubleshooting, or warranty claims, please contact COOSPIDER customer service. You can find more information and contact details by visiting the official COOSPIDER store:

