
Beileshi 3-9x40EG
Beileshi 3-9x40EG Optical Rifle Scope User Manual
Model: 3-9x40EG
Introduction
Thank you for choosing the Beileshi 3-9x40EG Optical Rifle Scope. This manual provides detailed instructions for the proper setup, operation, and maintenance of your new rifle scope. Please read this manual thoroughly before use to ensure optimal performance and longevity of your device.

Image: The Beileshi 3-9x40EG Optical Rifle Scope, showcasing its main body, adjustment turrets, objective lens, eyepiece, and included 20mm mounting rings along with an Allen wrench.
Package Contents
Verify that all items listed below are included in your package:
- 1 x Beileshi 3-9x40EG Rifle Scope
- 1 x Lens Cover
- 1 x Allen Wrench
- 2 x 20mm Mounts
- 1 x Instructions Manual (this document)
- 1 x Cleaning Cloth
- 1 x CR2032 Battery
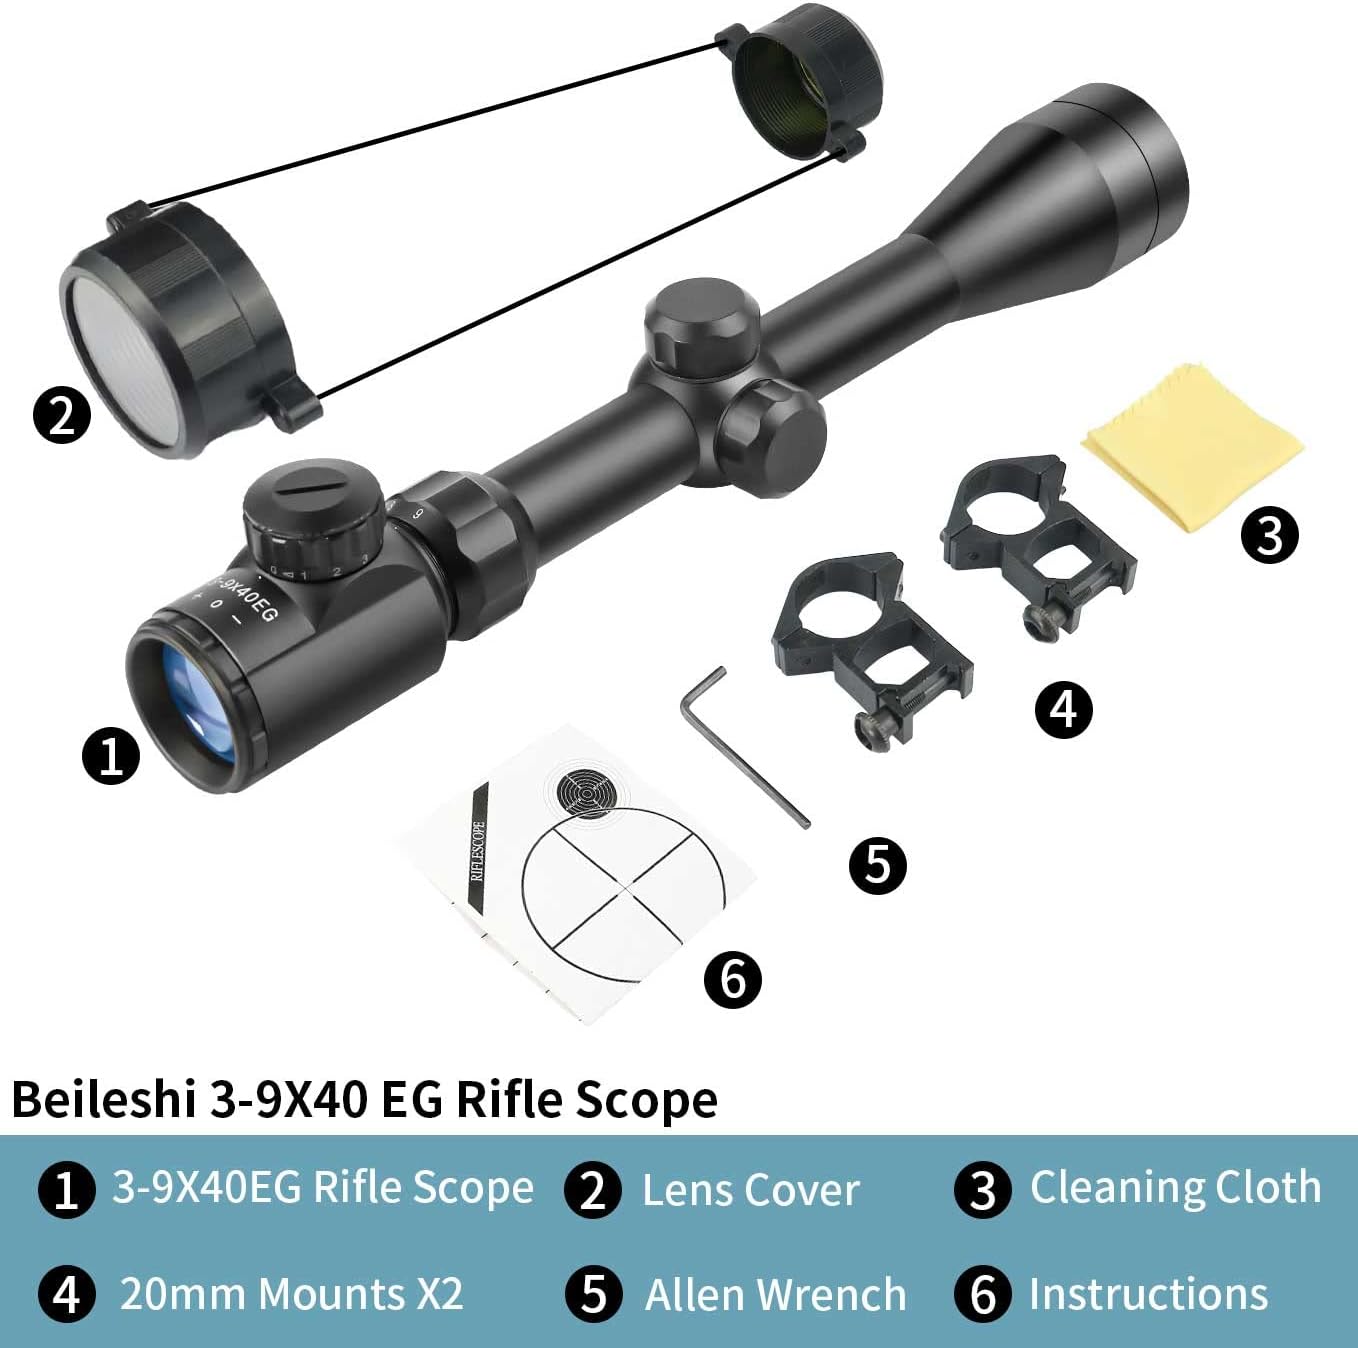
Image: A visual representation of all components included in the Beileshi 3-9x40EG Rifle Scope package, clearly labeled for identification.
Setup
1. Mounting the Scope
The Beileshi 3-9x40EG scope comes with two 20mm mounts designed for standard Weaver/Picatinny rails. Ensure your firearm has a compatible rail system.
- Loosen the screws on the 20mm mounts using the provided Allen wrench.
- Place the mounts onto your firearm's rail, ensuring they are spaced appropriately to support the scope evenly.
- Carefully place the scope into the lower halves of the mounts.
- Attach the upper halves of the mounts and tighten the screws evenly, ensuring the scope is level and the reticle is plumb. Do not overtighten.

Image: Close-up view of the two 20mm scope ring mounts, highlighting their design and dimensions for proper rail attachment.
2. Installing the Battery
The illuminated reticle requires one CR2032 battery. Locate the battery compartment, typically on the illumination control knob. Unscrew the cap, insert the CR2032 battery with the positive (+) side facing outwards, and then replace the cap.
3. Adjusting Diopter and Fast Focus Eyepiece
To achieve a clear reticle image, adjust the diopter. Point the scope at a plain, bright background (like a clear sky) and quickly glance through the eyepiece. Rotate the fast focus eyepiece until the reticle appears sharp and clear. This adjustment compensates for individual eyesight differences.

Image: A detailed view of the eyepiece end of the scope, indicating the diopter adjustment ring and the fast focus eyepiece for clear reticle focus.
Operating the Scope
1. Magnification Adjustment
The scope features a variable magnification from 3X to 9X. Rotate the magnification ring, located near the eyepiece, to adjust the zoom level according to your needs. Lower magnifications provide a wider field of view, while higher magnifications offer more detail for precise targeting.

Image: Comparison of the field of view at 3X magnification versus 9X magnification, demonstrating the effect of zoom on target size and surrounding visibility.
2. Illuminated Reticle
The scope is equipped with a red and green illuminated reticle, offering enhanced visibility in various lighting conditions. The illumination control knob, located on the left side of the scope, allows you to select between red or green illumination and adjust the brightness through 5 distinct levels for each color. Turn the knob to 'OFF' to conserve battery when not in use.
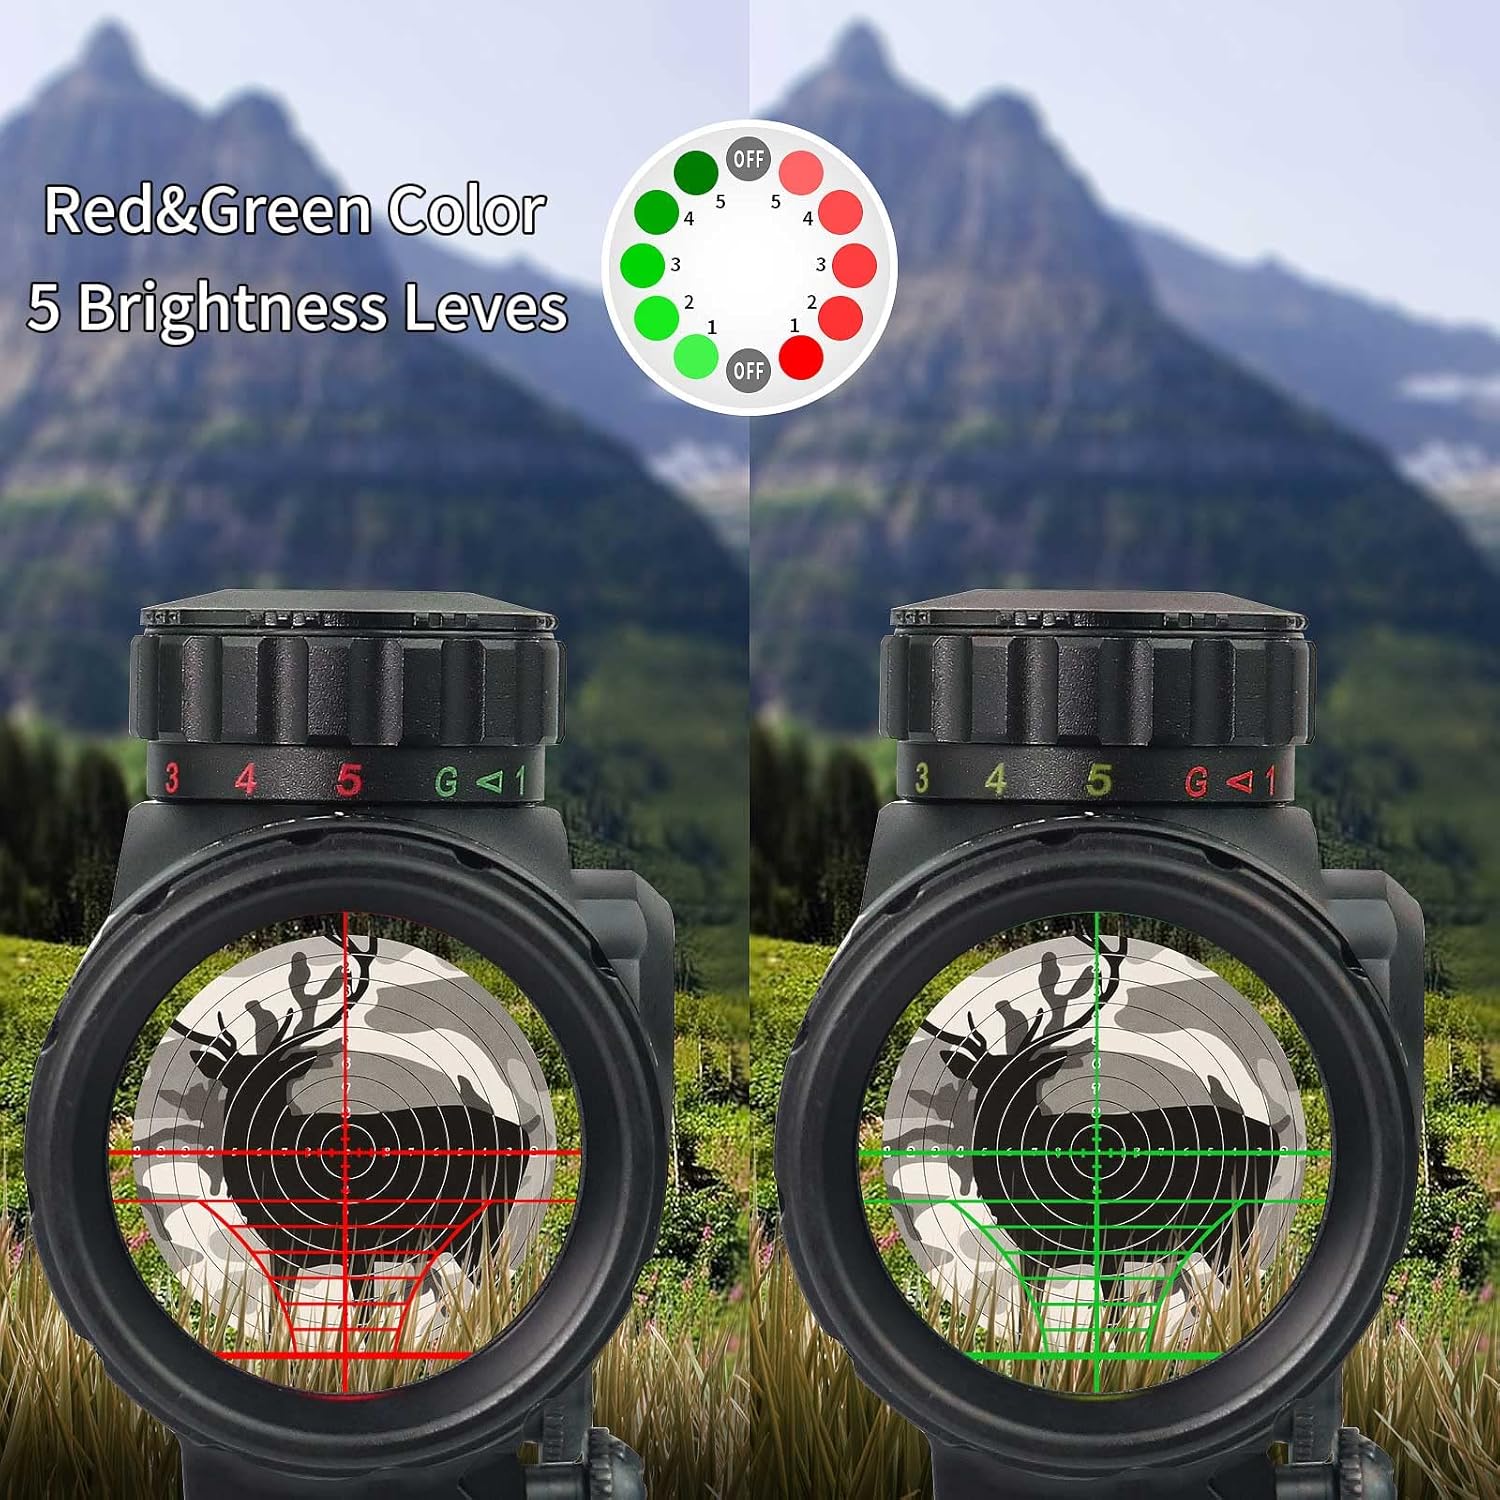
Image: A visual guide showing the red and green illuminated reticle options, along with the brightness control dial indicating 5 levels for each color.
3. Windage and Elevation Adjustment
The windage (horizontal) and elevation (vertical) turrets are used to zero your scope. These turrets are typically capped to protect them from accidental adjustments. Remove the caps to access the adjustment knobs. Each click of the turret moves the point of impact by 0.25 inches at 100 yards (0.25"@100yds).
- Elevation Turret: Located on top of the scope. Rotate clockwise to move the point of impact down, and counter-clockwise to move it up.
- Windage Turret: Located on the right side of the scope. Rotate clockwise to move the point of impact right, and counter-clockwise to move it left.
After zeroing, replace the turret caps to prevent unintentional changes.

Image: Detailed view of the windage and elevation adjustment turrets, showing their markings and design for precise adjustments.
4. Rangefinder Reticle
The scope features a rangefinder reticle designed to assist in estimating distances to targets of known size. Consult the specific reticle pattern and instructions provided with your scope for detailed usage of the rangefinding features.
Maintenance
Proper maintenance ensures the longevity and performance of your scope.
- Cleaning Lenses: Use the provided cleaning cloth or a soft, lint-free cloth specifically designed for optical lenses. Gently wipe away dust and smudges. For stubborn marks, use a small amount of lens cleaning fluid. Avoid using harsh chemicals or abrasive materials.
- Cleaning Body: Wipe the scope body with a soft, damp cloth. Dry thoroughly.
- Storage: Store the scope in a cool, dry place, away from direct sunlight and extreme temperatures. Use the lens covers when the scope is not in use to protect the lenses from dust and scratches.
- Waterproof/Fog-proof: While the scope is designed to be waterproof and fog-proof, avoid submerging it in water or exposing it to extreme temperature changes unnecessarily.
Troubleshooting
| Problem | Possible Cause | Solution |
|---|---|---|
| Blurry image | Improper diopter adjustment; dirty lenses; fogging | Adjust diopter; clean lenses; allow scope to acclimate to temperature. |
| Reticle not illuminating | Battery low or incorrectly installed; illumination knob off | Replace CR2032 battery; ensure battery is inserted correctly (+ side out); turn illumination knob to a numbered setting. |
| Point of impact shifts | Mounts loose; scope damaged; recoil | Check and tighten mounts; inspect scope for damage; ensure proper shooting technique. |
| Difficulty adjusting turrets | Turret caps still on; debris | Remove turret caps; clean around turrets. |
Specifications
| Feature | Specification |
|---|---|
| Magnification | 3-9X |
| Objective Diameter | 40mm (1.57 inches) |
| Field of View | 25-14 @ 100yds |
| Eye Relief | 3.3-2.7 inches |
| Length | 12.4 inches |
| Weight | 0.86 lbs |
| Reticle Illumination | Red & Green, 5 brightness levels |
| Exit Pupil | 0.2-0.67 inches |
| Click Value | 0.25" @ 100yds |
| Optical Coating | Fully coated |
| Material | Aerospace Aluminum Alloy |
| Features | Shockproof, Waterproof, Fog-proof |
| Mounting Type | Weaver Mount (20mm) |
| Battery Type | CR2032 |
Warranty and Support
Beileshi products are manufactured to high-quality standards. For any issues or inquiries regarding your scope, please contact the seller or manufacturer directly. Keep your purchase receipt as proof of purchase for any warranty claims.
For further assistance, you may visit the official Beileshi store page: Beileshi Store
Ask a question about this manual
Ask about setup, troubleshooting, compatibility, parts, safety, or missing instructions. Manuals+ will review the question and use this page’s manual context to help answer it.