
BC-1692, BC-2692
Instruction Manual: Replacement Drive Belt
For Betty Crocker Bread Maker Models BC-1692 & BC-2692
1. Product Overview
This product is a replacement drive belt specifically designed for Betty Crocker Bread Maker Models BC-1692 and BC-2692. The drive belt is a critical component that transfers power from the motor to the kneading paddle, enabling the bread maker to mix and knead dough effectively. Replacing a worn or broken belt can restore your bread maker's functionality.

Image 1.1: The replacement drive belt. This flexible, toothed rubber belt is designed for durability and precise power transmission within your bread maker.
2. Compatibility and Identification
It is crucial to verify your bread maker's model number before installing this replacement belt. This belt is ONLY compatible with Betty Crocker Bread Maker Models BC-1692 and BC-2692. Using the incorrect belt may lead to improper operation or further damage to your appliance.

Image 2.1: Important reminder to locate your bread maker's model number. This information is typically found on an adhesive decal, ink stamp, or embedded impression on the sides, bottom, or control panel of the machine.
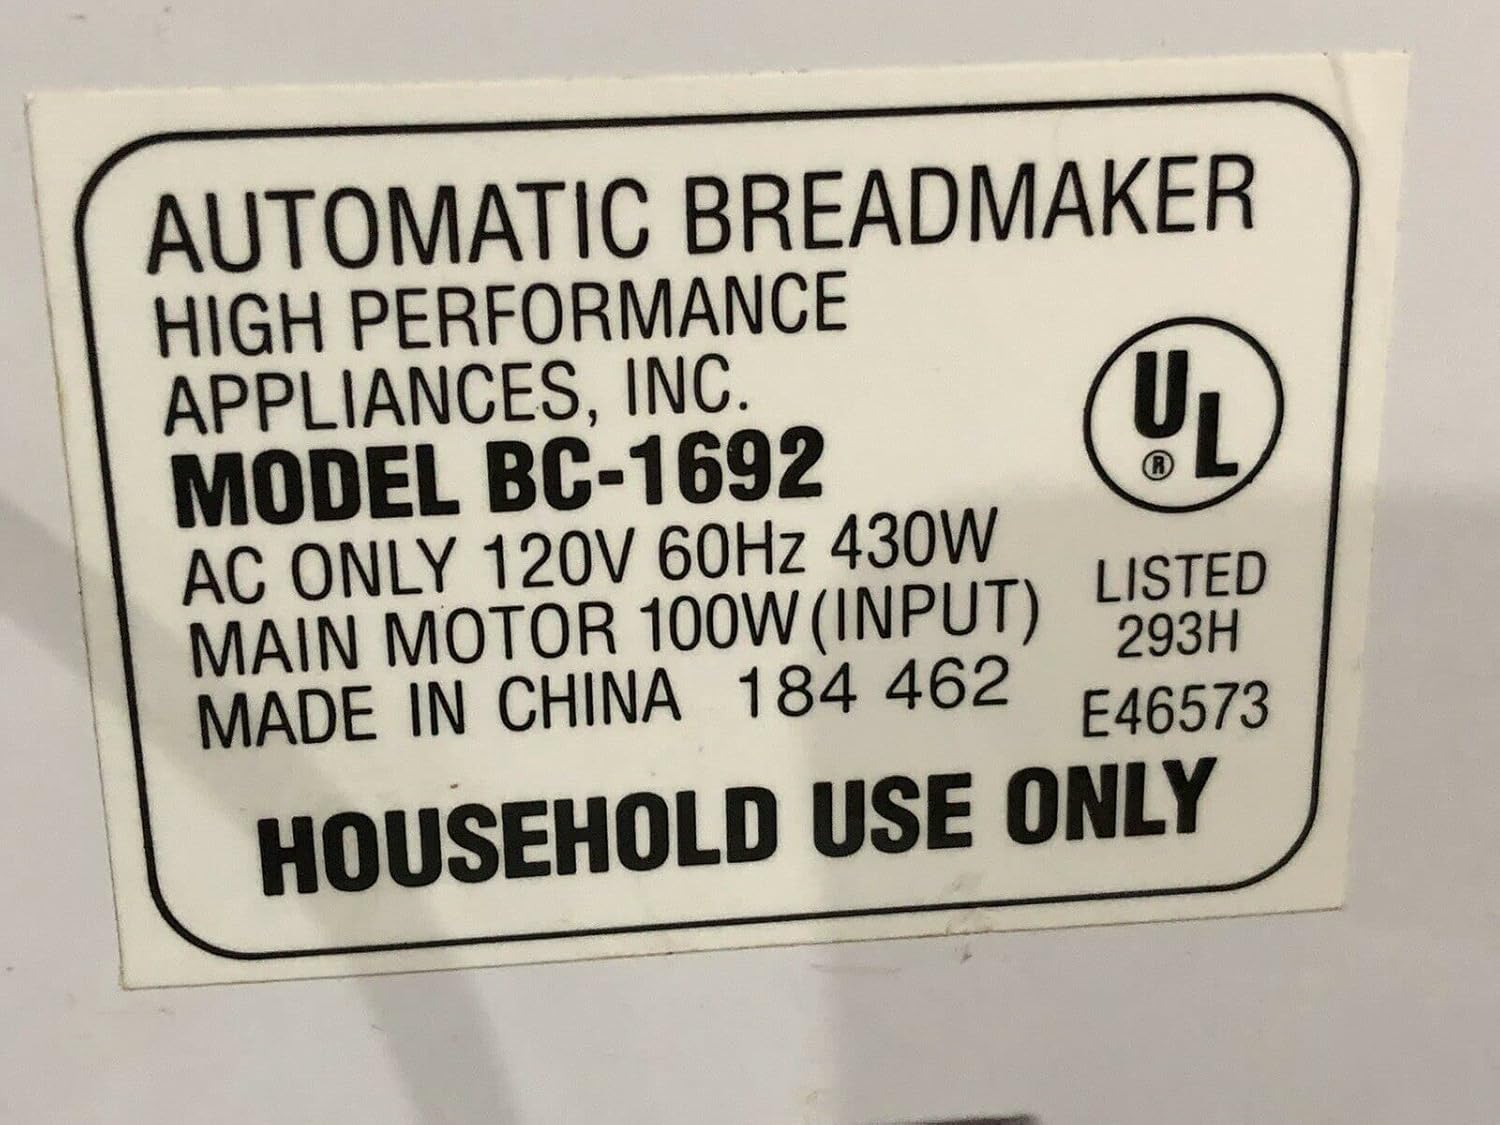
Image 2.2: Example of a typical model identification label. Ensure your label clearly states 'BC-1692' or 'BC-2692' to confirm compatibility with this replacement belt.
3. Installation Instructions
Safety First: Always unplug your bread maker from the power outlet before attempting any repairs or maintenance.
- Prepare the Work Area: Clear a clean, well-lit workspace. Gather necessary tools, which may include screwdrivers (Phillips and flathead), pliers, and a small container for screws.
- Access the Interior: Carefully turn the bread maker upside down. Locate and remove the screws securing the bottom panel. Gently pry open the bottom panel to expose the internal components, including the motor and drive mechanism.
- Locate the Old Belt: Identify the existing drive belt. It will typically be a rubber belt connecting the motor pulley to the main drive shaft that turns the kneading paddle.
- Remove the Old Belt: If the old belt is still intact, carefully roll it off the pulleys. If it is broken, remove any remaining pieces. Inspect the pulleys for any debris or damage and clean them if necessary.
- Install the New Belt: Place the new belt around the smaller motor pulley first. Then, carefully stretch and guide the belt onto the larger drive shaft pulley. Ensure the belt is seated correctly and snugly on both pulleys. The belt should be taut but not overly tight.
- Test Rotation: Manually rotate the main drive shaft (or the kneading paddle shaft from the top of the bread maker) to ensure the new belt moves smoothly and the motor pulley rotates in sync.
- Reassemble: Carefully replace the bottom panel, ensuring all wires are clear and not pinched. Secure the panel with the screws removed earlier.
- Final Test: Plug in the bread maker and perform a brief test cycle (e.g., a mix cycle) to confirm the belt is functioning correctly and the kneading paddle rotates as expected.
4. Maintenance
While the drive belt itself requires minimal maintenance, regular inspection can prolong its life and ensure optimal performance of your bread maker.
- Periodic Inspection: Every 6-12 months, or if you notice unusual noises or performance issues, consider opening the bottom panel (following installation steps 1-3) to inspect the belt.
- Check for Wear: Look for cracks, fraying, stretching, or missing teeth on the belt. A worn belt can slip, leading to incomplete kneading.
- Cleanliness: Ensure no dough, flour, or other debris has accumulated around the pulleys or belt, as this can cause slippage or premature wear. Use a dry cloth or soft brush for cleaning.
- Proper Storage: If storing the bread maker for an extended period, ensure it is in a dry, cool place to prevent material degradation of the belt.
5. Troubleshooting
If you encounter issues after replacing the belt, consider the following common problems and solutions:
| Problem | Possible Cause | Solution |
|---|---|---|
| Kneading paddle not turning or turning slowly. | Belt not properly seated; Belt too loose/tight; Incorrect belt size; Motor issue. | Re-seat belt on pulleys; Ensure correct belt for model; Consult a technician if motor suspected. |
| Loud grinding or squealing noise during operation. | Belt rubbing against casing; Debris in mechanism; Worn bearings (not belt related). | Check belt alignment; Clean internal area; If noise persists, professional inspection may be needed. |
| Burning smell. | Belt slipping excessively; Motor overheating. | Ensure belt is taut and clean; Unplug immediately and allow to cool; If smell persists, discontinue use and seek professional help. |
6. Specifications
- Product Type: Replacement Drive Belt
- Compatibility: Betty Crocker Bread Maker Models BC-1692, BC-2692
- Material: Durable Rubber
- ASIN: B0B72F5Z2T
- Date First Available: July 19, 2022
7. Support
For further assistance, questions regarding installation, or to report a defective product, please contact the seller directly through the platform where the purchase was made. Provide your order number and a detailed description of the issue for prompt support.
Please note that specific warranty terms may vary by seller. Refer to your purchase documentation or contact the seller for details regarding returns or replacements.
Ask a question about this manual
Ask about setup, troubleshooting, compatibility, parts, safety, or missing instructions. Manuals+ will review the question and use this page’s manual context to help answer it.