Introduction
This manual provides instructions for the safe and effective use of your Energizer TAC500 Rechargeable LED Flashlight. Please read this manual thoroughly before operating the device and retain it for future reference.
Safety Information
Observe the following safety precautions to prevent injury or damage to the flashlight:
- Do not look directly into the LED light. The intense light can cause temporary vision impairment.
- Keep out of reach of children.
- Do not attempt to disassemble or modify the flashlight. This may void the warranty and pose a safety risk.
- Use only the provided Micro-USB charging cable or a certified equivalent.
- Avoid exposing the flashlight to extreme temperatures or direct sunlight for prolonged periods.
- Although rated IPX4 water resistant, do not submerge the flashlight in water.
Package Contents
Verify that all items are present in your package:
- 2 x Energizer TAC500 Rechargeable LED Flashlights
- 2 x Micro-USB Charging Cables
- 2 x Lanyards

Image: Contents of the Energizer TAC500 package, including two flashlights, charging cables, and lanyards.
Product Features
- High Brightness: 500 lumens LED light, providing powerful illumination.
- Long Beam Distance: Up to 200 meters, suitable for various outdoor and emergency scenarios.
- Multiple Light Modes: High, Low, and Strobe settings for versatile use.
- Rechargeable: Integrated lithium-ion battery with Micro-USB charging.
- Durable Construction: Aircraft-grade aluminum body with a shatterproof lens.
- Water Resistant: IPX4 rating for protection against splashing water.
- Convenient Design: Features an on/off push button and a lanyard loop for easy carrying.

Image: The Energizer TAC500 flashlight providing 500 lumens of light, illuminating a path.
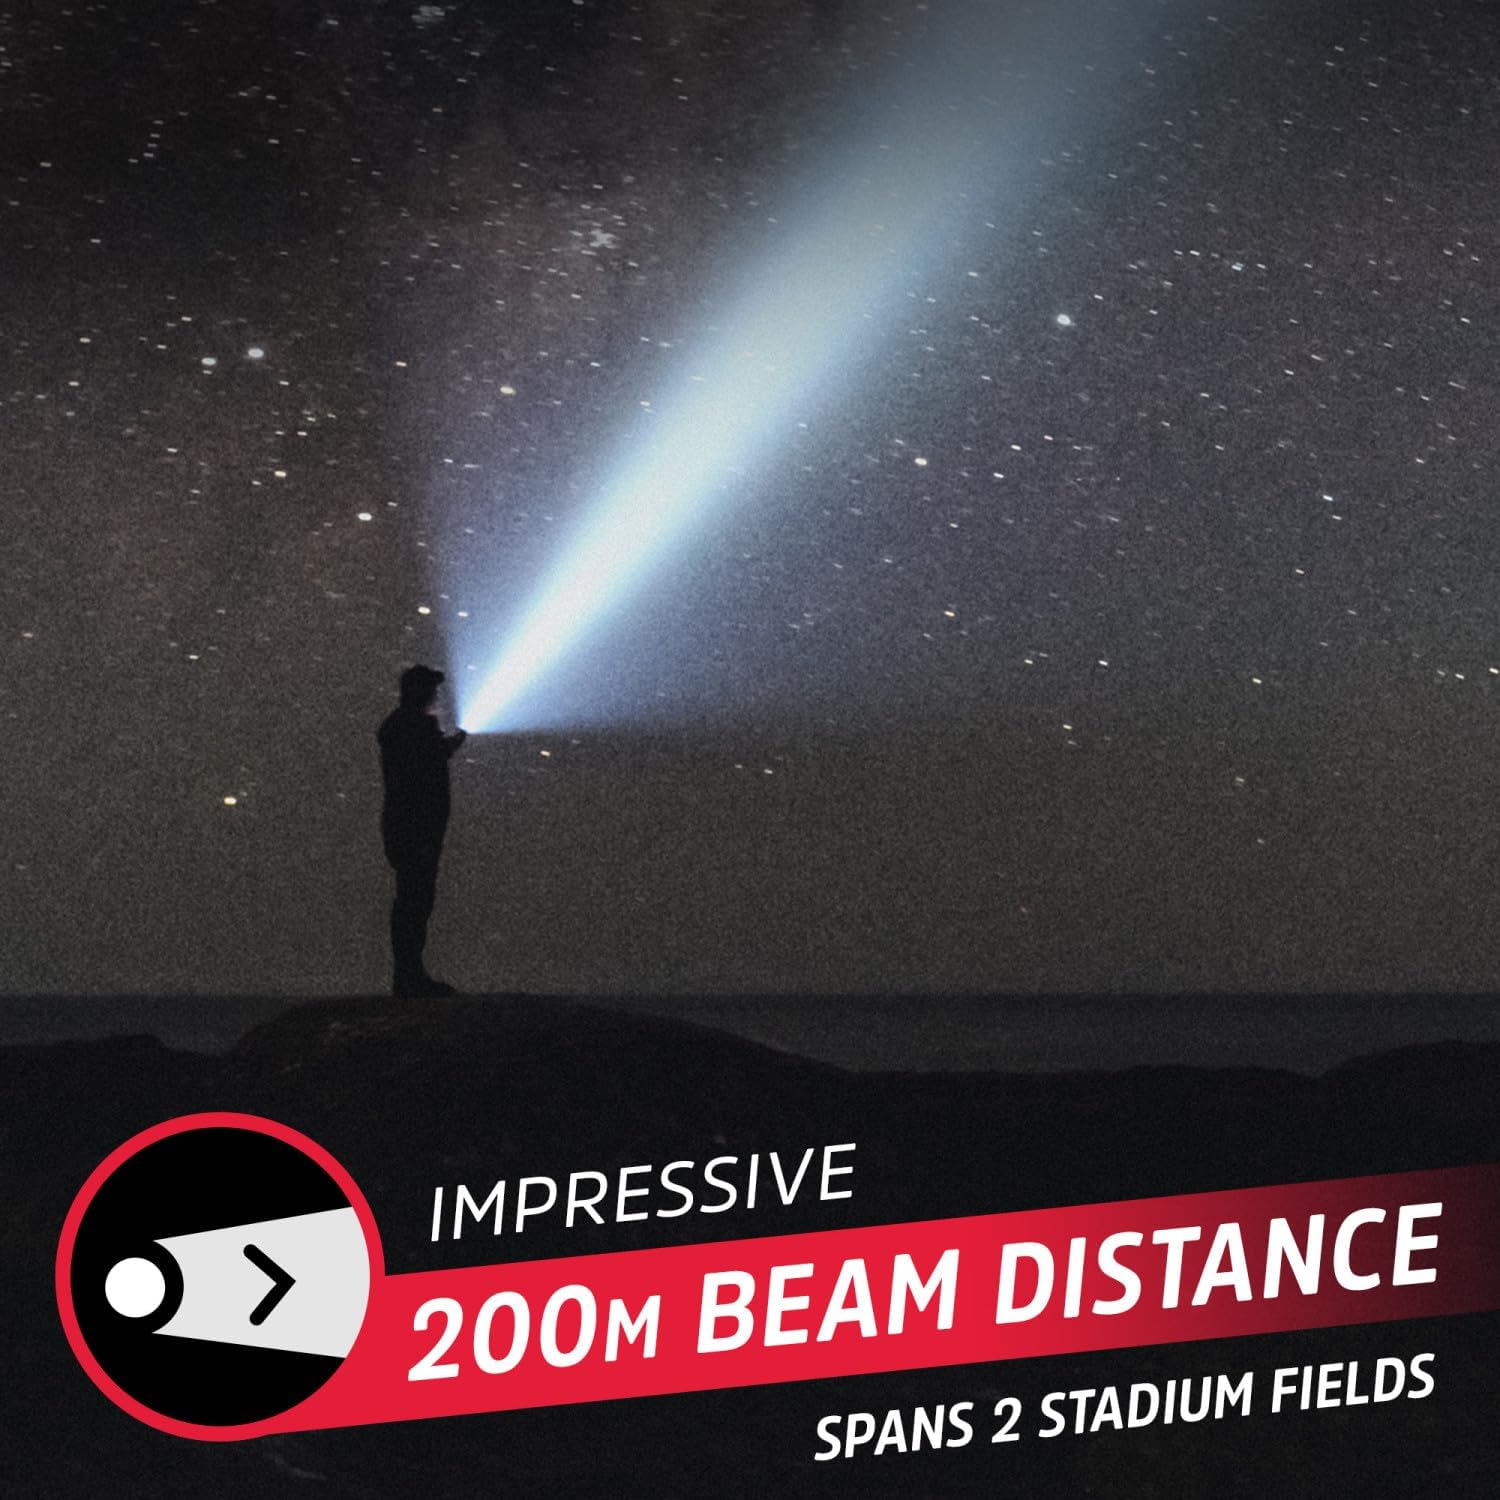
Image: The flashlight's impressive 200-meter beam distance, reaching far into the night.

Image: Detailed view of the flashlight's design, highlighting the power button, water resistance, and lanyard attachment point.
Setup
Charging the Flashlight
Before first use, fully charge the flashlight. The integrated lithium-ion battery is not user-replaceable.
- Locate the Micro-USB charging port on the flashlight. It is typically covered by a rubber flap for water resistance.
- Open the rubber flap.
- Connect the small end of the Micro-USB charging cable to the flashlight's charging port.
- Connect the larger end of the USB cable to a compatible USB power source (e.g., computer USB port, USB wall adapter).
- The power button LED indicator will illuminate red during charging.
- Once fully charged, the LED indicator will turn green.
- Disconnect the charging cable and securely close the rubber flap to maintain water resistance.
A full charge provides approximately 4 hours of runtime on high setting, and up to 7 hours on low setting.

Image: The flashlight in use, demonstrating its extended runtime on lower settings.
Operating Instructions
Power On/Off and Mode Selection
The flashlight features a single push button for operation.
- To Turn On: Press the power button once. The flashlight will turn on in High mode.
- To Change Modes: While the flashlight is on, press the power button repeatedly to cycle through the modes: High → Low → Strobe.
- To Turn Off: Continue pressing the power button until the flashlight cycles past the Strobe mode and turns off. Alternatively, if the flashlight remains in one mode for more than 5 seconds, the next press will turn it off directly.
Using the Lanyard
Attach the included lanyard to the lanyard loop at the tail end of the flashlight for secure carrying and to prevent accidental drops.
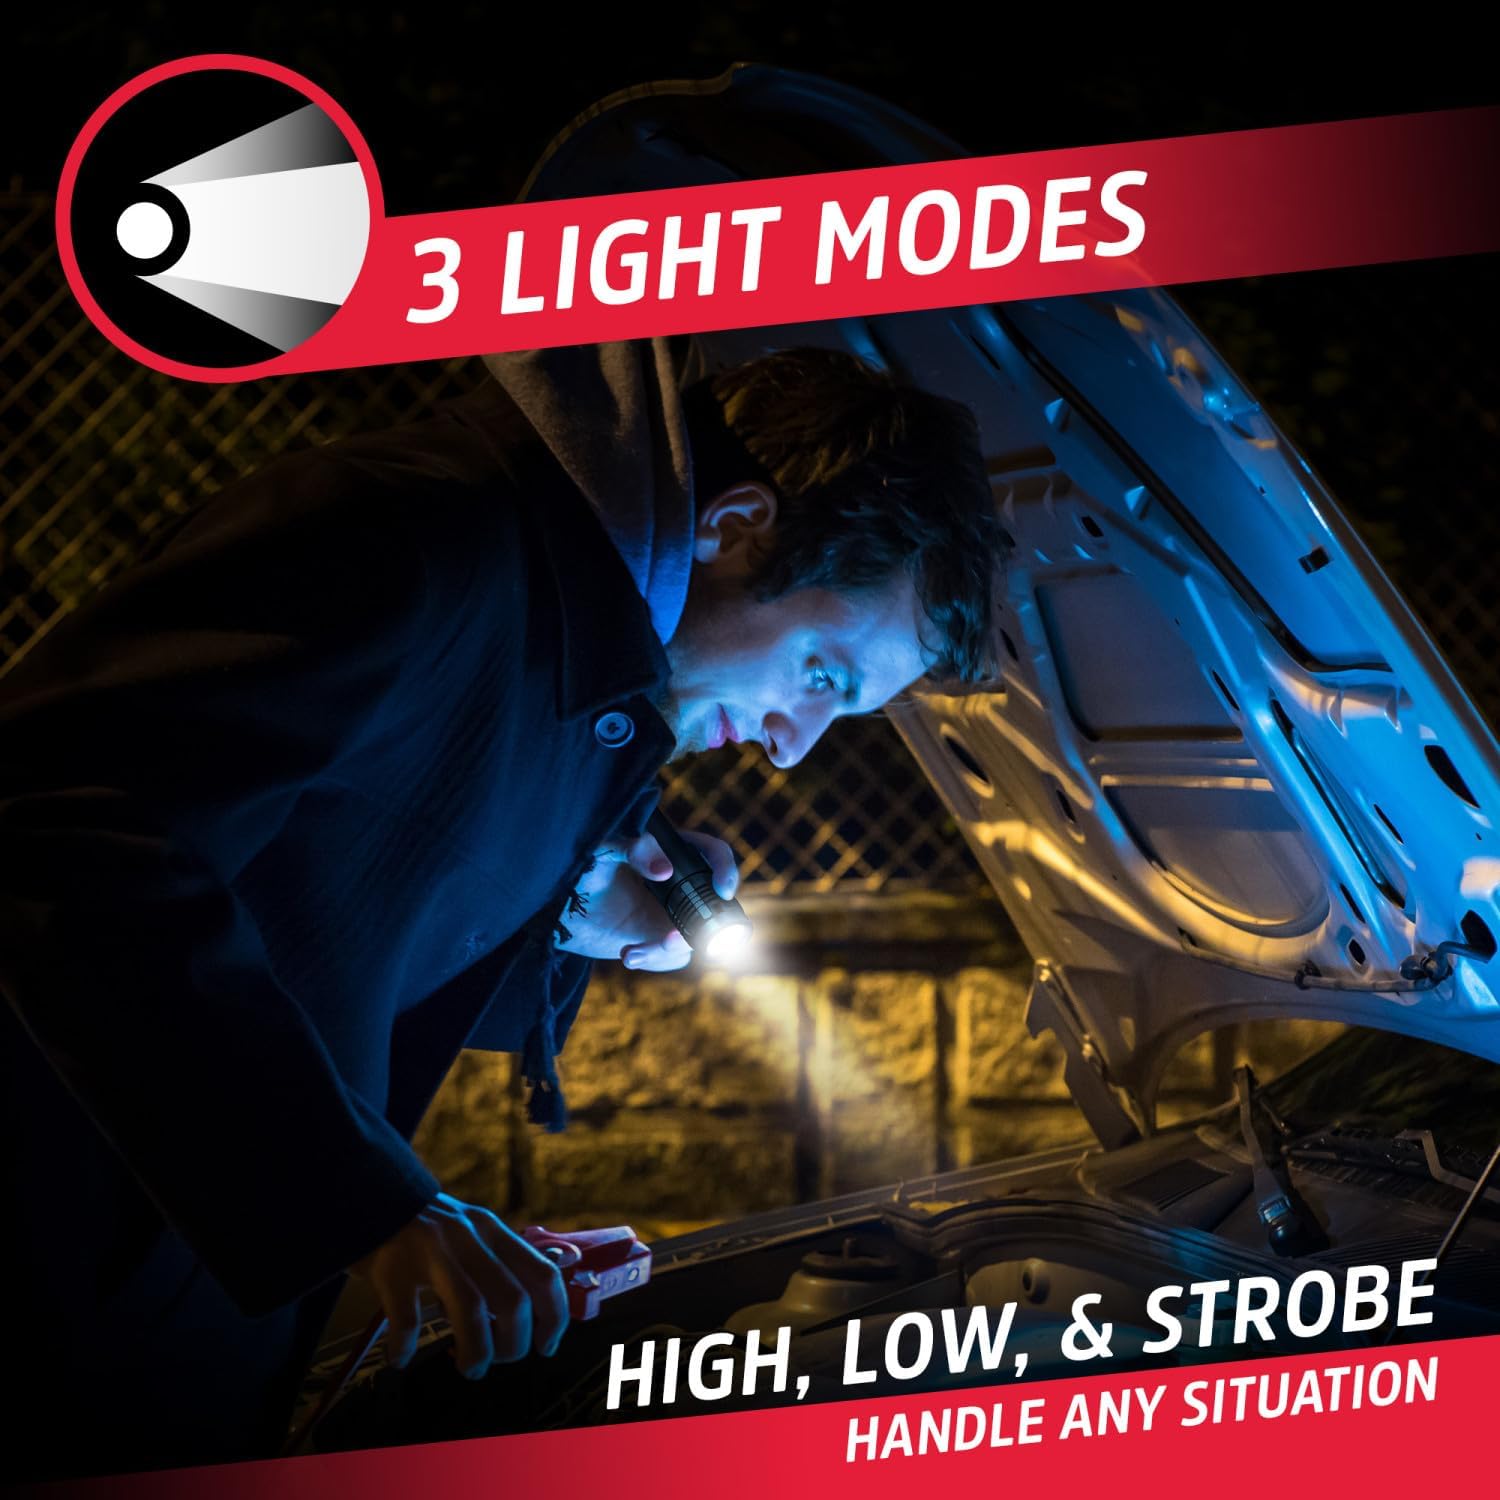
Image: The flashlight in use, demonstrating its versatility across different light modes for various tasks.
Maintenance
- Cleaning: Wipe the flashlight with a soft, damp cloth. Do not use abrasive cleaners or solvents.
- Storage: Store the flashlight in a cool, dry place away from direct sunlight when not in use. For long-term storage, charge the battery every 3-6 months to maintain battery health.
- Battery: The lithium-ion battery is built-in and not user-replaceable. Do not attempt to open the flashlight to replace the battery.
Troubleshooting
| Problem | Possible Cause | Solution |
|---|---|---|
| Flashlight does not turn on. | Battery is depleted. | Charge the flashlight using the Micro-USB cable. |
| Flashlight does not charge. | Charging cable or power source issue. | Ensure the Micro-USB cable is securely connected. Try a different USB cable or power source. |
| Light output is dim. | Battery is low. | Recharge the flashlight. |
| Cannot change light modes. | Button not pressed correctly or internal issue. | Ensure the button is pressed firmly. If the issue persists, contact customer support. |
Specifications
| Feature | Detail |
|---|---|
| Model Number | ENVMHHL8A |
| Light Output | 500 Lumens (High) |
| Beam Distance | Up to 200 meters |
| Light Modes | High, Low, Strobe |
| Power Source | Rechargeable Lithium-Ion Battery |
| Charging Port | Micro-USB |
| Runtime (High) | Approximately 4 hours |
| Runtime (Low) | Up to 7 hours |
| Water Resistance | IPX4 (Splash Resistant) |
| Material | Aircraft-grade Aluminum, Plastic |
| Dimensions | 5"D x 1"W x 1"H (approximate) |
| Weight | 0.66 Pounds (approximate) |
Warranty and Support
Energizer products are manufactured to high quality standards. For warranty information or technical support, please refer to the official Energizer website or contact their customer service department. Keep your proof of purchase for warranty claims.
For further assistance, visit the Energizer Store on Amazon.


