1. Introduction
The ROVE Ultimate 3-Lead Hardwire Kit is designed to provide continuous power to your compatible ROVE dash camera, enabling 24-hour parking monitoring and a clean, integrated installation. This kit ensures your dash cam remains operational even when your vehicle is turned off, offering enhanced security and peace of mind.
1.1. Compatibility
This hardwire kit is specifically designed for ROVE dash camera models with a USB-C port, including:
- ROVE R2-4K (USB-C Port Only)
- ROVE R2-4K PRO
- ROVE R2-4K DUAL
- ROVE R2-4K DUAL PRO
- ROVE R3
Important Note:
- The included fuse taps are NOT compatible with the following vehicles due to their unique fuse box design: 2021 Ford F150, 2011 Ford F150 Lariat, Ford F350, 2011 Ford Edge, 2013 Ford Explorer, 2013 Ford Expedition, 2021 Ford Ranger, 2013 Ford F150, 2016 Ford Expedition, 2014 Ford F250 Super Duty, Mazda CX5 2021, 2012 Chrysler 300C AWD, 2024 GMC Sierra HD, 2014 Jeep Cherokee KL, 2021 Chevrolet Tahoe, 2021 Jeep Grand Cherokee, 2022 Jeep Gladiator, 2023 Hyundai Palisade & Audi Q5.
2. Box Contents
The ROVE Ultimate Hardwire Kit includes all necessary components for a seamless installation:
- Type C Hard Wire Kit (12V-24V DC to 5V DC Regulator with 4 meters cable)
- 30V Voltage Meter
- 8 Various Size and Types of Piggy Back Fuse Taps
- Fuse Puller
- Wire Ties (4x)
- Trim Tool (1x)
- Cable Clips (4x)
- User Manual
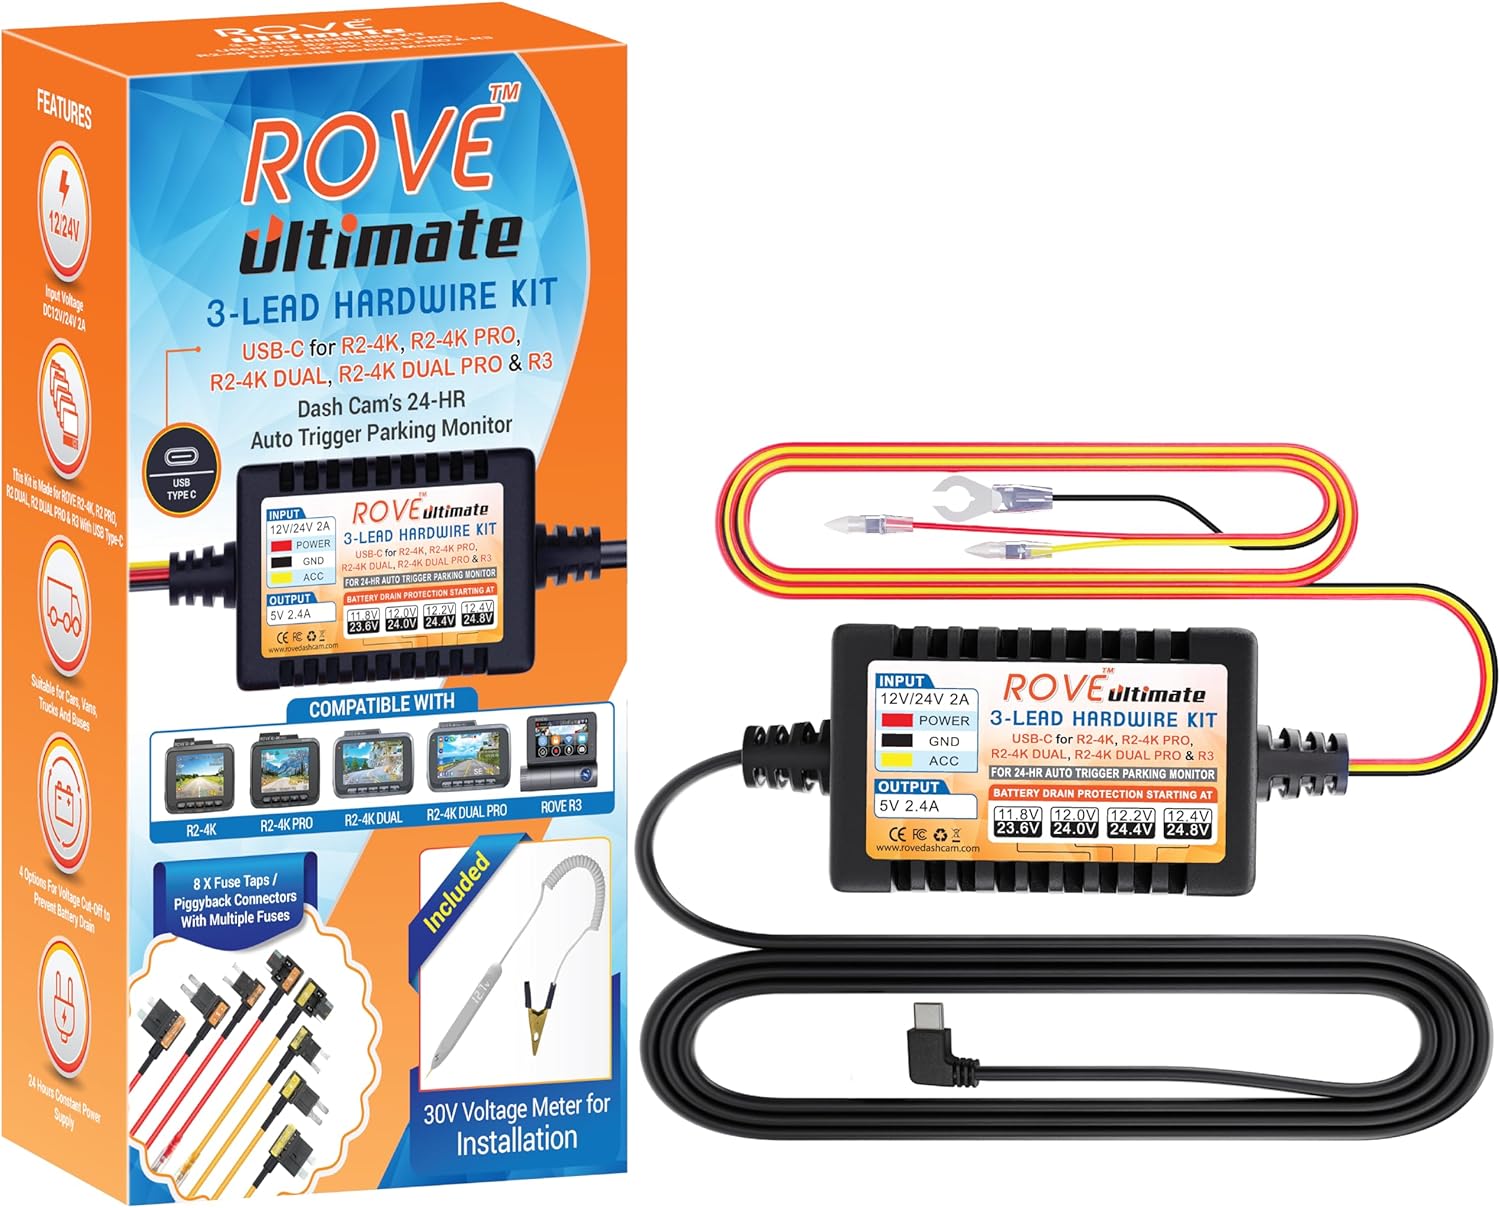
Image: ROVE Ultimate Hardwire Kit packaging and main components.
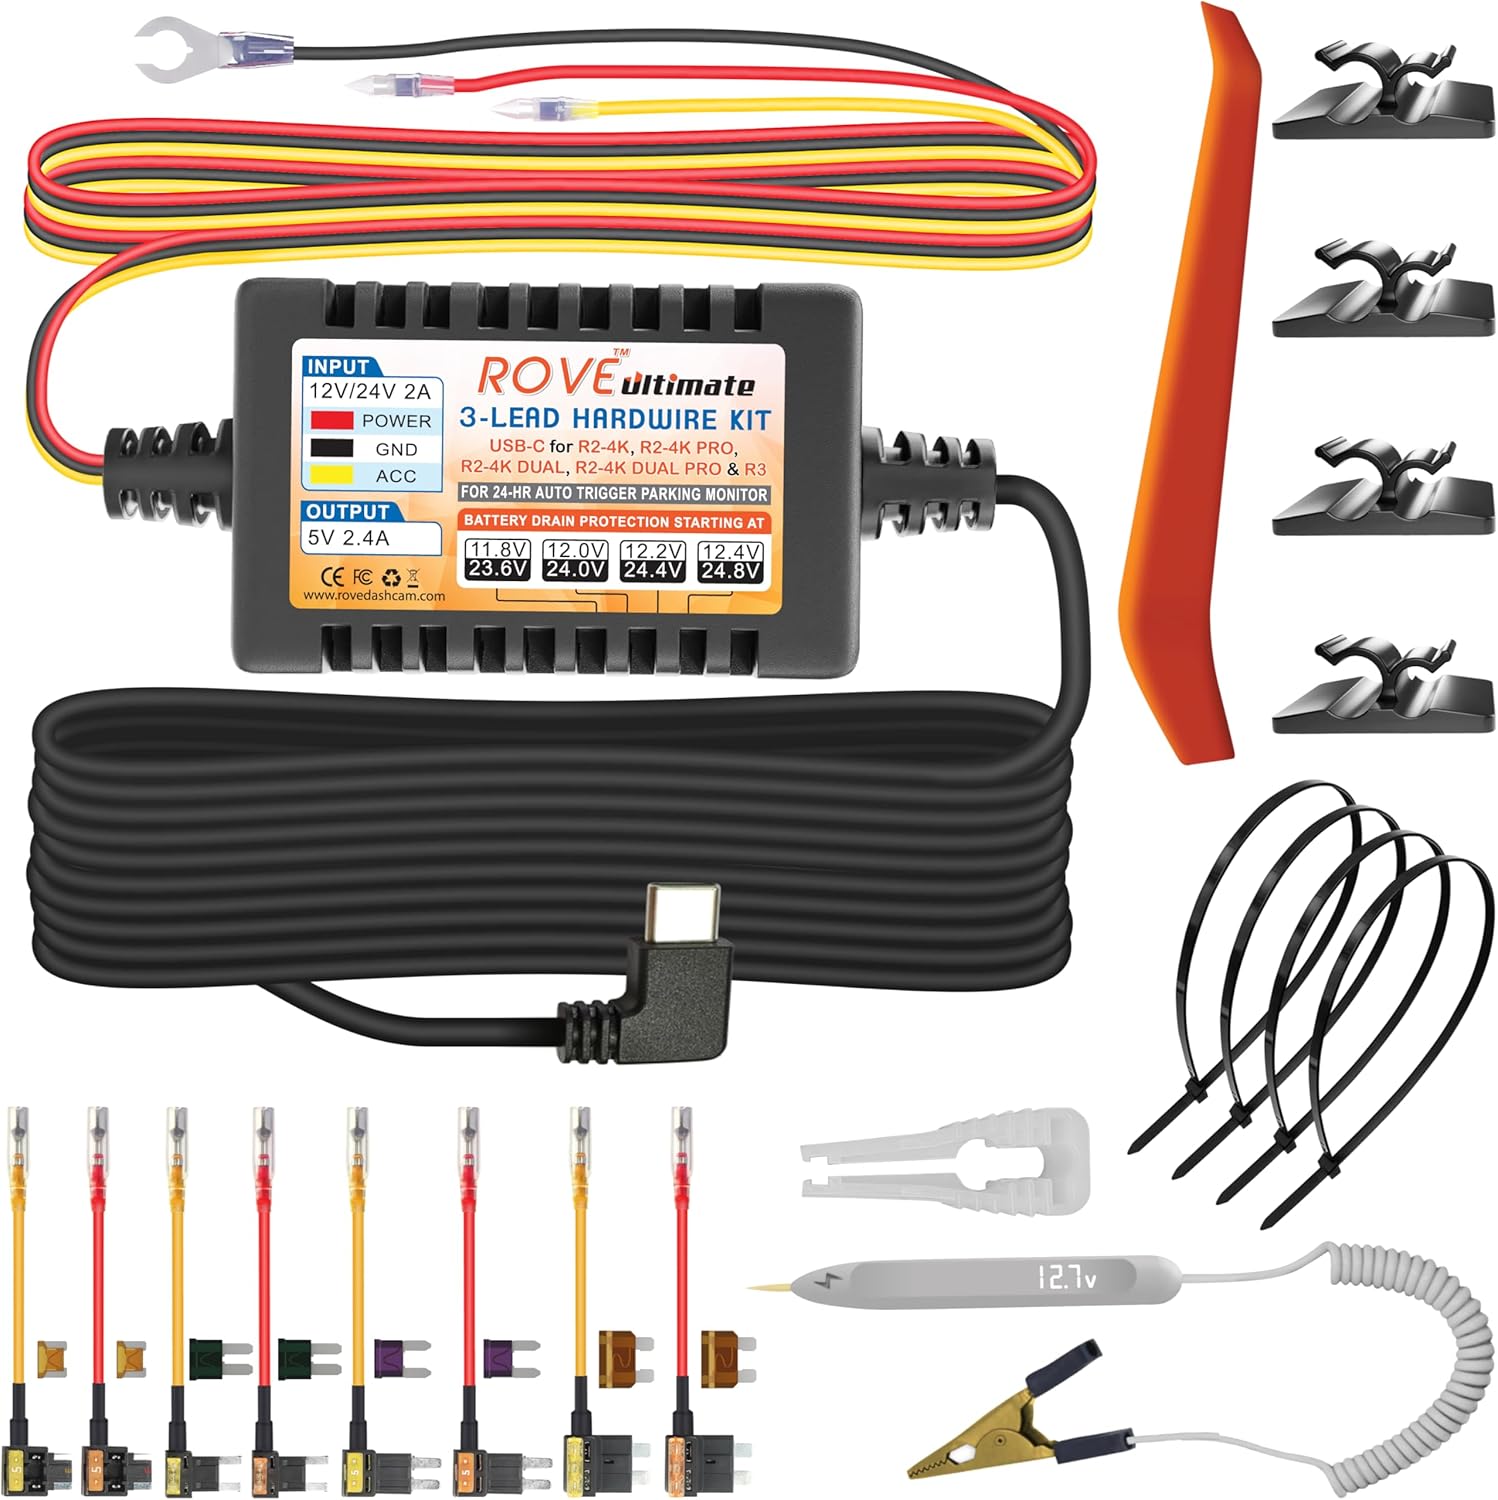
Image: All components of the ROVE Ultimate Hardwire Kit laid out.
3. Installation Guide
Follow these steps for a clean and secure installation of your ROVE Ultimate Hardwire Kit:
- Decide a perfect place to mount the dash cam: Choose an optimal location on your windshield that does not obstruct your view.

Image: Illustration of mounting the dash cam on the windshield.
- Locate your vehicle's fuse box: Refer to your vehicle's owner's manual to find the fuse box location, typically under the dashboard or in the engine bay.

Image: Illustration of locating the vehicle's fuse box.
- Determine the correct fuse slot for the hardwire kit installation: Use the included 30V Voltage Meter to identify a constant power fuse (always on) and an ACC power fuse (on only when the ignition is on).

Image: Close-up of a fuse box with various fuses.
Troubleshooting Tip:
Ensure correct orientation of the fuse taps. If the camera does not automatically power on/off with the vehicle, re-check the fuse tap orientation. The included voltmeter helps identify the 'hot' side of the fuse port.
- Install an Add-A-Fuse Tap: Select the appropriate piggyback fuse tap for your vehicle's fuse type. Insert the original fuse into the lower slot and a new fuse (of the same rating) for the dash cam into the upper slot.

Image: Diagram showing how to install an add-a-fuse tap.
- Fit the RED & YELLOW Fuse Taps to the respective slots: Connect the RED wire to the constant power fuse slot and the YELLOW wire to the ACC power fuse slot.

Image: Diagram showing the connection of red and yellow wires to the hardwire kit.
- Locating a ground point: Connect the BLACK wire to a metal bolt or screw on the vehicle's chassis for a secure ground connection.

Image: Illustration of connecting the ground wire to a metal point in the vehicle.
- Test the Dash Cam Installation: Start your vehicle to ensure the dash cam powers on. Turn off your vehicle to verify the parking monitor activates correctly.

Image: Dash cam screen showing active recording after installation.
- Cable Management: Use the included wire ties and cable clips to neatly route and hide all cables, ensuring they do not interfere with airbags or vehicle operation. The trim tool can assist in tucking wires under panels.

Image: Examples of neatly routing dash cam cables in a vehicle.
3.1. Installation Video
Video: Official ROVE Ultimate 3-Lead USB Type-C Hardwire Kit installation guide. This video demonstrates the step-by-step process of connecting the hardwire kit to your vehicle's fuse box for continuous power supply.
4. Operating Instructions
4.1. 24-Hour Parking Monitor
The hardwire kit enables the 24-Hour Parking Monitor feature on compatible ROVE dash cams. When your vehicle is parked and the ignition is off, the dash cam will continue to record based on your selected parking mode settings (e.g., time-lapse, motion detection, G-sensor).
4.2. Low Voltage Protection
The ROVE Ultimate 3-Lead Hardwire Kit includes built-in low voltage protection to prevent your car battery from draining completely. The kit will automatically cut off power to the dash cam if the vehicle's battery voltage drops below a configurable threshold:
- For 12V Battery: Power cut-off starting at 11.8V, 12.0V, 12.2V, 12.4V.
- For 24V Battery: Power cut-off starting at 23.6V, 24.0V, 24.4V, 24.8V.

Image: Diagram illustrating the low voltage protection settings on the hardwire kit.
4.3. G-Sensor Functionality
The G-Sensor (3-axis impact gravitational accelerometer) detects physical and gravitational forces on the camera. In parking mode, if an impact is detected, the dash cam will automatically record and save the footage.
4.4. Video Settings
Access your dash cam's menu to configure various video settings, including:
- Video Resolution (e.g., 4K 2160P, 2.5K 1440P, FHD 1080P)
- Loop Recording duration (e.g., 1-minute, 3-minute, 5-minute, 10-minute segments)
- High Dynamic Range (HDR) for enhanced exposure
- Exposure adjustment
- Time Lapse Record mode (e.g., 1 frame/second, 2 frames/second, 4 frames/second)
- Video Compression (H.265 HEVC)
- Video Bit Rate (Low, Standard, Max)
5. Safety Features
5.1. Low Voltage Protection
The hardwire kit continuously monitors your vehicle's battery voltage. If the voltage drops below the configured cut-off value, the kit will automatically stop providing power to the dash cam to prevent complete battery discharge, ensuring your vehicle can start.
5.2. Over Current/Surge Protection
The hardwire kit incorporates surge protection to safeguard your dash cam from sudden voltage spikes or overcurrents, which can occur due to electrical fluctuations in the vehicle. This protects both the dash cam and your vehicle's electrical system.

Image: Diagram illustrating the surge protection system within the hardwire kit.
6. Troubleshooting
6.1. Camera Not Powering On/Off Automatically
If your dash cam does not automatically power on when the vehicle starts or power off when the vehicle is turned off, it is likely due to incorrect orientation of the fuse taps in the fuse box.
- Solution: Use the included 30V Voltage Meter to test the fuse port on the circuit. Identify which side is the inlet (constant power) and which is the power out. Reinstall the fuse taps correctly, ensuring the power input is on the correct side.
7. Specifications
- Product Dimensions: 1.5 x 0.9 x 0.7 inches
- Item Weight: 8.8 ounces
- Item Model Number: R3-HWK
- Input Voltage: 12V/24V DC
- Output Voltage: 5V 2A (USB Type C)
- Special Features: Parking Monitor, USB Type C Output, Low Voltage Protection, Over Current/Surge Protection
- Manufacturer: ROVE
8. Warranty & Customer Support
ROVE is committed to customer satisfaction. Your ROVE Ultimate Hardwire Kit comes with a full, hassle-free 1-YEAR WARRANTY.
8.1. Contact Customer Care
For any inquiries, issues, or faster assistance, please contact our dedicated customer support team:
- Text: 1-401-484-7683 (for faster response)
- Email: help@rovedashcam.com
- Website: www.rovedashcam.com


