1. Introduction
The EPOMAKER TH21 is a 21-key hot-swappable wired numpad designed for enhanced productivity and gaming. It features customizable RGB backlighting, programmable keys, and durable XDA Profile PBT keycaps. This manual provides instructions for setup, operation, maintenance, and troubleshooting to ensure optimal use of your TH21 numpad.
2. Product Features
- 21-Key Layout: Provides essential numeric and function keys for various tasks.
- Hot-Swappable Switches: Allows for easy replacement of 3-pin or 5-pin mechanical switches without soldering.
- RGB Backlighting: Features multiple preset RGB effects with adjustable brightness and speed.
- Programmable: Supports key remapping and macro recording via dedicated software.
- XDA Profile PBT Keycaps: Durable and oil-resistant keycaps that maintain color over time.
- Gateron Pro Switches: Equipped with Gateron Pro switches for consistent performance and durability.
- Wired Connectivity: Connects via a detachable USB-C cable for stable performance.
3. Package Contents
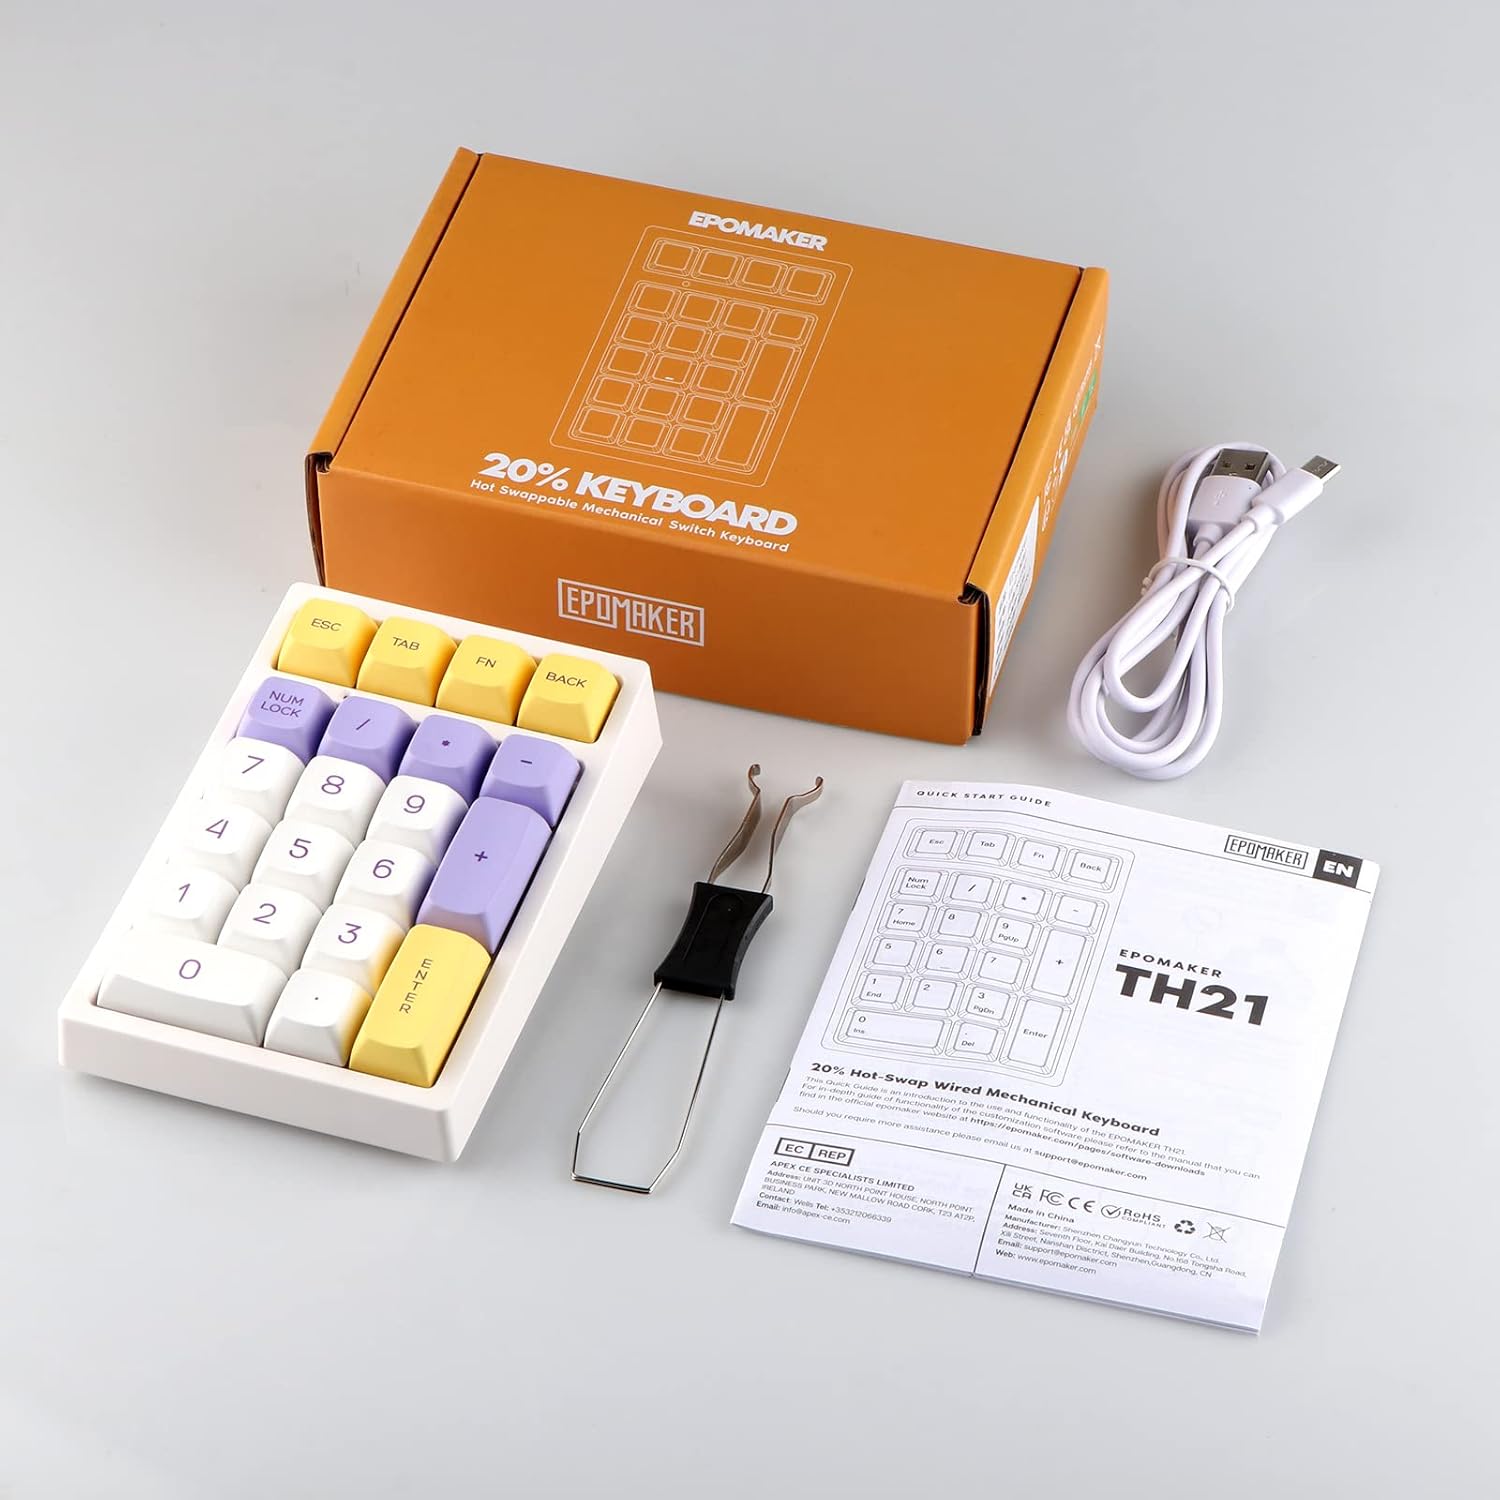
Image: Contents of the EPOMAKER TH21 Numpad package, including the numpad, USB cable, and quick start guide.
Please check the package for the following items:
- EPOMAKER TH21 Numpad
- USB-C Cable
- Keycap Puller
- Switch Puller
- Quick Start Guide
4. Setup Guide
4.1 Connecting the Numpad
- Locate the USB-C port on the back of the TH21 numpad.
- Connect one end of the provided USB-C cable to the numpad.
- Connect the other end of the USB-A connector to an available USB port on your computer (Windows or Mac).
- The numpad will be automatically recognized by your operating system.

Image: Close-up view of the USB-C port on the EPOMAKER TH21 Numpad, where the cable connects.
5. Operating Instructions
5.1 Basic Numpad Functionality
The TH21 numpad functions as a standard numeric keypad. Press the NUM LOCK key to toggle between numeric input and navigation functions (e.g., Home, End, Page Up, Page Down) if applicable to your operating system.
5.2 RGB Backlight Control
The TH21 numpad features multiple RGB backlight effects. Specific key combinations are used to cycle through these effects and adjust their parameters:
- Change Effect: Refer to the quick start guide for the specific key combination (e.g., Fn + a designated key) to cycle through different lighting modes.
- Adjust Brightness: Use the designated key combination (e.g., Fn + Up/Down arrow) to increase or decrease backlight brightness.
- Adjust Speed: Use the designated key combination (e.g., Fn + Left/Right arrow) to change the speed of dynamic lighting effects.
5.3 Hot-Swapping Switches
The TH21 numpad supports hot-swappable switches, allowing you to change mechanical switches without soldering. This feature enables customization of typing feel and sound.
- Remove Keycap: Use the provided keycap puller to gently remove the desired keycap. Grip the keycap firmly and pull straight up.
- Remove Switch: Use the provided switch puller. Align the prongs of the switch puller with the two clips on the top and bottom of the switch. Squeeze the clips and gently pull the switch straight up and out of the PCB.
- Install New Switch: Align the pins of the new 3-pin or 5-pin mechanical switch with the holes on the PCB. Ensure the switch is oriented correctly. Gently push the switch down until it clicks into place. Do not force the switch; if resistance is met, check pin alignment.
- Replace Keycap: Place the keycap onto the new switch stem and press down firmly.

Image: A hand using a keycap puller to remove a keycap from the EPOMAKER TH21 Numpad, revealing the switch underneath.

Image: A close-up view of a removed keycap and an exposed Gateron Pro switch on the EPOMAKER TH21 Numpad.

Image: A diagram highlighting the hot-swappable feature, showing how switches can be easily removed and replaced.
5.4 Programmable Functions and Software
The TH21 numpad is fully programmable, allowing users to remap keys and create macros. This functionality is accessed through dedicated software provided by EPOMAKER.
- Software Download: Visit the official EPOMAKER website to download the latest version of the TH21 programming software.
- Key Remapping: Use the software interface to assign different functions to individual keys.
- Macro Recording: Create and assign complex sequences of key presses (macros) to specific keys for streamlined workflows.
- Profile Management: Save and load different keybinding profiles for various applications or user preferences.

Image: An overview graphic displaying key features of the TH21, including icons for RGB Backlight, Programmable functions, and Macro Recording, indicating software support.
6. Maintenance
6.1 Cleaning the Numpad
To maintain the appearance and functionality of your TH21 numpad:
- Disconnect the numpad from your computer before cleaning.
- Use a soft, lint-free cloth slightly dampened with water or a mild cleaning solution to wipe the keycaps and casing.
- For dust and debris between keycaps, use compressed air or a small brush.
- Avoid using harsh chemicals or abrasive materials, as these can damage the surface.
6.2 Keycap and Switch Care
When removing or installing keycaps and switches, always use the provided tools and apply gentle, even pressure to prevent damage to the components or the PCB.
7. Troubleshooting
- Numpad Not Responding: Ensure the USB-C cable is securely connected to both the numpad and the computer. Try a different USB port or cable.
- Keys Not Registering: If individual keys are not working, ensure the switch is properly seated in the PCB. If the issue persists, try replacing the switch with a spare.
- RGB Backlight Not Working: Check if the backlight is turned off or set to minimum brightness using the designated key combinations. If the issue persists, try restarting your computer.
- Software Issues (Remapping/Macros): Ensure you have downloaded the correct and latest version of the EPOMAKER TH21 software from the official website. Run the software as an administrator. If problems persist, try reinstalling the software.
- Numpad Not Recognized by Computer: Try connecting the numpad to another computer to rule out a computer-specific issue. Ensure your operating system is up to date.
8. Product Specifications
| Feature | Detail |
|---|---|
| Brand | EPOMAKER |
| Model | TH21 |
| Number of Keys | 21 |
| Connectivity | Wired (USB-C) |
| Switch Type | Gateron Pro (Tactile) |
| Hot-Swappable | Yes (3-pin/5-pin) |
| Keycap Material | PBT |
| Keycap Profile | XDA Profile |
| Backlighting | RGB |
| Compatible Devices | Laptop (Windows/Mac) |
| Product Dimensions (L x W x H) | 5.26" x 3.46" x 2.01" (13.36cm x 8.79cm x 5.11cm) |
| Enclosure Material | Polybutylene Terephthalate |
9. Warranty Information
The EPOMAKER TH21 Numpad comes with a 1-year warranty from the date of purchase. This warranty covers manufacturing defects and malfunctions under normal use. It does not cover damage caused by misuse, accidents, unauthorized modifications, or normal wear and tear. Please retain your proof of purchase for warranty claims.
10. Customer Support
For further assistance, technical support, or warranty inquiries, please contact EPOMAKER customer service through their official website or the retailer where the product was purchased. Please have your product model (TH21) and proof of purchase ready when contacting support.