Introduction
This manual provides essential instructions for the safe and efficient operation, setup, maintenance, and troubleshooting of your Lifesmart LifePro 4 Element 1500-Watt Electric Infrared Portable Heater, model LS-1001HH. Please read all instructions carefully before use and retain this manual for future reference.
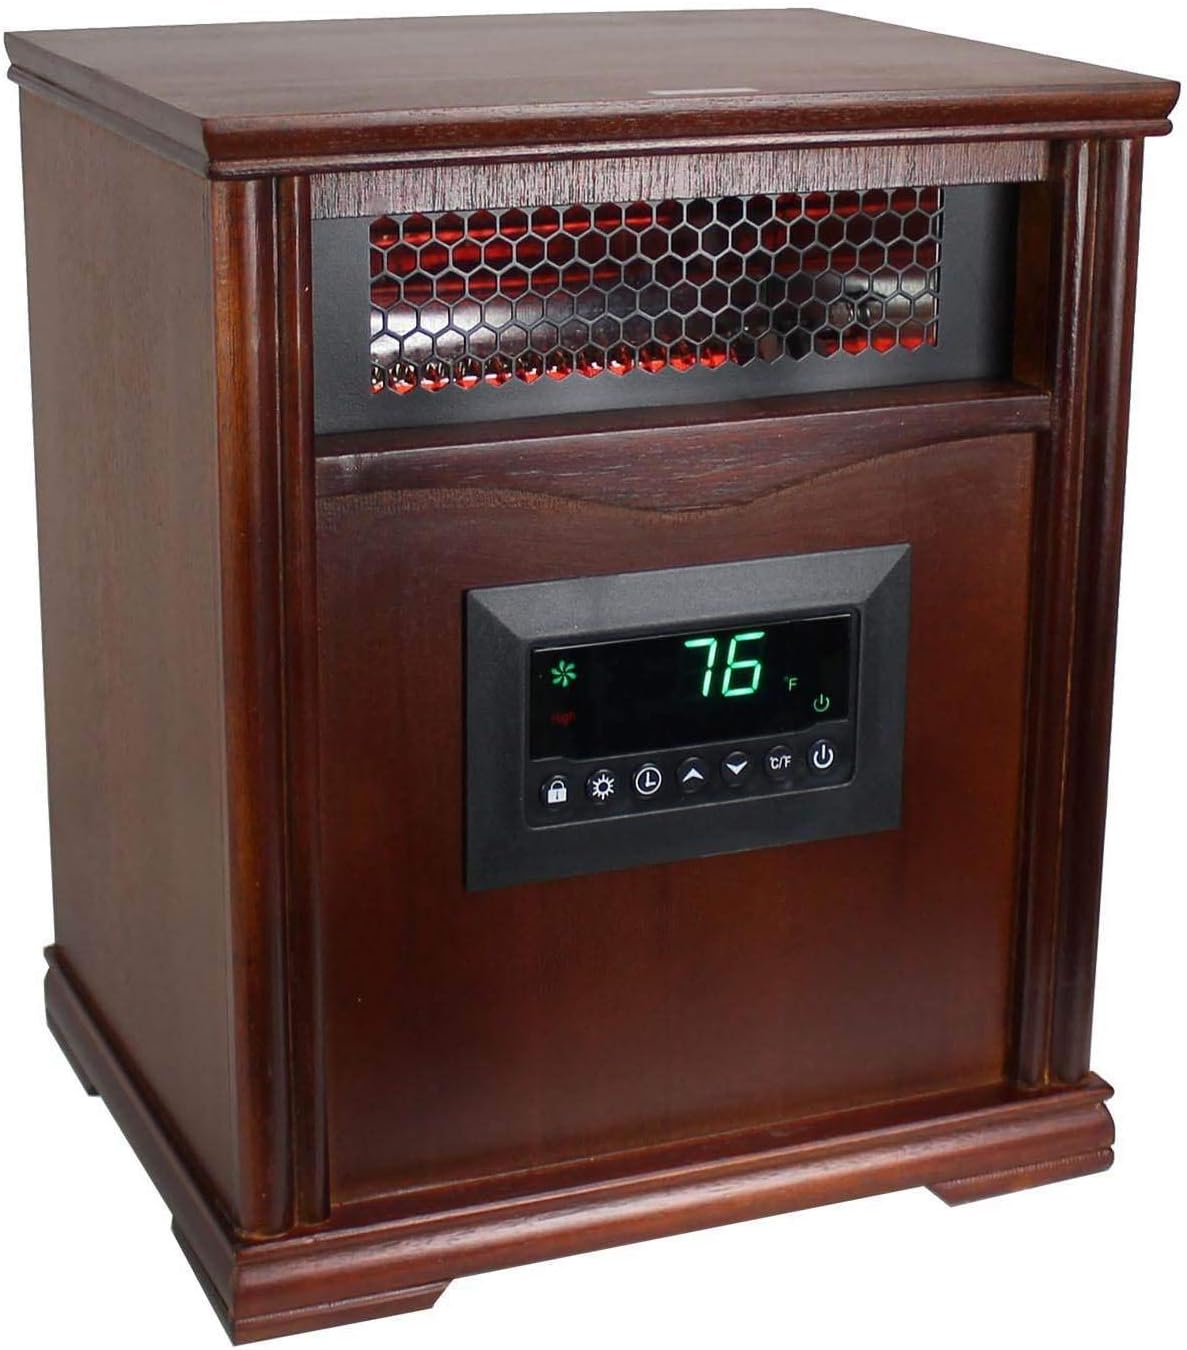
Figure 1: Front view of the Lifesmart LifePro LS-1001HH infrared heater.
Important Safety Information
WARNING: Risk of Fire.
To reduce the risk of fire, electrical shock, or injury, observe the following precautions:
- Keep combustible materials such as furniture, papers, drapes, and curtains at least 3 feet (0.9 meters) from the front of the heater and away from the sides and rear.
- This heater is for indoor use only. Do not use outdoors.
- Do not use in bathrooms, laundry areas, or similar indoor locations where water is present.
- Always plug heaters directly into a wall outlet/receptacle. Never use with an extension cord or relocatable power tap (outlet/power strip).
- Do not insert or allow foreign objects to enter any ventilation or exhaust opening as this may cause an electric shock or fire, or damage the heater.
- Do not block air intakes or exhaust in any manner.
- Unplug the heater when not in use.

Figure 2: Rear view of the heater with safety warning label.
Setup Instructions
- Unpacking: Carefully remove the heater from its packaging. Retain packaging for off-season storage.
- Caster Wheel Installation: If not pre-installed, attach the caster wheels to the bottom of the heater using the provided hardware. Ensure they are securely fastened for mobility.
- Placement: Place the heater on a firm, level surface. Ensure it is positioned at least 3 feet (0.9 meters) away from walls, furniture, and any other combustible materials. Do not place the heater on soft surfaces like beds or rugs where openings may become blocked.
- Power Connection: Plug the power cord directly into a grounded 120V AC, 60Hz electrical outlet. Ensure the outlet is not overloaded with other appliances.
Operating Instructions
Control Panel Overview

Figure 3: Heater control panel.
- Power Button (⏻): Turns the heater ON or OFF.
- Temperature Up/Down Buttons (▲/▼): Adjusts the desired temperature setting.
- Mode Button (⌛): Cycles through different heating modes (if available).
- Timer Button (⏱): Sets the auto-off timer.
- °C/°F Button: Toggles the temperature display between Celsius and Fahrenheit.
- Child Lock Button (🔒): Locks the control panel to prevent accidental changes.
Remote Control

Figure 4: Remote control for the heater.
The remote control duplicates the functions of the main control panel for convenient operation. Ensure batteries are correctly installed.
Basic Operation
- Power On: Press the Power button (⏻) on the control panel or remote. The display will show the current room temperature.
- Set Temperature: Use the Temperature Up (▲) or Down (▼) buttons to set your desired temperature. The heater will cycle on and off to maintain this temperature.
- Change Temperature Unit: Press the °C/°F button to switch between Celsius and Fahrenheit display.
- Set Timer: Press the Timer button (⏱) to activate the auto-off timer. Use the Temperature Up/Down buttons to set the desired number of hours (1-12 hours) before the heater automatically turns off.
- Child Lock: Press and hold the Child Lock button (🔒) for 3 seconds to activate or deactivate the child lock function.
- Power Off: Press the Power button (⏻) again to turn off the heater.
Maintenance
Regular maintenance ensures optimal performance and longevity of your heater.
- Cleaning the Exterior: Always unplug the heater before cleaning. Use a soft, damp cloth to wipe the exterior surfaces. Do not use abrasive cleaners or solvents.
- Cleaning the Air Intake Filter: The heater may have a removable air filter. Refer to the specific model's design for filter location. Gently remove and clean the filter with a vacuum cleaner or rinse with warm water. Ensure the filter is completely dry before reinserting.
- Storage: When not in use, store the heater in a cool, dry place. It is recommended to store it in its original packaging to protect it from dust and damage.
Troubleshooting
| Problem | Possible Cause | Solution |
|---|---|---|
| Heater does not turn on. | No power to the unit. Overheat protection activated. Tip-over switch activated. | Check if the power cord is securely plugged into a working outlet. Reset circuit breaker if tripped. Unplug the heater, wait 10 minutes, then plug back in. Ensure the heater is on a flat, stable surface. |
| Heater blows cold air. | Temperature setting is too low. Room temperature has reached set temperature. | Increase the desired temperature setting. The heater will stop heating once the room reaches the set temperature and will resume when the temperature drops. |
| Heater makes unusual noises. | Normal expansion/contraction of internal components. Loose parts. | Minor clicking or popping sounds are normal during heating and cooling. If noises are loud or persistent, discontinue use and contact customer support. |
| Remote control not working. | Dead batteries. Obstruction between remote and heater. | Replace batteries in the remote control. Ensure there is a clear line of sight between the remote and the heater's sensor. |
Specifications
- Model: LS-1001HH
- Type: 4 Element Infrared Portable Heater
- Power Output: 1500 Watts
- Voltage: 120V AC, 60Hz
- Item Weight: Approximately 5 pounds
- Product Dimensions: Approximately 10 x 10 x 10 inches (L x W x H)
- Included Components: Heater unit, Remote Control, Caster Wheels (may be pre-installed)
- Safety Features: Overheat Protection, Tip-Over Switch
Warranty and Support
For technical support or warranty inquiries, please contact Lifesmart customer service:
- Phone: 1-866-484-2066
- Website: www.lifecorpproducts.com
Please have your model number (LS-1001HH) and purchase information ready when contacting support.