1. Introduction
This manual provides detailed instructions for the installation, operation, and maintenance of the FGJQEFG Glow Plug Connector Wire Harness, Glow Plugs, and Removal Tool. This kit is designed for specific Ford 6.0L Powerstroke Diesel engines.
1.1. Compatibility
- 2004-2010 Ford 6.0L Powerstroke Diesel Econoline
- 2004-2010 Ford F-250, F-350, F-450, F-550 Super Duty
- 2004-2010 Ford Excursions Built After January 15, 2004
This product replaces OEM part numbers 4C2Z12A690AB, 4C2Z12A690BA, 5C3Z12A690A, and 4C3Z12A342AA.

Image 1.1: Example of glow plug harness installed in a compatible Ford 6.0L Powerstroke Diesel engine.
2. Safety Information
Always prioritize safety when working on vehicle engines. Failure to follow safety precautions can result in injury or damage to the vehicle.
- Disconnect the vehicle's battery before beginning any electrical work.
- Wear appropriate personal protective equipment (PPE), including safety glasses and gloves.
- Ensure the engine is cool before working on glow plugs or related components.
- Refer to your vehicle's service manual for specific torque specifications and additional safety guidelines.
- If you are unsure about any step, consult a qualified automotive technician.
3. Package Contents
Verify that all components are present and undamaged before proceeding with installation.
- Glow Plug Connector Wire Harness (Left and Right)
- Glow Plugs (Quantity: 8)
- Glow Plugs Removal Tool
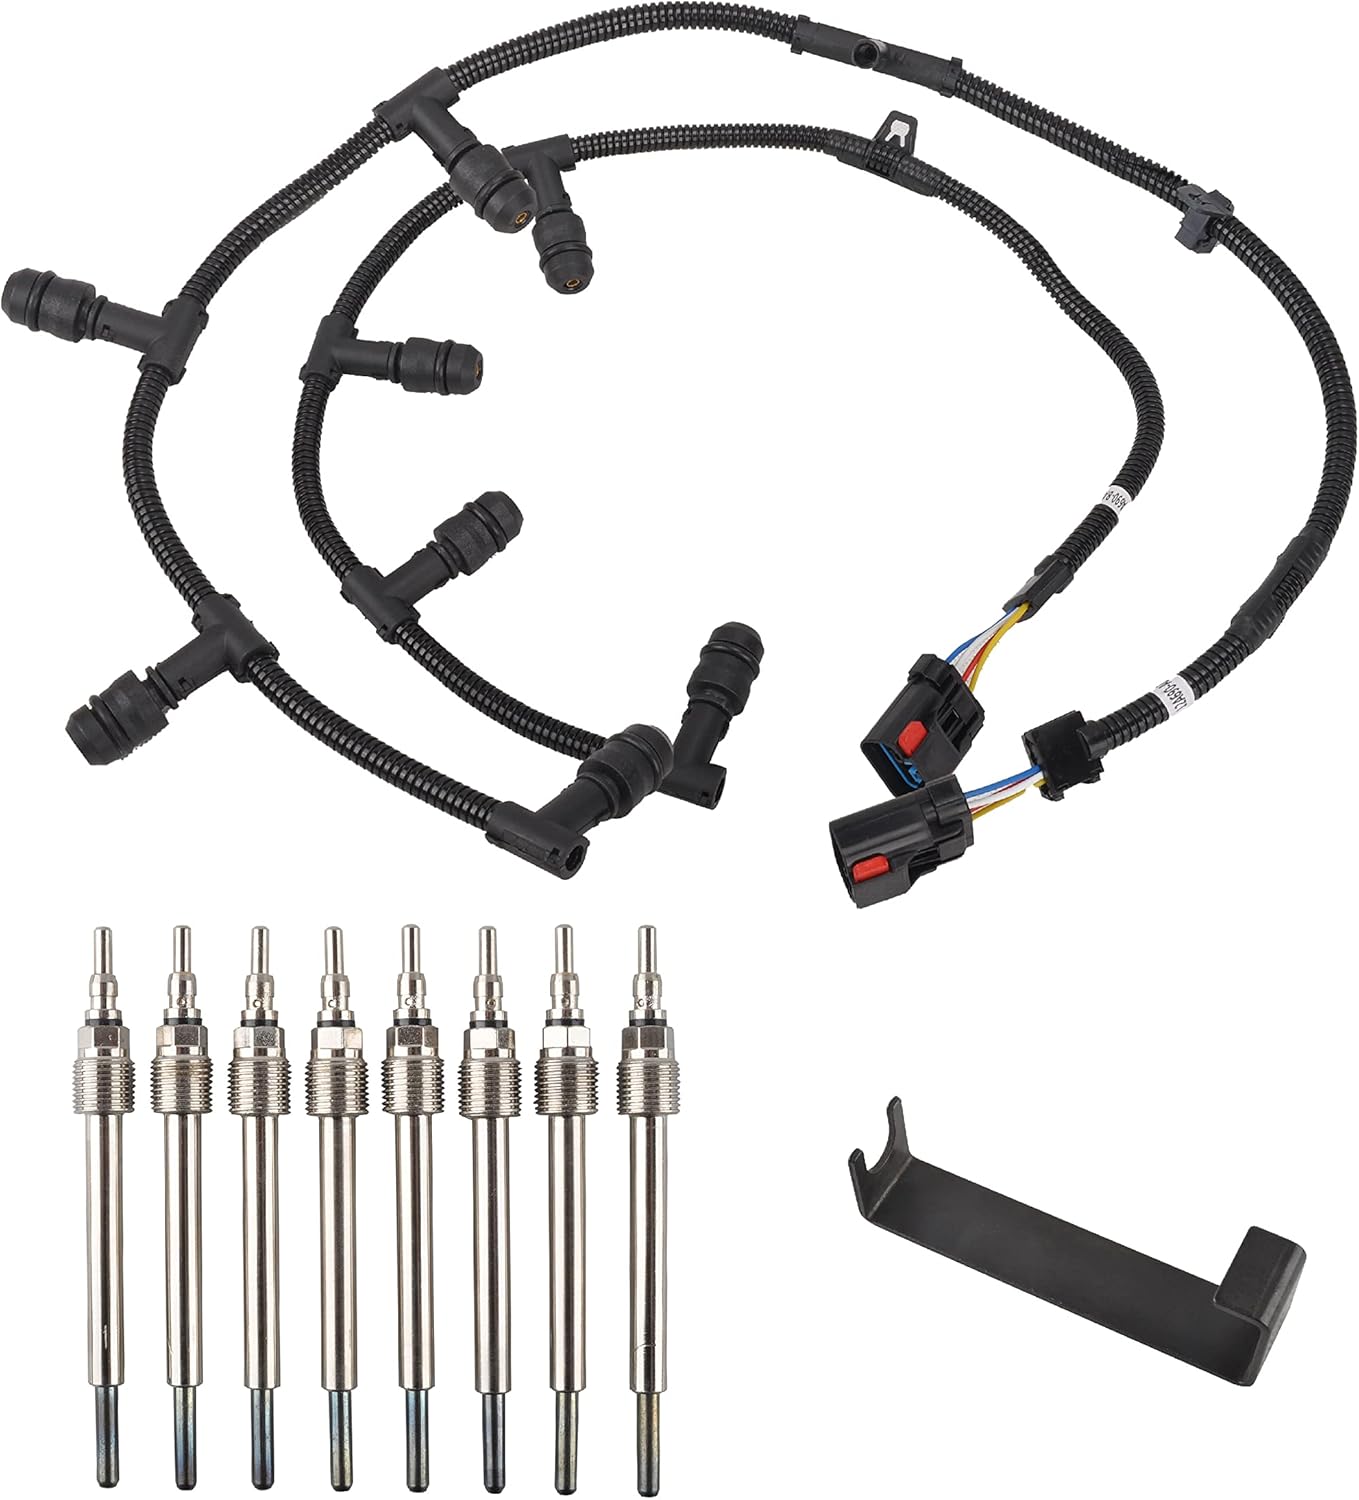
Image 3.1: Contents of the FGJQEFG Glow Plug Kit, including two wire harnesses, eight glow plugs, and a specialized removal tool.
4. Installation Instructions
The following steps outline the general procedure for replacing the glow plug wire harness and glow plugs. Specific vehicle disassembly and reassembly steps may vary; consult your vehicle's service manual.
4.1. Preparation
- Ensure the engine is completely cool.
- Disconnect both negative battery terminals to prevent electrical hazards.
- Remove any components obstructing access to the valve covers and glow plugs (e.g., air intake, intercooler pipes, fuel lines).
- Clean the area around the valve covers to prevent debris from entering the engine.
4.2. Removing Existing Components
- Carefully disconnect the electrical connectors from the existing glow plug harnesses.
- Remove the valve covers. This will expose the glow plug harnesses and glow plugs.
- Using the provided glow plug removal tool, carefully detach the old glow plug connectors from the glow plugs. The tool is designed to assist in safely prying off the connectors without damage.
- Unbolt and remove the old glow plug wire harnesses from the valve covers.
- Using an appropriate glow plug socket, carefully remove the old glow plugs from the cylinder heads. Exercise caution to avoid breaking glow plugs in the cylinder head.
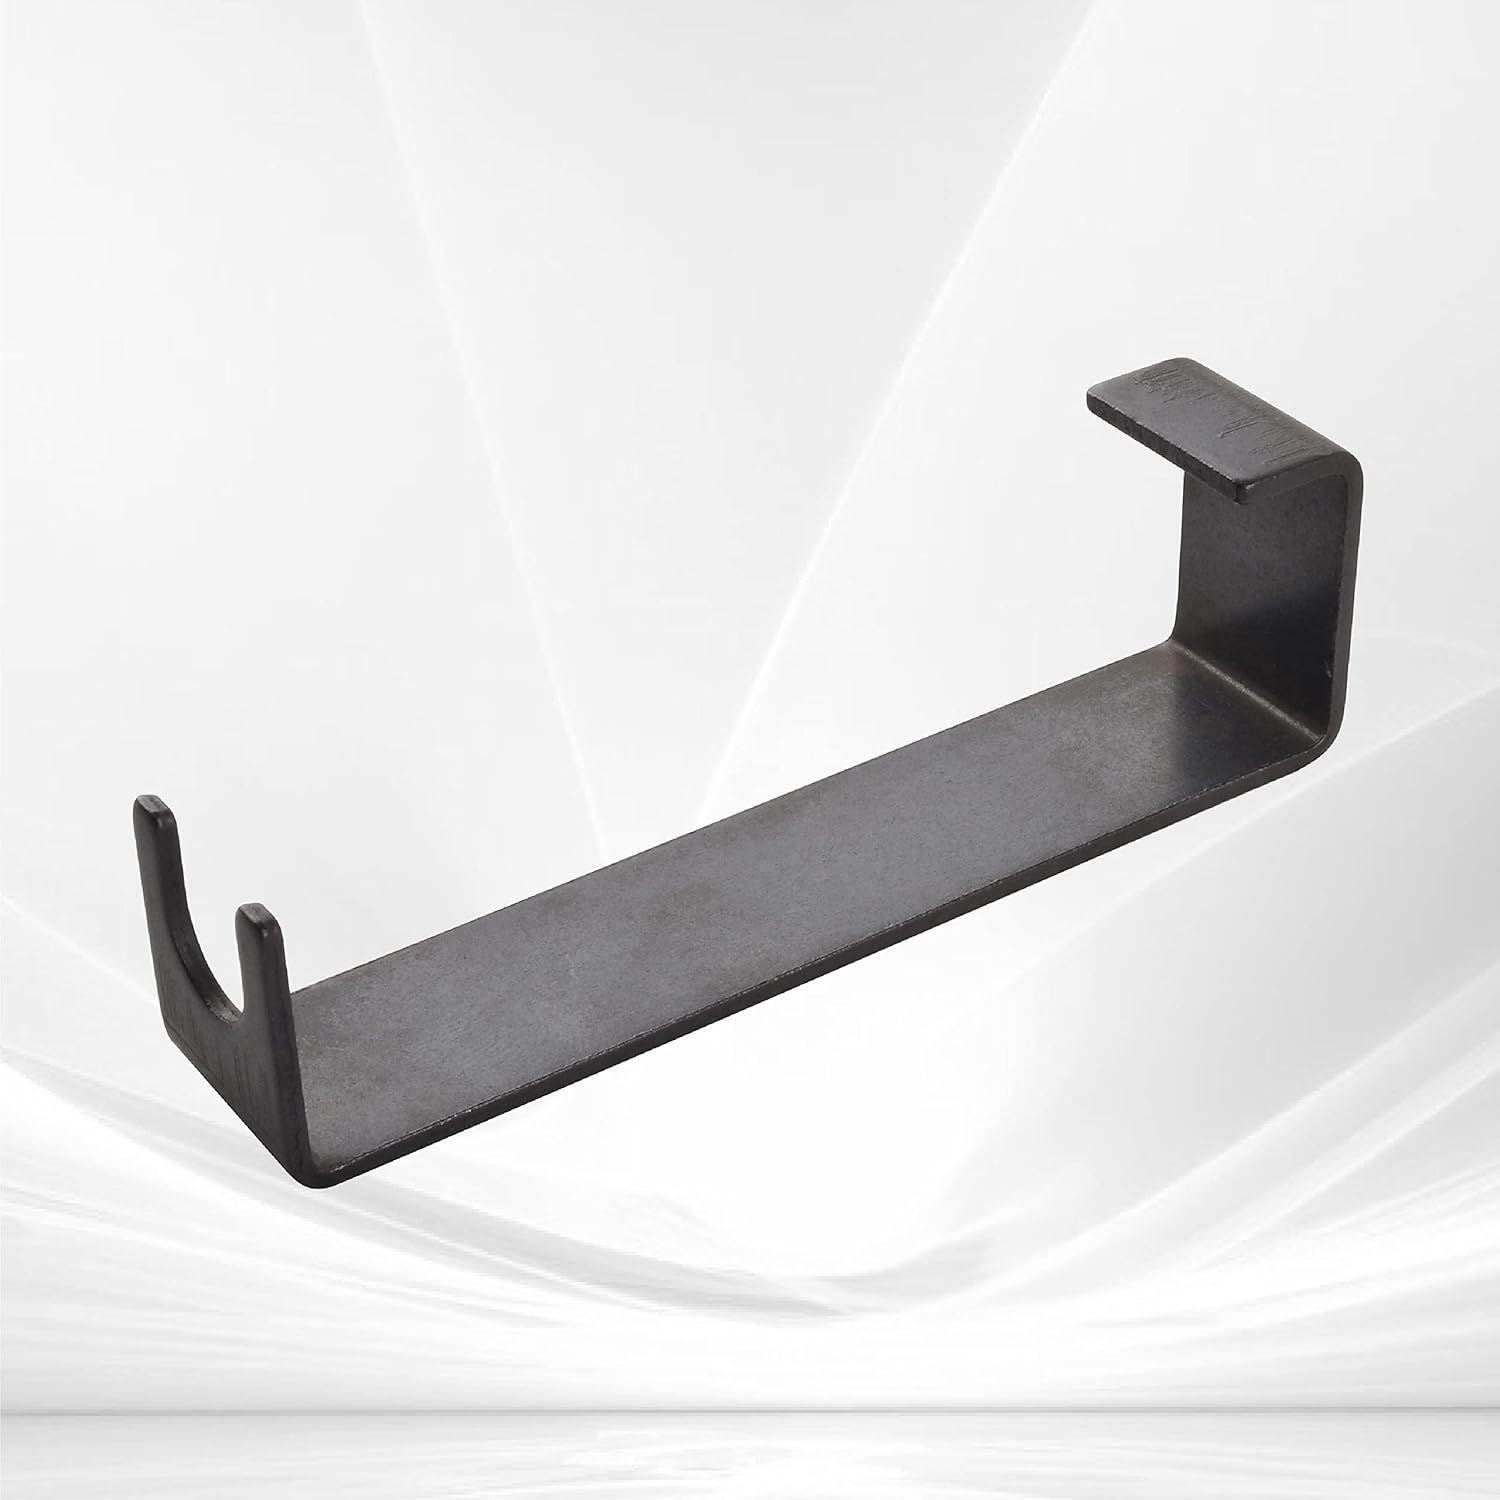
Image 4.1: The specialized removal tool for detaching glow plug connectors.
4.3. Installing New Components
- Apply a small amount of anti-seize compound to the threads of the new glow plugs.
- Hand-thread the new glow plugs into the cylinder heads. Once hand-tight, use a torque wrench to tighten them to the manufacturer's specified torque (refer to your vehicle's service manual).
- Install the new FGJQEFG glow plug wire harnesses into the valve covers, ensuring they are properly seated and secured.
- Connect the new glow plug harness connectors to the newly installed glow plugs. Ensure a firm, secure connection.
- Reinstall the valve covers, ensuring new gaskets are used if necessary and tightened to specification.
- Reconnect all electrical connectors to the glow plug harnesses.
- Reinstall any removed components (air intake, intercooler pipes, etc.).
- Reconnect the vehicle's battery terminals.

Image 4.2: A new glow plug, ready for installation.

Image 4.3: Detail of the glow plug harness connector.
5. Operating Instructions
After successful installation, the glow plug system will operate automatically as designed by the vehicle manufacturer. When starting a cold diesel engine, the glow plugs preheat the combustion chambers. The 'Wait to Start' light on your dashboard indicates when the glow plugs are active. Wait for this light to extinguish before attempting to crank the engine.
6. Maintenance
Regular inspection of the glow plug system can help ensure optimal engine performance.
- Visual Inspection: Periodically check the glow plug wire harnesses for any signs of wear, cracking, or damage to the insulation. Ensure all connections are secure.
- Glow Plug Function: If experiencing hard starting in cold weather, have the glow plugs tested by a qualified technician.
- Cleanliness: Keep the engine bay clean to prevent dirt and debris from affecting electrical connections.
7. Troubleshooting
If you encounter issues after installation, consider the following common troubleshooting steps:
- Hard Starting/No Start in Cold Weather:
- Verify all glow plug harness connections are secure and properly seated.
- Check for continuity in the glow plugs and harnesses using a multimeter.
- Inspect the glow plug control module (GPCM) and its connections.
- Check Engine Light:
- Scan the vehicle's onboard diagnostics (OBD-II) system for fault codes. Codes related to glow plugs (e.g., P067x) can indicate a specific glow plug or circuit issue.
- Ensure no wires were pinched or damaged during valve cover reinstallation.
- Smoke from Exhaust (White/Blue during cold start):
- This can indicate one or more glow plugs are not functioning, leading to incomplete combustion. Test individual glow plugs.
If troubleshooting steps do not resolve the issue, it is recommended to seek assistance from a certified mechanic.
8. Specifications
| Feature | Detail |
|---|---|
| Brand | FGJQEFG |
| Model Number | WJ1073 |
| Compatible Engine | Ford 6.0L Powerstroke Diesel |
| Material | Acrylonitrile Butadiene Styrene (for harness components) |
| Connector Type | Deutsch DT (standard for application) |
| Replacement Part Numbers | 4C2Z12A690AB, 4C2Z12A690BA, 5C3Z12A690A, 4C3Z12A342AA |
9. Warranty and Support
For information regarding product warranty, returns, or technical support, please refer to the seller's policies or contact FGJQEFG customer service directly. Keep your purchase receipt for warranty claims.