1. Safety Instructions
Please read and understand all instructions before beginning installation. Failure to follow these instructions may result in electric shock, fire, or personal injury.
- Electrical Safety: Ensure power is turned off at the circuit breaker before installation or maintenance. Consult a qualified electrician if you are unsure about wiring.
- Mounting: The ceiling fan must be mounted to a structurally sound ceiling joist or outlet box capable of supporting the fan's weight.
- Bulbs: Use only E26 base bulbs, maximum 10W LED or equivalent incandescent. Bulbs are not included.
- Clearance: Maintain adequate clearance between the fan blades and any obstructions.
- Remote Control: Keep the remote control away from water and extreme temperatures.
2. Package Contents
Verify that all components are present and undamaged before proceeding with installation.
- Caged Ceiling Fan Unit (with integrated motor and light sockets)
- Remote Control
- Mounting Bracket
- Hardware Pack (screws, wire nuts, etc.)
- Instruction Manual
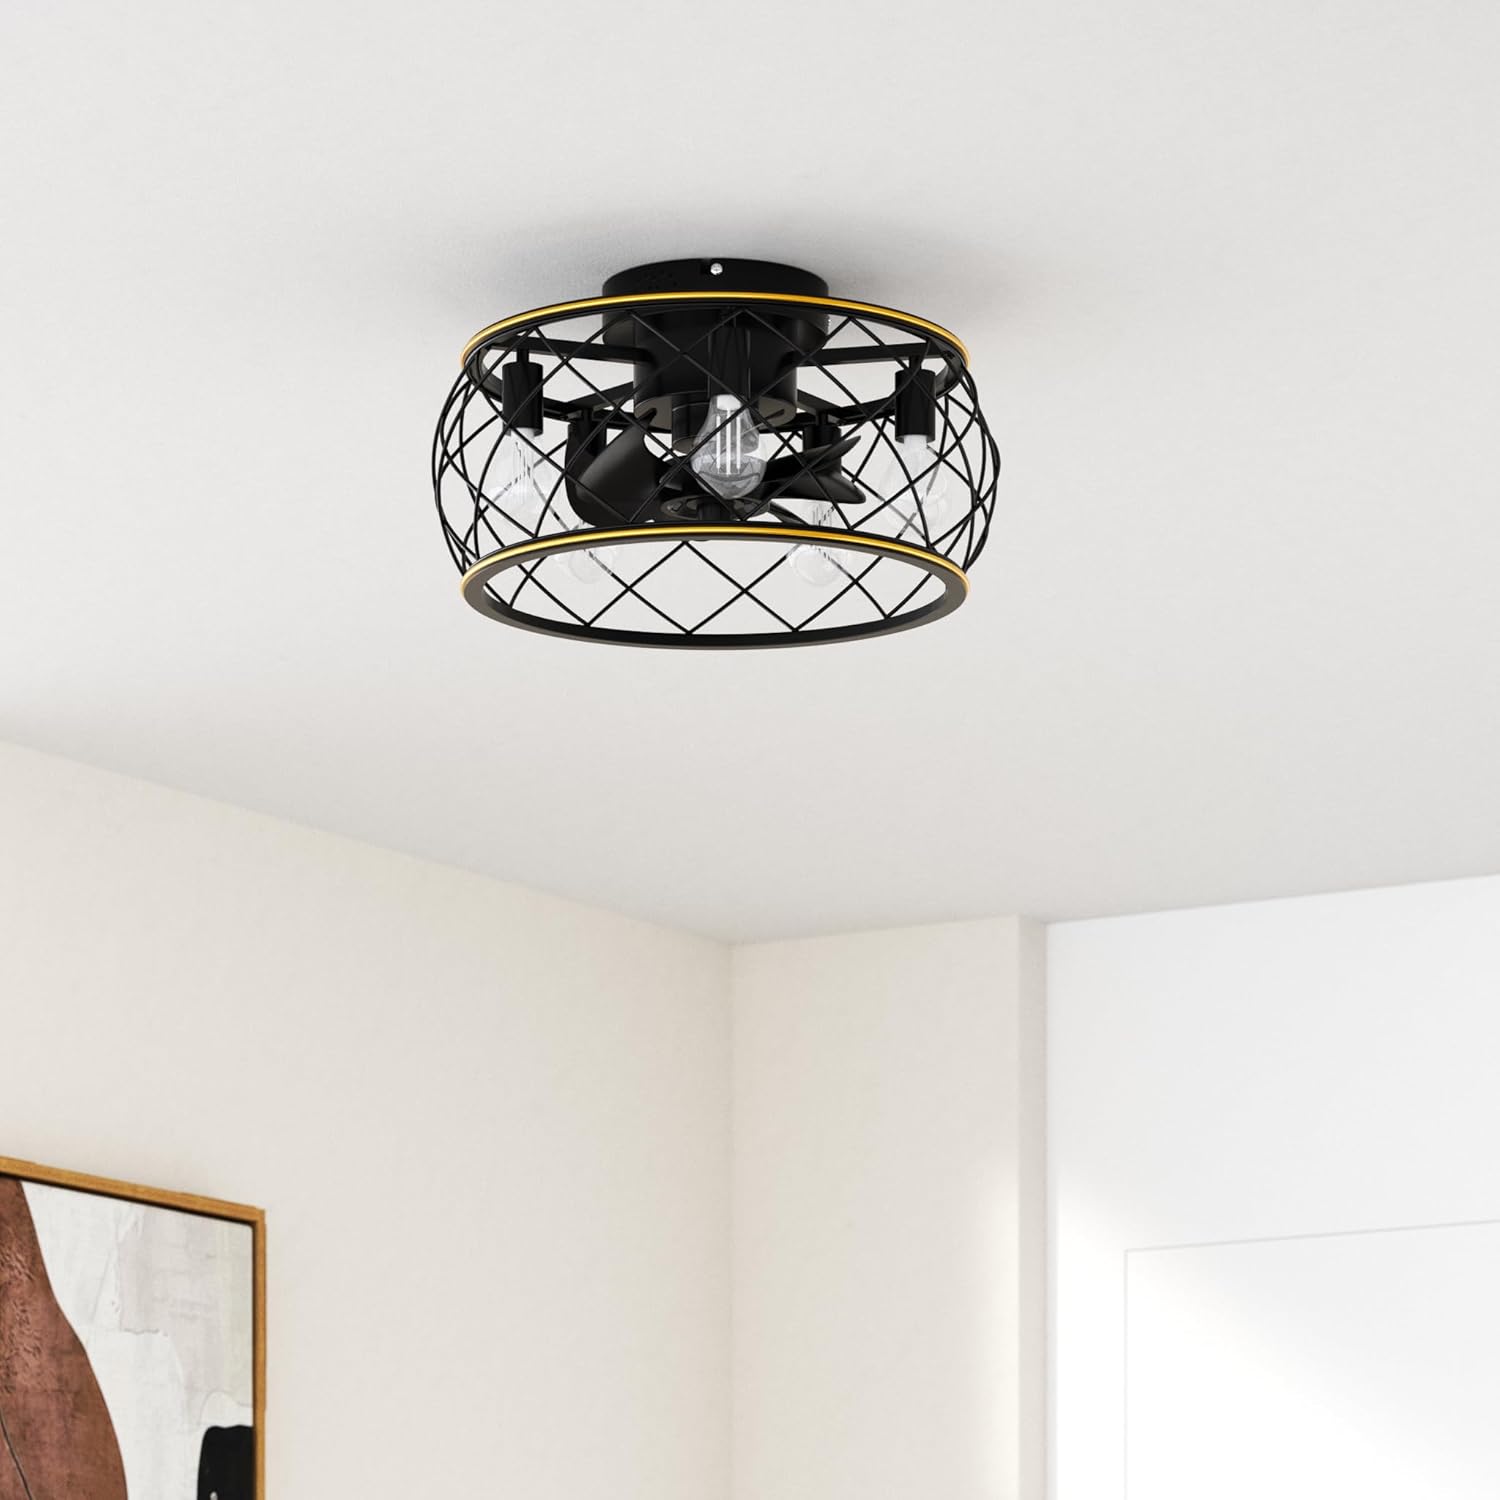
Image 1: Overview of the Ohniyou Caged Ceiling Fan with Lights and Remote.
3. Installation
Professional installation is recommended for electrical work. Ensure power is disconnected before starting.
- Prepare Mounting Location: Turn off power at the circuit breaker. Remove any existing light fixture.
- Install Mounting Bracket: Secure the mounting bracket to the ceiling junction box using appropriate screws. Ensure it is firmly attached.
- Assemble Fan Unit (if necessary): Some components may require pre-assembly. Refer to the detailed diagrams in the printed manual for specific steps.
- Wiring Connections: Connect the fan's wires to the household wiring according to local electrical codes. Typically, connect live to live, neutral to neutral, and ground to ground. Use wire nuts to secure connections.
- Attach Fan to Mounting Bracket: Carefully lift the fan unit and attach it to the installed mounting bracket. Secure with screws.
- Install Light Bulbs: Screw five E26 base bulbs (not included) into the sockets.
Video 1: This video demonstrates the installation process for a similar caged ceiling fan, including assembly of the frame, fan blades, and wiring connections. Note that specific steps may vary slightly for your Ohniyou model.

Image 2: Close-up view of the fan's flush mount design, 8 black blades, hand-painted gold line detail, and 5 E26 bulb bases.
4. Operating Instructions
Your Ohniyou Caged Ceiling Fan is operated using the included remote control.
Remote Control Functions:
- Power Button: Turns the fan and light on/off.
- Light On/Off: Controls the light independently.
- Fan Speed (1-6): Adjusts the fan speed from low (1) to high (6).
- Timer (1H, 2H, 4H): Sets the fan to automatically turn off after 1, 2, or 4 hours.
- Forward (F) / Reverse (R): Changes the direction of the fan blades. Use 'F' for downdraft (summer mode) and 'R' for updraft (winter mode).

Image 3: Diagram of the remote control with labeled buttons for fan speed, light control, timer, and forward/reverse functions.
Video 2: This video demonstrates the operation of the Ohniyou Caged Ceiling Fan, showcasing the remote control functions for turning the light and fan on/off, and adjusting fan speeds.
Reversible Motor Function:
The reversible motor allows for year-round comfort:
- Summer Downdraft Mode (Forward): Air circulates downward to create a cooling effect.
- Winter Updraft Mode (Reverse): Air circulates upward to redistribute warm air, enhancing heating efficiency.

Image 4: Visual representation of the fan's reversible motor function, illustrating airflow for both summer downdraft and winter updraft modes.
5. Maintenance
Regular maintenance ensures optimal performance and longevity of your ceiling fan.
- Cleaning: Dust the fan blades and cage regularly with a soft, damp cloth. Do not use abrasive cleaners or solvents.
- Bulb Replacement: Ensure power is off before replacing light bulbs. Allow bulbs to cool completely before handling.
- Tighten Fasteners: Periodically check and tighten all screws and fasteners to ensure secure operation.
6. Troubleshooting
If you experience issues with your fan, refer to the following common problems and solutions:
| Problem | Possible Cause | Solution |
|---|---|---|
| Fan does not start | No power, loose wiring, remote battery dead | Check circuit breaker, ensure wiring is secure, replace remote battery. |
| Light does not work | Bulb faulty, loose wiring, remote battery dead | Replace bulb, check wiring, replace remote battery. |
| Fan is noisy | Loose screws, unbalanced blades | Tighten all mounting screws, ensure blades are securely attached. |
| Remote not working | Dead battery, interference | Replace remote battery, ensure no obstructions between remote and fan. |
7. Specifications
- Brand: Ohniyou
- Model Name: 011
- Product Dimensions: 20"L x 20"W x 9.7"H
- Item Weight: 9.53 pounds
- Material: Metal
- Style: Farmhouse
- Installation Type: Flush Mount
- Power Source: AC
- Voltage: 120 Volts
- Number of Light Sources: 5
- Bulb Base: E26
- Wattage: 30 watts (total for lights)
- Special Feature: Bladeless, Remote Controlled, Reversible Motor
- Indoor/Outdoor Usage: Indoor, Outdoor
- Included Components: Remote Control

Image 5: Detailed diagram showing the product dimensions (20 inches diameter, 9.7 inches height) and E26 bulb base requirement.
8. Warranty & Support
This Ohniyou Caged Ceiling Fan comes with a Limited Warranty. For specific details regarding warranty coverage, terms, and conditions, please refer to the warranty information provided in the product packaging or contact Ohniyou customer support.
For technical assistance, troubleshooting, or replacement parts, please contact Ohniyou customer service through the retailer where the product was purchased or visit the official Ohniyou website.


