
Introduction
Thank you for choosing the KOOPER AriaPlus Evolution 4-in-1 Air Fryer Oven. This appliance combines the functions of an air fryer, convection oven, rotisserie, and dehydrator, offering versatile cooking options. Please read this instruction manual thoroughly before first use to ensure safe and optimal operation. Keep this manual for future reference.
Important Safety Instructions
- Always place the appliance on a stable, heat-resistant surface.
- Do not immerse the main unit, cord, or plug in water or other liquids.
- Ensure the voltage indicated on the appliance matches your local power supply before connecting.
- Keep children and pets away from the appliance during operation.
- Do not operate the appliance if the cord or plug is damaged, or if the appliance malfunctions. Contact customer support for assistance.
Product Overview
Main Unit and Features
The KOOPER AriaPlus Evolution is designed for efficient and healthy cooking. It features a digital touch screen for easy control and an interior light for monitoring cooking progress.

Front view of the Kooper AriaPlus Evolution Air Fryer Oven with the door closed, displaying its sleek black and silver design.

An empty interior view of the Kooper AriaPlus Evolution Air Fryer Oven, highlighting the stainless steel walls and heating element at the top.
Control Panel
The appliance is equipped with a digital touch screen for intuitive control of cooking functions, temperature, and time. It includes 9 preset programs and a preheating function.

A close-up of the digital touch screen control panel, showing temperature setting '165' and various function icons.
Included Accessories
- Rotating Frying Basket: For even cooking of smaller items like fries or nuts.
- Rotisserie Spit: For roasting whole chickens or larger cuts of meat.
- Cooking Rack: For baking, dehydrating, or general cooking.
- Crumb and Grease Collection Tray: Placed at the bottom to catch drips.
- Extraction Tool: For safely removing hot accessories.

The cylindrical rotating mesh frying basket accessory, designed for even cooking of smaller items.

The stainless steel rotisserie spit accessory, complete with adjustable forks for securing food.

A square mesh cooking rack accessory, suitable for baking or dehydrating.
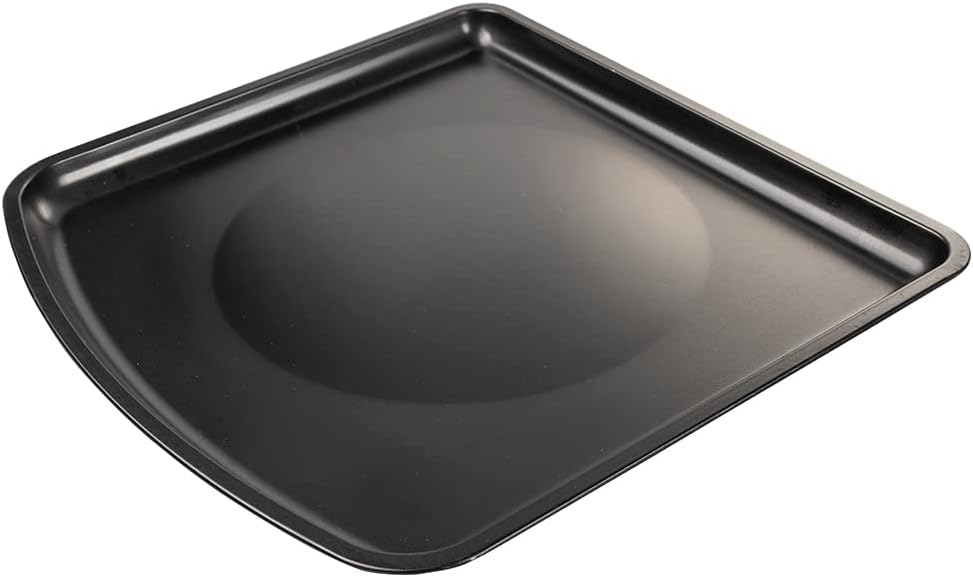
The removable crumb and grease collection tray, designed to catch drips and facilitate cleaning.

A hand demonstrating the use of the extraction tool to safely remove hot accessories from the oven.
Setup
Unpacking and Initial Placement
- Carefully remove all packaging materials from the appliance and accessories.
- Place the air fryer oven on a flat, stable, and heat-resistant surface, ensuring adequate ventilation around the unit. Maintain at least 10 cm (4 inches) of space on all sides.
- Ensure the power cord is not pinched or damaged.

The rear view of the air fryer oven, showing the ventilation grille and power cord connection point.
First Use Cleaning
- Wipe the exterior of the appliance with a damp cloth.
- Wash all accessories (rotating basket, rotisserie spit, cooking rack, crumb tray) with warm, soapy water. Rinse thoroughly and dry completely. Note: Accessories are not dishwasher safe.
- Insert the crumb and grease collection tray at the bottom of the cooking chamber.
Accessory Installation
The appliance features internal slots and a rotisserie shaft for various accessories.
- Cooking Rack: Slide into any of the horizontal slots inside the oven.
- Rotating Frying Basket: Insert the shaft of the basket into the rotisserie drive socket on the left side of the oven, then secure the other end into the support on the right.
- Rotisserie Spit: Skewer your food onto the spit, secure with the forks, then install into the rotisserie drive socket and support as with the frying basket.

The rotisserie spit accessory correctly installed within the air fryer oven's cooking chamber.

The rotating mesh frying basket positioned inside the air fryer oven, ready for use.
Operating Instructions
Basic Operation
- Plug the appliance into a grounded power outlet. The digital display will illuminate.
- Press the Power button to turn on the appliance.
- Select a preset program or manually set the temperature (65°C to 200°C) and cooking time (up to 90 minutes) using the touch controls.
- Press the Start/Pause button to begin cooking.
- The interior light can be turned on/off to monitor cooking progress.
- The appliance will automatically shut off with an acoustic signal when the timer expires.
Preheating Function
For best results, especially with air frying, use the preheating function. Select the preheat option on the control panel before adding food. The oven will heat to the desired temperature and signal when ready.
Using Preset Programs
The oven features 9 preset programs for common dishes. Select the desired program from the touch screen. The appliance will automatically set the optimal temperature and time. You can adjust these settings manually if needed.
Rotisserie Cooking
For rotisserie cooking, ensure the rotisserie spit with food is properly installed. Select the rotisserie function on the control panel. This will activate the rotation mechanism for even cooking.
Maintenance and Cleaning
Regular cleaning ensures optimal performance and extends the life of your appliance. Always unplug the appliance and allow it to cool completely before cleaning.
General Cleaning
- Wipe the exterior with a damp cloth. Do not use abrasive cleaners.
- Clean the interior with a soft, damp cloth and mild detergent. For stubborn stains, a non-abrasive sponge can be used.
- The transparent door is removable for easier cleaning. To remove, open the door fully, then gently lift it upwards from its hinges.

The transparent front door of the air fryer oven being removed for cleaning or access.
Accessory Cleaning
All stainless steel accessories (rotating basket, rotisserie spit, cooking rack, crumb tray) should be washed by hand with warm, soapy water. Rinse thoroughly and dry immediately to prevent water spots or corrosion. These accessories are not dishwasher safe.
Troubleshooting
| Problem | Possible Cause | Solution |
|---|---|---|
| Appliance does not turn on. | Not plugged in; power outlet malfunction; power button not pressed. | Ensure plug is securely in a working outlet. Press the power button. |
| Food is not cooking evenly. | Overcrowding; incorrect temperature/time; accessories not rotating. | Do not overcrowd the basket/rack. Adjust temperature/time. Ensure rotisserie accessories are correctly installed and function is activated. |
| White smoke coming from the appliance. | Excess oil/grease on heating element or crumb tray; fatty food. | Clean the crumb tray and interior. Reduce oil used. This is usually harmless, but unplug if excessive. |
| Digital display not responding. | Temporary electronic glitch. | Unplug the appliance for 5 minutes, then plug it back in. |
Specifications
| Feature | Detail |
|---|---|
| Model Name | AriaPlus Evolution |
| Model Number | 5902510 |
| Capacity | 12 Liters |
| Power | 1800 Watts |
| Voltage | 220-240 Volts |
| Frequency | 50/60 Hz |
| Temperature Range | 65°C - 200°C |
| Timer Range | Up to 90 minutes |
| Control Method | Touch Screen |
| Material | Stainless Steel (Interior) |
| Color | Black + Steel |
| Cable Length | 150 cm |
| Dimensions (Package) | 42.6 x 41.4 x 34.9 cm |
| Weight (Package) | 7.3 kg |
| Dishwasher Safe Accessories | No |
Warranty and Support
For warranty information and customer support, please refer to the documentation provided with your purchase or contact the retailer. Keep your proof of purchase for any warranty claims.