1. Introduction
Thank you for choosing the SEAOURA 24/7 Cycle LED Aquarium Plant Light. This light is designed to provide optimal lighting conditions for freshwater fish and low-to-mid level aquatic plants, simulating natural light cycles from dawn to dusk. This manual provides detailed instructions for installation, operation, and maintenance to ensure the best performance and longevity of your aquarium light.

Figure 1: SEAOURA 24/7 Cycle LED Aquarium Plant Light overview.
2. What's in the Box
Please check the package contents to ensure all items are present:
- 1 x SEAOURA 24/7 Cycle LED Aquarium Plant Light
- 1 x Power Cable
- 1 x Extendable Mount (Brackets)
- 1 x User Manual (This document)

Figure 2: Included components.
3. Setup and Installation
Follow these steps to install your aquarium light:
- Attach the Extendable Mounts: Slide the extendable metal brackets onto both ends of the light fixture. Ensure they are securely fitted.
- Position the Light: Place the light fixture on top of your aquarium tank. Adjust the extendable brackets to fit the width of your tank (suitable for 18-24 inch tanks). The light can be used with or without a transparent hood/lid, and on rimmed or rimless tanks.
- Connect Power: Connect the power cable to the light fixture and then plug the power adapter into a standard electrical outlet.
- Initial Power On: The light will typically turn on in a default mode. Refer to the Operating Instructions section to configure your desired settings.

Figure 3: Attaching and adjusting the extendable brackets.
4. Operating Instructions
The SEAOURA aquarium light features a multi-function controller for various settings. Familiarize yourself with the controller buttons:
- Timer Button (Clock Icon): Sets the duration for Timer Mode (4H, 6H, 8H, 10H, 12H).
- Power/Mode Button (Circle with Line/M): Turns the light On/Off and cycles through color modes in DIY Mode.
- Brightness Adjustment (Up/Down Arrows): Adjusts brightness from 10% to 100% in 10 levels.
- 24/7 Cycle Button (24/7 Icon): Activates and sets the 24/7 natural light cycle mode.
- AM/PM Button: Used for setting the current time in 24/7 mode.

Figure 4: Multi-function controller.
4.1. 24/7 Cycle Mode
This mode simulates a natural sunrise, daylight, sunset, and moonlight cycle. It automatically turns on and off, providing a minimum of 9 hours of sleep time for fish and plants.
- Enter 24/7 Mode: Long press the 24/7 Cycle Button until the 24/7 indicator lights up.
- Set Current Time: The controller will display a blinking time. Use the AM/PM Button to set the current hour. The 16 time points on the controller serve as a reference for the initial time setting.
- Select Cycle Mode: Once the current time is set, click the 24/7 Cycle Button again to confirm. Then, use the Brightness Adjustment (Up/Down Arrows) to choose one of the three preset 24/7 modes (M1, M2, M3):
- M1: Auto on at 6:00 AM and auto off at 9:00 PM.
- M2: Auto on at 7:00 AM and auto off at 10:00 PM.
- M3: Auto on at 8:00 AM and auto off at 11:00 PM.
- Confirm Selection: Press the 24/7 Cycle Button one more time to confirm your chosen mode. The light will now operate according to the selected 24/7 cycle.
Note: In 24/7 mode, you cannot manually change the brightness or color. The light will automatically adjust these parameters throughout the day.

Figure 5: 24/7 Cycle Mode function.
4.2. DIY Mode (Custom Color & Brightness)
This mode allows you to manually select specific colors and brightness levels.
- Activate DIY Mode: Short press the Power/Mode Button (M) to cycle through the available color modes.
- Select Color: There are 8 color modes: Red, Blue, Green, Pink, Orange, Sea Blue, Yellow, and Full Spectrum. Keep pressing the Power/Mode Button (M) until your desired color is displayed. A 'Cycle' option is also available, which cycles through all colors.
- Adjust Brightness: Use the Brightness Adjustment (Up/Down Arrows) to set the desired intensity (10% to 100%).
- Turn On/Off: Long press the Power/Mode Button (M) for 2 seconds to turn the light on or off in DIY mode.
Note: The 'Cycle' color mode does not have a brightness adjustment option.

Figure 6: Custom light color options.
4.3. Timer Mode
This mode allows you to set the light to turn on for a specific duration each day.
- Select Duration: Press the Timer Button (Clock Icon) to cycle through the available timer options: 4 Hours, 6 Hours, 8 Hours, 10 Hours, or 12 Hours. The corresponding indicator light will illuminate.
- Automatic Operation: Once a timer duration is selected, the light will automatically turn on for that period each day at the time you set it. For example, if you set a 6-hour timer at 9:00 AM, the light will turn on at 9:00 AM and turn off at 3:00 PM daily.
Note: The timer mode will recalculate the setting time in case of a power failure.

Figure 7: Precise timing and timer settings.
4.4. Official Product Videos
For visual guidance on setting up and operating your SEAOURA aquarium light, please refer to the official videos below:
SEAOURA 24/7 Aluminum Alloy Aquarium Light Operation Guide
Video 1: A detailed guide on how to operate the SEAOURA 24/7 Aluminum Alloy Aquarium Light, including setting various modes and functions.
How to setting 24/7 Cycle Mode?
Video 2: Step-by-step instructions on how to set up and activate the 24/7 natural light cycle mode on your aquarium light.
5. Maintenance
Proper maintenance ensures the longevity and optimal performance of your light.
- Cleaning: The light features an ultra-thin aluminum alloy shell and an IP68 waterproof rating, making it easy to clean. Gently wipe the light fixture with a soft, damp cloth. Do not use abrasive cleaners or solvents.
- Water Exposure: While the light is IP68 waterproof, it is designed to be placed above the water surface. Avoid prolonged submersion. In case of accidental falls into the water, retrieve immediately and ensure all connections are dry before re-powering.
- Ventilation: Ensure the light is not covered or obstructed to allow for proper heat dissipation from the aluminum alloy casing.
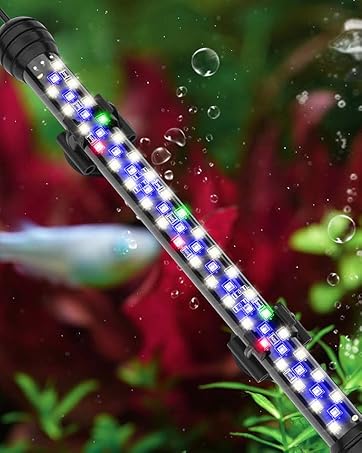
Figure 8: IP68 Waterproof design for easy cleaning.
6. Troubleshooting
Here are solutions to common issues you might encounter:
- Light does not turn on:
- Check if the power cable is securely connected to both the light fixture and the power outlet.
- Ensure the power outlet is functional.
- Press the Power/Mode button to manually turn on the light.
- 24/7 Mode timing is incorrect after power outage:
- The light has a power-off memory function. In case of power failure, the 24/7 mode will restart at 6:00 AM. The timer mode will recalculate based on the new power-on time.
- If the timing is significantly off, reset the current time in 24/7 mode as described in section 4.1.
- Cannot change brightness/color in 24/7 Mode:
- This is normal behavior. In 24/7 mode, the light automatically adjusts brightness and color to simulate natural cycles. Manual adjustments are only available in DIY Mode.
7. Specifications
| Feature | Specification |
|---|---|
| Model Name | Aquarium light (SR-618) |
| Brand | SEAOURA |
| Wattage | 18 watts |
| Application Size | 18-24 inch tank |
| Light Source Type | LED (5050 & 2835 chips) |
| Color Temperature | 6500 Kelvin (White LEDs) |
| Special Features | 24/7 cycle, Corded, Full Spectrum, Sunrise-Daylight-Sunset-Moonlight, Timer, Dimmable |
| Waterproof Rating | IP68 |
| Material | Aluminum alloy |
| Product Dimensions | 3.7"D x 16.26"W x 0.3"H |
| Item Weight | 1.41 pounds (0.64 Kilograms) |
| Voltage | 20 Volts (DC) |
8. Safety Information
Please read and follow these safety guidelines to prevent injury or damage:
- Always unplug the light from the power outlet before performing any maintenance, cleaning, or handling the light.
- Do not operate the light if the power cord or plug is damaged.
- This product is designed for indoor use only.
- Keep out of reach of children.
- Ensure your hands are dry when plugging or unplugging the power adapter.
9. Warranty and Support
For any questions, concerns, or support regarding your SEAOURA 24/7 Cycle LED Aquarium Plant Light, please contact SEAOURA customer service. Refer to your purchase documentation for specific warranty details and contact information.


