1. Introduction
Thank you for choosing the Promounts Modern All Seasons 52" Smart Ceiling Fan. This manual provides essential information for the safe installation, operation, and maintenance of your new ceiling fan. Please read it thoroughly before installation and keep it for future reference.
This Wi-Fi enabled ceiling fan features 3 aerodynamic blades, an integrated LED light with 3 color temperatures, 6 adjustable fan speeds, and voice/app control compatibility with Alexa and Google Assistant. It also includes a reversible motor for year-round comfort and a timer function for automated control.
2. Safety Information
Always follow basic safety precautions when installing and operating electrical appliances to reduce the risk of fire, electric shock, and personal injury.
- Read all instructions carefully before beginning installation.
- Installation must be performed by a qualified electrician.
- Ensure the power is turned off at the circuit breaker before installation or maintenance.
- The mounting structure must be capable of supporting the weight of the fan (approximately 15 lbs).
- Do not bend the blade holders during installation, balancing, or cleaning.
- Keep hands clear of the fan blades when the fan is operating.
- This fan is suitable for both indoor and outdoor use, but ensure proper weather protection for outdoor installations.
3. Package Contents
Unpack your fan and check the contents against the list below. You should have the following items:
- 1 x DC Motor
- 3 x Reversible Fan Blades
- 1 x Remote Controller
- 1 x LED Light Kit
- 1 x Screw Package
Tools and Materials Required: Philips Screw Driver, Blade Screw Driver, 11 mm Wrench, Step Ladder, Wire Cutters.

Image: All components of the Promounts 52" Smart Ceiling Fan laid out for assembly, including blades, motor, light kit, remote, and mounting hardware.
4. Setup and Installation
Follow these steps carefully for proper installation. Refer to the wiring diagram and installation video for visual guidance.
4.1. Fan Assembly
- Prepare the Fan Motor: Remove the outer screws from the fan motor assembly.
- Attach Fan Blades: Securely attach the three fan blades to the motor housing using the provided screws. Ensure they are tightened evenly.
- Install Fan Housing: Place the fan housing over the motor assembly, aligning the screw holes. Secure it with screws.
- Assemble Canopy: Disassemble the downrod by removing the pin and screws. Feed the wires through the downrod. Reattach the pin and screws to secure the downrod to the motor.
- Install LED Light Kit: Connect the LED light kit to the fan's wiring. Secure the light kit to the fan assembly.
- Attach Glass Diffuser: Carefully place the glass diffuser over the LED light kit and secure it.

Image: Close-up view of the fan motor and one blade, illustrating the lightweight construction and how blades attach.
4.2. Wiring and Mounting
Before proceeding, ensure power is OFF at the circuit breaker.
- Mounting Bracket: Install the ceiling mounting bracket to your electrical junction box.
- Connect Receiver: Connect the receiver unit to the fan's wiring and the household wiring according to the provided wiring diagram.
- Hang Fan: Carefully lift the assembled fan and hang it onto the mounting bracket.
- Secure Canopy: Slide the canopy up to cover the mounting bracket and secure it with screws.
Wiring Diagram:

Image: A detailed wiring diagram illustrating how to connect the ceiling fan to the outlet box, including the receiver for smart control. It shows connections for neutral, hot, ground, light, and fan lines.
4.3. Installation Videos
Video: This video provides a comprehensive guide to the physical installation process of the Promounts Modern All Season Smart Ceiling Fan.
Video: This video demonstrates the wiring process for the Promounts Modern All Season Smart Ceiling Fan, ensuring correct electrical connections.
5. Operating Instructions
5.1. Basic Functions (Remote Control)
- Fan Speed: Use the remote to select one of 6 adjustable fan speeds.
- LED Light: Turn the integrated LED light on/off and adjust its brightness.
- Color Temperature: Cycle through 3 light color temperatures: Warm (3000K), Natural (4500K), and Cool White (6000K).
- Reverse Airflow: Activate the reversible motor for summer cooling (downward airflow) or winter warmth (upward airflow).
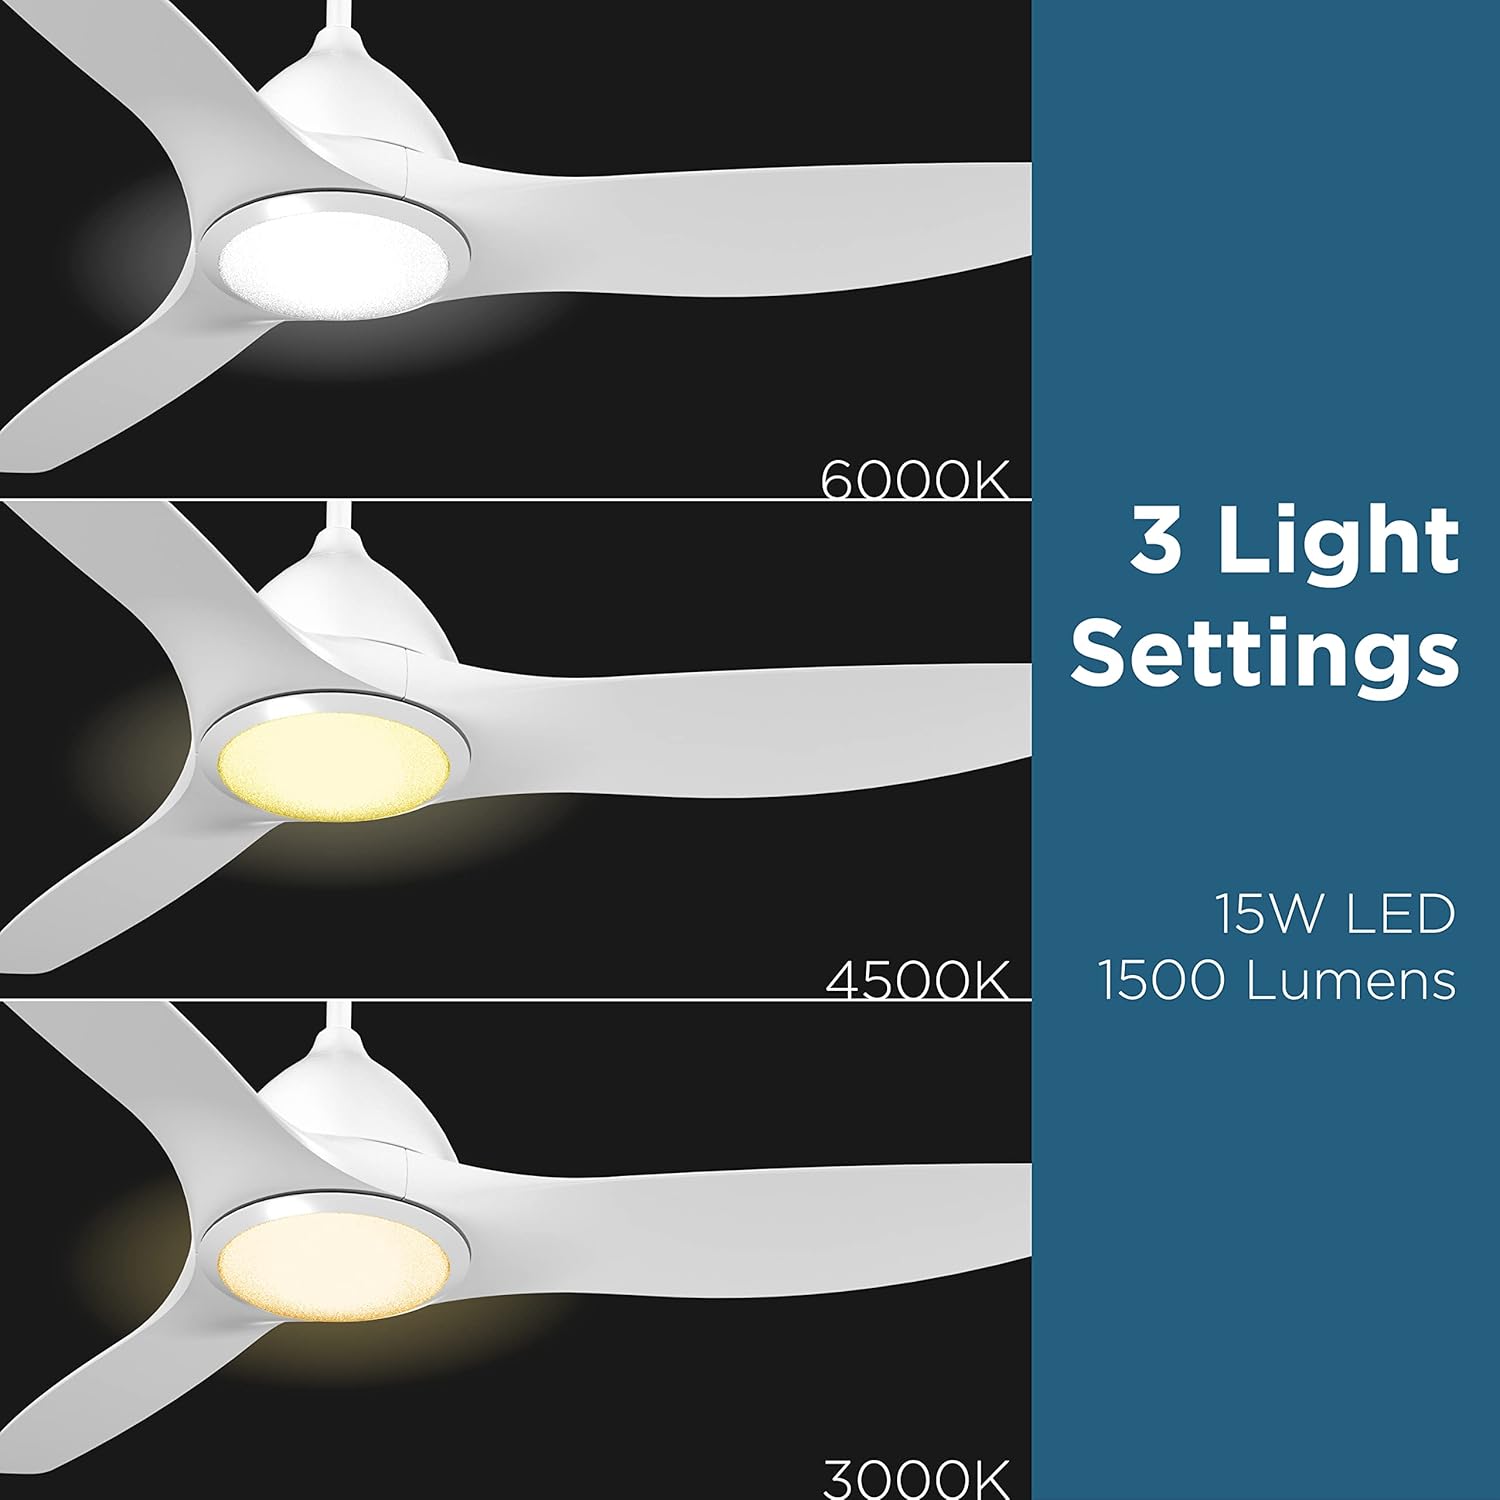
Image: Visual representation of the three adjustable LED light color temperatures: Warm (3000K), Natural (4500K), and Cool White (6000K).

Image: A diagram illustrating the reversible airflow function, showing how the fan circulates air downwards for cooling in summer and upwards to distribute warm air in winter.
5.2. Smart Control & App Integration
Control your fan and light settings through the mobile app or via voice commands with Alexa and Google Assistant. Ensure your fan is connected to your home’s 2.4GHz Wi-Fi network.
- Mobile App: Download the dedicated app to control all fan functions, set timers, and create custom schedules.
- Voice Control: Integrate with Alexa or Google Assistant for hands-free operation. Examples: "Alexa, turn on Ceiling Fan," "Hey Google, set fan to speed 3."
- Timer Function: Set specific times for the fan or light to automatically turn on/off.

Image: A smartphone displaying the fan control app interface alongside examples of voice commands for Alexa and Google Assistant.
5.3. Pairing Video
Video: This video demonstrates the process of pairing the Promounts Modern All Season Smart Ceiling Fan with your smart device or home assistant.
6. Maintenance
Regular maintenance ensures optimal performance and longevity of your ceiling fan.
- Cleaning: Clean the fan blades and motor housing periodically with a soft, damp cloth. Do not use abrasive cleaners or solvents.
- Tighten Screws: Check all screws and connections annually to ensure they are secure.
- Blade Balancing: If the fan wobbles, use the included balancing kit to correct it.
- LED Light: The LED light kit is designed for long-lasting performance and typically does not require replacement.
7. Troubleshooting
If you encounter issues with your fan, refer to the following common problems and solutions:
| Problem | Possible Cause | Solution |
|---|---|---|
| Fan does not start | Loose wiring, no power, remote battery dead | Check all wiring connections, ensure power is on, replace remote battery. |
| Fan wobbles | Loose blades, unbalanced blades, loose mounting bracket | Tighten blade screws, use balancing kit, ensure mounting bracket is secure. |
| Light does not work | Loose light kit wiring, faulty LED driver | Check light kit connections, contact customer support if LED driver is suspected. |
| Remote not working | Battery dead, remote not paired | Replace remote battery, re-pair remote with fan (refer to pairing instructions). |
| Smart control issues | Wi-Fi connectivity issues, incorrect app setup | Ensure 2.4GHz Wi-Fi is active, re-pair fan with app, check router settings. |
8. Specifications
| Feature | Detail |
|---|---|
| Brand | Promounts |
| Model Number | OHCF02-W |
| Color | White |
| Product Dimensions | 52"D x 52"W x 9"H |
| Item Weight | 15 Pounds |
| Number of Blades | 3 |
| Blade Material | Acrylonitrile Butadiene Styrene (ABS) |
| Number of Speeds | 6 |
| Light Type | LED |
| Color Temperatures | 3 (3000K, 4500K, 6000K) |
| Wattage | 45 watts |
| Voltage | 110 Volts |
| Power Source | AC |
| Control Method | App, Remote, Touch, Google Assistant |
| Indoor/Outdoor Usage | Indoor, Outdoor |
| Specification Met | Energy Star, FCC, RoHS |
9. Warranty and Support
This Promounts ceiling fan comes with a 3-Year Warranty. For warranty claims, technical support, or any questions regarding your product, please contact Promounts AV Products USA directly.
You can visit the Promounts Store on Amazon for more information or to contact the seller.


