1. Introduction
This manual provides detailed instructions and information for the MITSUKO NAFKB1504M Clutch Release Fork Clips Bearing Sleeve Repair Kit. This kit is designed to replace critical components within your vehicle's clutch release mechanism, ensuring proper clutch operation and engagement. Please read all instructions carefully before proceeding with installation.
Vehicle Compatibility
This repair kit is compatible with various Subaru models and engine configurations. Verify your vehicle's specific requirements before installation.
- 1996-2009 Subaru Legacy 2.5L (Non-Turbo)
- 2012-2014 Subaru Impreza 2.0L (Non-Turbo)
- 1998-2011 Subaru Impreza 2.5L (Non-Turbo)
- 2000-2009 Subaru Outback 2.5L
- 2001-2004 Subaru Outback 3.0L
2. Kit Components
The MITSUKO NAFKB1504M repair kit includes the following components:
- Clutch Release Fork
- Clutch Release Bearing
- Bearing Sleeve
- Retaining Clips

Figure 2.1: Overview of the MITSUKO Clutch Release Fork Clips Bearing Sleeve Repair Kit components. This image displays all parts included in the kit: the clutch release fork, the release bearing, the bearing sleeve, and the retaining clips.

Figure 2.2: The clutch release fork. This component is responsible for transferring the movement from the clutch slave cylinder to the release bearing, disengaging the clutch.

Figure 2.3: The clutch release bearing and bearing sleeve. The release bearing presses against the diaphragm spring of the pressure plate, while the sleeve guides the bearing's movement on the transmission input shaft.
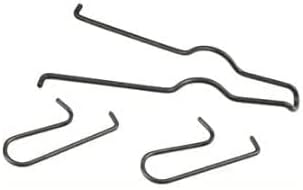
Figure 2.4: Clutch release fork retaining clips. These clips secure the clutch release fork in its proper position within the transmission bell housing.
3. Installation Instructions
Installation of clutch components requires mechanical expertise and specialized tools. If you are not confident in your ability to perform this repair, it is recommended to seek assistance from a qualified automotive technician.
Safety Precautions
- Always wear appropriate personal protective equipment (PPE), including safety glasses and gloves.
- Ensure the vehicle is securely supported on jack stands or a lift before working underneath.
- Disconnect the vehicle's battery before starting work.
- Allow the engine and transmission to cool completely before handling components.
- Be aware of potential pinch points and sharp edges.
Required Tools (General)
- Socket and wrench set
- Torque wrench
- Pry bars
- Grease (high-temperature, lithium-based recommended)
- Shop rags and cleaner
- Transmission jack (if removing transmission)
Installation Steps (General Overview)
The following steps provide a general overview. Refer to your vehicle's specific service manual for detailed procedures and torque specifications.
- Vehicle Preparation: Safely lift and support the vehicle. Disconnect the battery.
- Transmission Removal: Depending on the vehicle and specific repair, it may be necessary to remove the transmission to access the clutch components. Follow your vehicle's service manual for transmission removal procedures.
- Old Component Removal: Carefully remove the old clutch release fork, release bearing, bearing sleeve, and retaining clips. Inspect surrounding components for wear or damage.
- Clean and Inspect: Thoroughly clean the bell housing area, transmission input shaft, and any mating surfaces. Inspect the transmission input shaft for wear.
- Lubrication: Apply a thin layer of high-temperature grease to the transmission input shaft where the bearing sleeve slides, and to the pivot ball for the clutch fork. Also, lightly grease the contact points between the clutch fork and the release bearing.
- Install Bearing Sleeve: Slide the new bearing sleeve onto the transmission input shaft. Ensure it seats correctly.
- Install Release Bearing: Attach the new release bearing to the clutch release fork. Ensure it is securely seated and oriented correctly.
- Install Clutch Release Fork: Position the clutch release fork with the attached bearing into the bell housing. Secure it with the new retaining clips onto the pivot ball. Ensure the fork moves freely and engages the bearing properly.
- Reassemble: Reinstall the transmission, clutch assembly (if removed), and all other components in reverse order of removal. Ensure all fasteners are torqued to manufacturer specifications.
- Test Operation: After reassembly, bleed the clutch hydraulic system (if applicable) and test clutch engagement and disengagement before driving the vehicle.
4. System Operation
After successful installation, the clutch release system will function as follows:
- When the clutch pedal is pressed, hydraulic pressure (or cable tension) actuates the clutch slave cylinder.
- The slave cylinder pushes the clutch release fork.
- The clutch release fork pivots on its pivot ball, pushing the release bearing forward along the bearing sleeve.
- The release bearing presses against the diaphragm spring of the clutch pressure plate.
- This action disengages the clutch disc from the flywheel, allowing for gear changes.
- When the clutch pedal is released, the process reverses, engaging the clutch and transferring power to the transmission.
5. Maintenance Guidelines
While the components in this kit are designed for durability, proper maintenance of the overall clutch system can extend its lifespan and ensure reliable operation.
- Clutch Fluid: For hydraulic clutch systems, regularly check and replace the clutch fluid according to your vehicle manufacturer's recommendations.
- Proper Clutch Use: Avoid riding the clutch, excessive slipping, or holding the clutch pedal down unnecessarily, as these actions can accelerate wear on all clutch components.
- Inspection: During other transmission or engine work, visually inspect the clutch release components for signs of wear, corrosion, or damage.
6. Troubleshooting Common Issues
If you experience issues after installation or during normal operation, consider the following common problems and potential causes:
| Symptom | Possible Cause | Action |
|---|---|---|
| Difficulty shifting gears | Incomplete clutch disengagement, air in hydraulic line, worn pilot bearing | Check clutch fluid level, bleed hydraulic system, inspect pilot bearing |
| Clutch pedal feels soft or spongy | Air in hydraulic system, failing master/slave cylinder | Bleed hydraulic system, inspect master/slave cylinders |
| Squealing or grinding noise when pressing clutch pedal | Worn release bearing, lack of lubrication on pivot points | Inspect release bearing, ensure proper lubrication during installation |
| Clutch not engaging fully (slipping) | Worn clutch disc, contaminated clutch disc, incorrect pressure plate installation | Inspect clutch disc and pressure plate, ensure proper installation |
7. Product Specifications
| Specification | Detail |
|---|---|
| Brand | MITSUKO |
| Model Number | NAFKB1504M |
| Item Weight | 3 pounds |
| Manufacturer Part Number | NAFKB1504M |
| Exterior Finish | Brushed |
| Date First Available | July 11, 2022 |
8. Warranty Information
MITSUKO offers a reliable 12-month/12,000-mile warranty on this product. This warranty covers defects in materials and workmanship under normal use and service. Please retain your proof of purchase for warranty claims.
9. Customer Support
For any technical questions or assistance regarding the MITSUKO NAFKB1504M Clutch Release Fork Clips Bearing Sleeve Repair Kit, please contact our highly trained customer support staff. Our team is available to provide guidance and support for your installation and product inquiries.
Manufacturer: MITSUKO
For further assistance, please refer to the contact information provided with your purchase or visit the official MITSUKO website.