
Introduction
Thank you for purchasing the Fistone 1/24 RC Battle Tank Set. This manual provides essential information for the safe and effective operation of your remote control tanks. Please read it thoroughly before use and retain it for future reference.
Safety Information
- This product is recommended for users aged 8 years and older. Adult supervision is advised for younger users.
- Keep small parts away from children to prevent choking hazards.
- Do not operate the tanks near water or in wet conditions to avoid electrical damage.
- Avoid operating the tanks in crowded areas or near obstacles that could cause damage or injury.
- Always turn off the tanks and remote control when not in use.
- Use only the provided charging cable and battery. Do not attempt to charge non-rechargeable batteries.
- Do not disassemble or modify the product, as this may cause malfunction or injury.
What's in the Box
The Fistone 1/24 RC Battle Tank Set includes the following components:
- 1x T90 RC Battle Tank
- 1x Leopard RC Battle Tank
- 2x Remote Controls
- 2x 3.7V 500mAh Lithium Ion Batteries
- 2x USB Charging Cables
- 2x Water Bottles (for spray effect)
- 1x Screwdriver
- 1x Product Manual (this document)

Image: The complete set of two RC battle tanks (T90 and Leopard models), two remote controls, and various accessories including batteries, charging cables, water bottles, and a screwdriver.
Setup
1. Battery Installation & Charging
- Tank Battery: Locate the battery compartment on the underside of each tank. Open the compartment using the provided screwdriver. Connect the 3.7V 500mAh Lithium Ion battery to the tank's connector and place it inside. Secure the compartment cover.
- Remote Control Battery: The remote controls require 2x AA batteries each (not included). Open the battery compartment on the back of each remote and insert the batteries, observing polarity. Close the compartment.
- Charging: Connect the tank battery to the USB charging cable. Plug the USB cable into a standard USB power adapter (e.g., phone charger, computer USB port). The indicator light on the USB cable will show charging status. A full charge takes approximately 2-3 hours and provides about 30 minutes of playtime.
2. Filling Water for Spray Effect
- Locate the water inlet on the top of the tank (refer to image below).
- Use the provided water bottle to carefully fill the water tank. Do not overfill.
- Ensure the water inlet cap is securely closed after filling.

Image: A detailed view of the tank's top, highlighting the water inlet where water is added for the simulated spray effect.
3. Pairing the Remote Control
- Turn on the tank using the power switch located on the tank's underside.
- Turn on the remote control using the ON/OFF switch.
- The remote control and tank should automatically pair. If pairing fails, turn both devices off and on again. The 2.4GHz frequency allows multiple tanks to operate simultaneously without interference.
Operating Instructions
Remote Control Layout
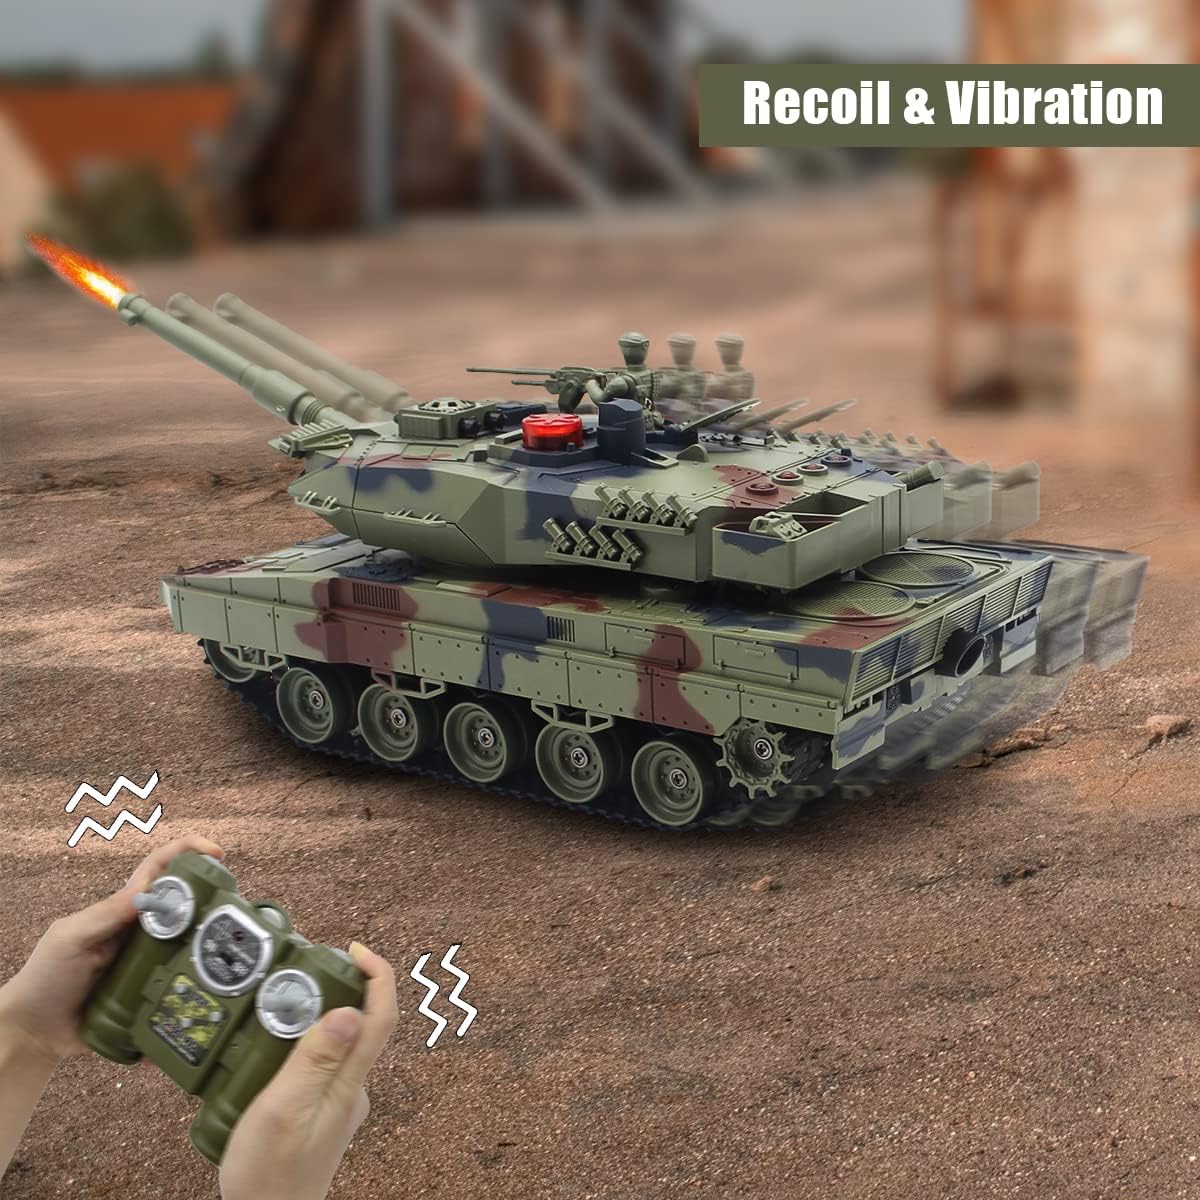
Image: A clear diagram illustrating the remote control's buttons and their corresponding functions, including driving, shooting, and turret controls.
- Left Tread Driving Button: Controls the left track for forward/backward movement.
- Right Tread Driving Button: Controls the right track for forward/backward movement.
- Controller ON/OFF: Power switch for the remote control.
- Shooting Button: Activates the main cannon shot.
- Indicator Light: Displays connection status and battle life.
- Sound Switch: Toggles tank sound effects on/off.
- Engine Power Switch: Activates the tank's engine sounds.
- Missile Button: Fires a simulated missile.
- Cannon Button: Fires the main cannon.
- Turret Turn Right: Rotates the turret to the right.
- Turret Turn Left: Rotates the turret to the left.
Basic Movement
- Forward/Backward: Push both tread driving buttons forward or backward simultaneously.
- Turn Left/Right: Push one tread driving button forward and the other backward, or push only one button forward/backward.
- 360-Degree Rotation: Push one tread driving button forward and the other backward to spin the tank in place.
Turret and Barrel Control
- Turret Rotation: Use the 'Turret Turn Right' and 'Turret Turn Left' buttons to rotate the turret up to 330 degrees.
- Barrel Adjustment: The tank's barrel can be adjusted up and down by 30 degrees.

Image: The tank showcasing its full range of motion, including the turret's 330-degree rotation, the tank's ability to rotate 360 degrees, and the barrel's 30-degree vertical adjustment.
Battle Functions & Effects
- Shooting: Press the 'Shooting Button' or 'Cannon Button' to fire the main cannon. The tank will simulate recoil and vibration.
- Missile Launch: Press the 'Missile Button' to simulate firing a missile.
- Sound Effects: The tanks feature realistic sounds including gunshots, machine guns, and engine noises. These can be toggled using the 'Sound Switch' and 'Engine Power Switch'.
- LED Lights: Tanks are equipped with LED lights for enhanced realism, allowing for play in low-light conditions.
- Simulated Spray: Activate the spray function using the dedicated switch on the tank to emit a simulated exhaust effect. Ensure the water tank is filled.
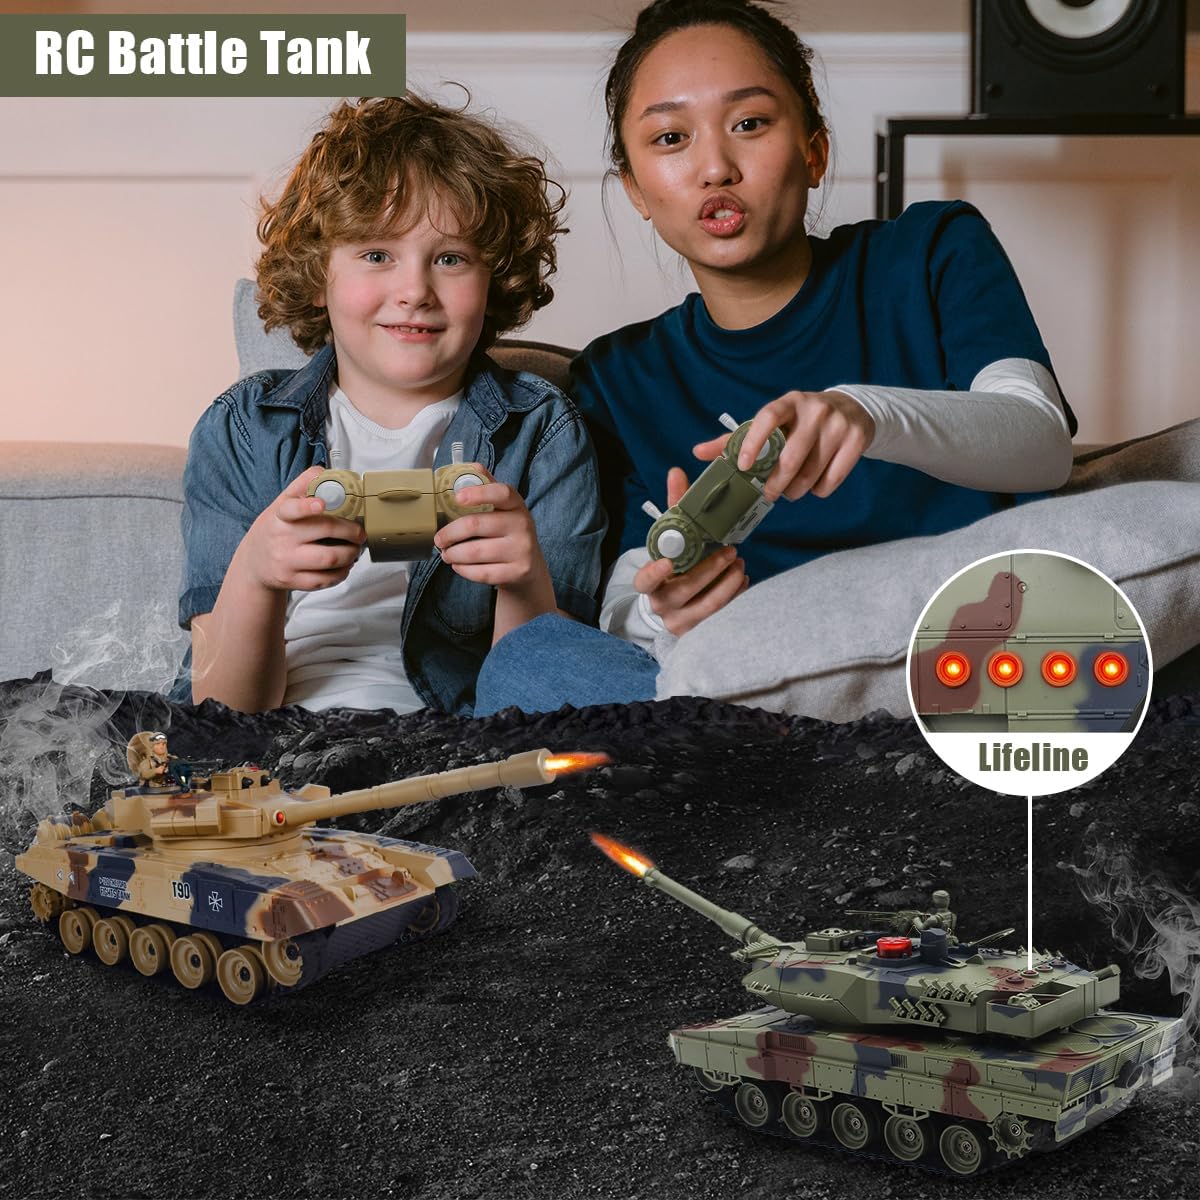
Image: A tank exhibiting the recoil and vibration feature, enhancing the realism of firing its main cannon, with the remote control visible.
Battle Rules & Life Indicators
Each tank is equipped with four life indicator lights (HP). When a tank is hit, one HP is reduced. The battle ends when a tank loses all four HP.
- Hit by a virtual shell: Reduces one HP.
- Hit by a missile: Reduces one HP.
- Shot by machine gun 5 times: Reduces one HP.

Image: An overhead view of a tank detailing the battle rules, specifically how hits from virtual shells, missiles, and machine gun fire reduce the tank's four life points, indicated by LED lights.
Terrain Operation
The tanks are designed to operate on various surfaces, including:
- Sandy Land
- Highway (paved surfaces)
- Indoor surfaces (e.g., wood, tile)
- Grass Land (short grass)
The tanks can climb slopes up to 40 degrees and navigate small obstacles.
Maintenance
- Cleaning: Use a soft, dry cloth to wipe down the tanks and remote controls. Do not use water or chemical cleaners.
- Battery Care: Always remove batteries from the tanks and remote controls if storing for extended periods. Recharge batteries fully before storage and periodically during storage to maintain battery health.
- Storage: Store the tanks and accessories in a cool, dry place away from direct sunlight and extreme temperatures.
Troubleshooting
| Problem | Possible Cause | Solution |
|---|---|---|
| Tank does not move or respond. | Low battery in tank or remote; tank/remote not powered on; pairing issue. | Charge tank battery; replace remote batteries; ensure both are powered on; re-pair tank and remote. |
| Short playtime. | Battery not fully charged; aging battery. | Ensure battery is fully charged (2-3 hours); consider purchasing a new battery if performance significantly degrades. |
| Spray effect not working. | Water tank empty; spray switch off. | Refill water tank; ensure spray switch is in the 'ON' position. |
| Remote control buttons unresponsive. | Low remote battery; internal contact issue. | Replace remote batteries. If issue persists, contact customer support. |
| Tracks come off. | Operating on unsuitable terrain; excessive force. | Reattach tracks carefully. Avoid rough terrain or sharp turns at high speed. |
Specifications
- Product Dimensions: 12.4 x 4.7 x 4.1 inches
- Item Weight: 2.8 pounds
- Model Number: 788
- Manufacturer Recommended Age: 8 - 18 years
- Batteries: 1x 3.7V 500mAh Lithium Ion battery (included) for each tank; 2x AA batteries (not included) for each remote.
- Charging Time: 2-3 hours
- Play Time: Approximately 30 minutes per charge
- Remote Control Frequency: 2.4GHz
- Remote Control Distance: Up to 20m (65ft)
- Turret Rotation: 330 degrees
- Barrel Adjustment: 30 degrees (up/down)
- Climbing Angle: Up to 40 degrees
Warranty & Support
Fistone products are designed for quality and performance. For any questions, technical support, or warranty inquiries, please refer to the contact information provided with your purchase or visit the official Fistone website. Please retain your proof of purchase for warranty claims.