1. Introduction
The MTW Signal Fire AI-6C is an advanced optical fiber fusion splicer designed for efficient and precise fiber optic cable splicing. This device features six motors for core and cladding alignment, ensuring high-quality splices. It is suitable for various fiber types including SM, MM, DS, and NZDS, making it a versatile tool for FTTH (Fiber to the Home) and other optical network installations. This manual provides essential information for the safe and effective operation, maintenance, and troubleshooting of your AI-6C fusion splicer.

Figure 1: MTW Signal Fire AI-6C Optical Fiber Fusion Splicer
2. Safety Information
Please read and understand all safety instructions before operating the AI-6C fusion splicer to prevent injury and damage to the equipment.
- Eye Protection: Always wear appropriate eye protection when working with optical fibers and the splicer. Invisible laser radiation may be present.
- Electrical Safety: Do not operate the splicer with wet hands or in damp environments. Ensure the power adapter is correctly connected to a grounded outlet.
- Fiber Handling: Optical fiber shards are extremely sharp and can cause serious injury. Always dispose of fiber scraps in a designated container.
- High Temperature: The heating element reaches high temperatures during the heat shrink process. Avoid direct contact to prevent burns.
- Battery Safety: Use only the specified battery and charger. Do not expose the battery to extreme temperatures or puncture it.
- Flammable Materials: Keep flammable liquids, such as alcohol for cleaning, away from the heating element and arc discharge area.
3. Package Contents
Verify that all items listed below are present in your AI-6C fusion splicer kit:

Figure 2: Accessories in the Tool Box
- AI-6C Fusion Splicer Unit
- S07 Fiber Cleaver
- Spare Electrode
- Strap
- User's Manual & Quality Certificate Warranty Card
- Wire Stripping Pliers
- Miller Stripper
- Alcohol Bottle (empty)
- Brush
- Power Adapter
4. Product Overview
The AI-6C fusion splicer features a robust design with intuitive controls and a clear display for efficient operation. Key components are highlighted below:

Figure 3: AI-6C Component Diagram
- Protective Case: Durable outer casing for protection.
- Charging Port: For connecting the power adapter to charge the internal battery.
- USB Port: Can be used to charge external devices like a phone.
- Automatic Heating Element: For heat shrinking splice protection sleeves.
- Disassembly-Free Three-in-One Fiber Holder: Accommodates various fiber types without needing to change holders.
- 5-inch TFT Color Display: Provides real-time splicing status and menu navigation.
- Control Buttons: RESET, CONTINUE, MAGNIFICATION KEY, POWER METER AND OPTICAL MODULES SWITCH.
- 5200mAh Lithium Battery: High-capacity internal battery for portable operation.
- LED Light: Built-in illumination for night or low-light operation.
5. Setup
Follow these steps for initial setup of your AI-6C fusion splicer:
- Unpack and Inspect: Carefully remove all components from the toolbox and inspect for any damage.
- Charge the Battery: Connect the power adapter to the splicer's charging port and a power outlet. The 5200mAh lithium battery requires approximately 3.5 hours for a full charge. Ensure the battery is securely installed.
- Install Electrodes: If not already installed, carefully place the electrodes into their designated slots. Refer to the user manual for detailed instructions on electrode installation and replacement.
- Power On: Press and hold the power button to turn on the splicer. The 5-inch TFT color display will illuminate.
- Initial Calibration: The splicer may perform an automatic calibration upon first power-on or after electrode replacement. Allow this process to complete.

Figure 4: Battery Installation/Removal
6. Operating Instructions
This section outlines the general procedure for performing a fiber fusion splice.
6.1 Fiber Preparation
- Strip the Fiber: Use the wire stripping pliers and Miller stripper to remove the outer jacket and coating from the fiber, exposing the bare fiber. Ensure the stripped length is appropriate for cleaving.
- Clean the Fiber: Apply a small amount of isopropyl alcohol to a lint-free wipe and carefully clean the bare fiber to remove any residue. Allow it to air dry completely.
- Cleave the Fiber: Place the cleaned, stripped fiber into the S07 Fiber Cleaver. Follow the cleaver's instructions to achieve a precise, perpendicular cleave. A good cleave is critical for low splice loss.
6.2 Splicing Procedure
- Place Fiber in Holders: Open the splicer's lid and carefully place the prepared fibers into the 3-in-1 fiber holders. Ensure the cleaved ends are positioned correctly within the V-grooves. The universal fiber holders support SM, MM, bare fiber, pigtail, rubber-insulated, and multi-fiber cables.
- Close the Lid: Gently close the splicer's lid. The AI-6C will automatically begin the alignment process using its six motors and auto-focus feature.
- Initiate Splicing: The splicer will typically initiate the splicing process automatically once alignment is complete. The splicing time is approximately 8 seconds.
- Inspect Splice: After splicing, the display will show the estimated splice loss. Visually inspect the splice on the screen for any imperfections.
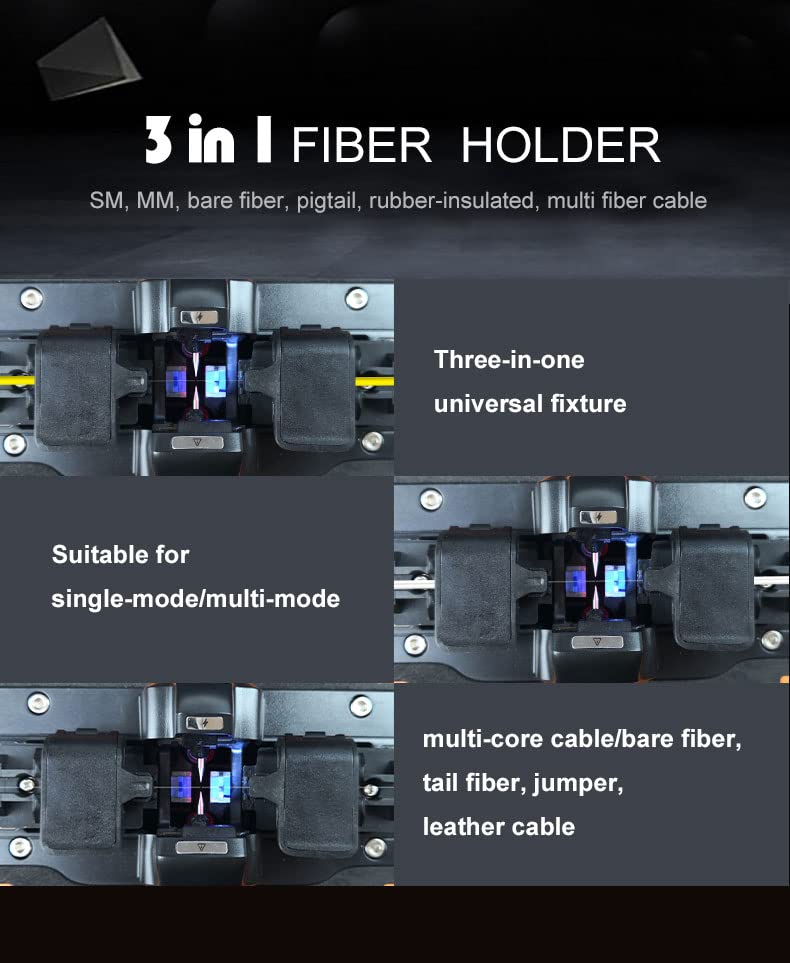
Figure 5: 3-in-1 Fiber Holder Versatility
6.3 Heat Shrink Protection
- Position Protection Sleeve: Carefully remove the spliced fiber from the V-grooves and slide a heat shrink protection sleeve over the splice point.
- Place in Heater: Position the fiber with the protection sleeve in the automatic heating oven. The heating time is approximately 18 seconds.
- Remove and Cool: Once heating is complete, carefully remove the fiber and allow the sleeve to cool and harden before handling further.
6.4 Additional Features
- Night Operation: The built-in LED light provides illumination for working in dark environments.
- Phone Charging: The splicer's internal battery can be used to charge a mobile phone via its USB port.
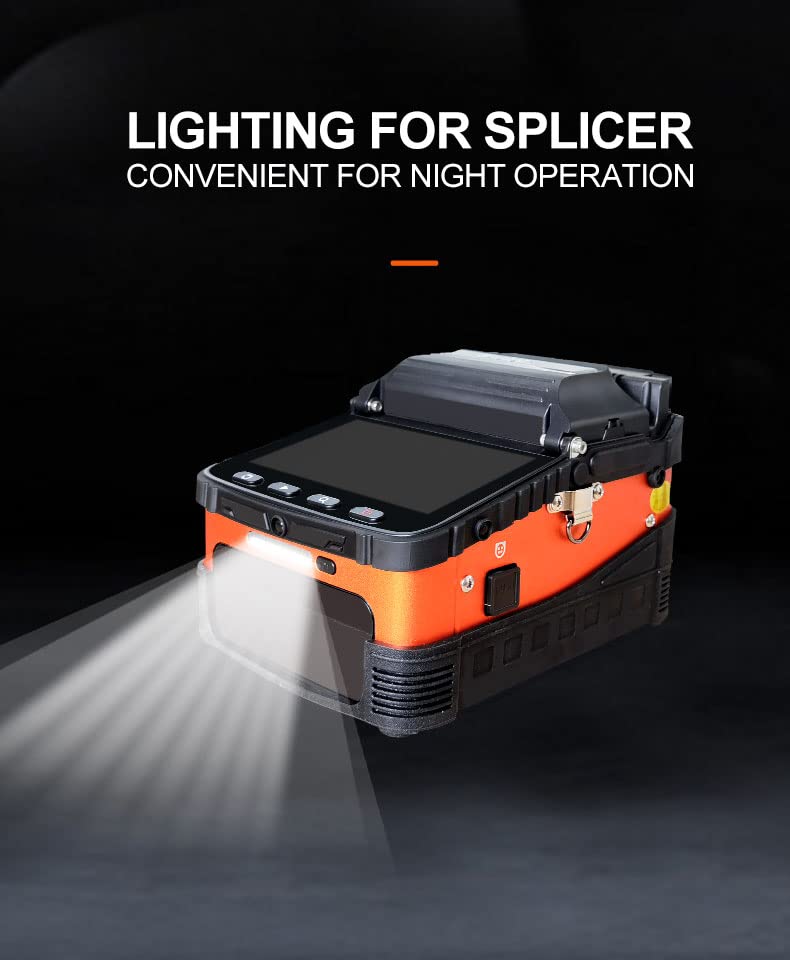
Figure 6: LED Light for Night Operation

Figure 7: Phone Charging Capability
7. Maintenance
Regular maintenance ensures the longevity and optimal performance of your AI-6C fusion splicer.
- Clean V-Grooves and Lenses: Use a cotton swab moistened with isopropyl alcohol to gently clean the V-grooves and objective lenses regularly. Dust and fiber debris can affect splicing accuracy.
- Electrode Cleaning/Replacement: If splice quality degrades or the splicer prompts, clean the electrodes with a brush. Replace electrodes when they become worn or damaged, following the instructions in the full user manual.
- Battery Care: To maximize battery life, avoid fully discharging the battery frequently. Store the splicer in a cool, dry place when not in use. If storing for extended periods, charge the battery to approximately 50%.
- Software Updates: Check the manufacturer's website for any available software updates to ensure optimal performance and new features.
8. Troubleshooting
This section addresses common issues you might encounter with the AI-6C fusion splicer.
| Problem | Possible Cause | Solution |
|---|---|---|
| High Splice Loss | Dirty V-grooves or lenses Poor fiber cleave Worn electrodes Incorrect fiber type setting | Clean V-grooves and lenses Re-cleave fiber, ensure proper technique Clean or replace electrodes Verify correct fiber type selected in settings |
| Splicer Fails to Power On | Battery discharged Battery not properly installed Power adapter fault | Charge the battery Reinstall battery securely Test power adapter with another device if possible; contact support |
| Heating Element Not Working | Heating element fault Software issue | Restart splicer. If issue persists, contact technical support. |
| Fiber Not Aligning | Dirty V-grooves Damaged fiber holders Fiber not seated correctly | Clean V-grooves Inspect fiber holders for damage Ensure fiber is properly seated in V-grooves |
9. Specifications
The following table details the technical specifications of the MTW Signal Fire AI-6C Optical Fiber Fusion Splicer:

Figure 8: Basic Parameters
| Parameter | Specification |
|---|---|
| Fiber Alignment | Core/cladding alignment / Manual alignment |
| Splicing Time | 8 seconds |
| Heating Time | 18 seconds (Automatic heating/Preheating) |
| Focus Mode | Six motors Auto focus |
| Applicable Fibers | SM (G.652 & G.657), MM (G.651), DS (G.657), NZDS (G.655) |
| Splice Loss | 0.025dB (SM), 0.01dB (MM), 0.04dB (DS/NZDS) |
| Control Technology | Real-time control and calibration of fusion ARC |
| Return Loss | Better than 60dB |
| Fiber Diameter | Cladding Diameter: 80-150 µm, Coating Diameter: 100-1000 µm |
| Fiber Cleave Length | Coating less than 250µm: 8-16mm, Coating less than 250-1000µm: 16mm |
| Built-in Lighting | Easy for night operation |
| Tension Test | Standard 2N |
| Fiber Holders | 3 in 1 fiber holder (SM, MM, bare fiber, pigtail, rubber-insulated, multi fiber cable) |
| Magnification | 300 for X or Y view, 150 for X or Y view |
| Screen | 5 inch TFT color display |
| Splicing Mode | Normal / high precision splicing |
| Splicing Record Storage | Synchronize to phone, server to cloud storage (unlimited) |
| Built-in Battery | 5200 mAh high-capacity lithium battery, charging time ≤ 3.5 hours, continuous splicing and heating about 160 times |
| Power Supply | Input AC100-240V 50/60Hz, output DC13.5V/4A, real-time detection of battery power |
| Operating Conditions | Temperature: -15 ~ +50 ℃, Humidity: <95% RH (no condensation), Working Altitude: 0-5000m, Max. Wind Speed: ≤ 15m/s |
| Shrinkable Tube | 60mm, 40mm |
| Machine Weight | 2.08kg (with battery), 1.60kg (without battery) |
| Toolbox Weight | 4.7kg (including machine and accessories) |
| Total Weight | 5.5kg |
10. Warranty and Support
The MTW Signal Fire AI-6C Optical Fiber Fusion Splicer comes with a standard warranty as detailed in the included Quality Certificate Warranty Card. Please refer to this document for specific terms, conditions, and duration of your warranty.
For technical support, service, or warranty claims, please contact your authorized dealer or the manufacturer directly. Contact information can typically be found on the warranty card or the manufacturer's official website.