Introduction
This user manual provides detailed instructions for the installation, operation, and maintenance of your MOUNTAINONE Wired Video Intercom System. Please read this manual thoroughly before using the product to ensure proper functionality and safety.
The MOUNTAINONE Wired Video Intercom system features a 7-inch color monitor, smart intercom capabilities with a camera, wired doorbell, and IR night vision. This kit includes one video intercom and one monitor, offering comprehensive home security with multi-device interconnection and easy installation.
Package Contents
Upon opening the package, verify that all components are present and in good condition. The standard package includes:
- 1 x Outdoor Video Intercom Unit
- 1 x Indoor 7-inch Monitor
- 1 x Power Adapter
- 1 x 5M Connection Cable
- 1 x Mounting Bracket
- 1 x User Manual
- Screws and Wall Plugs for installation

Image: Overview of the MOUNTAINONE Video Intercom System package contents, including the outdoor unit, indoor monitor, power adapter, connection cable, mounting bracket, user manual, and installation hardware.
Product Features
- 7-inch Color Monitor: Ultraslim design with sensitive touch panel for clear viewing and easy operation.
- Durable Outdoor Unit: Metal body with IP55 waterproof rating and rain cover for protection against weather elements.
- Infrared LED Night Vision: HD camera provides clear images day and night, supporting visual intercom.
- Multi-Intercom & Multi-Device Interconnection: Supports connection of up to 2 outdoor doorbells with up to 4 indoor monitors. All monitors can view, listen, talk, and unlock the door.
- Adjustable Ringtones: 25 types of doorbell chimes with adjustable volume.

Image: The MOUNTAINONE Wired Video Intercom System, featuring the outdoor doorbell unit on the left and the indoor 7-inch color monitor on the right.

Image: The outdoor doorbell unit, highlighting its IP55 waterproof rating and durable metal body with a rain cover, depicted in a rainy setting.

Image: The indoor monitor showing a family on its screen, with musical notes illustrating the adjustable chime feature. The outdoor unit is also visible, with a hand pressing its call button.

Image: A split image demonstrating the infrared LED night vision feature, showing a clear daytime view transitioning to a bright, detailed night view captured by the HD camera.

Image: An illustration of the multi-intercom capability, showing how up to two outdoor doorbells can be connected to up to four indoor monitors within a home.
Setup and Installation
1. Site Selection
- Outdoor Unit: Choose a location near your entrance, typically at eye level (around 1.4-1.6 meters from the ground), protected from direct heavy rain if possible, even with its waterproof rating. Ensure clear line of sight to the visitor.
- Indoor Monitor: Select a convenient location inside your home, such as a hallway or living room, where the monitor is easily accessible and visible.
2. Wiring Diagram
The system uses a wired connection. Ensure proper wiring to avoid damage and ensure functionality. The connection cable provided is 5 meters long. For longer distances, use appropriate gauge wiring.
The system requires a 4-wire connection between the outdoor unit and the indoor monitor for video, audio, power, and unlock control. Additional wires may be needed for connecting multiple monitors or doorbells.
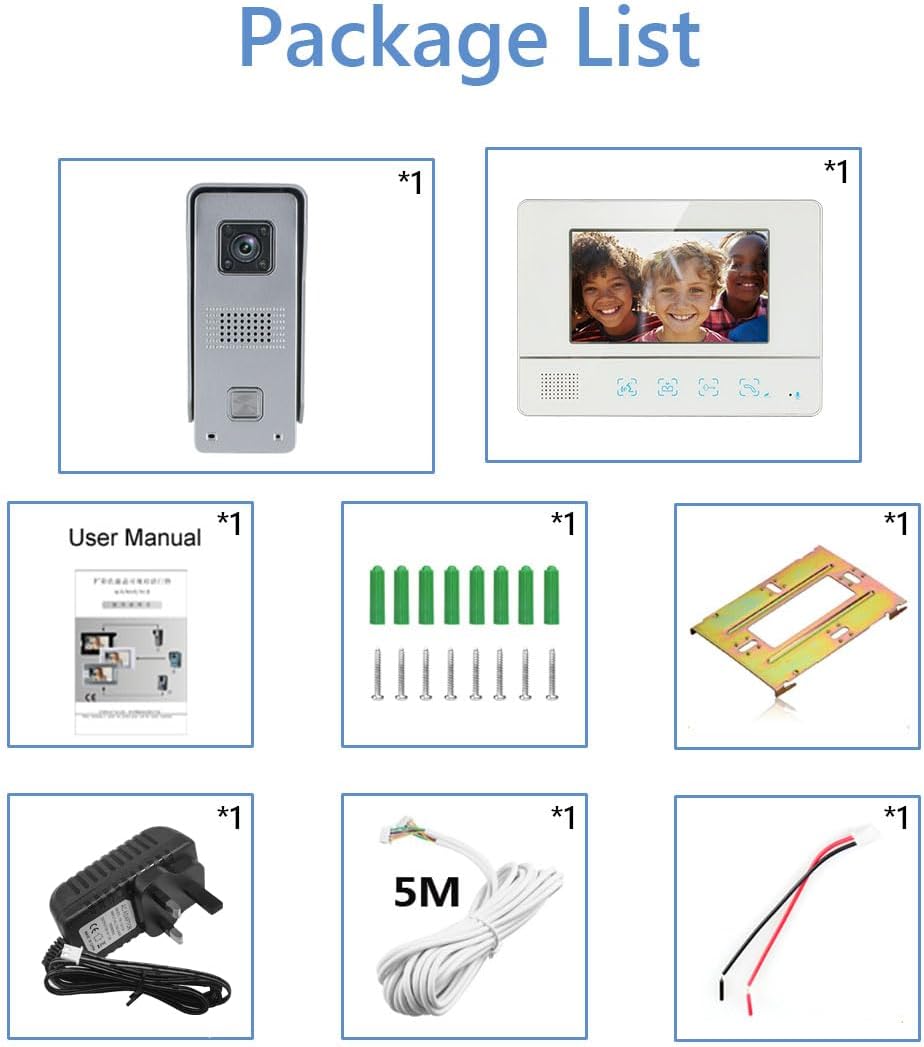
Image: Rear view of the indoor monitor, detailing its vents, menu buttons, ring volume control, and bracket for wall mounting. The image also provides dimensions (240x170x25mm) and labels for the 7-inch LCD, speaker, and touch icons for intercom, monitor, unlock, and talking functions.
3. Mounting the Outdoor Unit
- Secure the mounting bracket to the wall using the provided screws and wall plugs.
- Connect the wiring from the indoor monitor to the outdoor unit's terminals.
- Carefully attach the outdoor unit to the mounting bracket, ensuring it is securely fastened.
4. Mounting the Indoor Monitor
- Secure the indoor monitor's mounting plate to the wall using screws.
- Connect the wiring from the outdoor unit and the power adapter to the indoor monitor's terminals.
- Mount the indoor monitor onto its plate, ensuring all connections are secure.
5. Power Connection
Connect the power adapter to the indoor monitor and then plug it into a standard electrical outlet. The system will power on automatically.
Operating Instructions
1. Receiving a Call
- When a visitor presses the call button on the outdoor unit, the indoor monitor will ring and display the visitor's image.
- To answer the call, press the "Talk" button on the monitor.
2. Two-Way Intercom
- After answering, you can speak with the visitor through the monitor's microphone and speaker.
- The visitor can speak back through the outdoor unit's microphone and speaker.
3. Unlocking the Door
- To unlock an electronic door lock (if connected), press the "Unlock" button on the monitor during a call or monitoring session.
4. Monitoring
- To view the outdoor camera feed at any time without a call, press the "Monitor" button on the indoor unit.
- The monitor will display the live feed from the outdoor unit.
5. Adjusting Settings
- Use the "Menu" buttons on the side of the indoor monitor to navigate settings.
- Adjust ringtone volume using the "Ring Volume" control.
- Select from 25 different doorbell chimes.
Maintenance
- Cleaning: Use a soft, dry cloth to clean the indoor monitor and outdoor unit. Do not use abrasive cleaners or solvents.
- Outdoor Unit: Periodically check the outdoor unit for any obstructions to the camera or microphone. Ensure the rain cover is clean and intact.
- Wiring: Inspect all wiring connections periodically to ensure they are secure and free from damage.
- Software Updates: Check the manufacturer's website for any available firmware updates for improved performance or new features.
Troubleshooting
| Problem | Possible Cause | Solution |
|---|---|---|
| No image on monitor / Monitor not powering on. |
|
|
| No audio during intercom. |
|
|
| Door unlock function not working. |
|
|
| Poor night vision quality. |
|
|
Specifications
| Feature | Detail |
|---|---|
| Indoor Monitor Size | 7 inches (Color TFT LCD) |
| Outdoor Unit Material | Metal, Plastic |
| Waterproof Rating | IP55 (Outdoor Unit) |
| Night Vision | Infrared LED |
| Video Capture Resolution | 480p |
| Power Source | Wired (15 Volts, 8 Watts) |
| Max. Monitors Supported | 4 (per 2 outdoor units) |
| Mounting Type | Wall Mount |
| Model Number | 811 |
| Item Weight | 1.5 Kilograms |
Warranty and Support
MOUNTAINONE products are designed for reliability and performance. For warranty information, please refer to the warranty card included in your product packaging or visit the official MOUNTAINONE website.
For technical support, troubleshooting assistance, or spare parts, please contact MOUNTAINONE customer service. Contact details can typically be found on the product packaging or the official brand website.
Please retain your purchase receipt as proof of purchase for warranty claims.


