1. Introduction
This manual provides detailed instructions for the installation, operation, and maintenance of your Strpump 10.1-inch Android 10 Car Stereo Radio. Please read this manual thoroughly before using the product to ensure proper function and safety. This unit is specifically designed for Suzuki Swift models manufactured between 2005 and 2010.

Image 1.1: The Strpump 10.1-inch Android 10 Car Stereo Radio, featuring a 1280x720 DSP+IPS QLED display and Octa-Core processor.
2. Safety Information
- Professional Installation Recommended: Installation of this car stereo should ideally be performed by a qualified professional to prevent damage to the unit or your vehicle.
- Power Supply: Ensure the unit is connected to a 12V DC power supply with negative grounding.
- Wiring: Do not modify the wiring harness. Incorrect wiring can cause damage or fire.
- Operation While Driving: Do not operate the unit in a way that distracts you from driving. Always prioritize road safety.
- Temperature: Avoid exposing the unit to extreme temperatures or direct sunlight for prolonged periods.
- Moisture: Keep the unit dry. Exposure to moisture can cause malfunction.
3. Package Contents
Please verify that all items listed below are included in your package:
- 1x Strpump 10.1-inch Android Car Stereo Unit
- 1x GPS Antenna
- 1x Radio Fascia (specific to Suzuki Swift 2005-2010)
- 2x USB Cables
- 1x CAM In Cable
- 1x Installation Tool Set
- 1x 4G SIM RCA Cable
- 1x 4G Antenna
- 1x External Microphone
- 1x Power Harness (specific to Suzuki Swift 2005-2010)
- 1x Can bus (optional, some models may not require it)

Image 3.1: Visual representation of the accessories included in the package, such as the main unit, GPS antenna, radio fascia, various cables, installation tools, and microphone.
4. Setup and Installation
The Strpump car stereo is designed for a plug-and-play, non-destructive installation for Suzuki Swift models (2005-2010). A plastic frame and power harness are included, ensuring compatibility with your vehicle's original wiring without modification.
4.1. Pre-Installation Check
- Ensure your vehicle's ignition is off and the battery is disconnected before starting installation.
- Confirm all package contents are present.
- If your car has a factory amplifier or OEM camera, a different harness set may be required. Contact Strpump support if this applies to your vehicle.
4.2. Installation Steps
- Remove Original Radio: Carefully remove the existing car radio and dashboard trim using the provided installation tools. Refer to your vehicle's service manual for specific instructions on removing the dashboard components.
- Connect Wiring Harness: Connect the provided power harness to the vehicle's wiring. The harness is designed to be plug-and-play, matching the original car harness.
- Connect Antennas and Cables: Connect the GPS antenna, 4G antenna, USB cables, CAM In cable, and external microphone to the corresponding ports on the Strpump unit.
- Install Radio Fascia: Mount the Strpump unit into the provided radio fascia.
- Secure Unit: Carefully slide the assembled unit into the dashboard opening, ensuring all cables are not pinched. Secure the unit in place.
- Reconnect Battery: Reconnect the vehicle's battery.
- Test Functionality: Turn on the ignition and power on the unit to test all functions, including audio, display, touch response, GPS, Bluetooth, and camera inputs.

Image 4.1: Comparison showing the original Suzuki Swift dashboard setup and the dashboard after the Strpump car stereo has been installed.
5. Operating Instructions
Your Strpump car stereo runs on Android 10, offering a user-friendly interface similar to a smartphone or tablet.
5.1. Basic Operation
- Power On/Off: The unit typically powers on with the vehicle's ignition. A power button on the unit or screen may also be available for manual control.
- Touchscreen Interface: Navigate through menus and applications by tapping, swiping, and pinching on the 10.1-inch 2.5D+IPS QLED display.
- Volume Control: Adjust audio volume using the physical buttons on the unit, steering wheel controls (if configured), or on-screen controls.

Image 5.1: The 1280x720P 2.5D+IPS QLED screen provides a clear and vibrant display for all functions.
5.2. User Interface (UI) Overview
The unit features various UI displays for different functions:

Image 5.2: Examples of the main user interface, menu, navigation, CarPlay, Bluetooth music, USB music, video player, radio, file manager, 32-band equalizer, and OBD2 diagnostic screens.
5.3. Navigation (GPS)
The unit supports various GPS applications, including pre-installed offline maps and online options like Google Maps, iGO, Waze, and Navitel. Ensure the GPS antenna is properly connected for optimal signal reception.
- Online Maps: Connect to Wi-Fi or 4G to use online navigation services.
- Offline Maps: Pre-installed maps allow navigation without an internet connection.
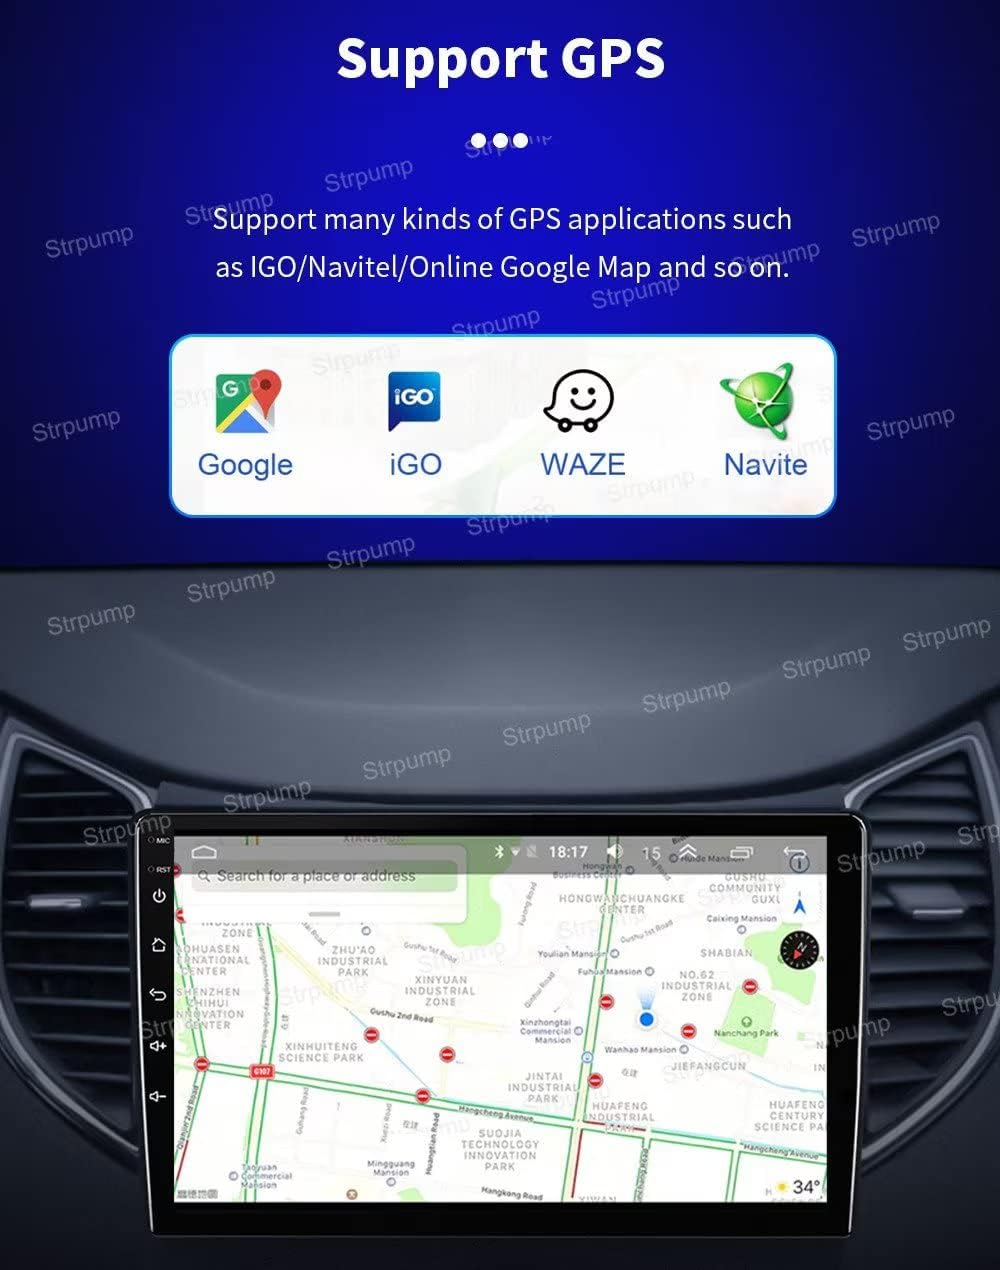
Image 5.3: The unit supports multiple GPS applications for navigation, including Google Maps, iGO, Waze, and Navitel.
5.4. CarPlay & Android Auto
The unit supports both wired and wireless Apple CarPlay and Android Auto. Connect your smartphone via USB or Bluetooth for seamless integration.
- Wired Connection: Connect your iPhone or Android phone to the 6-Pin USB port. The system will automatically detect and launch CarPlay or Android Auto.
- Wireless Connection: Pair your phone via Bluetooth and follow the on-screen prompts to establish a wireless CarPlay or Android Auto connection.
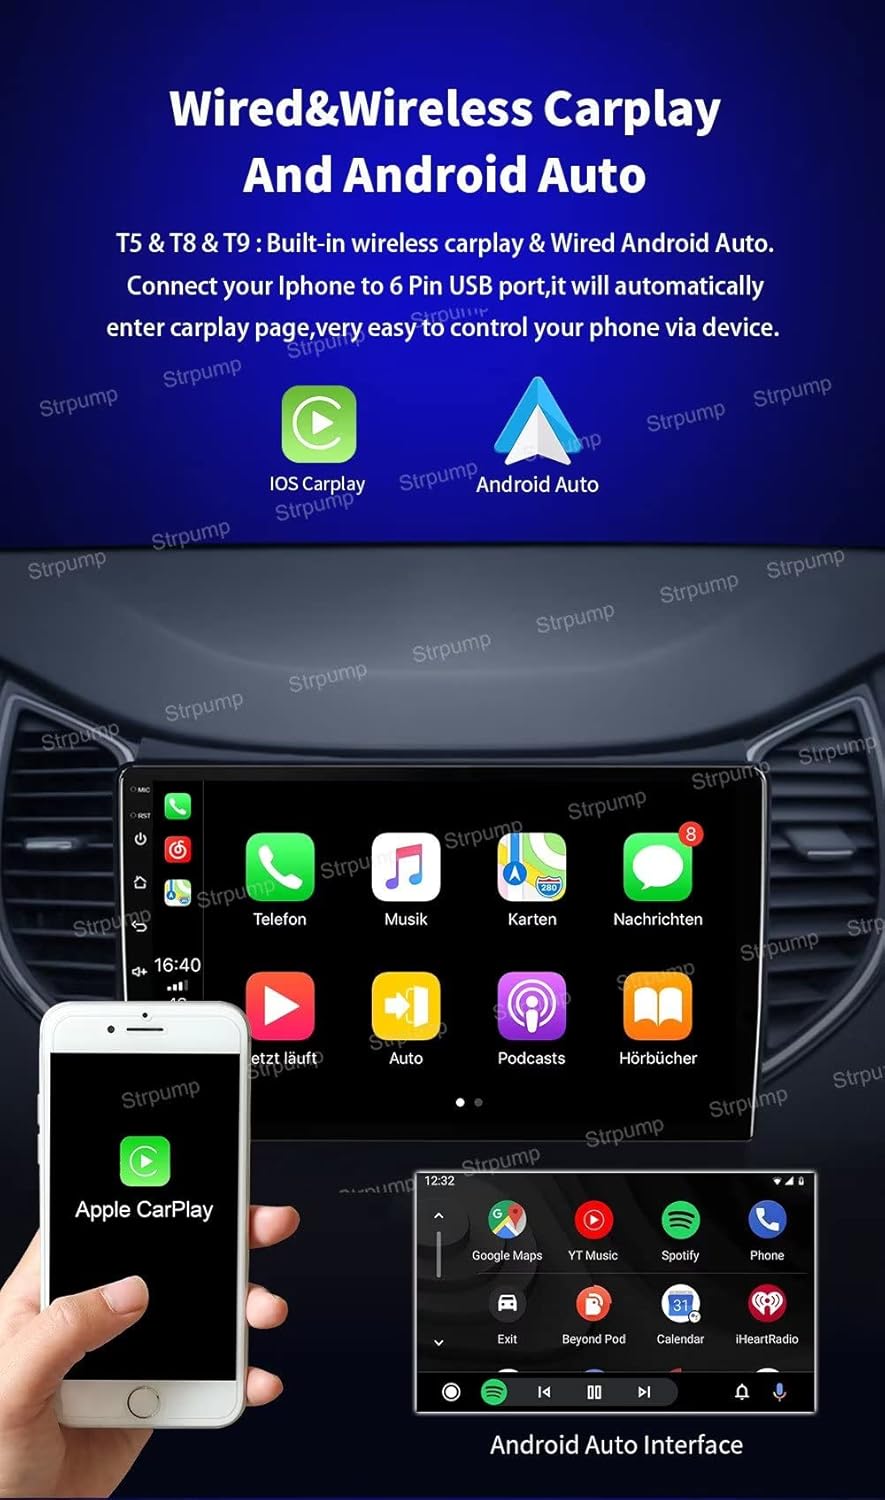
Image 5.4: The car stereo supports both Apple CarPlay and Android Auto, allowing integration of smartphone features.
5.5. Bluetooth
The built-in Bluetooth module allows for hands-free phone calls and A2DP music streaming.
- Pairing: Go to the Bluetooth settings on the unit and your phone, search for available devices, and pair with the car stereo.
- Hands-Free Calling: Make and receive calls directly from the unit's screen. The external microphone ensures clear audio.
- Music Streaming: Play audio from your phone through the car stereo speakers.
5.6. Audio Features (DSP & EQ)
The unit features a built-in 32-band DSP (Digital Sound Processor) and a 4 x 60W amplifier output, allowing for advanced audio customization.
- 32-Band EQ: Access the equalizer settings to fine-tune audio frequencies to your preference.
- Subwoofer Output: Connect an external subwoofer for enhanced bass.
5.7. Connectivity (4G & Wi-Fi)
Stay connected with built-in 4G and Wi-Fi capabilities.
- Wi-Fi: Connect to a Wi-Fi hotspot or your phone's hotspot for internet access.
- 4G: Insert a 4G SIM card (via the 4G SIM RCA cable) to enable direct 4G connectivity.

Image 5.5: The unit supports built-in 4G LTE connectivity across various frequency bands for reliable internet access.
5.8. Rear View Camera
The unit supports a rear view camera (including HD AHD cameras) and automatically switches to the camera display when the vehicle is put into reverse gear.
- Connection: Connect the rear view camera to the CAM In port.
- Automatic Display: The screen will automatically show the rear view when reversing.

Image 5.6: The system automatically displays the rear view camera feed when the car is in reverse, assisting with parking.
5.9. Other Features
- Google Play Store: Download and install various Android applications.
- AUX-IN & Cam-IN: Support for external audio and video input sources.
- Boot Logos: Customizable boot logos.
- Multimedia Playback: Support for lossless music, 3D games, online video, TV, movies, music, radio, and YouTube.
- Social Media: Access to apps like Twitter, Facebook, Gtalk, and Gmail.
- Optional Accessories Support: Compatible with OBDII, TPMS, DVR, TV Tuner, and DAB (accessories sold separately).
6. Maintenance
- Cleaning the Screen: Use a soft, lint-free cloth to gently wipe the screen. For stubborn smudges, slightly dampen the cloth with water or a screen-cleaning solution. Avoid harsh chemicals or abrasive materials.
- General Cleaning: Keep the unit free from dust and debris. Use a soft brush or compressed air to clean vents and ports.
- Software Updates: Periodically check for software updates to ensure optimal performance and access to new features. Follow the on-screen instructions for any available updates.
- Avoid Liquids: Do not spill liquids on the unit. If liquid enters the unit, disconnect power immediately and seek professional assistance.
7. Troubleshooting
If you encounter issues with your Strpump car stereo, refer to the following common problems and solutions:
- No Power:
- Check all power connections and fuses.
- Ensure the vehicle's ignition is on.
- No Sound:
- Verify volume settings are not at zero or muted.
- Check speaker connections.
- Ensure the correct audio source is selected.
- GPS Not Working/Inaccurate:
- Ensure the GPS antenna is properly connected and has a clear view of the sky.
- Check GPS settings within the unit.
- Bluetooth Connection Issues:
- Ensure Bluetooth is enabled on both the unit and your phone.
- Delete previous pairings and attempt to re-pair.
- Move your phone closer to the unit.
- Touchscreen Unresponsive:
- Restart the unit (turn off vehicle ignition and restart).
- Ensure the screen is clean and free of debris.
- Unit Freezes/Crashes:
- Perform a soft reset by pressing the reset button (if available) or by turning off the vehicle and restarting.
- If issues persist, consider a factory reset (note: this will erase all user data and settings).
For issues not covered here, or if troubleshooting steps do not resolve the problem, please contact Strpump customer support.
8. Specifications
| Feature | Specification |
|---|---|
| Operating System | Android 10.0 |
| CPU | UIS8581A Octa-Core CortexTM A55 1.6GHZ |
| RAM | 3GB |
| ROM (Storage) | 32GB |
| Display Size | 10.1 Inches |
| Screen Type | 2.5D+IPS QLED |
| Resolution | 1280 x 720 HD |
| Connectivity | Bluetooth, Cellular (4G), Wi-Fi |
| Special Features | Bluetooth, Built-in Carplay & Android Auto, DSP, GPS Navigation |
| Audio Output Mode | AUX, Stereo |
| Voice Command | Microphone support |
| Mounting Type | Panel Mount |
| Vehicle Service Type | Car (Suzuki Swift 2005-2010) |
9. Warranty and Support
9.1. Warranty Information
This Strpump car stereo unit comes with a 1-Year Warranty from the date of purchase. This warranty covers manufacturing defects and malfunctions under normal use. It does not cover damage caused by improper installation, misuse, accidents, unauthorized repairs, or normal wear and tear.
Please retain your proof of purchase for warranty claims.
9.2. Customer Support
For technical assistance, warranty claims, or any questions regarding your Strpump 10.1'' Android 10 Car Stereo Radio, please contact Strpump customer support through the retailer where the product was purchased or visit the official Strpump website for contact information.