
1. Introduction
The Vastarry Vacuum Fluorescent Display (VFD) Music Spectrum is a sophisticated audio indicator designed to visually represent sound frequencies. Featuring a classic VFD screen and powered by an STM32F103 processor, it offers 10 distinct display modes, environmental noise learning, and two sleep modes, including a built-in clock function.
2. Key Features
- VFD Display: Utilizes a classic vacuum fluorescent display for unique music spectrum visualization.
- Advanced Processing: Equipped with an STM32F103 processor for precise sound spectrum analysis.
- Multiple Display Modes: Offers 10 distinct display modes to suit various preferences.
- Dual Audio Input: Supports both silicon microphone (MEMS) and direct audio line input.
- Environmental Noise Learning: Features a function to learn and filter out ambient noise for clearer spectrum display.
- Configurable Settings: Adjustable MEMS gain, display speed, and sleep modes.
- Clock Functionality: Includes a built-in clock that can be displayed during quiet periods.
- Frequency Bands: Displays 25 frequency bands with 15 vertical levels.
3. Technical Specifications
| Parameter | Value |
|---|---|
| Input Voltage | 5V Type-C / 12VDC |
| Sleep Current | 0.03A (5V) |
| Working Current | 0.3-0.8A (5V) |
| Input Channel | Audio input X1 |
| Frequency Response | 600Hz-20KHz |
| Input Impedance | 50kOhm |
| Dimensions (LWH) | 176x50x28mm |
| Screen Material | Glass |
| Shell Material | Acrylic PMMA |
| MCU | STM32F103 |
| Display Resolution | 25 segments and 15 levels |
4. Setup
4.1 Power Connection
Connect the device to a suitable power source using either a 5V Type-C cable (ensure it's not a fast-charging adapter) or a 12VDC power supply. Use a certified power supply to prevent damage to the motherboard and ensure clean power delivery.
4.2 Audio Input
The VFD Music Spectrum supports dual-mode audio input:
- Silicon Microphone (MEMS): For ambient sound pickup.
- Audio Line Input: For direct connection to an audio source.
To disable the microphone and use only the line-in, locate and remove the yellow jumper on the bottom right pins of the circuit board.
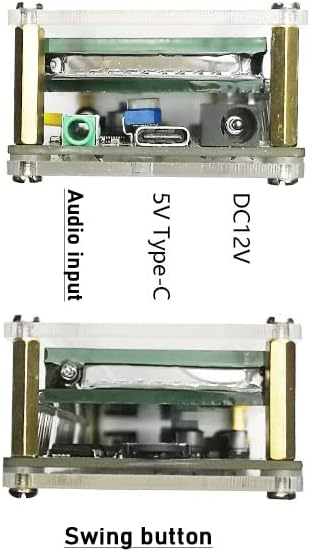
Figure 1: Top-down view illustrating the power and audio input connections.

Figure 2: Close-up of the yellow jumper on the circuit board, which can be removed to disable the MEMS microphone and enable line-in only.
5. Operating Instructions
The device features a menu system for various settings. Use the control buttons/knobs (refer to product images for exact location) to navigate and adjust options.
5.1 Display Modes (MODE)
The device offers 10 display modes. Use the MODE option to cycle through them (0-9).
5.2 Gain Setting (GAIN)
Adjusts the internal gain for audio input. The range is 0-19, with 0 as the default. Increasing the gain gradually enhances sensitivity, particularly useful in pickup mode.
5.3 Noise Learning (LEARN)
Press the up/down buttons to enter noise learning mode. A horizontal line will appear at the bottom of the display. Any sound detected during this process will be sampled as environmental noise and subsequently filtered out during normal operation. This helps in achieving a cleaner spectrum display.
5.4 Speed Setting (SPEED)
Controls the display speed, with options from 0 (slowest) to 4 (fastest). The default value is 2.
5.5 Sleep Settings (SLEEP)
Configure how the device behaves during quiet periods:
- 0: No sleep. The spectrum display remains active.
- 1: Displays the clock when quiet.
- 2: Turns off the display when quiet.
5.6 Clock Setting
To set the clock, enter Mode 10. Once the clock appears, use the left switch (or corresponding control) to adjust the time. Typically, 'Down' selects the digit to change, and 'Up' changes the digit's value.
5.7 Sensitivity Adjustment
- Audio Cable Input: Adjust the back input attenuation potentiometer.
- Pickup Mode: Use the GAIN option to adjust the internal gain.
6. Product Visuals and Demonstrations
6.1 Product Images

Figure 3: Front view of the Vastarry VFD Music Spectrum displaying dynamic audio levels.

Figure 4: Angled view of the VFD Music Spectrum, highlighting the vibrant display in an ambient setting.
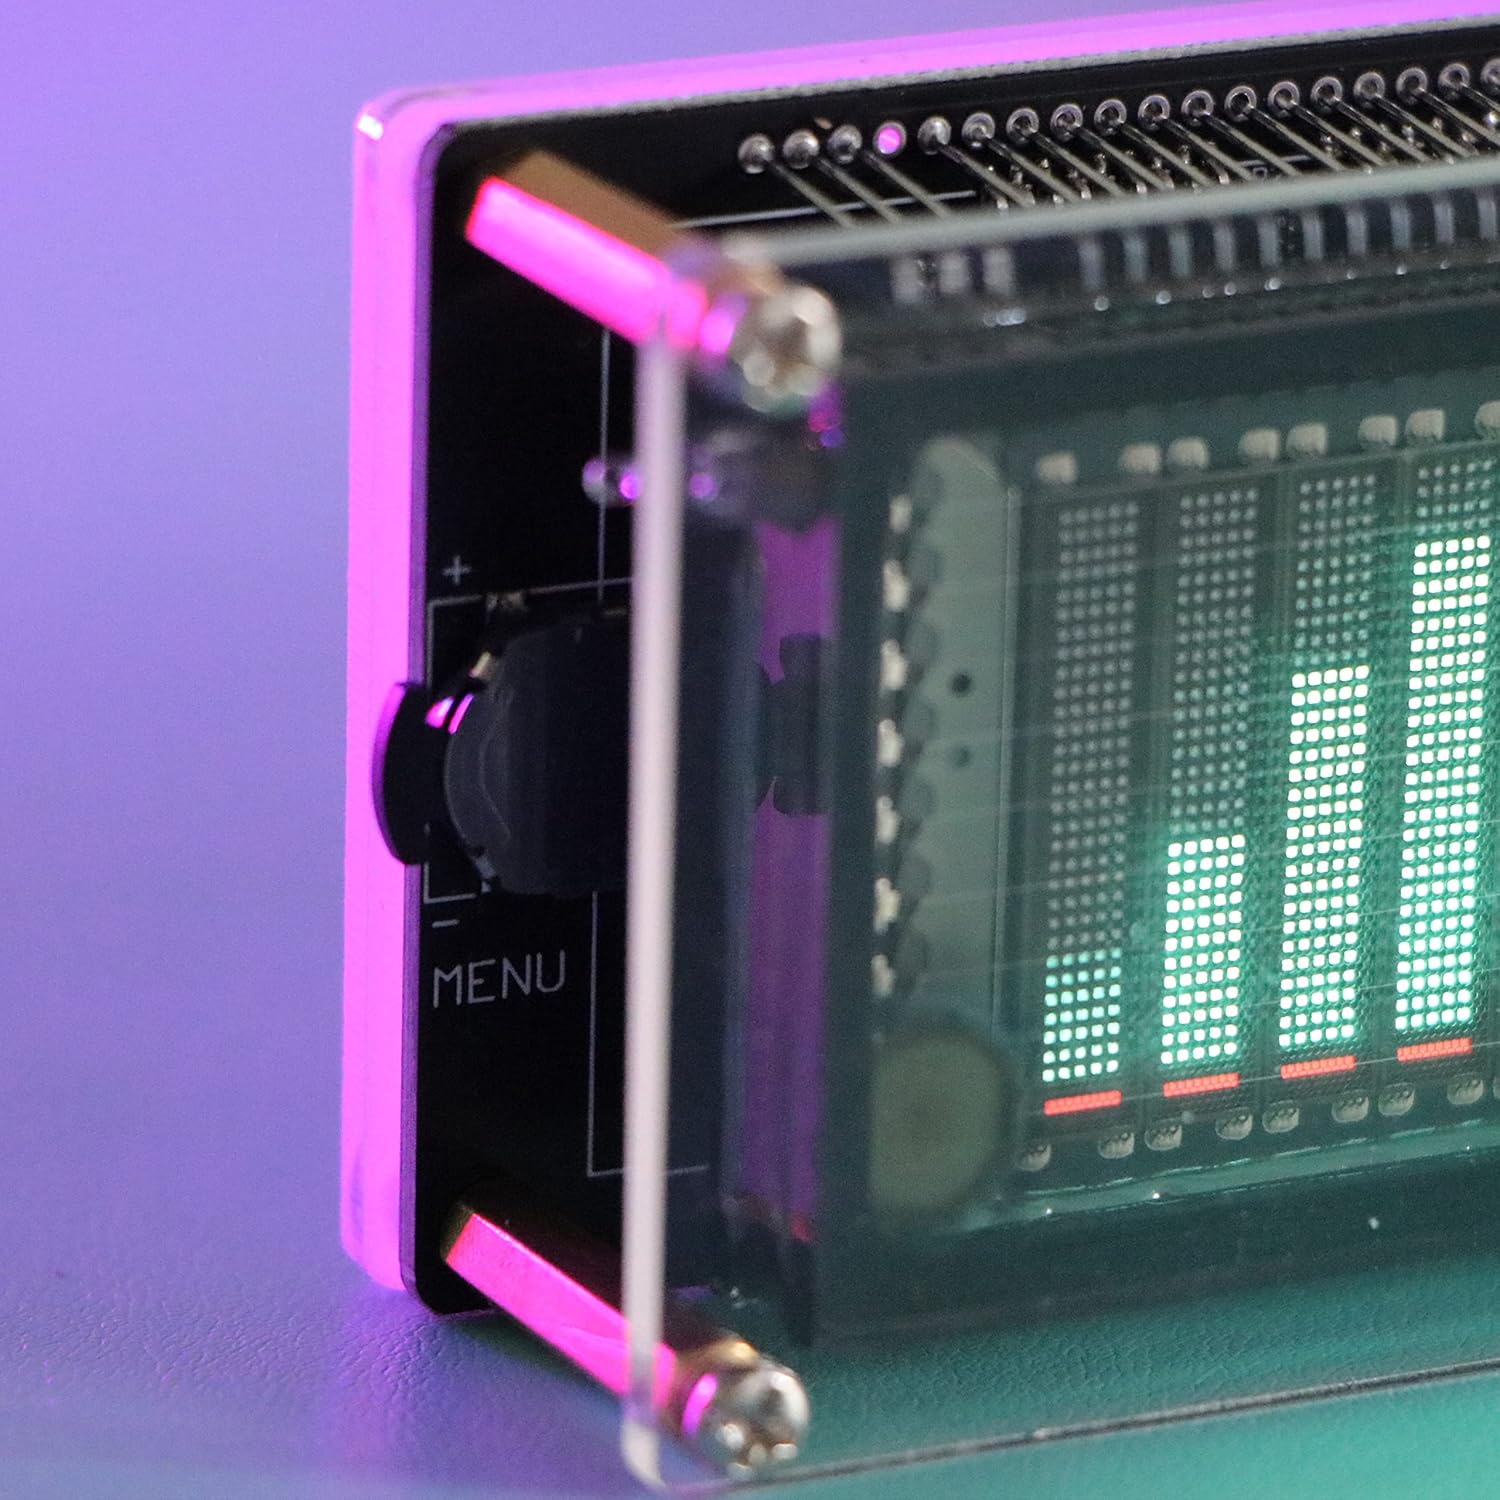
Figure 5: Close-up of the left side of the device, featuring the menu control button.

Figure 6: Close-up of the right side of the device, showing the audio input jack and gain adjustment.

Figure 7: The VFD Music Spectrum showcasing an alternative audio visualization pattern.

Figure 8: The VFD Music Spectrum illuminated with a blue hue, demonstrating color variation.
6.2 Product Videos
Video 1: Demonstration of the VFD Audio Spectrum Analyzer, showcasing its 25-band display and 10 different display modes. This video illustrates the various visual effects and operational settings of a similar VFD music spectrum device.
7. Maintenance
To clean the screen, use only anhydrous alcohol. Do not use any other solvents or liquids, as they may damage the display surface.
8. Troubleshooting
8.1 Light Column Beating in Quiet Environment
It is normal for the light column on the far right to show a single bar beating in a quiet environment. This behavior will typically last for about 10 seconds before the display switches to the clock or returns to normal, helping to avoid interference from minor ambient noise.
8.2 Music Spectrum Not Reaching 3 Bars Brightness
When the music spectrum starts, it requires a minimum signal level to reach 3 bars of brightness (indicated by a beaming bar below the clock). Ensure your audio input signal is sufficient for optimal display.
9. Safety Precautions
- Always connect the power supply according to the specified parameters (5V Type-C or 12VDC) to prevent damage. Use only certified power supplies.
- High voltage is present inside the device. Do not touch any exposed parts during operation.
- Do not immerse the device in water or use it in environments with humidity exceeding 90%. This product is intended for indoor or car use only.
- The VFD screen is a glass vacuum device; avoid strong vibrations or impacts.
10. Warranty and Support
For warranty information and technical support, please refer to the product packaging or contact Vastarry customer service directly. Specific warranty details are not provided in this manual.