1. Introduction
The JONR Wet Dry Vacuum Cleaner XQ02E is designed for efficient multi-surface cleaning, combining vacuuming, mopping, and washing functions in one cordless, lightweight unit. It features a self-cleaning system and is suitable for hardwood, tile, and other hard floor types.

Image: The JONR Wet Dry Vacuum Cleaner demonstrating its 3-in-1 cleaning capabilities (vacuum, mop, wash) on various hard floor surfaces.
2. Product Components and Setup
2.1 What's in the Box
Before assembly, ensure all components are present. The packaging typically includes the main vacuum unit, handle, charging base, power adapter, roller brush, filter, cleaning brush, and a bottle of floor cleaner.
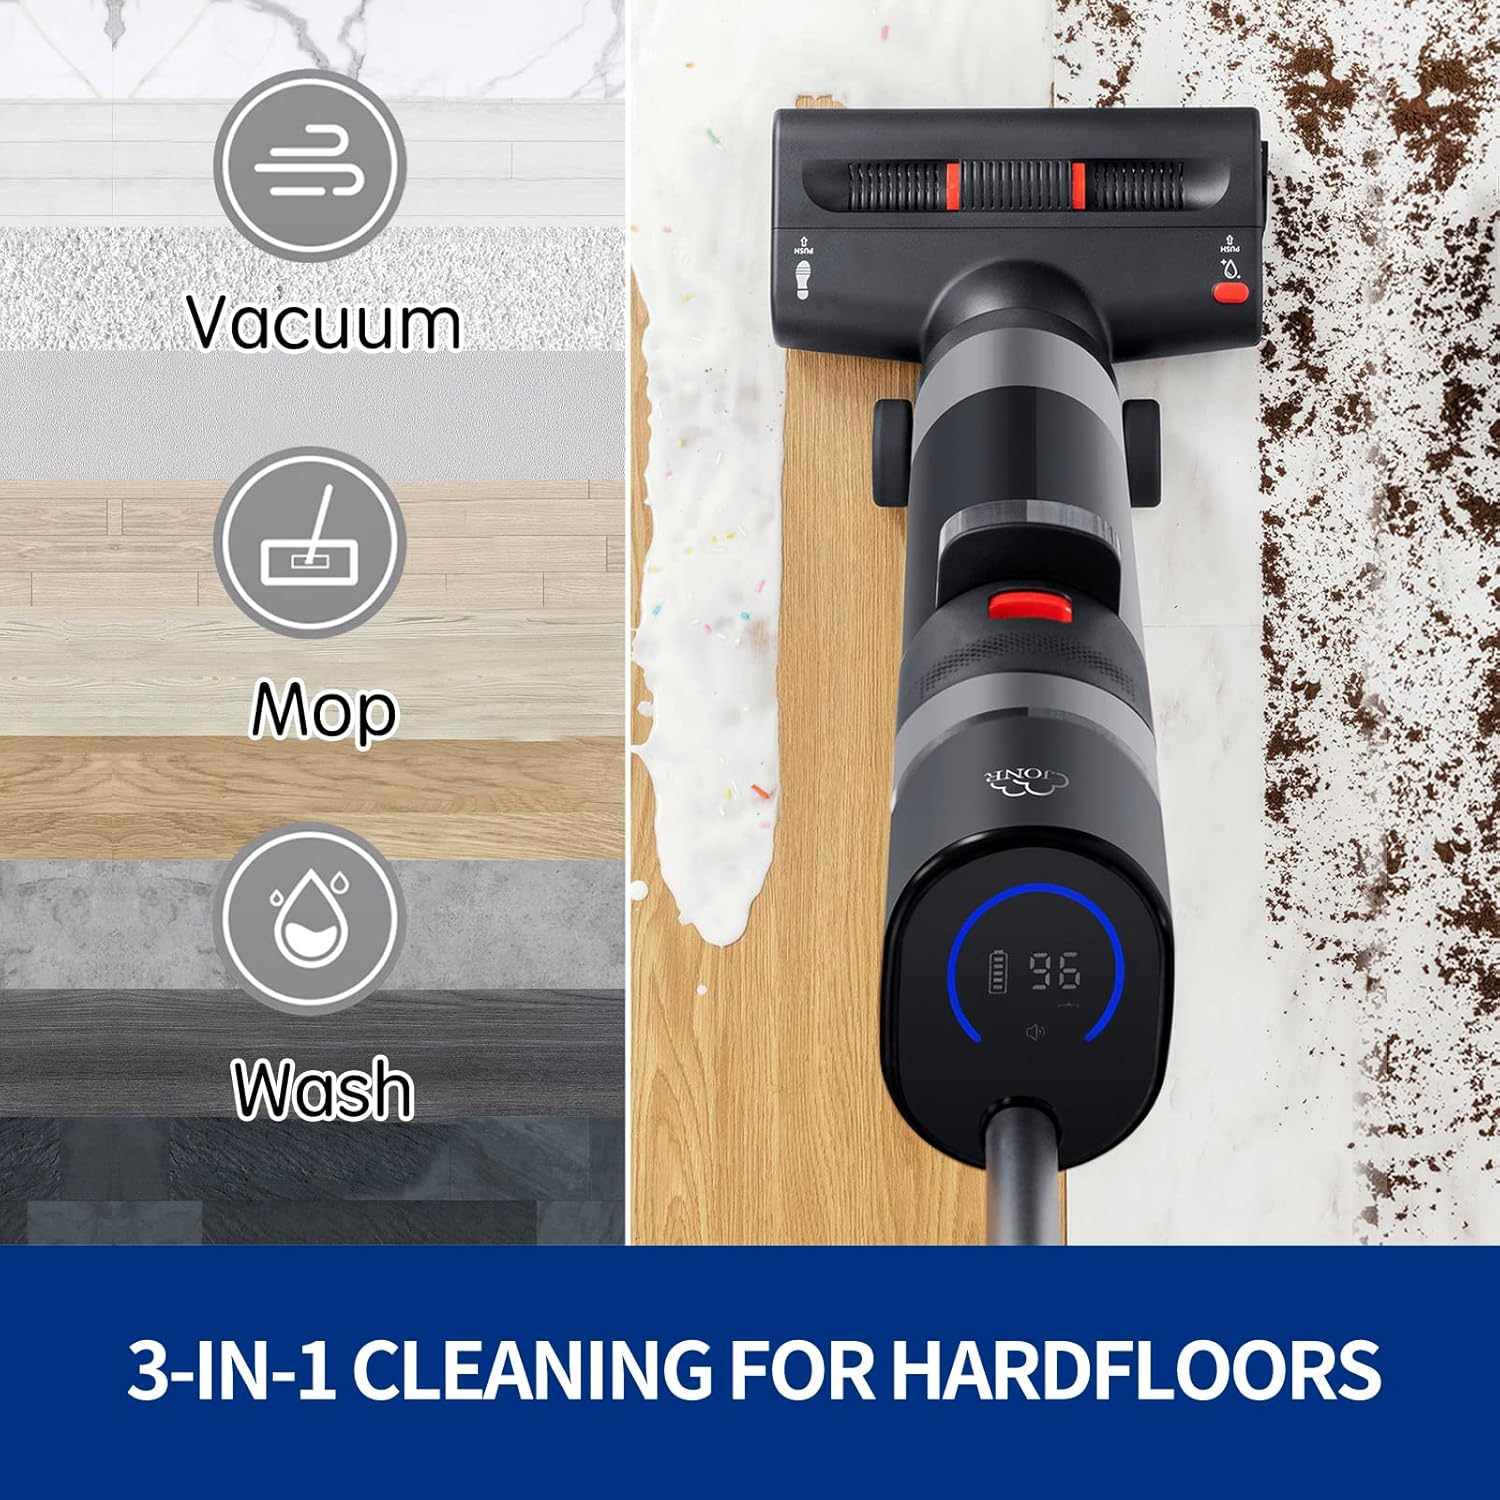
Image: JONR Wet Dry Vacuum Cleaner with included accessories, such as the main unit, handle, charging base, cleaning solution, and brushes.
Video: This video demonstrates the unboxing process and shows all items included in the JONR Wet Dry Vacuum Cleaner carton.
2.2 Assembly
- Attach the Handle: Insert the handle into the main body of the vacuum until it clicks securely into place.
- Install Water Tanks: Ensure the clean water tank and dirty water tank are correctly seated in their designated compartments.
- Charge the Battery: Place the assembled vacuum on the charging base and connect the power adapter. Allow the unit to fully charge before first use.

Image: The JONR Wet Dry Vacuum Cleaner highlighting its dual-tank design, separating clean water from dirty water for effective cleaning.
Video: This video illustrates the dual-tank system, showing how clean water is used and dirty water is collected separately.
3. Operation
3.1 Filling the Clean Water Tank
- Press the release button to detach the clean water tank.
- Fill the tank with clean water and, if desired, a suitable floor cleaning solution (ensure it is compatible with wet dry vacuums). Do not overfill.
- Reattach the tank securely until it clicks.
3.2 Powering On and Selecting Modes
- Press the power button on the handle to turn on the vacuum.
- The LED screen will display battery life and current mode.
- Toggle between modes (e.g., Wet Mopping, Dry Vacuum, High Power) using the mode selection button on the handle.

Image: Close-up of the JONR Wet Dry Vacuum Cleaner's intuitive LED screen, showing battery status and indicating voice broadcast functionality.
3.3 Cleaning Hard Floors
- For wet cleaning, ensure the clean water tank is filled.
- Push the vacuum forward and pull it back slowly to allow the roller brush to effectively clean and dry the floor.
- The smart infrared detection technology adjusts suction power based on dirt levels (Normal/Light Stains vs. Moderate/Heavy Stains).
- The vacuum is designed for edge cleaning, allowing it to reach close to baseboards and corners.

Image: The JONR Wet Dry Vacuum Cleaner demonstrating its complete edge cleaning capability, reaching close to walls and corners.

Image: The JONR Wet Dry Vacuum Cleaner's smart infrared detect technology, showing how it identifies and adapts to normal/light and moderate/heavy stains.
Video: This video demonstrates the JONR Wet Dry Vacuum Cleaner's ability to clean corners with ease, showcasing its maneuverability.
4. Maintenance
4.1 Self-Cleaning System
- After use, place the vacuum on its charging base.
- Press the self-cleaning button (often indicated by a water drop icon) to activate the self-cleaning cycle for the roller brush and internal pipes.
- The vacuum will automatically clean itself, typically taking about 30 seconds.

Image: The JONR Wet Dry Vacuum Cleaner's one-step self-cleaning roller brush feature, illustrating how it cleans both the brush and internal pipes.
Video: This video demonstrates the self-cleaning system of the JONR Wet Dry Vacuum Cleaner, showing easy daily maintenance and storage.
4.2 Emptying the Dirty Water Tank
- Regularly empty the dirty water tank after each use to prevent odors and maintain performance.
- Press the release button and remove the dirty water tank.
- Dispose of the contents and rinse the tank thoroughly with clean water.
- Reinstall the tank.
4.3 Cleaning the Filter and Roller Brush
- Remove the filter and roller brush as instructed in the detailed manual.
- Rinse them under running water to remove any debris.
- Allow all parts to air dry completely before reassembling to prevent mold or mildew.
5. Troubleshooting
| Problem | Possible Cause | Solution |
|---|---|---|
| Vacuum does not turn on or charge. | Battery depleted, charging cable not connected, or charging base issue. | Ensure the vacuum is correctly seated on the charging base and the power adapter is plugged in. Check for any damage to the charging cable or base. |
| Poor suction or cleaning performance. | Dirty water tank full, clean water tank empty, clogged filter, or tangled roller brush. | Empty the dirty water tank. Refill the clean water tank. Clean or replace the filter. Remove any hair or debris from the roller brush. |
| Water leaking from the unit. | Water tanks not properly installed, or a crack in a water tank. | Ensure both clean and dirty water tanks are securely latched. Inspect tanks for any visible damage. |
| Self-cleaning function not working. | Vacuum not on the charging base, or insufficient water in the clean water tank. | Place the vacuum firmly on the charging base. Ensure the clean water tank has enough water for the cycle. |
6. Specifications
- Brand: JONR
- Model Name: XQ02E
- Special Feature: Dry, Wet
- Filter Type: Cloth
- Is Cordless?: Yes
- Clean Water Tank Capacity: 0.5 Liters
- Dirty Water Tank Capacity: 0.55 Liters
- Recommended Uses: Hard Floor, Hardwood, Tile Floor
- Form Factor: Stick
- Color: Black
- Battery Type: Lithium-Ion (1 included)
- Noise Level: 80 Decibels
- Product Dimensions: 10 x 9 x 45 inches
- Item Weight: 9 pounds
- Control Method: Voice, Push Button
7. Warranty and Support
For warranty information, technical support, or service inquiries, please refer to the warranty card included with your product or contact JONR customer service directly. Contact details can typically be found on the official JONR website or through your retailer.