Introduction
The Subminimal NanoFoamer V2 is a high-performance handheld milk frother designed to create cafe-quality microfoamed milk for barista-style coffee drinks at home. This manual provides essential information for the proper setup, operation, maintenance, and troubleshooting of your NanoFoamer V2.

Image: The Subminimal NanoFoamer V2, its packaging, and included NanoScreens, demonstrating the complete product set.
What's Included
Your NanoFoamer V2 package includes the following components:
- One NanoFoamer V2 unit
- Two NanoScreens (Fine and Superfine)
- One Protective Hood
- One Adhesive Wall Mount
- One User Manual (this document)
- One Certificate of Authenticity
- Access code for Latte Art Master Class
Key Features
- High-Performance Power: Achieve cafe-quality microfoamed milk with a handheld tool, suitable for barista-style cappuccinos and latte art.
- Advanced Design: Features a digital on/off switch, replaceable impeller, click-on NanoScreens, stainless steel motor cover, a stable heavy-duty stainless steel shaft, and new battery housing to reduce vibrations.
- IP4 Waterproofing: Designed for easy cleaning under running water.
- Patented NanoScreen Technology: Unique impeller and NanoScreen technology create smooth, premium milk foam. NanoScreens are interchangeable for different foam textures.
- Versatile Use: Beyond frothing milk, the device can be used for mixing and stirring drinks, protein powders, and matcha by removing the NanoScreen.

Image: Key features of the NanoFoamer V2, including its battery operation, digital switch, waterproof design, and protective case.
Setup
- Install Batteries: The NanoFoamer V2 requires 2 AA batteries (not included). Unscrew the bottom cap of the frother and insert the batteries according to the polarity indicators. Securely reattach the cap.
- Attach NanoScreen: Select either the Fine or Superfine NanoScreen based on your desired foam texture. Align the NanoScreen with the impeller shaft and click it into place.
- Prepare Milk: Heat your milk to approximately 60 degrees Celsius (140 degrees Fahrenheit). Avoid exceeding 70 degrees Celsius (158 degrees Fahrenheit) as this can break down milk proteins and affect frothing quality. Ensure you have at least 3.8 cm (1.5 inches) depth of milk in your frothing jug for optimal results.

Image: Tips for preparing milk, illustrating the recommended milk depth for frothing.
Operating Instructions
Follow these steps to create microfoamed milk:
- Choose NanoScreen: For beginners, the Fine NanoScreen is recommended as it is easier to achieve good results. The Superfine NanoScreen produces thinner microfoam.
- Churn Milk: Submerge the NanoFoamer V2 into the warm milk. Press the digital on/off switch to activate. Start in the middle of the milk to incorporate air, then move the frother towards the side of the jug for a perfectly consistent blend. Continue for approximately 20-30 seconds.
- Pour: Once the desired microfoam consistency is achieved, turn off the NanoFoamer V2. Gently swirl the milk in the jug to homogenize the foam before pouring it over your espresso or coffee.
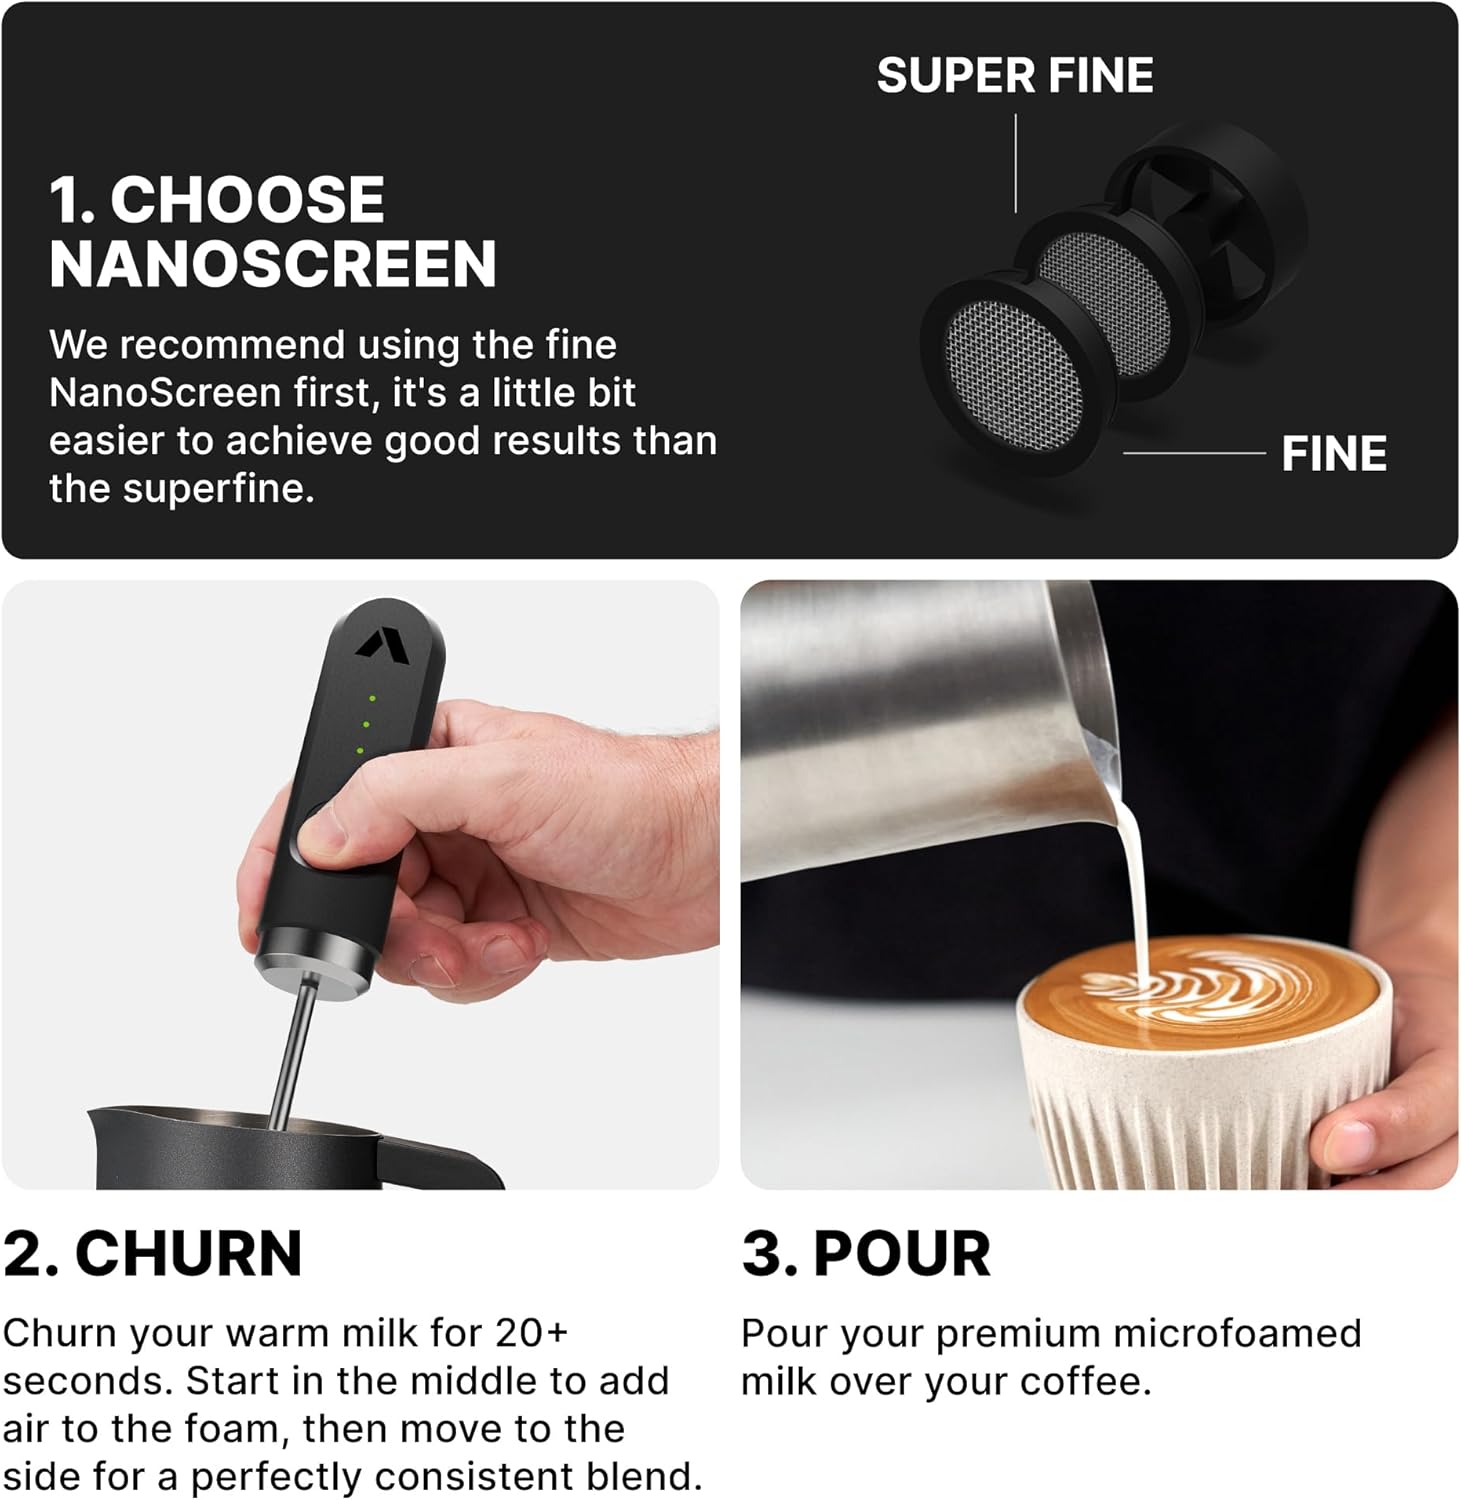
Image: Visual guide for the three-step frothing process: selecting the NanoScreen, churning the milk, and pouring the microfoam.
Official Product Video: How to Texture Milk
Video: This official Subminimal video demonstrates the correct technique for texturing milk using the NanoFoamer, guiding users through the process to achieve optimal microfoam.
Official Product Video: New Features of the Updated Nanofoamer
Video: This official Subminimal video highlights the new and improved features of the updated NanoFoamer model, providing a visual overview of its enhancements.
Maintenance & Cleaning
The NanoFoamer V2 is designed for easy cleaning:
- Rinse After Each Use: Due to its IP4 waterproof rating, you can rinse the frother directly under running water immediately after each use. This prevents milk residue from drying and becoming difficult to remove.
- Remove NanoScreen: Periodically remove the NanoScreen and impeller for a more thorough cleaning. Wash them with warm, soapy water and rinse thoroughly.
- Storage: After cleaning and drying, place the protective hood over the impeller and NanoScreen. You can store your NanoFoamer V2 in a drawer or use the adhesive wall mount for convenient access.
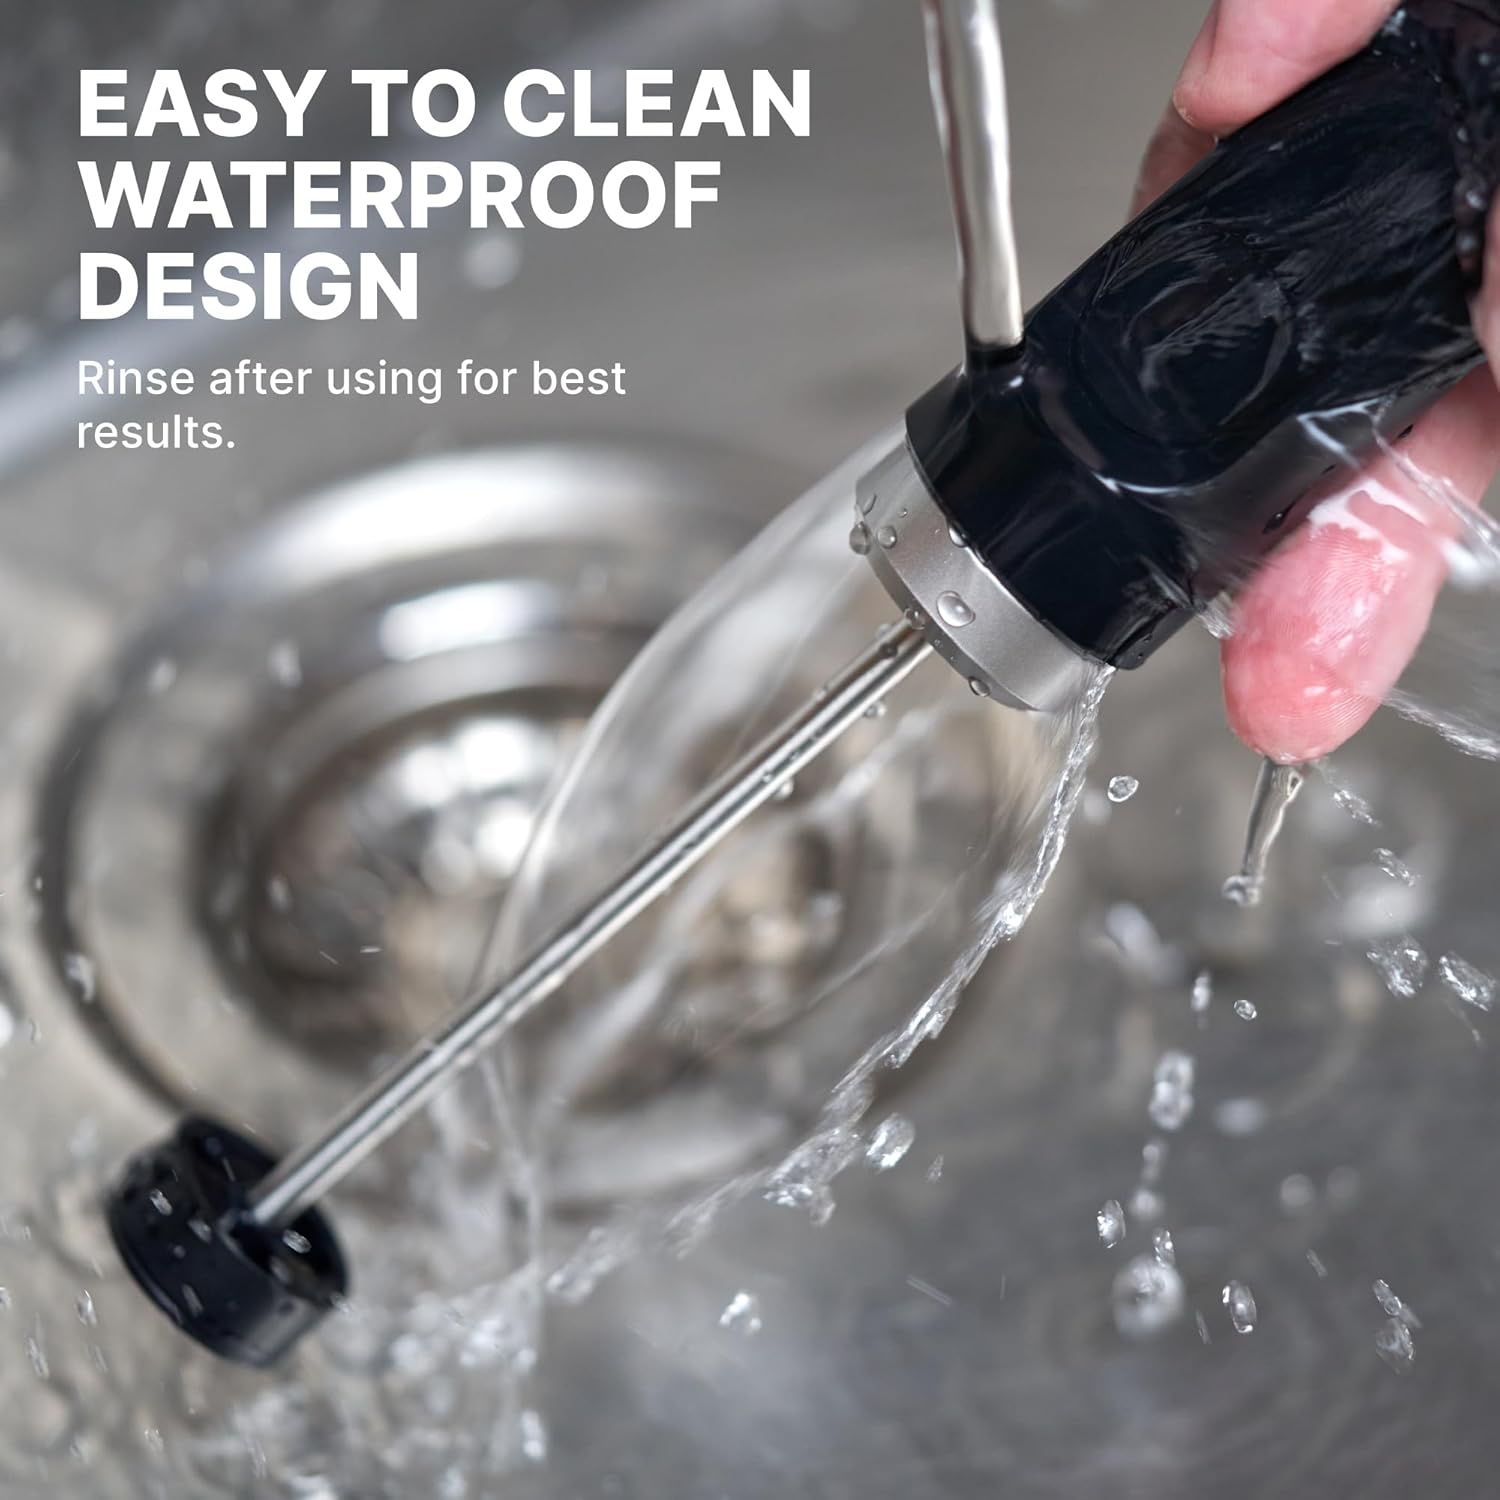
Image: The NanoFoamer V2 being rinsed under running water, demonstrating its waterproof design for easy cleaning.
Troubleshooting
- Poor Foam Quality:
- Ensure milk is at the correct temperature (around 60°C).
- Verify sufficient milk depth (at least 3.8 cm).
- Check that the NanoScreen is correctly attached and not damaged.
- Replace batteries if the frother's speed seems low.
- Frother Not Turning On:
- Check battery installation and ensure they are fresh.
- Ensure the digital on/off switch is pressed firmly.
- Excessive Splashing:
- Ensure the impeller is fully submerged in the milk before activating.
- Use a taller frothing jug if necessary.
Specifications
| Feature | Detail |
|---|---|
| Brand | Subminimal |
| Model Name | NanoFoamer V2 |
| Color | Black |
| Material | Plastic, Stainless Steel |
| Power Source | Battery Powered (2 x AA Batteries) |
| Special Feature | Ergonomic Handle, Waterproof (IP4) |
| Product Dimensions | 1.4"W x 1.4"H |
| Item Weight | 5.3 ounces (150 Grams) |
| Product Care Instructions | Hand Wash Only |
Support
For further assistance, product registration, or to access the Latte Art Master Class, please refer to the official Subminimal website or contact customer support through the details provided in your product packaging.
Protection plans are available for purchase separately to extend coverage for your device. Please refer to the retailer for details on available protection plans.


