XSQUO Useful Tech XS-V580
XSQUO Useful Tech Portable 3-in-1 Smart Radio (Model: XS-V580) Instruction Manual
Your comprehensive guide to operating your portable FM radio, Bluetooth speaker, and Micro SD card audio player.
Introduction
Thank you for choosing the XSQUO Useful Tech Portable 3-in-1 Smart Radio. This device combines an FM radio, a Bluetooth speaker, and an audio player from a Micro SD card, offering versatile audio entertainment in a compact design. This manual provides detailed instructions for setup, operation, and maintenance to ensure optimal performance and longevity of your device.
Important Safety Information
- Do not expose the device to extreme temperatures, direct sunlight, or high humidity.
- Avoid dropping or subjecting the device to strong impacts.
- Do not disassemble or attempt to repair the device yourself. Refer all servicing to qualified personnel.
- Keep the device away from water or other liquids.
- Use only the specified charging cable and power adapter (DC 5V-500mA, not included) to charge the battery.
- Dispose of batteries and electronic components responsibly according to local regulations.
Setup
Package Contents
- XSQUO Useful Tech Portable 3-in-1 Smart Radio
- USB Charging Cable
- AUX Cable
- Owner's Manual (this document)
- Quick Start Guide

Figure 1: The XSQUO Smart Radio shown with its retail packaging, USB charging cable, and AUX cable. This image illustrates the complete contents typically found in the product box.
Component Identification

Figure 2: Front and side view of the XSQUO Smart Radio, highlighting the display, control buttons, speaker grille, and side ports. The device features a black body with blue accents and a carrying strap.

Figure 3: Detailed view of the right side panel of the XSQUO Smart Radio. This panel includes the ON/OFF/Volume knob, AUX IN port, headphone jack, and USB 2.0 Micro B charging port.
- Display Screen: Shows current mode, frequency, track information, and battery status.
- Control Buttons: Play/Pause, Skip Forward/Backward, Menu, Mode, Bluetooth pairing.
- Speaker Grille: Audio output.
- ON/OFF/Volume Knob: Rotates to adjust volume, push to power on/off.
- AUX IN Port: 3.5mm input for external audio sources.
- Headphone Jack: 3.5mm output for private listening.
- USB 2.0 Micro B Port: For charging the device and data transfer.
- Micro SD Card Slot: For playing audio files from a Micro SD card.
- Carrying Strap: For portability.
Battery Installation and Charging
The device uses a rechargeable lithium-ion battery. The battery is typically pre-installed, but if replacement is needed, follow these steps:
- Locate the battery compartment on the back of the device.
- Carefully open the battery compartment cover.
- Insert the lithium-ion battery, ensuring the contacts align correctly.
- Close the battery compartment cover securely.

Figure 4: View of the battery compartment on the back of the XSQUO Smart Radio, showing a lithium-ion battery being inserted. This illustrates the process for battery installation or replacement.

Figure 5: A hand holding the compact lithium-ion battery, which powers the XSQUO Smart Radio. This image provides a clear view of the battery's size and design.
Charging the Battery:
- Connect the supplied USB charging cable to the USB 2.0 Micro B port on the side of the radio.
- Connect the other end of the USB cable to a DC 5V-500mA USB power adapter (not included) or a computer's USB port.
- The charging indicator on the display will show the charging status. A full charge typically takes approximately 120 minutes and provides up to 6 hours of operating time.
Operating Instructions
Power On/Off and Volume Control
- Power On: Rotate the ON/OFF/Volume knob clockwise until you hear a click and the display illuminates.
- Power Off: Rotate the ON/OFF/Volume knob counter-clockwise until you hear a click and the display turns off.
- Volume Adjustment: Rotate the ON/OFF/Volume knob clockwise to increase volume and counter-clockwise to decrease volume.
Mode Selection
Press the MODE button repeatedly to cycle through available modes: FM Radio, Bluetooth, and Micro SD Card Player.
FM Radio Mode
When in FM Radio mode, the display will show the current frequency.
- Auto Scan: Press and hold the MENU button to initiate an automatic scan for FM stations. The radio will scan frequencies from 87MHz to 108MHz and store up to 20 stations.
- Manual Tuning: Use the Previous Track (⏮) and Next Track (⏭) buttons to manually tune to frequencies or navigate between stored stations.
- Direct Station Selection: Use the numeric buttons (0-9) on the top panel to directly enter a stored station number.
Bluetooth Speaker Mode
In Bluetooth mode, the device acts as a wireless speaker.
- Switch the radio to Bluetooth mode using the MODE button. The display will show "Bluetooth" and indicate pairing status.
- On your smartphone, tablet, or other Bluetooth-enabled device, enable Bluetooth and search for available devices.
- Select "XSQUO Smart Radio" from the list of devices to pair.
- Once paired, the radio will confirm the connection, and you can play audio from your connected device. The effective range is approximately 10 meters.
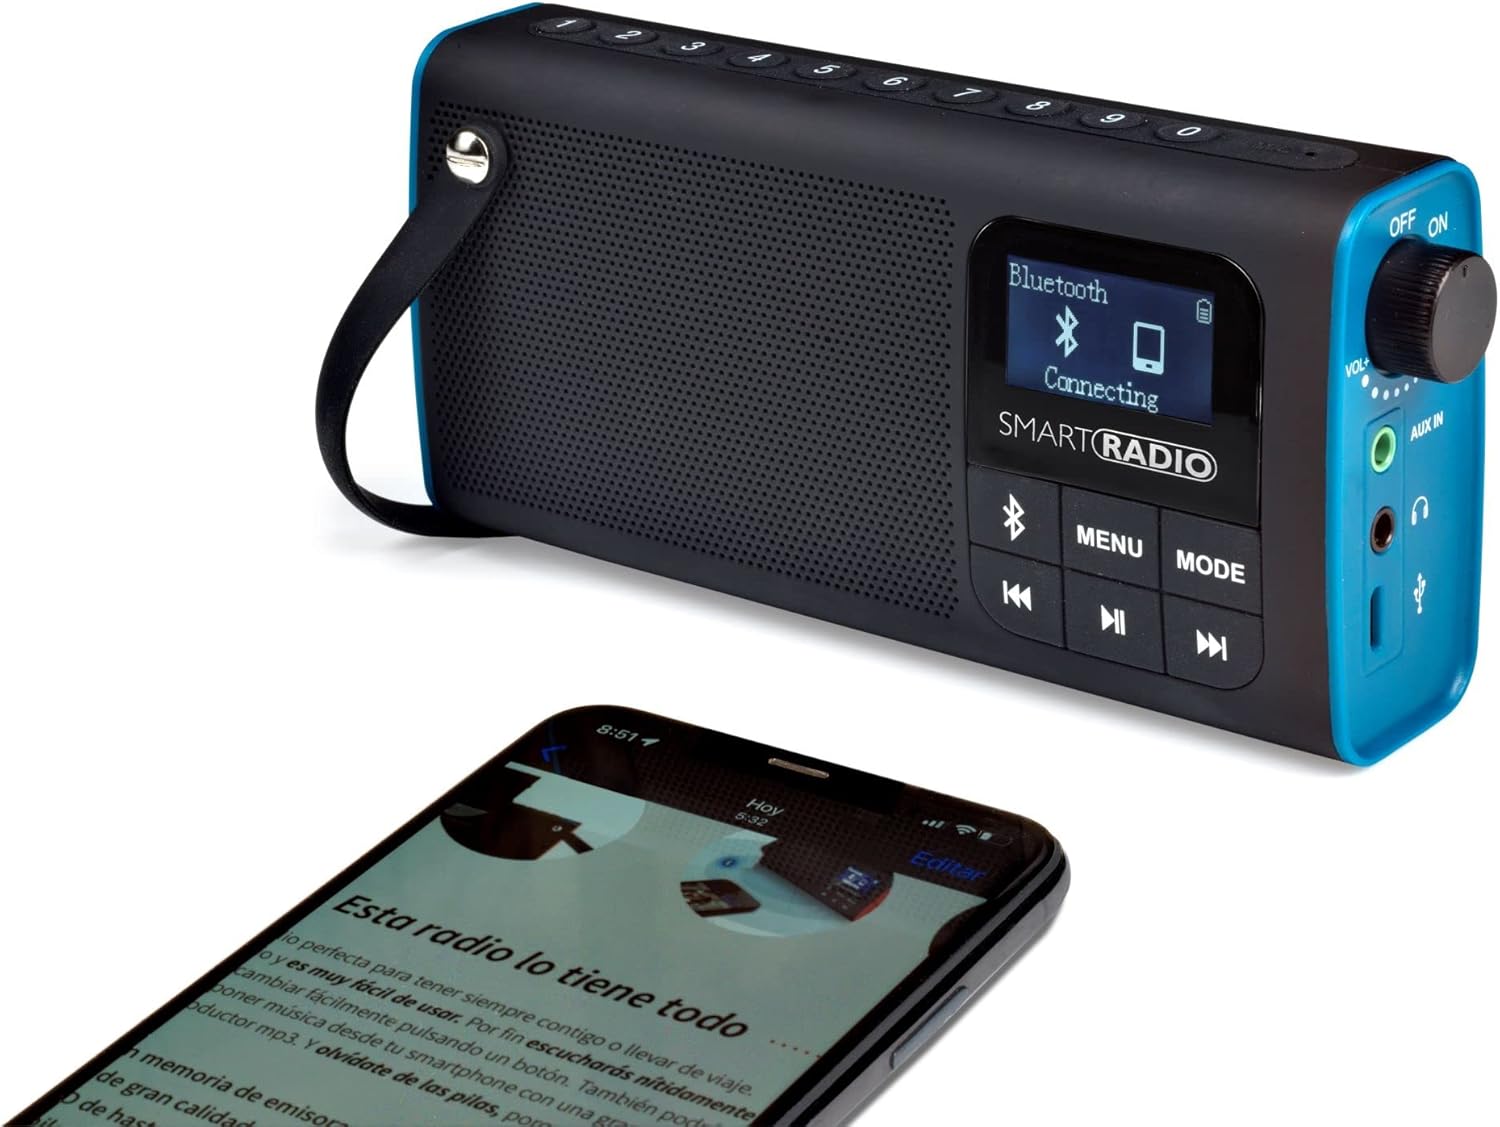
Figure 6: The XSQUO Smart Radio display showing "Bluetooth Connecting" while a smartphone is positioned nearby, illustrating the process of pairing the device with a mobile phone for wireless audio playback.
Micro SD Card Audio Player Mode
The radio supports playing MP3, WMA, and WAV audio files directly from a Micro SD card.
- Insert a Micro SD card (pre-loaded with compatible audio files) into the Micro SD card slot on the top of the device. Ensure the card is inserted correctly until it clicks into place.
- Switch the radio to Micro SD Card Player mode using the MODE button. Playback will begin automatically.
- Use the Previous Track (⏮) and Next Track (⏭) buttons to navigate between songs.
- Press the Play/Pause (⏸) button to pause or resume playback.
- Equalizer Modes: Press the MENU button to cycle through six equalizer modes: Natural, Rock, Pop, Classic, Jazz, and Soft.

Figure 7: Close-up view of the Micro SD card slot located on the top panel of the XSQUO Smart Radio, with a Micro SD card positioned above it, indicating where the card should be inserted for audio playback.
AUX Input and Headphone Jack
- AUX Input: Connect an external audio device (e.g., CD player, TV, HIFI system) to the AUX IN port using the supplied 3.5mm AUX cable. The radio will automatically switch to AUX mode or you may need to select it via the MODE button.
- Headphone Jack: Plug 3.5mm headphones into the headphone jack for private listening. When headphones are connected, audio will be routed through them, and the main speaker will be muted.
Maintenance
- Cleaning: Use a soft, dry cloth to clean the exterior of the device. Do not use abrasive cleaners, waxes, or solvents.
- Storage: When not in use for extended periods, store the device in a cool, dry place, away from direct sunlight and extreme temperatures.
- Battery Care: To prolong battery life, avoid fully discharging the battery frequently. Charge the device regularly, even if not in use.
Troubleshooting
| Problem | Possible Cause | Solution |
|---|---|---|
| Device does not power on. | Battery is discharged or not properly installed. | Charge the battery. Ensure the battery is correctly inserted in its compartment. |
| No sound from speaker. | Volume is too low, headphones are connected, or incorrect mode selected. | Increase volume. Disconnect headphones. Ensure the correct mode (FM, Bluetooth, SD) is selected. |
| Poor FM radio reception. | Weak signal or interference. | Relocate the radio to an area with better reception. Perform an auto scan again. |
| Bluetooth device cannot pair. | Radio not in Bluetooth mode, device too far, or pairing list full. | Ensure radio is in Bluetooth mode. Move devices closer. Try unpairing and re-pairing. |
| Micro SD card audio not playing. | Card not inserted correctly, unsupported file format, or radio not in SD mode. | Reinsert Micro SD card. Ensure files are MP3, WMA, or WAV. Select Micro SD mode. |
Specifications
| Model Number | XS-V580 |
| Brand | XSQUO Useful Tech |
| Dimensions (L x W x H) | 13 x 3.5 x 6.5 cm |
| Weight | 139 g |
| Battery Type | Lithium Ion (1 included) |
| Voltage | 3.7 Volts |
| Power Source | Battery Powered |
| Charging Input | DC 5V-500mA (via USB 2.0 Micro B) |
| Operating Time | Up to 6 hours |
| Charging Time | Approx. 120 minutes |
| FM Frequency Range | 87MHz - 108MHz |
| Bluetooth Version | Bluetooth 5 |
| Bluetooth Range | Up to 10 meters |
| Speaker Output Power | 5 Watts |
| Supported Audio Formats (Micro SD) | MP3, WMA, WAV |
| Connectivity | Bluetooth, USB 2.0, AUX IN, Headphone Jack |
| Compatible Devices | Earphone, Laptop, Smartphone, Tablet |
Warranty Information
XSQUO Useful Tech products are manufactured to high-quality standards. For specific warranty terms and conditions, please refer to the warranty card included with your purchase or visit the official XSQUO Useful Tech website. Keep your proof of purchase for any warranty claims.
Customer Support
If you encounter any issues or have questions regarding your XSQUO Useful Tech Portable 3-in-1 Smart Radio that are not covered in this manual, please contact our customer support team. Contact information can typically be found on the product packaging, the official brand website, or your purchase documentation.
Website: www.xsquotech.com
Email: info@xsquotech.com