
1. Introduction
This manual provides essential information for the proper installation, operation, and maintenance of your DNA MOTORING HL-HAY-019-BK LED Sequential Chase Turn Signal Half-Ring Halo Headlights. Please read these instructions thoroughly before beginning installation to ensure safe and correct usage. Professional installation is highly recommended.
These headlights are designed to enhance visibility and the aesthetic appeal of your vehicle, featuring advanced LED technology for improved lighting performance.
2. Product Features
- Full LED Headlight design, requiring no additional bulbs.
- Amber LED Sequential Chase Turn Signals for dynamic indication.
- White / Amber LED Light Bar with Switchback functionality.
- White LED Halo Half-Ring Driving Lights for distinct daytime visibility.
- Amber LED Side Marker for enhanced safety.
- Separate High & Low Projector Beams, with both beams active in High Beam Mode.
- Constructed with high-quality ABS Plastic Housing and Polycarbonate Lens for impact resistance and durability.

Image 2.1: Labeled diagram highlighting key features such as LED Halo Running Light, Amber Reflector, LED Side Marker Light, LED Amber Chasing Signal Light, Projector Low Beam, and Projector High Beam.
3. Compatibility
These headlights are compatible with the following vehicle models:
- 09-18 Dodge Ram 1500
- 10-18 Dodge Ram 2500
- 10-18 Dodge Ram 3500
Important Notes:
- Fits 09-12 Models without Quad Lamps.
- Excludes Factory Projector Headlight Models.
4. Package Contents
Upon opening the package, please verify that all the following components are present:
- 1 Pair of Headlights (Left & Right)
- 1 Headlight Adjuster Driver (4mm socket driver)
- Installation Gloves
- Tie Straps for Wiring
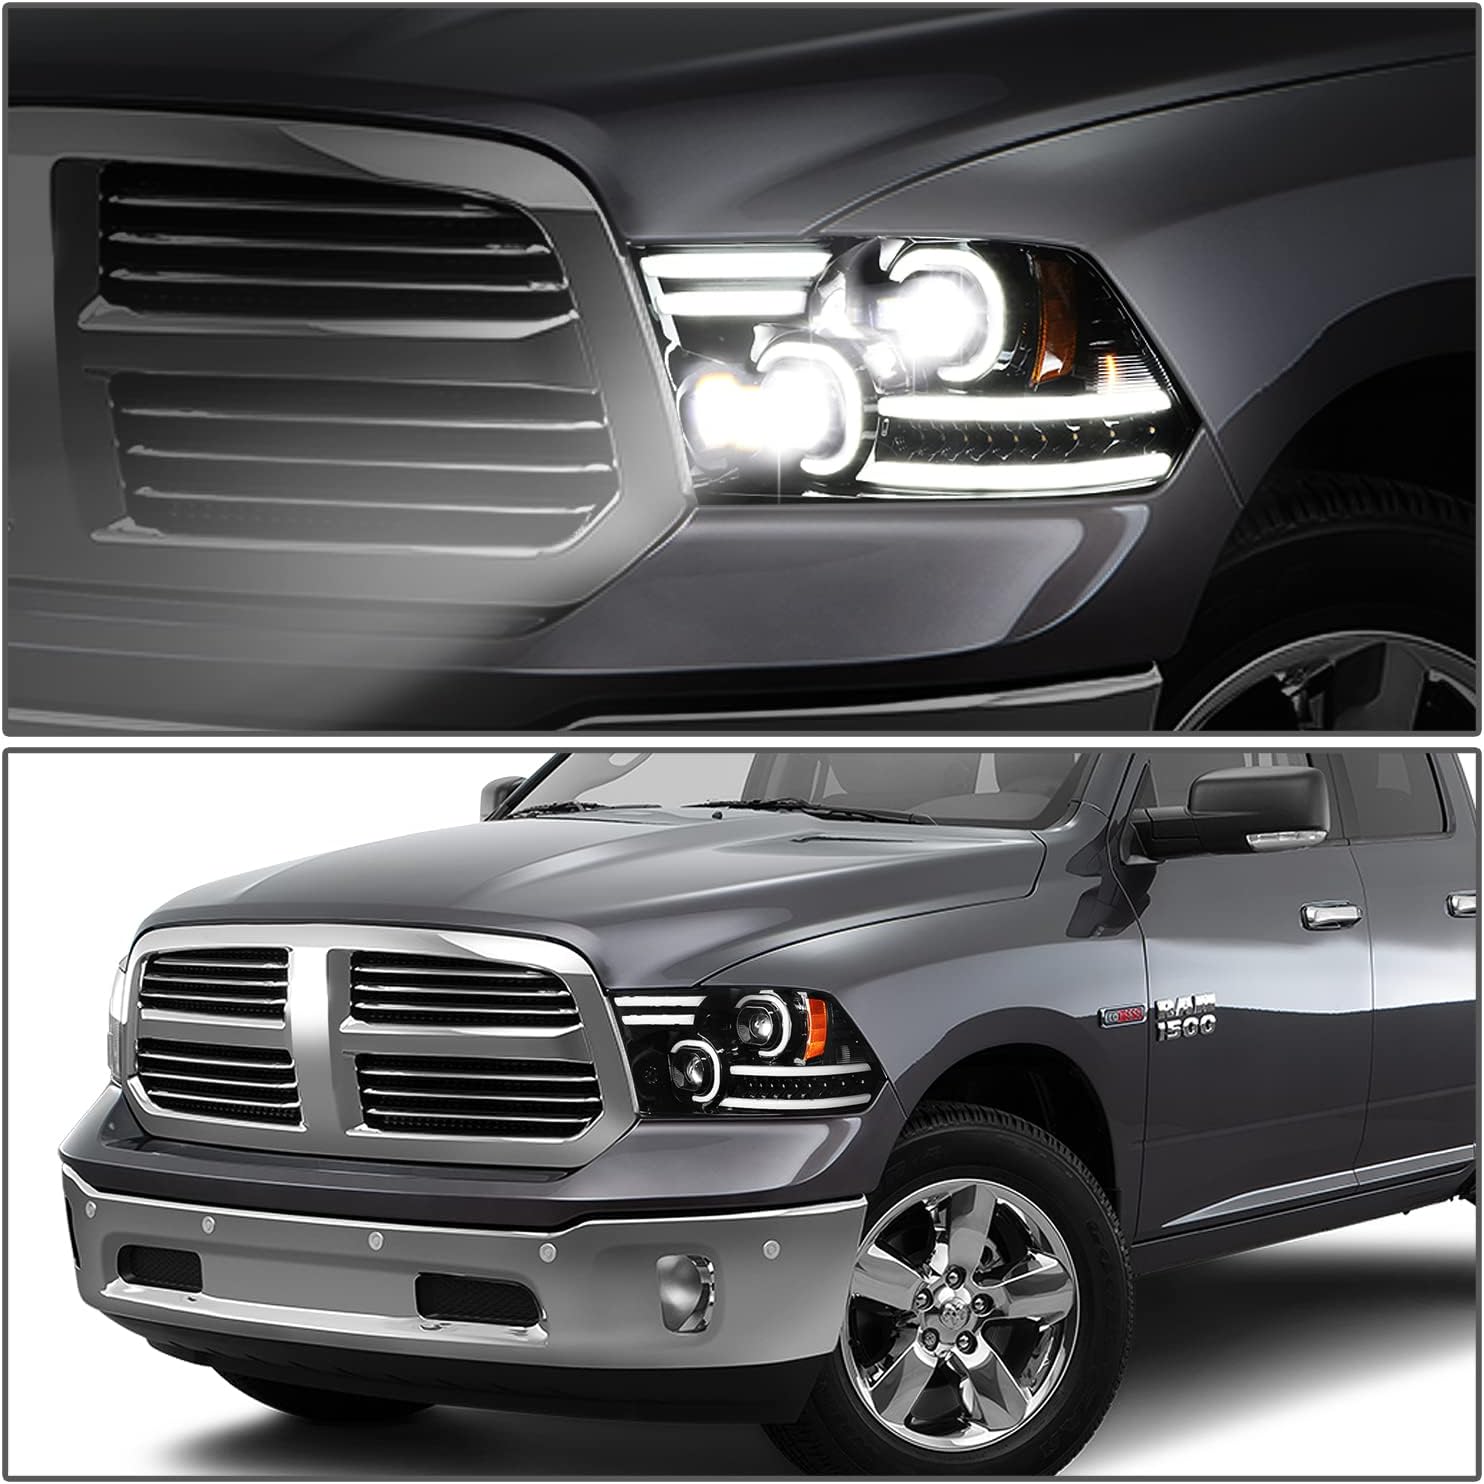
Image 4.1: The package includes a pair of headlights, a headlight adjustment tool, installation gloves, and tie straps for wiring management.
5. Installation Guide
Professional installation is highly recommended. Installation instructions are NOT included with the product. The following steps are general guidelines and may vary based on your specific vehicle model and existing headlight configuration.
General Installation Steps:
- Safety First: Ensure your vehicle is turned off, the parking brake is engaged, and the battery's negative terminal is disconnected to prevent electrical shorts.
- Access Headlights: Depending on your vehicle, you may need to remove the grille, bumper, or fender liners to access the headlight mounting bolts and wiring.
- Remove Old Headlights: Carefully unbolt and disconnect the wiring harness from your existing headlights. Remove the old headlight assemblies.
- Install New Headlights: Connect the wiring harness of the new DNA MOTORING LED headlights to your vehicle's electrical system. Ensure all connections are secure.
- Test Functionality: Before fully securing the headlights and reassembling the vehicle, reconnect the battery and test all light functions: low beam, high beam, turn signals, and daytime running lights. Address any issues (refer to Troubleshooting section).
- Secure Headlights: Once functionality is confirmed, mount the new headlight assemblies using the original mounting points and bolts.
- Reassemble Vehicle: Reinstall any removed components (grille, bumper, etc.).
- Aim Headlights: Properly aim your headlights to ensure optimal visibility and to avoid blinding oncoming traffic. Use the included 4mm socket driver for adjustment (refer to Section 7).

Image 5.1: The DNA MOTORING LED Headlights seamlessly integrated into a Dodge Ram truck, showcasing their design and fitment.
6. Operation
Your DNA MOTORING LED Headlights are designed for intuitive operation, integrating with your vehicle's existing lighting controls.
- Daytime Running Lights (DRL) / Halo Half-Ring: These white LED lights activate automatically with your vehicle's ignition, providing enhanced visibility during daylight hours.
- Low Beam: Activated via your vehicle's standard headlight switch. Provides focused illumination for regular driving conditions.
- High Beam: Activated via your vehicle's standard high beam switch. Both the dedicated high beam projector and the low beam projector will illuminate simultaneously for maximum light output.
- Sequential Chase Turn Signals: When the turn signal is activated, the amber LEDs will illuminate in a sequential pattern, providing a clear and modern indication of your turning intentions.
- Amber LED Side Marker: This light illuminates with your parking lights and turn signals, increasing side visibility.

Image 6.1: The headlights displaying their various light functions, including the bright white DRLs and the amber sequential turn signals.
7. Headlight Adjustment
Proper headlight aiming is crucial for safe driving and to comply with local regulations. Your DNA MOTORING headlights include built-in adjusters.
- Locate the adjustment screws on the back or top of the headlight housing.
- Use the provided 4mm socket driver to turn the adjustment screws. Typically, one screw adjusts the vertical aim and another adjusts the horizontal aim.
- Park your vehicle on a level surface facing a wall approximately 25 feet away.
- Consult your vehicle's owner's manual or a professional mechanic for specific aiming procedures and recommended beam patterns.
Image 7.1: The included headlight adjuster driver and a view of the rear of the headlight housing, showing potential locations for adjustment screws and wiring harness connections.
8. Maintenance
To ensure the longevity and optimal performance of your LED headlights, follow these simple maintenance guidelines:
- Cleaning: Clean the polycarbonate lenses regularly with a soft cloth and mild soap and water. Avoid abrasive cleaners or harsh chemicals, as these can damage the lens coating.
- Inspection: Periodically inspect the headlight assemblies for any signs of damage, cracks, or loose connections. Ensure the wiring harnesses are securely connected and free from corrosion.
- Seal Integrity: The headlights are vacuum tested to ensure air-tight and water-resistant seals. If you notice moisture inside the lens, inspect the seals for damage.
9. Troubleshooting
If you encounter issues with your DNA MOTORING LED Headlights, consider the following troubleshooting steps:
Common Issues and Solutions:
- Turn Signals Not Working or Flashing Erratically:
- Check Connections: Ensure all wiring harness connections are fully seated and secure.
- Resistor Requirement: Some vehicles may require additional load resistors for LED turn signals to function correctly and prevent hyper-flashing or dash errors. If your vehicle experiences these symptoms, consult an automotive electrician regarding the installation of appropriate resistors.
- Vehicle Compatibility: Verify that your vehicle model and year are fully compatible as per Section 3. Incompatible wiring systems can cause malfunctions.
- Dash Errors or Warning Lights:
- This often indicates a mismatch in electrical load between the new LED lights and the vehicle's original system. Load resistors (as mentioned above) may be necessary.
- Ensure all connections are clean and free of corrosion.
- Headlights Aimed Incorrectly (Too High/Low):
- Refer to Section 7, "Headlight Adjustment," and use the provided 4mm socket driver to adjust the beam pattern.
- If adjustment screws appear ineffective or non-existent, re-verify the correct installation and mounting of the headlight assembly.
- Wiring Plug Not Compatible:
- Double-check the compatibility information in Section 3. Ensure your vehicle does not have factory projector headlights or quad lamps if specified.
- If the plug connection is physically different, the product may not be compatible with your specific vehicle sub-model. Contact the seller for clarification.
- No Lights Functioning:
- Verify the battery is properly reconnected and charged.
- Check all wiring connections for looseness or damage.
- Inspect vehicle fuses related to lighting.
If these steps do not resolve the issue, it is recommended to consult a certified automotive technician or contact DNA MOTORING customer support.
10. Product Specifications
| Brand | DNA MOTORING |
| Model Number | HL-HAY-019-BK |
| Color | Black |
| Light Source Type | LED |
| Voltage | 12 Volts (DC) |
| Lens Material | ABS, Polycarbonate, Plastic |
| Auto Part Position | Front |
| Specific Uses For Product | Head Lights |
| Vehicle Service Type | Truck |
| UPC | 194286106836 |
11. Warranty and Support
For warranty information regarding this product, please contact the seller directly. Warranty terms and conditions may vary.
For technical support, installation assistance, or any other inquiries, please reach out to DNA MOTORING customer service through their official channels or the retailer from whom the product was purchased.