AWNLUX W5700CW-19x8WA3003
AWNLUX Motorized Retractable RV Awning Instruction Manual
Model: W5700CW-19x8WA3003
Brand: AWNLUX
1. Introduction
This manual provides detailed instructions for the installation, operation, and maintenance of your AWNLUX Motorized Retractable RV Awning. Designed for RVs, 5th wheels, travel trailers, toy haulers, and motorhomes, this awning offers convenient shade and protection with its motorized extension and retraction. Please read this manual thoroughly before installation and use to ensure safe and efficient operation.

Image: AWNLUX Motorized RV Awning extended on a recreational vehicle.
2. Safety Instructions
- Always read and understand all instructions before installation and operation.
- Ensure the RV is stable and level before installing or operating the awning.
- Do not operate the awning in strong winds, heavy rain, or snow. Retract the awning immediately in adverse weather conditions.
- Keep hands and clothing clear of moving parts during operation.
- Ensure no obstructions are present when extending or retracting the awning.
- Use appropriate safety gear (e.g., gloves, eye protection) during installation.
- If the awning is not fully opened or closed, adjust the limit screws as instructed.
3. Product Overview & Features
The AWNLUX Motorized Retractable RV Awning is designed for durability and ease of use, providing reliable shade for your outdoor activities.
- Durable Fabric: Made from high-quality 16oz vinyl material, offering 100% waterproof and 95% UV resistance.
- Motorized Operation: Features a built-in motor for effortless extension and retraction with a simple push of a button.
- Emergency Hand Crank: Includes a manual hand crank for operation in case of power outage.
- Adjustable Pitch: Allows for quick and easy adjustment of the awning's angle to optimize shade and water runoff.
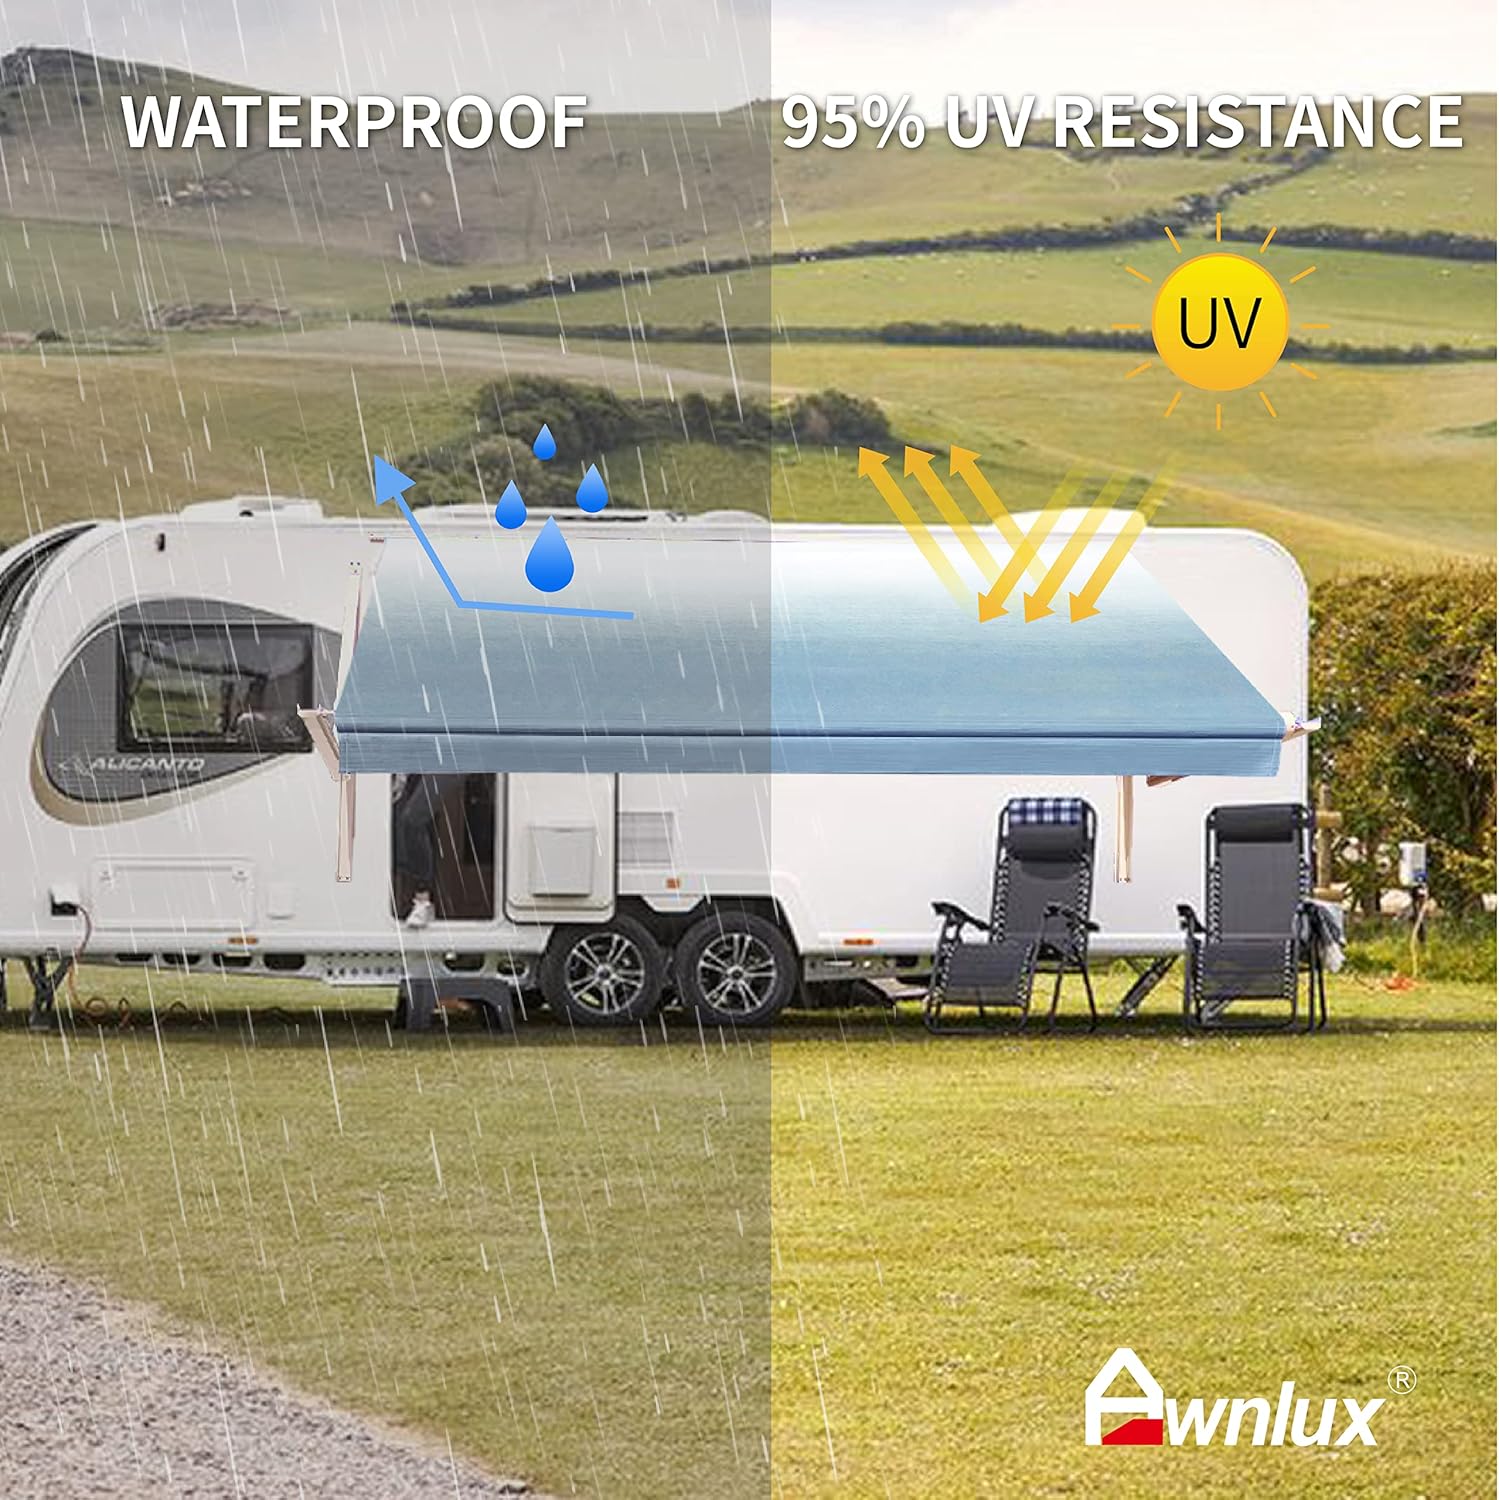
Image: Awning fabric demonstrating waterproof and UV resistance.
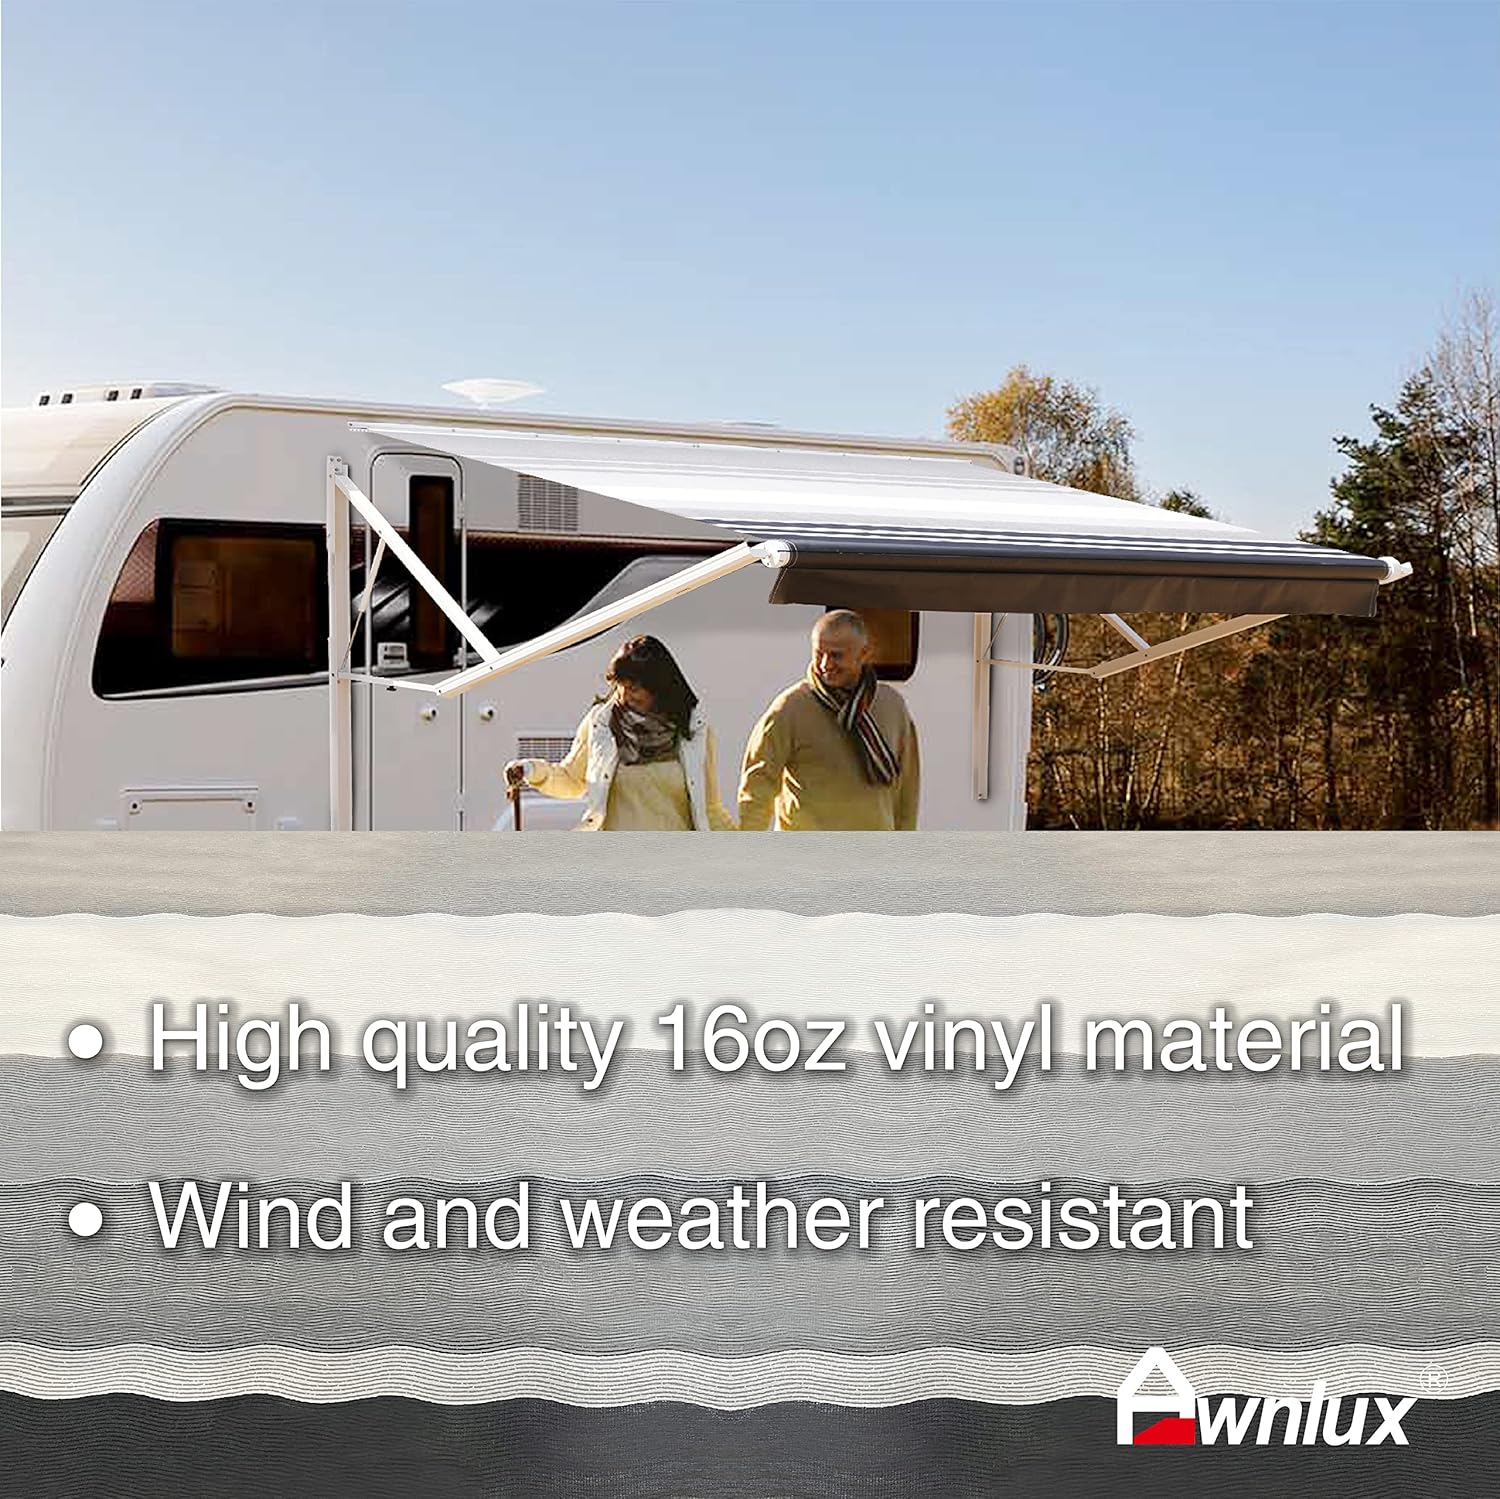
Image: High-quality 16oz vinyl material for durability.

Image: Emergency hand crank for manual operation.
4. Pre-Installation Considerations
Before beginning installation, ensure you have selected the correct awning size for your RV and have all necessary parts. Avoid installing near car doors, windows, or storage compartments that could obstruct operation.
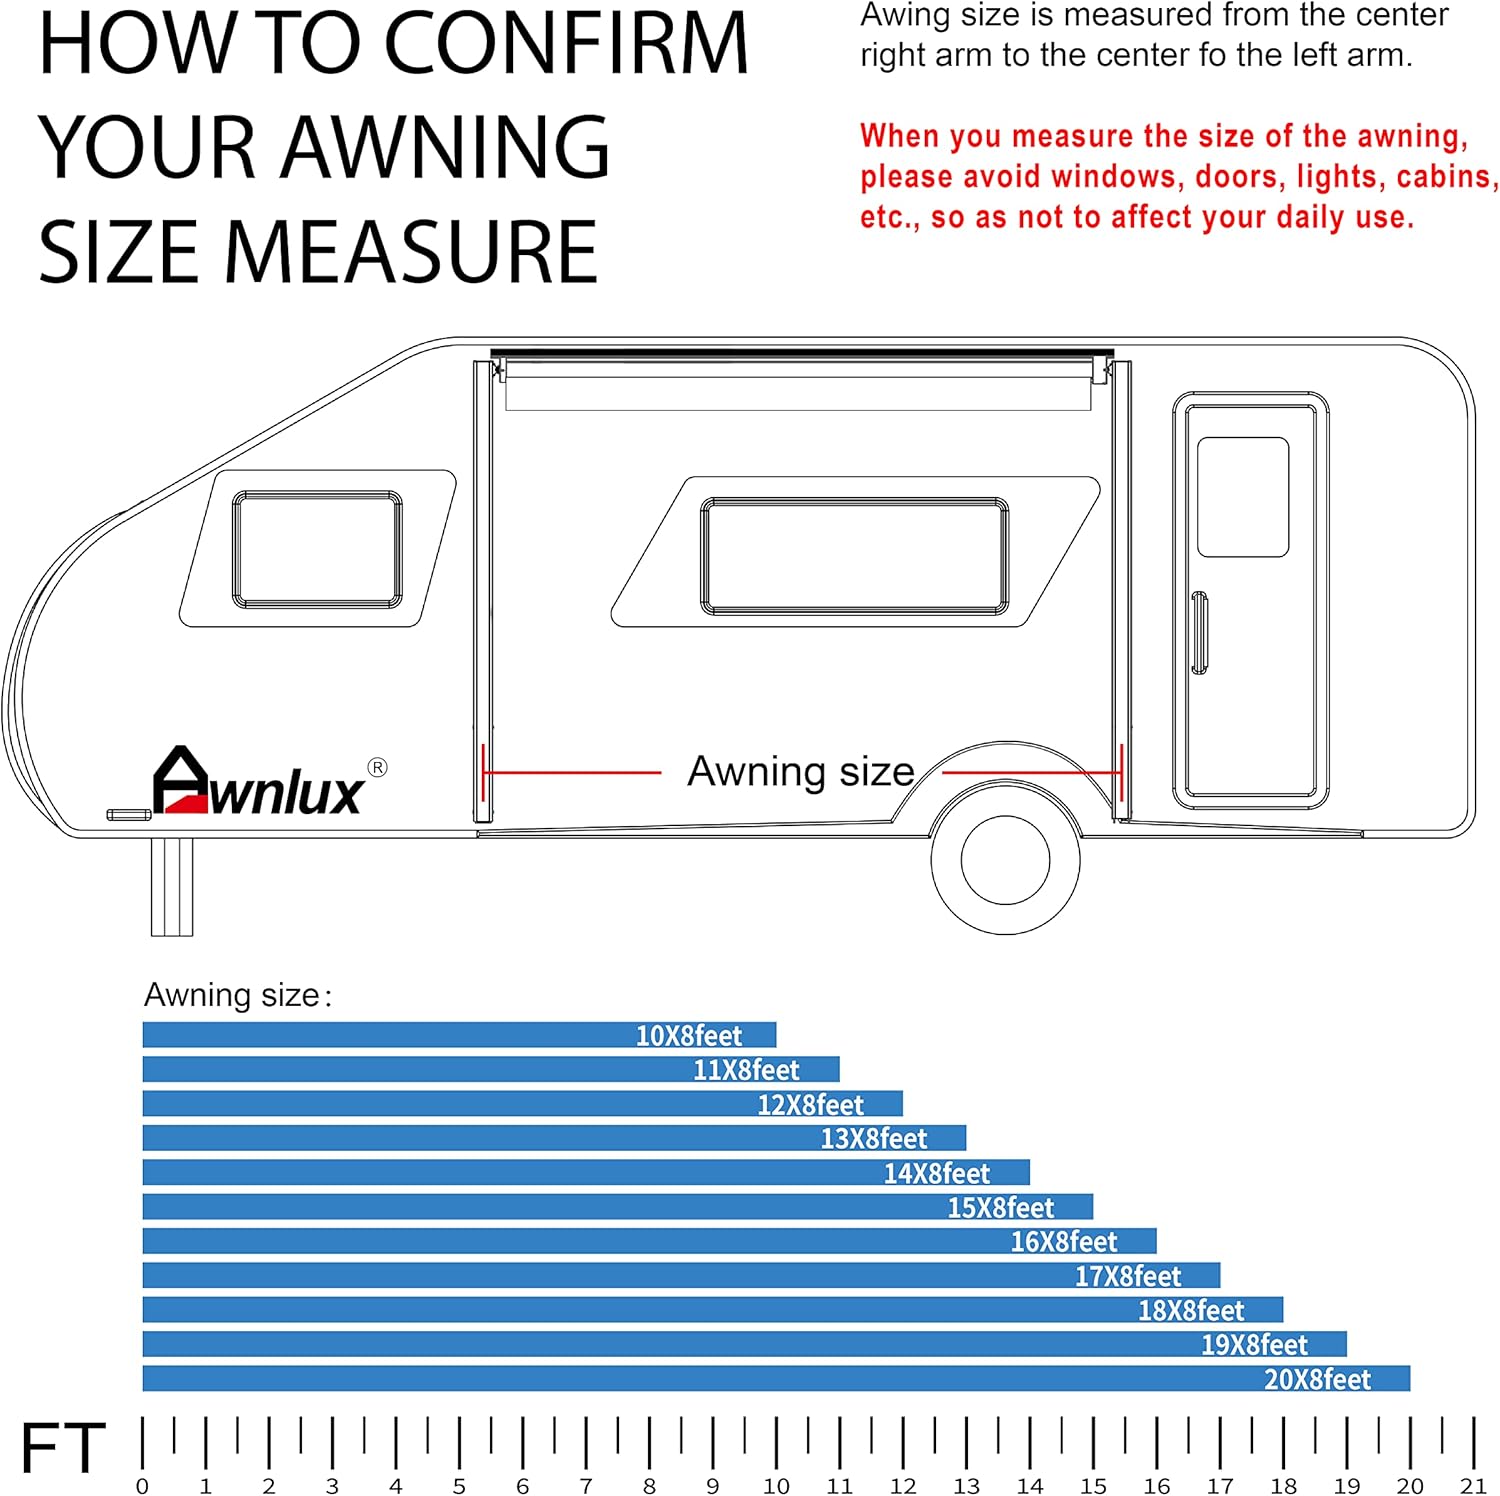
Image: Guide on how to measure your RV awning size.
5. Installation Guide
For a visual guide, please refer to the official Awnlux Motorized RV Awning Instruction Video below. Ensure your vehicle is stable and level before starting.
Video: Awnlux Motorized RV Awning Instruction Video (8:26). This video provides comprehensive steps for installing your awning.
Installation Steps:
- Unboxing & Inventory: Unpack all components and verify against the parts list in your manual.
- Measuring & Marking: Measure and mark the 6 fixing points for the Z-type brackets on your RV, ensuring they avoid any obstructions.
- Bracket Installation: Install the Z-type brackets using M6x16 screws at the marked positions.
- Arm Installation: Insert the left and right awning arms into their respective Z-type brackets. Mark and punch holes for the 5-position (left arm) and 6-position (right arm), then secure with M6x16 screws.
- Fabric Tube Assembly: Arrange the fabric tube sections. Remove the roller connectors from the tube ends, then connect the tube pieces by aligning the holes and fixing them with M6x16 screws. Ensure the prompt line is aligned.
- Fabric Installation: Unpack the awning fabric. Insert the valance fabric with its grey polycord into the tube. Then, insert the main fabric into the 'A' port of the tube, using a pressing plate to secure it into the groove, and insert the grey polycord. Ensure the fabric is centered (approx. 1.5cm from the edge). Roll up the fabric as directed.
- Connecting Fabric Tube to Arms: Insert the top edge of the fabric into the fabric lock rail and insert the black polycord. Connect the left awning arm to the left fabric tube by aligning and securing with the provided screw. Repeat this process for the right awning arm and fabric tube. Finally, fix the fabric to the lock rail using Φ4.2x13.5 self-tapping screws.
- Temporary Wiring & Testing: Prepare a temporary 12V power supply. Connect the black wiring from the switch to the negative (-) terminal of the power supply, and the red wiring from the switch to the positive (+) terminal. Connect the blue wiring from the switch to the brown wire on the awning motor, and the white wiring from the switch to the blue wire on the awning motor. Test the awning's extension and retraction. If it doesn't fully open or close, adjust the limit screws (using a green rod into the motor's bottom hole for '+' adjustment to open further, or upper hole for '-' adjustment to close further).
- Permanent Wiring & Finalization: After adjusting the motor limits, open the awning completely and remove the temporary wires. Connect the motor's power cord from the hole on the right side arm. Connect this cable with the main power cable that runs inside the arm, ensuring the connector is hidden within the protection shell. Connect the motor to your RV's power supply, ensuring all connections are secure and waterproofed to prevent water intake. Install the switch into the pre-drilled hole in your RV's wall.
6. Operating Instructions
Motorized Operation:
Your AWNLUX awning features a simple switch for motorized operation.
- To Extend the awning, press and hold the 'OPEN' button on the switch. Release the button to stop the awning at any desired projection.
- To Retract the awning, press and hold the 'CLOSE' button on the switch. Release the button to stop the awning at any desired position.

Image: Motorized awning control switch.
Manual Operation (Emergency Hand Crank):
In case of power failure, the awning can be manually operated using the included hand crank.
- Locate the hand crank receiver on the awning motor.
- Insert the hand crank into the receiver.
- Turn the crank clockwise to retract the awning, or counter-clockwise to extend it.
Adjusting Awning Pitch:
The awning's pitch can be adjusted to allow for water runoff during rain or to optimize shade.
- Loosen the adjustable knobs on the awning arms.
- Adjust the arms to achieve the desired slope.
- Tighten the knobs securely to lock the pitch in place.
7. Maintenance
- Cleaning: Clean the vinyl fabric regularly with mild soap and water. Avoid harsh chemicals or abrasive cleaners. Ensure the fabric is completely dry before retracting to prevent mildew.
- Inspection: Periodically inspect all mounting hardware, arms, and fabric for any signs of wear, damage, or loose connections. Tighten any loose screws.
- Lubrication: Lubricate moving parts of the arms and motor mechanism as recommended by the manufacturer to ensure smooth operation.
8. Troubleshooting
| Problem | Possible Cause | Solution |
|---|---|---|
| Awning does not extend/retract | No power; Loose wiring; Motor issue | Check power supply and connections. Ensure voltage is sufficient (at least 12V). Inspect wiring for damage. Contact support if motor is faulty. |
| Awning extends/retracts unevenly | Obstruction; Arms not aligned; Fabric not properly installed | Check for obstructions. Ensure arms are properly aligned and secured. Verify fabric is correctly inserted into the tube and lock rail. |
| Awning stops before fully open/closed | Limit switch needs adjustment | Adjust the motor limit screws as described in the Installation Guide (Step 5, point 8). |
| Water pooling on fabric | Insufficient pitch | Adjust the awning pitch to allow for proper water runoff (see Operating Instructions). |
9. Specifications
| Attribute | Value |
|---|---|
| Model | W5700CW-19x8WA3003 |
| Size | 19' (18'2" Fabric) |
| Color | White Frame-Black Strip |
| Material | Vinyl |
| Operation Mode | Motorized (with Manual option) |
| Product Dimensions | 72.44 x 12.6 x 9.45 inches |
| Item Weight | 1 pounds (approx. 16 ounces) |
10. Warranty & Support
AWNLUX products are designed for quality and durability. For specific warranty information regarding your motorized RV awning, please refer to the warranty card included with your product or visit the official AWNLUX website.
If you encounter any issues during installation or operation, or if you require replacement parts, please contact AWNLUX customer support. Our professional after-sales and installation support team is available to assist you and can provide video call support for complex issues.
Contact information can typically be found on the product packaging, the official brand website, or through your point of purchase.
Ask a question about this manual
Ask about setup, troubleshooting, compatibility, parts, safety, or missing instructions. Manuals+ will review the question and use this page’s manual context to help answer it.