
1. Introduction
Thank you for choosing the KITCHEN MOVE PILCA Automatic Bean-to-Cup Espresso Coffee Machine. This compact and multifunction device is designed to deliver high-quality espresso and lungo coffees from fresh coffee beans. Featuring a 19-bar pressure pump, a simplified touch interface, and a thermoblock rapid heating system, your machine ensures a delightful coffee experience. This manual provides essential information for the safe and efficient operation, maintenance, and care of your coffee machine.
2. Safety Information
Please read all safety instructions carefully before using the appliance. Keep this manual for future reference.
- Ensure the voltage indicated on the appliance matches your local mains voltage before connecting.
- Do not immerse the appliance, power cord, or plug in water or any other liquid.
- Keep the appliance out of reach of children.
- Unplug the machine from the power outlet before cleaning and when not in use.
- Do not operate the appliance with a damaged cord or plug, or after the appliance malfunctions or has been damaged in any manner.
- Use only original accessories and spare parts.
- Avoid contact with hot surfaces.
3. Product Overview and Components
Familiarize yourself with the various parts of your KITCHEN MOVE PILCA coffee machine:

- Water Reservoir (1.2L): Located at the top, easily removable for refilling.
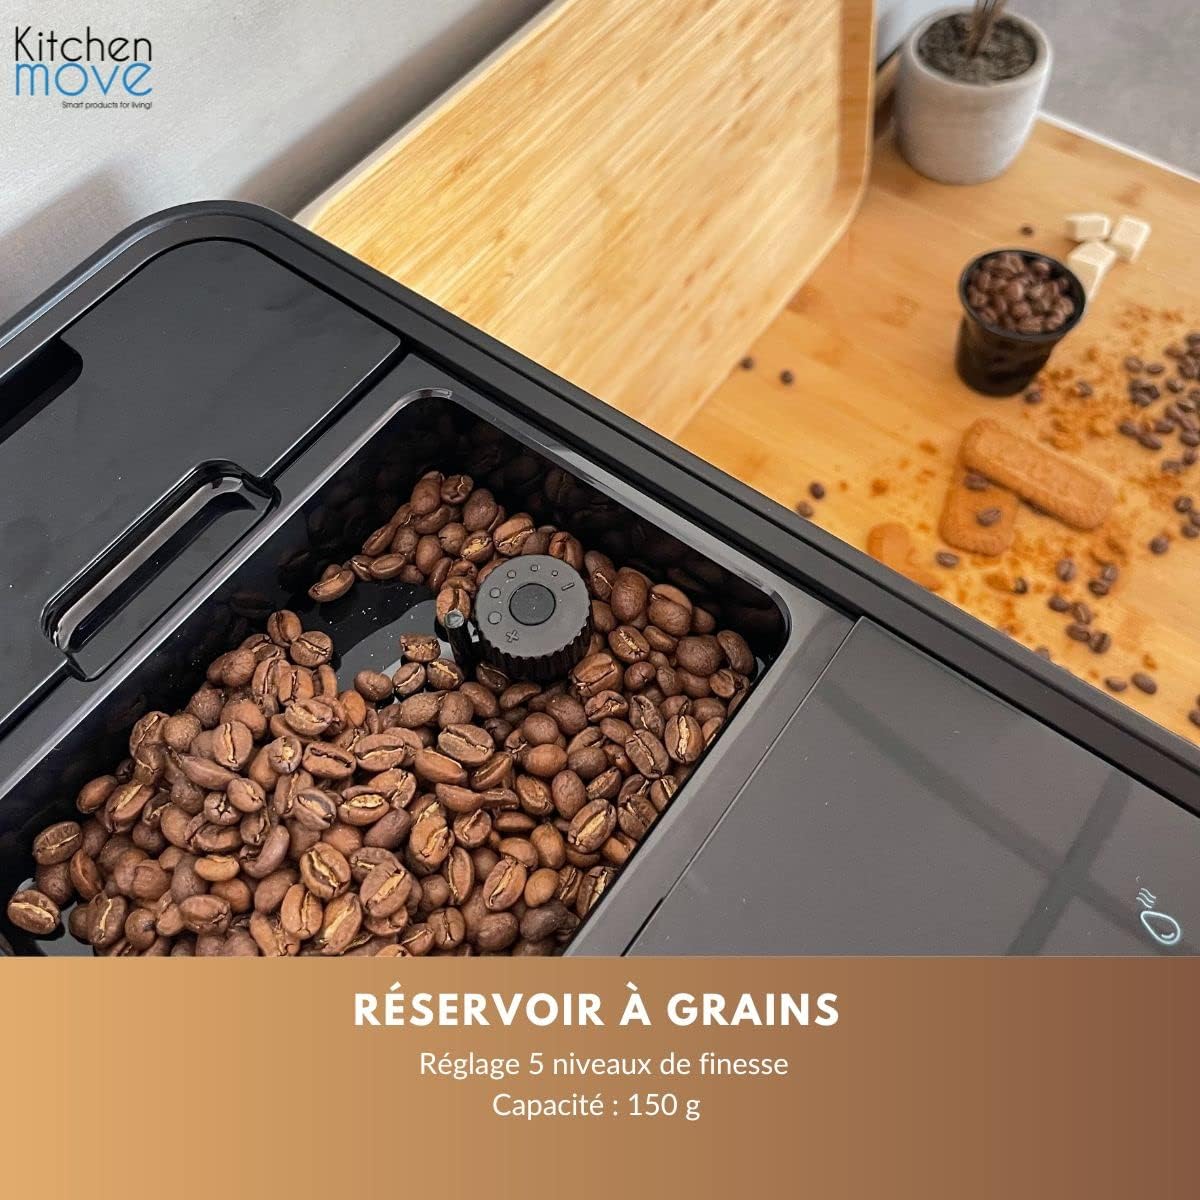
- Bean Reservoir (150g): Holds whole coffee beans, with an integrated grind fineness control.
- Touchscreen Interface: For selecting coffee types and adjusting settings.
- Alert Indicators: LEDs to signal status or required actions (e.g., low water, empty beans, descaling needed).
- Automatic Cleaning Spout: Dispenses hot water for system cleaning.
- Cup Illumination: LED light to illuminate the cup during brewing.
- Washable Infuser and Maintenance Hatch: Accessible for cleaning the brewing unit.
- Removable Coffee Grounds Tray: Collects used coffee grounds.


4. Setup
4.1 Unpacking
Carefully remove the coffee machine and all accessories from the packaging. Retain the packaging for future transport or storage.
4.2 Initial Cleaning
- Wash the water reservoir, coffee grounds tray, and drip tray with warm water and a mild detergent. Rinse thoroughly and dry.
- Wipe the exterior of the machine with a damp cloth.
4.3 Filling the Water Reservoir
- Remove the water reservoir from the machine.
- Fill it with fresh, cold drinking water up to the MAX level indicator.
- Place the water reservoir back into the machine, ensuring it is securely seated.
4.4 Adding Coffee Beans
- Open the lid of the bean reservoir.
- Pour whole coffee beans into the reservoir. Do not use ground coffee, instant coffee, or caramelized beans, as this can damage the grinder.
- Close the lid securely.
4.5 First Use Cycle
Before making your first coffee, perform a rinsing cycle:
- Ensure the water reservoir is filled and the bean reservoir is closed.
- Place a large container under the coffee spout.
- Plug in the machine and press the power button. The machine will perform an automatic rinse.
- Once the rinse is complete, the machine is ready for use.
5. Operating Instructions
5.1 Powering On/Off
Press the power button on the touchscreen to turn the machine on or off. The machine will perform an automatic rinse cycle upon startup and before shutting down.
5.2 Adjusting Grind Fineness
The machine features a stainless steel grinder with 5 levels of fineness adjustment. To adjust, turn the dial inside the bean reservoir. A finer grind (lower number) results in a stronger coffee, while a coarser grind (higher number) produces a milder taste. Adjust only when the grinder is operating.
5.3 Selecting Coffee Type and Brewing
The touch interface offers 5 functions for various coffee preparations:
- Short Coffee (Espresso): For a concentrated shot.
- Long Coffee (Lungo): A larger volume of coffee.
- Extended Coffee: An even larger volume.
- Personalized Cup: Allows you to set your preferred volume.
- Place a cup under the coffee spout.
- Select your desired coffee type from the touchscreen.
- The machine will automatically grind the beans, pre-percolate, and brew your coffee.
- For personalized cup volume, press and hold the personalized cup icon until the desired volume is reached, then release. The machine will remember this setting for future use.


6. Maintenance
Regular cleaning and maintenance ensure optimal performance and longevity of your coffee machine.
6.1 Daily Cleaning
- Drip Tray and Coffee Grounds Tray: Empty and rinse these trays daily. They are removable for easy cleaning.
- Water Reservoir: Rinse daily and refill with fresh water.
- Coffee Spout: Wipe with a damp cloth.
6.2 Automatic Cleaning Program
The machine has an integrated self-cleaning program. Follow the instructions displayed on the touchscreen when prompted by an alert indicator.
6.3 Descaling Program
The descaling program should be performed when the descaling alert indicator lights up. This is crucial for maintaining the machine's performance and preventing limescale buildup.
- Empty the water reservoir, coffee grounds tray, and drip tray.
- Pour one descaling sachet (3 sachets included) into the water reservoir and fill with water up to the descaling solution line (refer to specific instructions in the machine's internal guide if available).
- Place a large container under the coffee spout.
- Follow the instructions on the touchscreen to start the descaling program. The process may take several minutes.
- After descaling, rinse the water reservoir thoroughly and perform at least two full water cycles to flush out any remaining descaling solution.
6.4 Cleaning the Infuser
The infuser (brewing unit) is accessible via a maintenance hatch and should be cleaned regularly (e.g., weekly) to remove coffee residues.
- Turn off and unplug the machine.
- Open the maintenance hatch.
- Remove the infuser by pressing the release buttons (if any) and pulling it out.
- Rinse the infuser under running water until all coffee residues are removed. Do not use detergent.
- Allow the infuser to air dry completely before reinserting it.
- Close the maintenance hatch securely.
7. Troubleshooting
If you encounter issues with your coffee machine, refer to the following common problems and solutions:
| Problem | Possible Cause | Solution |
|---|---|---|
| No coffee dispensed | Water reservoir empty; Coffee beans empty; Brewing unit clogged. | Refill water reservoir; Refill bean reservoir; Clean the brewing unit. |
| Coffee is too weak | Grind setting too coarse; Not enough coffee used. | Adjust grind fineness to a finer setting; Check personalized cup volume. |
| Machine leaks water | Water reservoir not properly seated; Drip tray full. | Ensure water reservoir is correctly inserted; Empty and clean drip tray. |
| Descaling indicator on | Limescale buildup. | Perform the descaling program as described in Section 6.3. |
If the problem persists after attempting these solutions, please contact KITCHEN MOVE customer support.
8. Specifications
Technical details for the KITCHEN MOVE PILCA coffee machine (Model BAT-ART50):
| Feature | Detail |
|---|---|
| Model Name | PILCA |
| Model Number | BAT-ART50 |
| Dimensions (L x W x H) | 41 x 18 x 32 cm |
| Item Weight | 9 Kilograms |
| Power | 1235-1470 Watts |
| Voltage | 220-240 Volts |
| Pump Pressure | 19 Bars |
| Water Reservoir Capacity | 1.2 Liters |
| Bean Reservoir Capacity | 150 grams |
| Grind Fineness Settings | 5 levels |
| Material | Aluminum, Stainless Steel, Plastic |
| Operating Mode | Fully Automatic |
| Interface | Touchscreen |
| Special Features | Water filter, Automatic cleaning, Integrated coffee grinder, Removable reservoir, Thermoblock heating, ECO System with automatic shut-off. |

9. Warranty and Support
For warranty information, technical support, or service inquiries, please refer to the warranty card included with your product or contact KITCHEN MOVE customer service directly. Keep your proof of purchase for warranty claims.