VnioLife HK-809
VnioLife Professional Ionic Foot Bath Detox Machine HK-809 User Manual
Model: HK-809
1. Product Overview
The VnioLife Professional Ionic Foot Bath Detox Machine (Model HK-809) is designed for personal and professional use, offering dual foot bath functionality and an integrated heating belt. This manual provides instructions for safe and effective operation.

Image 1.1: The VnioLife HK-809 Ionic Foot Bath Detox Machine and included accessories, featuring the main unit, two ion arrays, two heating belts, two wristbands, power cord, and a spoon.
2. Package Contents
Please verify that all items are present in your package:
- 1 x Ionic Detox Machine (Main Unit)
- 2 x Heating Belts
- 2 x Ion Arrays
- 2 x Wristbands
- 1 x User Manual (this document)
- 1 x Power Cord
- 1 x Spoon (for measuring salt)
3. Setup Instructions
- Unpack Components: Carefully remove all items from the aluminum case.
- Position the Machine: Place the main unit on a stable, flat surface near an electrical outlet.
- Prepare Foot Basins: Fill two non-metallic foot basins (not included) with warm water. Ensure the water level is sufficient to cover the ion array and your feet.
- Connect Ion Arrays: Plug each ion array into the 'ARRAY' port on the front panel (Port A and Port B). Place one ion array into each foot basin.
- Connect Wristbands: Plug each wristband into the 'WRIST BAND' port next to its corresponding 'ARRAY' port. Users must wear the wristbands for the machine to function.
- Connect Heating Belts (Optional): If using, plug the heating belts into the designated ports on the rear of the machine.
- Power Connection: Connect the power cord to the machine and then to a standard electrical outlet.

Image 3.1: Detailed view of the control panel and connection points for ion arrays, wristbands, and heating belts.
4. Operating Instructions
4.1 Initial Power On
Press the power button on the main unit. The digital display will illuminate.
4.2 Foot Bath Operation
- Add Salt (Optional, with caution): A very small amount of non-iodized salt (e.g., sea salt) can be added to the water to increase conductivity if the machine displays a low current (A: 0.0). Caution: Adding too much salt can cause the machine to beep and stop working due to high voltage. Start with a tiny sprinkle and add more gradually if needed. Some water sources may not require any added salt.
- Wear Wristbands: Ensure both users are wearing their wristbands securely on their wrists. The machine requires the wristband connection to operate.
- Select Mode: Use the 'MODE' button for each channel (A or B) to cycle through the 5 detoxification modes. Each mode has a specific waveform pattern displayed on the screen.
- Set Time: Use the '+' and '-' buttons to adjust the session duration. The recommended duration is between 10 and 60 minutes.
- Start Session: Press the 'START' button for each channel to begin the foot bath session. The display will show real-time voltage (V) and current (A) readings.
- Monitor Session: Observe the water color change during the session. This is a normal part of the process.
- End Session: The machine will automatically stop when the set time expires. You can also press 'STOP' at any time to end the session manually.
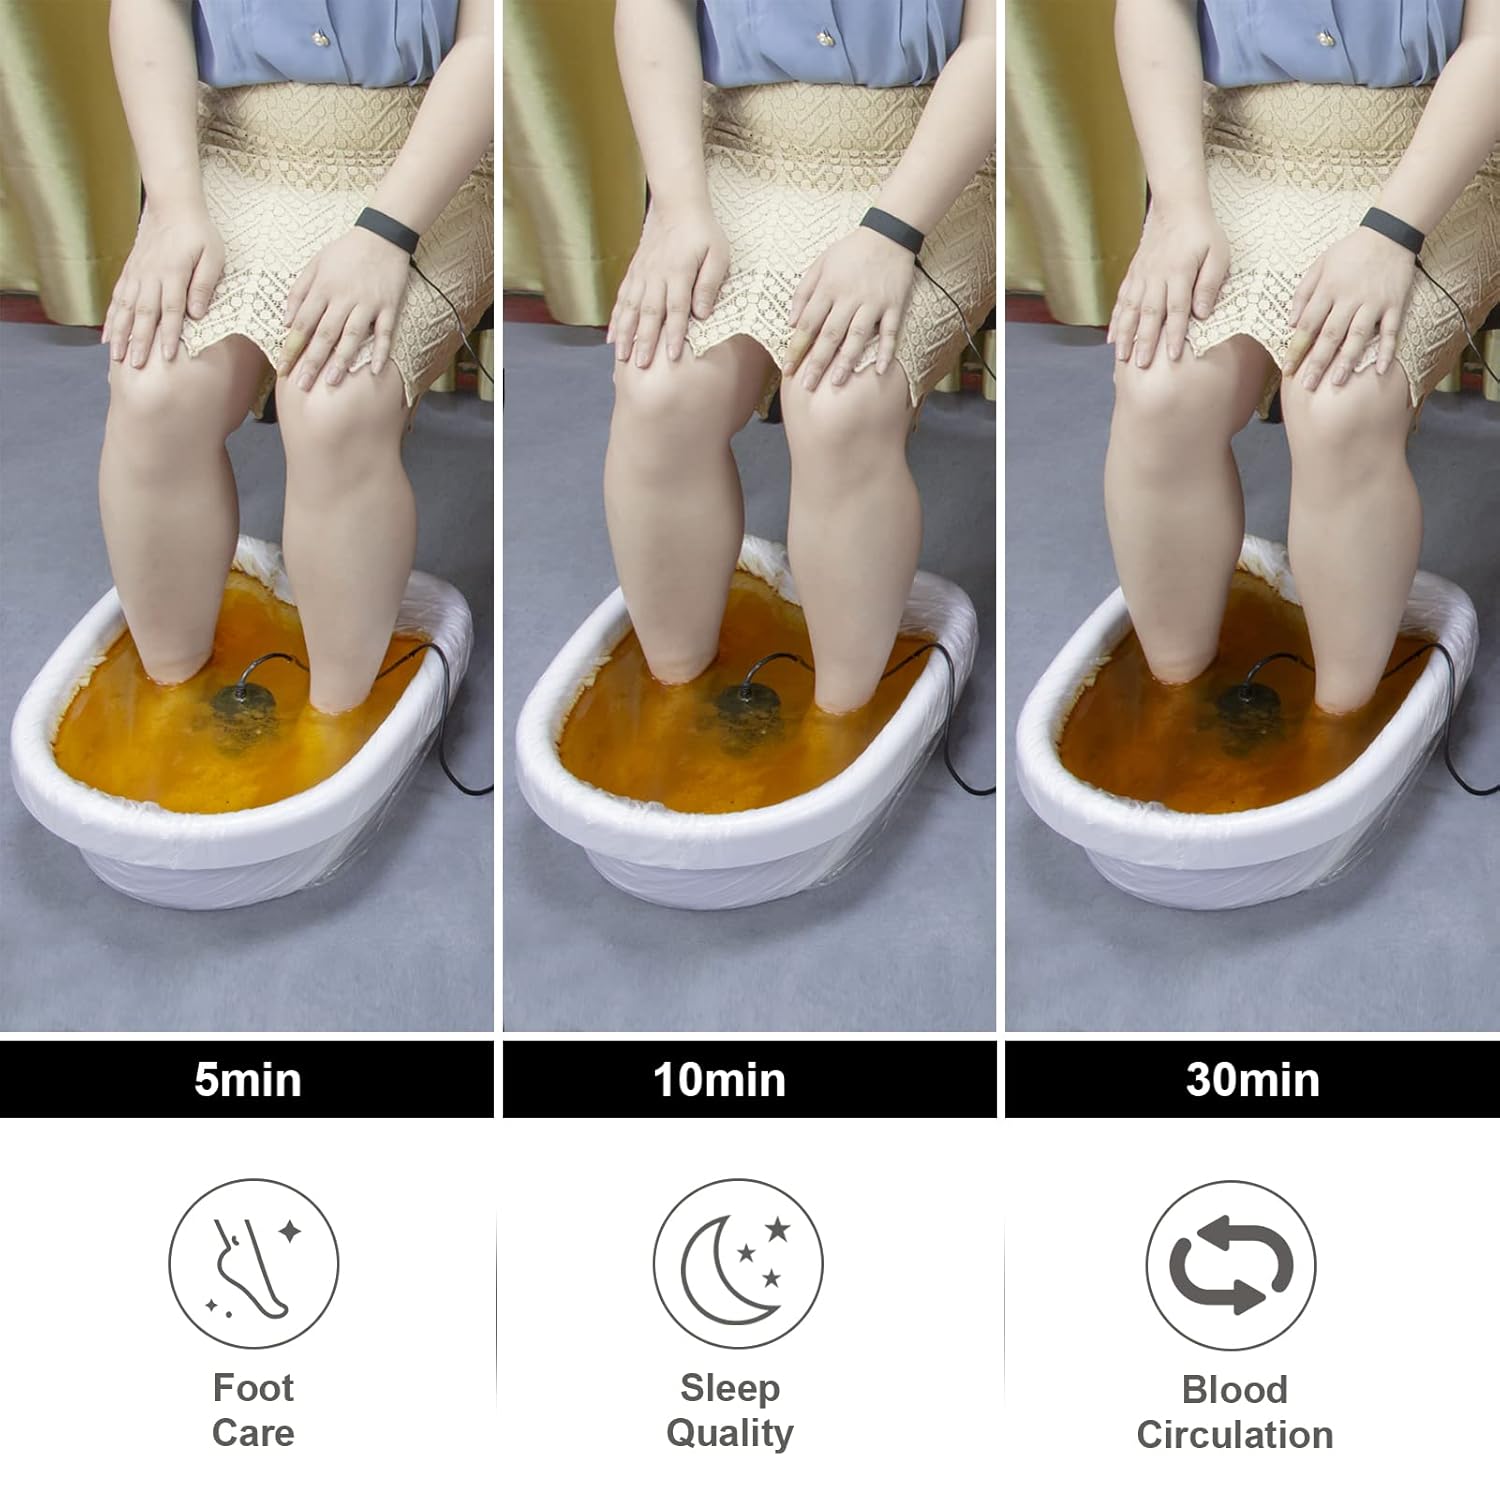
Image 4.1: Explanation of the 5 detoxification modes and their intended effects on pH levels and substance expulsion.

Image 4.2: Visual representation of water color changes during a foot bath session at 5, 10, and 30 minutes.
4.3 Heating Belt Operation
The heating belt can be used concurrently with the foot bath or independently.
- Connect Belt: Plug the heating belt into the designated port on the rear of the machine.
- Wear Belt: Secure the heating belt around the desired area (e.g., waist, back).
- Adjust Temperature: Use the heating belt controls on the main unit to select one of the 3 temperature levels: Low, Medium, or High.
- Duration: The heating belt operates for the duration of the foot bath session or until manually turned off.

Image 4.3: Heating belt temperature diagram indicating Low, Medium, and High settings, along with suggested application areas for comfort.
5. Maintenance
5.1 Ion Array Care
- After each use, rinse the ion array thoroughly with clean water.
- Allow the ion array to air dry completely before storing.
- Store the dry ion array in its original packaging or a designated storage box to protect it.
- Ion arrays are consumable items and will degrade over time with regular use. Replace them when performance diminishes.
5.2 Machine Cleaning
- Wipe the main unit with a soft, damp cloth. Do not use abrasive cleaners or immerse the unit in water.
- Ensure the machine is unplugged before cleaning.
6. Troubleshooting
| Problem | Possible Cause | Solution |
|---|---|---|
| Machine beeps and stops working. | Too much salt in the water, causing high voltage. | Reduce or remove salt from the water. Use only a tiny sprinkle if necessary. |
| Machine does not start or operate. | Wristband not worn or improperly connected. | Ensure wristbands are securely connected and worn by users. Check for faulty wristband cables. |
| Ion array shows reduced performance. | Normal wear and tear; array degradation. | Replace the ion array with a new one. |
| Machine shuts off after a few minutes. | Possible internal fault or connection issue. | Check all connections. If the problem persists, contact customer support. |
7. Specifications
- Model Number: HK-809
- UPC: 752895759302
- Package Dimensions: 16.4 x 11.5 x 6.4 inches
- Item Weight: 12.2 Pounds
- Detox Modes: 5
- Session Duration: 10-60 minutes (adjustable)
- Heating Belt Temperature Levels: 3 (Low, Medium, High)
8. Warranty and Support
This product comes with a manufacturer's warranty. Please refer to the product packaging or the seller's information for specific warranty terms and duration.
For technical assistance, troubleshooting beyond this manual, or warranty claims, please contact VnioLife customer support through the platform where the product was purchased or visit the official VnioLife store page.
VnioLife Store: https://www.amazon.com/stores/VnioLife/page/F56CE947-FF19-413C-B5B6-69C2DD2C6B92