1. Introduction
Thank you for choosing the XUNTOP Digital Inclinometer, Model XOP007. This precision tool is designed for accurate angle measurement in various applications, including automotive, carpentry, and construction. Please read this manual carefully before use to ensure proper operation and to maximize the device's lifespan.
Package Contents:
- 1 x XUNTOP Digital Inclinometer (Model XOP007)
- 1 x USB-C Charging Cable
- 1 x Carry Bag

Image 1.1: XUNTOP Digital Inclinometer, USB-C cable, and carry bag.
2. Product Features
- Measuring Range: 4 x 90° (360° total)
- Accuracy: ±0.1° at 0° and 90°, ±0.2° for other angles
- Resolution: 0.05°
- Waterproof Rating: IP54 (dust and splash resistant)
- Power: Integrated 340mAH rechargeable Lithium Polymer battery
- Display: Bright VA display with automatic rotation
- Magnetic Base: Strong magnets on all four sides for secure attachment
- Laser Function: Dual lasers for precise alignment
- Charging: USB-C port for convenient recharging

Image 2.1: Overview of key features including accuracy, resolution, data hold, dual laser, battery, Type-C charging, auto calibration, angle finder, unit conversion, and IP54 rating.
3. Setup
3.1 Charging the Device
Before first use, fully charge the inclinometer. Connect the provided USB-C charging cable to the device's charging port and to a compatible USB power source (e.g., computer, wall adapter).

Image 3.1: The inclinometer charging via its USB-C port.
3.2 Power On/Off
Press the ON/OFF button to turn the device on or off. The display will illuminate, showing the current angle.
3.3 Automatic Calibration
The device features automatic calibration. For optimal accuracy, ensure the device is placed on a flat, level surface before taking critical measurements. The inclinometer will self-calibrate upon power-on or when the ZERO button is pressed.
4. Operating Instructions
4.1 Taking Measurements
Place the inclinometer on the surface you wish to measure. The angle will be displayed on the screen. The display automatically rotates for easy reading when the device is inverted.

Image 4.1: The inclinometer demonstrating its 4x90° measuring range, automatic display rotation, and strong magnetic base.
4.2 Zeroing the Display
To set the current surface as the reference (0°), press the ZERO button. This is useful for measuring relative angles.
4.3 Data Hold Function
Press the HOLD button to freeze the current reading on the display. Press it again to release the hold and resume live measurement.
4.4 Unit Conversion
The device supports different units of measurement. Press the U button to cycle through available units (e.g., degrees, percentage, mm/m, in/ft).
4.5 Using the Laser Function
The inclinometer features dual lasers for enhanced alignment. To activate and cycle through laser modes:
- First Press: Activates the right laser.
- Second Press: Activates the left laser.
- Third Press: Activates both left and right lasers.
- Fourth Press: Turns off the lasers.

Image 4.2: The inclinometer demonstrating its laser function for alignment.
4.6 Magnetic Attachment
The strong magnets on all four sides allow the inclinometer to be securely attached to metal surfaces, such as saw blades, metal frames, or pipes, for hands-free operation.
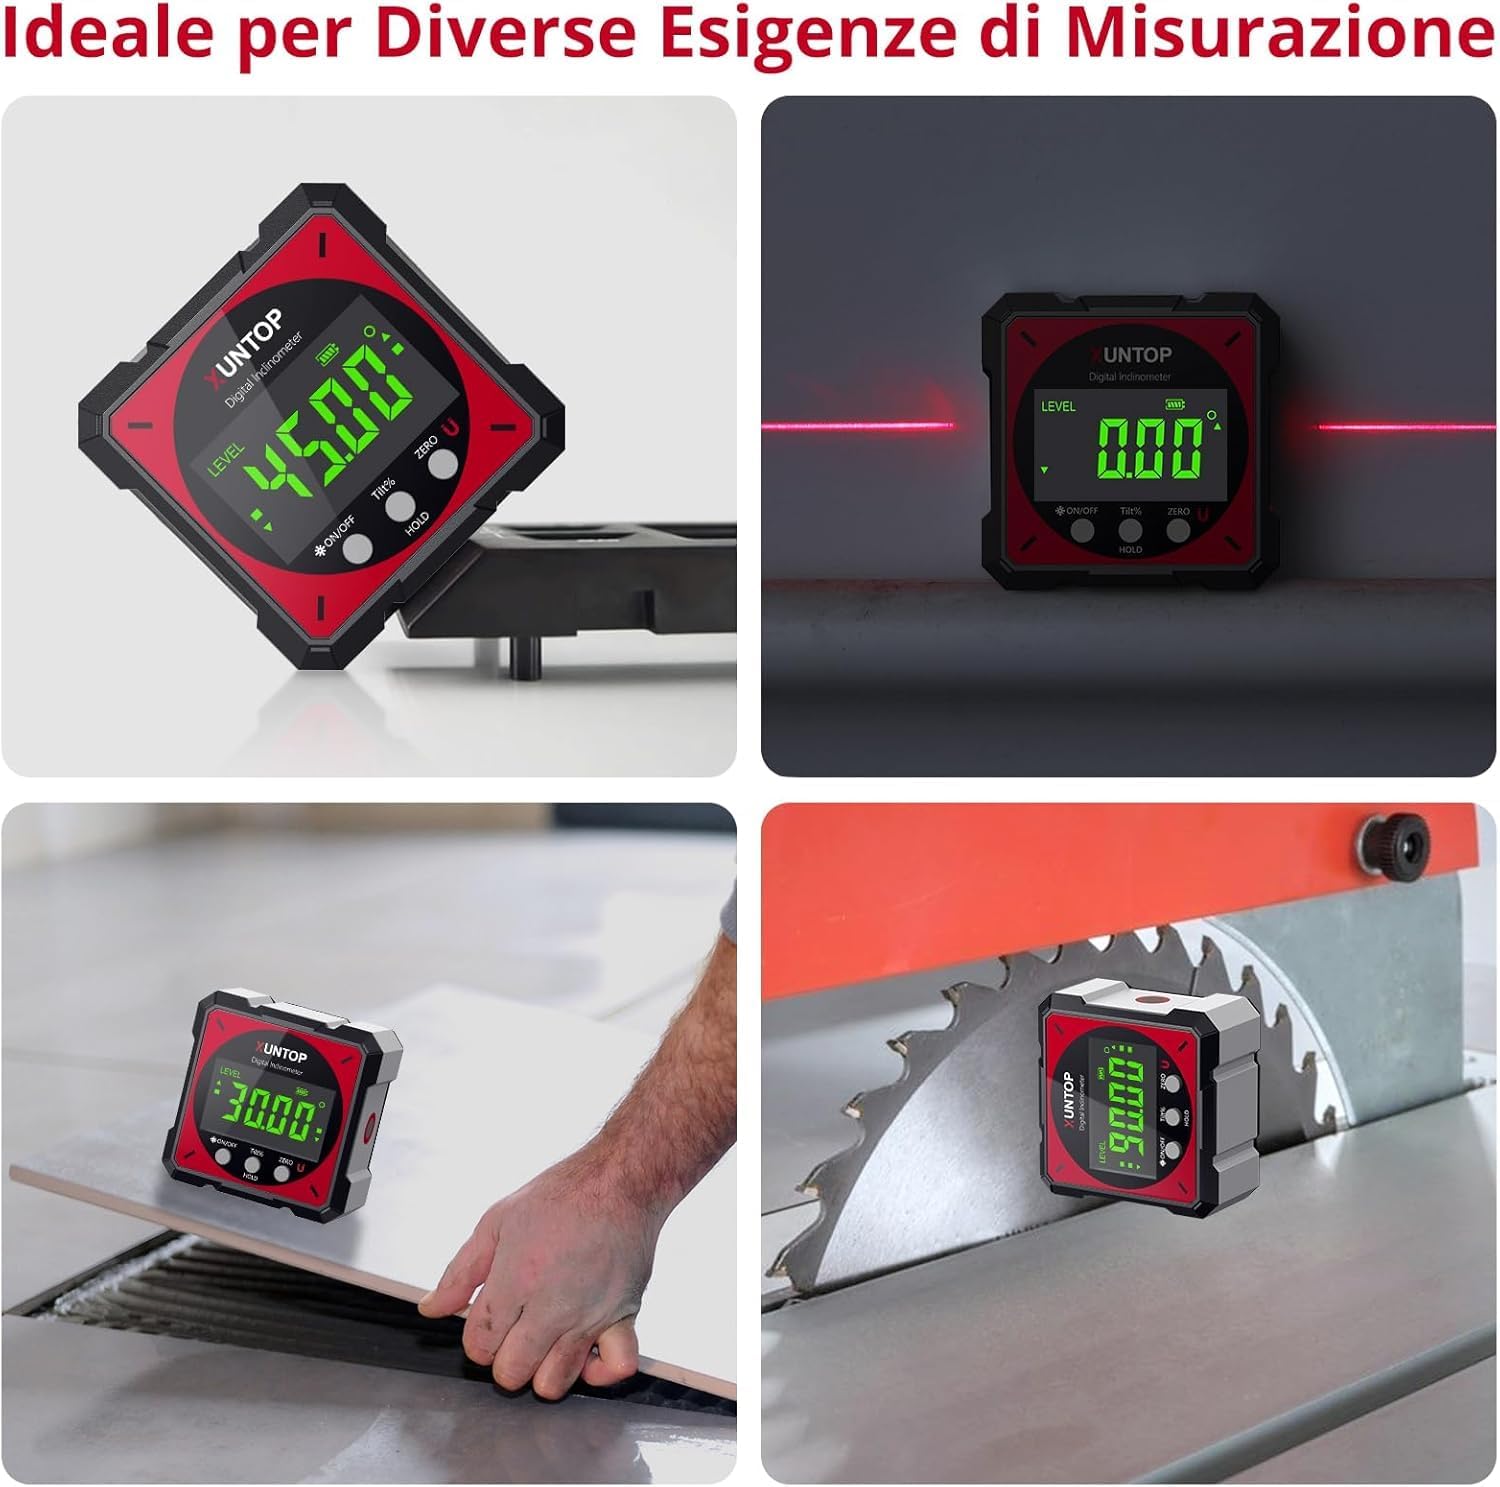
Image 4.3: Examples of the inclinometer being used for different measurement tasks, including on a saw blade and a tile.
5. Maintenance
5.1 Cleaning
Wipe the device with a soft, dry cloth. Do not use abrasive cleaners or solvents. The IP54 rating means it is resistant to dust and splashes, but it should not be submerged in water.
5.2 Storage
When not in use, store the inclinometer in its protective carry bag in a cool, dry place, away from direct sunlight and extreme temperatures. Ensure the device is turned off to preserve battery life.
5.3 Battery Care
To maintain battery health, avoid fully discharging the battery frequently. Recharge the device regularly, especially if it has not been used for an extended period.
6. Troubleshooting
- Device does not turn on: Ensure the battery is charged. Connect the USB-C cable and attempt to power on while charging.
- Inaccurate readings: Perform a calibration by placing the device on a known level surface and pressing the ZERO button. Ensure the surface is stable and free from vibrations.
- Display is dim or unreadable: Check battery level. If low, recharge the device. Ensure the backlight is active if in a dark environment.
- Laser not working: Ensure the device is powered on and the laser function has been activated by pressing the appropriate button (refer to Section 4.5). Check battery level.
7. Specifications
| Feature | Specification |
|---|---|
| Manufacturer | XUNTOP |
| Model Number | XOP007 |
| Measuring Range | 4 x 90° (360°) |
| Accuracy | ±0.1° (0°, 90°), ±0.2° (other angles) |
| Resolution | 0.05° |
| Waterproof Rating | IP54 |
| Battery | 340mAH Lithium Polymer (rechargeable) |
| Charging Port | USB-C |
| Material | Aluminum |
| Product Dimensions | 6.1 x 6.1 x 0.1 cm |
| Weight | 150 g |
| Color | Red |
| Operating Mode | Automatic |
8. Warranty and Support
8.1 Warranty Information
XUNTOP products are manufactured to high-quality standards. For specific warranty details, please refer to the warranty card included with your purchase or contact your retailer. Keep your proof of purchase for any warranty claims.
8.2 Customer Support
If you encounter any issues or have questions regarding your XUNTOP Digital Inclinometer, please contact the retailer where you purchased the product or visit the official XUNTOP website for support resources. Please have your model number (XOP007) and purchase details ready when contacting support.