
Happytools 13.5 Amp Electric Tiller
Happytools 13.5 Amp Electric Tiller User Manual
Model: 13.5 Amp Electric Tiller
Introduction
This manual provides essential information for the safe and efficient operation, maintenance, and troubleshooting of your Happytools 13.5 Amp Electric Tiller. Please read this manual thoroughly before operating the machine to ensure proper use and to prevent injury or damage.
The Happytools Electric Tiller is designed to reduce the effort of tilling soil in gardens, flower beds, and greenhouses. It features a powerful 13.5 amp motor, six durable steel tines, and a foldable handle for convenient storage and portability.
Safety Information
WARNING: Read all safety warnings and instructions. Failure to follow the warnings and instructions may result in electric shock, fire, and/or serious injury.
- Always wear appropriate personal protective equipment, including eye protection, gloves, and sturdy footwear.
- Ensure the work area is clear of debris, rocks, and other obstacles that could be thrown by the tines.
- Keep bystanders, especially children, away from the operating area.
- Do not operate the tiller in wet conditions or on excessively rocky soil.
- Before any maintenance or cleaning, always unplug the tiller from the power source.
- The tiller is equipped with a safety button and overtemperature protection. Do not bypass these safety features.
- Do not use directly in rocky soil to avoid damaging the blades.
- Remove tall grass or vines first to avoid entangling the blades and making them stop working.
Product Overview
Familiarize yourself with the components of your electric tiller.

Figure 1: Labeled components of the Happytools 13.5 Amp Electric Tiller, showing the Safety Button, ON/OFF Trigger, Lever Clamps for Folding, Cable Clamps, Powerful Motor, Shield, 6 Sharp Blades, Durable Wheels, Wheel Position Adjustment, 15-inch Long Wire, and Ergonomic Handle.
- Powerful Motor: 13.5 Amp motor for efficient tilling.
- 6 Sharp Blades (Tines): Durable steel tines for effective soil cultivation.
- Ergonomic Handle: Designed for comfortable operation and reduced strain.
- Safety Button & ON/OFF Trigger: Ensures safe starting and stopping of the machine.
- Lever Clamps: For quick and easy folding of the handle.
- Adjustable Wheels: Allows for easy transport and depth adjustment.
- Wide Shield: Protects the user and motor from thrown debris.
Setup and Assembly
The Happytools Electric Tiller requires minimal assembly. Follow these steps to prepare your tiller for use.
- Unpacking: Carefully remove all components from the packaging. Verify that all parts listed in the package contents are present.
- Handle Assembly:
Attach the upper handle to the lower handle using the provided hardware. Ensure all connections are secure.
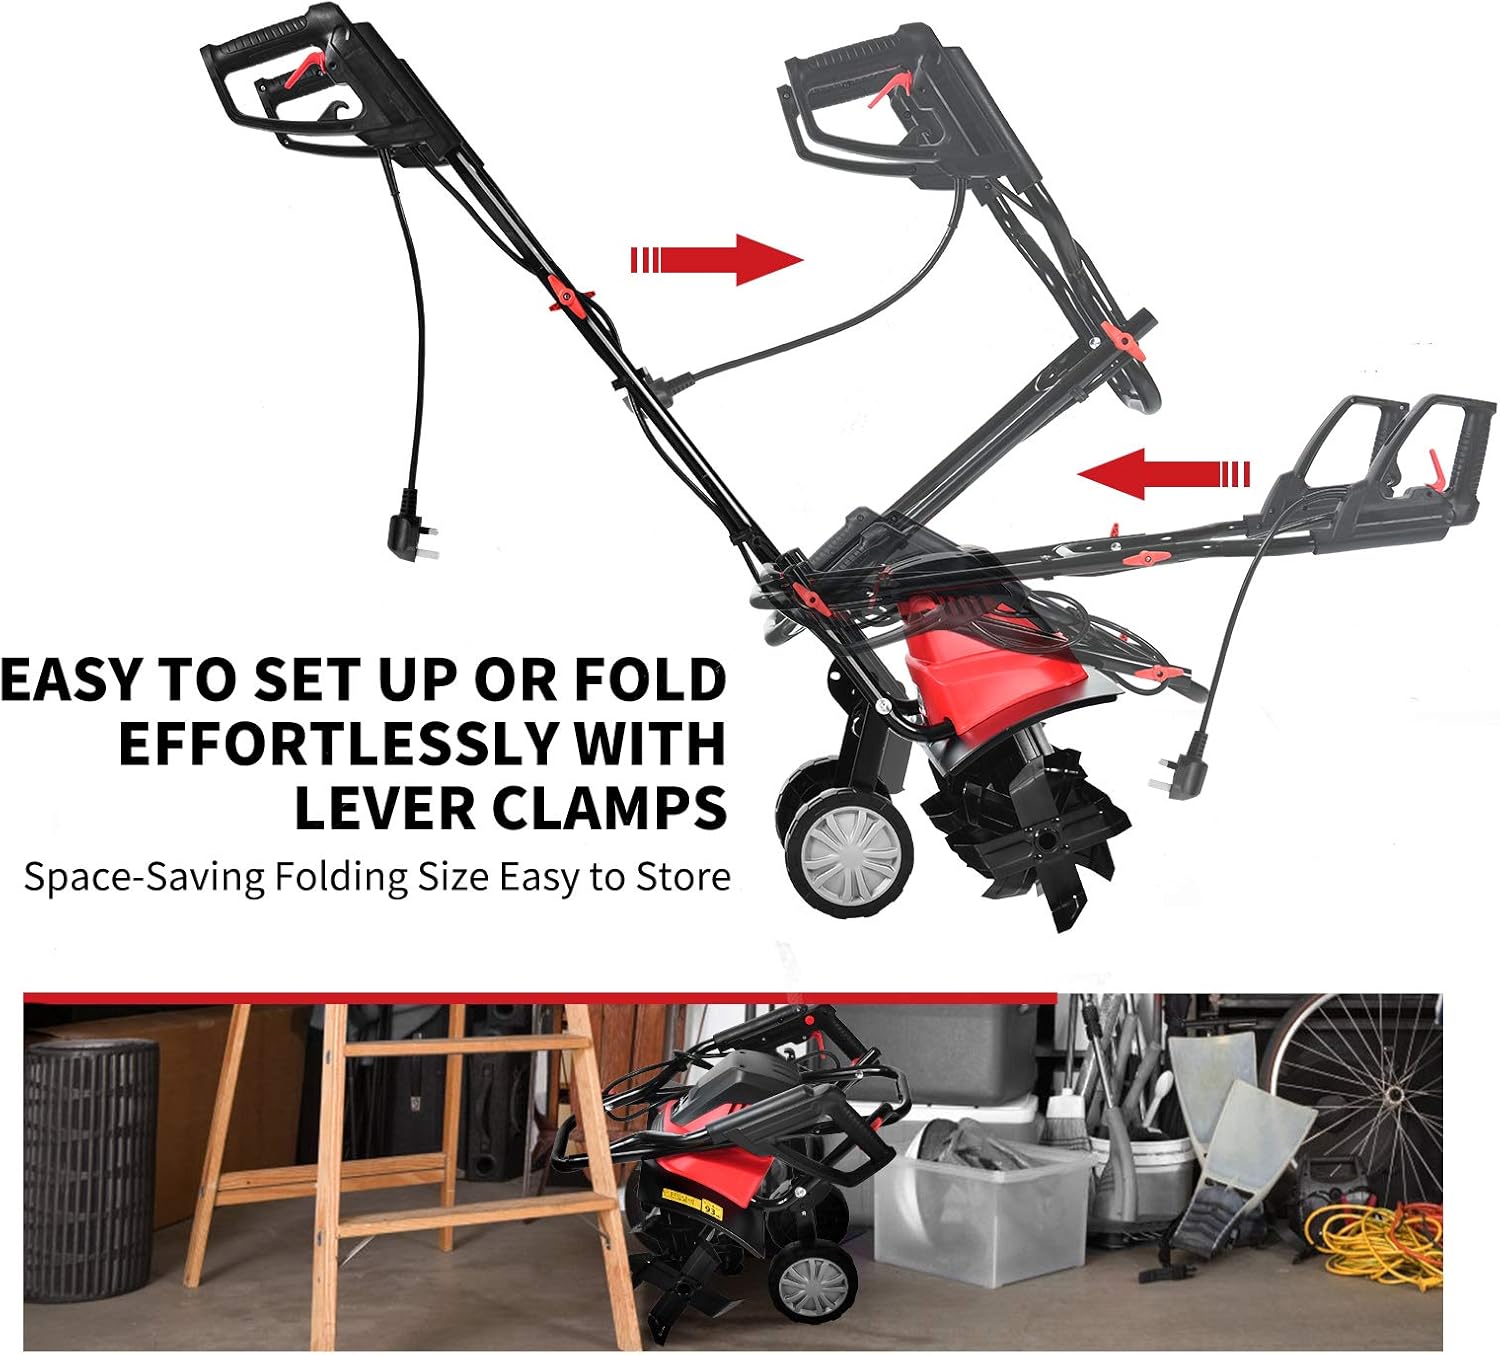
Figure 2: The tiller's handle can be easily set up or folded using the lever clamps, allowing for space-saving storage.
- Cable Management: Secure the power cord along the handle using the cable clamps to prevent entanglement during operation.
- Wheel Adjustment: The tiller features adjustable wheels for transport and setting tilling depth.
To lift the wheels for tilling, pull out the ring-pull mechanism and adjust the wheel position. For transport, lower the wheels.

Figure 3: Easy wheel adjustment: Pull out the ring-pull to lift the wheels for tilling or lower them for transport.
Operating Instructions
Follow these steps for safe and effective operation of your electric tiller.
- Preparation:
- Clear the tilling area of large rocks, roots, and debris.
- Ensure the soil is not excessively wet or hard-packed.
- Wear appropriate safety gear.
- Connecting Power: Plug the tiller into a suitable 120V/60Hz power outlet. Use an outdoor-rated extension cord if necessary, ensuring it is of adequate gauge for the distance.
- Starting the Tiller:
- Press and hold the safety button.
- While holding the safety button, squeeze the ON/OFF trigger to start the motor.
- Release the safety button once the motor starts.
- Tilling Technique:
Guide the tiller slowly and steadily through the soil. Allow the tines to dig into the ground. For deeper tilling, make multiple passes over the same area, gradually increasing depth.

Figure 4: The electric tiller effectively breaking up soil, demonstrating its 8.7-inch working depth and 17.7-inch working width.
The tiller is designed for a working width of 17.7 inches and a maximum working depth of 8.7 inches.

Figure 5: Visual representation of the tiller's working depth (8.7 inches) and working width (17.7 inches), highlighting its 6 blades, high strength, and sharp design.
- Stopping the Tiller: Release the ON/OFF trigger to stop the motor. Always unplug the tiller when not in use or before making adjustments.
Maintenance
Regular maintenance ensures the longevity and optimal performance of your tiller.
- Cleaning: After each use, unplug the tiller and clean off any soil, debris, or plant matter from the tines and shield. Use a stiff brush or cloth. Do not use water directly on the motor housing.
- Blade Inspection: Regularly inspect the tines for wear, damage, or entanglement. Remove any tangled grass or vines. Replace worn or damaged tines promptly.
- Cord Inspection: Check the power cord and plug for any signs of damage. Do not use the tiller if the cord is damaged.
- Storage: Store the tiller in a dry, secure location. The foldable handle allows for compact storage.
Troubleshooting
| Problem | Possible Cause | Solution |
|---|---|---|
| Tiller does not start. |
|
|
| Tines stop rotating or slow down. |
|
|
| Excessive vibration. |
|
|
Specifications
| Feature | Detail |
|---|---|
| Brand | Happytools |
| Model | 13.5 Amp Electric Tiller |
| Power Input | 13.5 Amps |
| Main Voltage | 120V/60HZ |
| Number of Blades | 6 |
| Working Width | 450mm (17.7 inches) |
| Working Depth | Max. 220mm (8.7 inches) |
| Speed | 400 RPM |
| Net Weight | 24 lbs |
| Overall Dimensions (L x W x H) | 41'' x 40'' x 18'' |
| Sound Power Level | 91.57 dB(A) |
| Material | Alloy Steel |
| Color | Black + Red |
Warranty and Support
For warranty information or technical support, please contact Happytools customer service. Keep your purchase receipt as proof of purchase.
While specific warranty terms are not detailed here, typical warranties cover defects in materials and workmanship under normal use. Damage from misuse, neglect, or unauthorized repairs is generally not covered.
For further assistance, visit the official Happytools store: Happytools Store on Amazon
Ask a question about this manual
Ask about setup, troubleshooting, compatibility, parts, safety, or missing instructions. Manuals+ will review the question and use this page’s manual context to help answer it.