KIMEX 018-7064W
KIMEX 018-7064W Motorized Retractable Ceiling TV Mount User Manual
Model: 018-7064W
Introduction
This manual provides detailed instructions for the installation, operation, and maintenance of your KIMEX 018-7064W Motorized Retractable Ceiling TV Mount. This advanced ceiling mount is designed for televisions ranging from 32 to 70 inches, offering a discreet and space-saving solution for both flat and sloped ceilings. It features motorized retraction and extension, controlled via a remote control or smart home integration (Wi-Fi, TUYA, Amazon Alexa, Google Nest).
Please read this manual thoroughly before installation and use to ensure safe and optimal performance of the product.
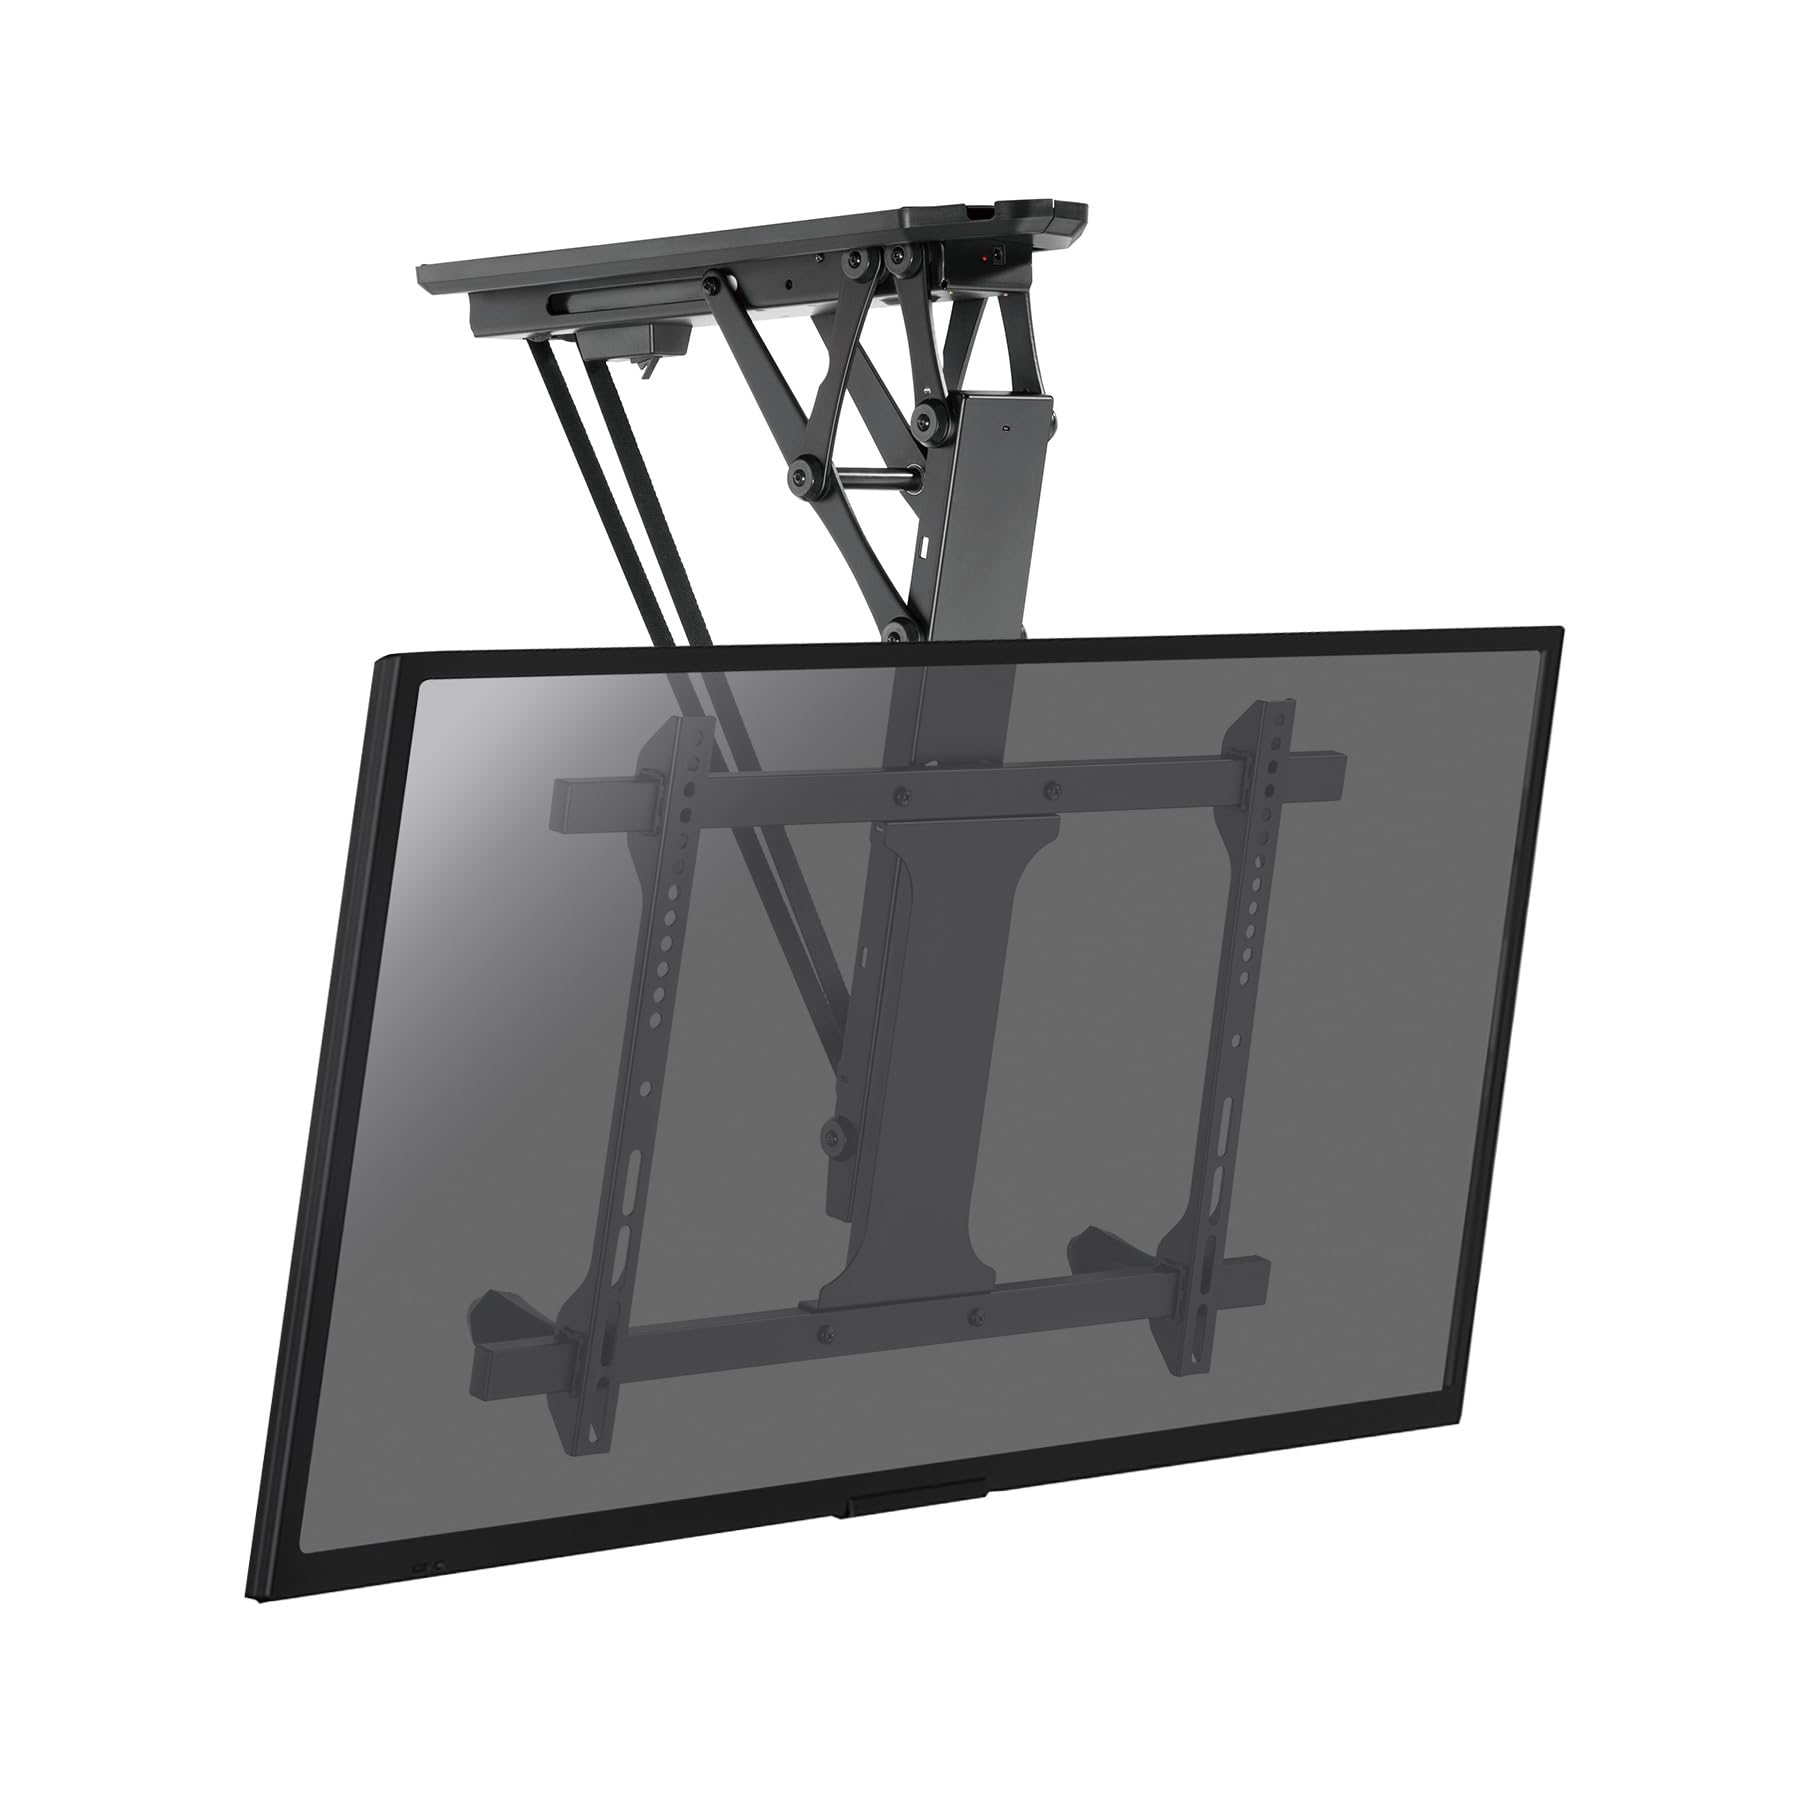
Figure 1: KIMEX 018-7064W Motorized Retractable Ceiling TV Mount (Extended)
Safety Information
- Ensure the mounting surface (ceiling) can safely support the combined weight of the mount and the television.
- Do not exceed the maximum weight capacity of 35 kg (77 lbs).
- Do not exceed the recommended screen size range of 32-70 inches.
- Always use appropriate tools and follow all installation steps carefully.
- Consult a qualified professional for installation if you are unsure about any part of the process.
- Keep children and pets away from the mount during operation.
- Do not attempt to modify the mount or its components.
- Disconnect power before performing any maintenance or adjustments.
Package Contents
Verify that all components are present and undamaged before proceeding with installation.
- Motorized Ceiling TV Mount Assembly
- Remote Control
- Mounting Hardware Kit (screws, anchors, washers)
- VESA Plate
- Installation Template
- Power Adapter
- User Manual (this document)
Specifications
| Model Number | 018-7064W |
| Brand | KIMEX |
| Compatible Screen Sizes | 32" - 70" |
| Maximum Weight Capacity | 35 kg (77 lbs) |
| VESA Compatibility | Min 200x100mm, Max 600x400mm |
| Tilt Angle | 0° to -75° |
| Control Methods | Remote Control, Wi-Fi (TUYA, Amazon Alexa, Google Nest), Voice Control |
| Color | Black |
| Country of Origin | France |

Figure 2: Dimensional Diagram of the Mount
Setup and Installation
Before starting, ensure you have all necessary tools (drill, screwdriver, level, stud finder) and that the ceiling structure is suitable for mounting.
- Prepare the Ceiling: Use the provided installation template to mark the drilling points on your ceiling. Ensure the location is free of electrical wires or pipes.
- Mount the Bracket: Drill pilot holes according to the template. Secure the main ceiling bracket assembly to the ceiling using the appropriate screws and anchors from the hardware kit. Ensure it is firmly attached and level.
- Attach VESA Plate to TV: Secure the VESA plate to the back of your television using the screws that match your TV's VESA pattern. Ensure the screws are tightened securely but do not overtighten.
- Hang the TV: Carefully lift the television with the attached VESA plate and hook it onto the main ceiling mount assembly. Ensure the TV is properly seated and secured.
- Connect Power: Plug the power adapter into the mount and then into a suitable power outlet.
- Cable Management: Route all necessary cables (power, HDMI, etc.) through the integrated cable management channels for a clean and aesthetic finish.

Figure 3: Mount in Retracted Position
Operating Instructions
Remote Control Operation
The mount is operated using the provided radio frequency (RF) remote control.
- Extend/Retract: Press the UP or DOWN buttons to extend or retract the TV.
- Stop: Press the STOP button to halt movement at any desired position.
- Memory Functions: The remote allows you to store two preferred positions.
- Move the TV to the desired position.
- Press and hold MEM1 or MEM2 until the mount beeps or flashes, indicating the position is saved.
- To recall a saved position, simply press MEM1 or MEM2.
Smart Home Integration (Wi-Fi)
The mount can be controlled via Wi-Fi using compatible smart home applications like TUYA, Amazon Alexa, or Google Nest, and also through voice commands.
- Download App: Download the TUYA Smart app (or relevant Alexa/Google Home app) from your device's app store.
- Pair Device: Follow the in-app instructions to add and pair your KIMEX 018-7064W mount. This typically involves putting the mount into pairing mode (refer to app instructions or mount's quick start guide for specific steps).
- Control: Once paired, you can control the mount's extension, retraction, and stop functions directly from the app or via voice commands through your smart assistant.

Figure 4: Operating the Mount with Remote Control
Maintenance
- Cleaning: Clean the mount surfaces with a soft, dry cloth. Do not use abrasive cleaners or solvents.
- Inspection: Periodically check all screws and connections to ensure they remain tight and secure.
- Lubrication: The motorized components are designed for long-term, maintenance-free operation. Do not attempt to lubricate any internal parts.
- Cable Check: Ensure all cables are free from kinks, pinches, or damage.
Troubleshooting
| Problem | Possible Cause | Solution |
|---|---|---|
| Mount does not respond to remote control. |
|
|
| Mount does not respond to Wi-Fi/App control. |
|
|
| Mount makes unusual noises during operation. |
|
|
| TV does not stop at programmed memory position. |
|
|
Warranty and Support
KIMEX provides a 3-year availability for spare parts for this product. For technical support, warranty claims, or further assistance, please contact KIMEX customer service through their official website or the retailer where the product was purchased.
Please have your model number (018-7064W) and proof of purchase ready when contacting support.
Ask a question about this manual
Ask about setup, troubleshooting, compatibility, parts, safety, or missing instructions. Manuals+ will review the question and use this page’s manual context to help answer it.