
Introduction
The AUTODUNK Smart Battery Box 12V is designed to convert a standard deep-cycle battery into a versatile portable power station. This manual provides essential information for the safe and efficient use of your battery box, including setup, operation, maintenance, and troubleshooting.
This heavy-duty battery box accommodates deep-cycle batteries up to 12.9 inches x 8.6 inches x 8.1 inches. It features multiple power outputs and built-in protection for various 12V devices.

Image: The AUTODUNK Smart Battery Box being used with a solar panel for portable power in an outdoor setting.
Product Components
Familiarize yourself with the key components of your AUTODUNK Smart Battery Box:

Image: Detailed top view of the battery box showing the Negative (-) External Terminal, 16 Amp Resettable Circuit Breaker, ON/OFF Switch, QC3.0 & PD Type-C Dual Ports, Positive (+) External Terminal, 2x 50 Amp Heavy Duty Anderson Connectors (with 60A fuse), Digital Voltmeter, and 12V Cigarette Connector.
- Negative (-) External Terminal: For connecting external negative battery cables.
- Positive (+) External Terminal: For connecting external positive battery cables.
- 16 Amp Resettable Circuit Breaker: Provides overcurrent protection for the internal circuits.
- ON/OFF Switch: Controls power to the integrated ports.
- QC3.0 & PD Type-C Dual Ports: USB ports for charging mobile devices.
- 2x 50 Amp Heavy Duty Anderson Connectors (with 60A fuse): High-current ports for charging the battery or powering high-draw devices.
- Digital Voltmeter: Displays the battery's voltage.
- 12V Cigarette Connector: Standard automotive power outlet for 12V appliances under 100W.
Setup Instructions
- Open the Battery Box: Unlatch and remove the top cover of the battery box.
- Insert Battery: Carefully place your deep-cycle battery into the box. Ensure the battery dimensions are within the maximum capacity of 12.9 inches x 8.6 inches x 8.1 inches.
- Connect Battery Terminals: Connect the internal positive (+) cable from the box to the positive terminal of your battery. Connect the internal negative (-) cable from the box to the negative terminal of your battery. Ensure connections are secure.
- Close the Box: Replace the top cover and secure the latches.
- Secure the Battery Box: Use the integrated tie-down strap to secure the battery box in your vehicle or desired location to prevent movement during transport.
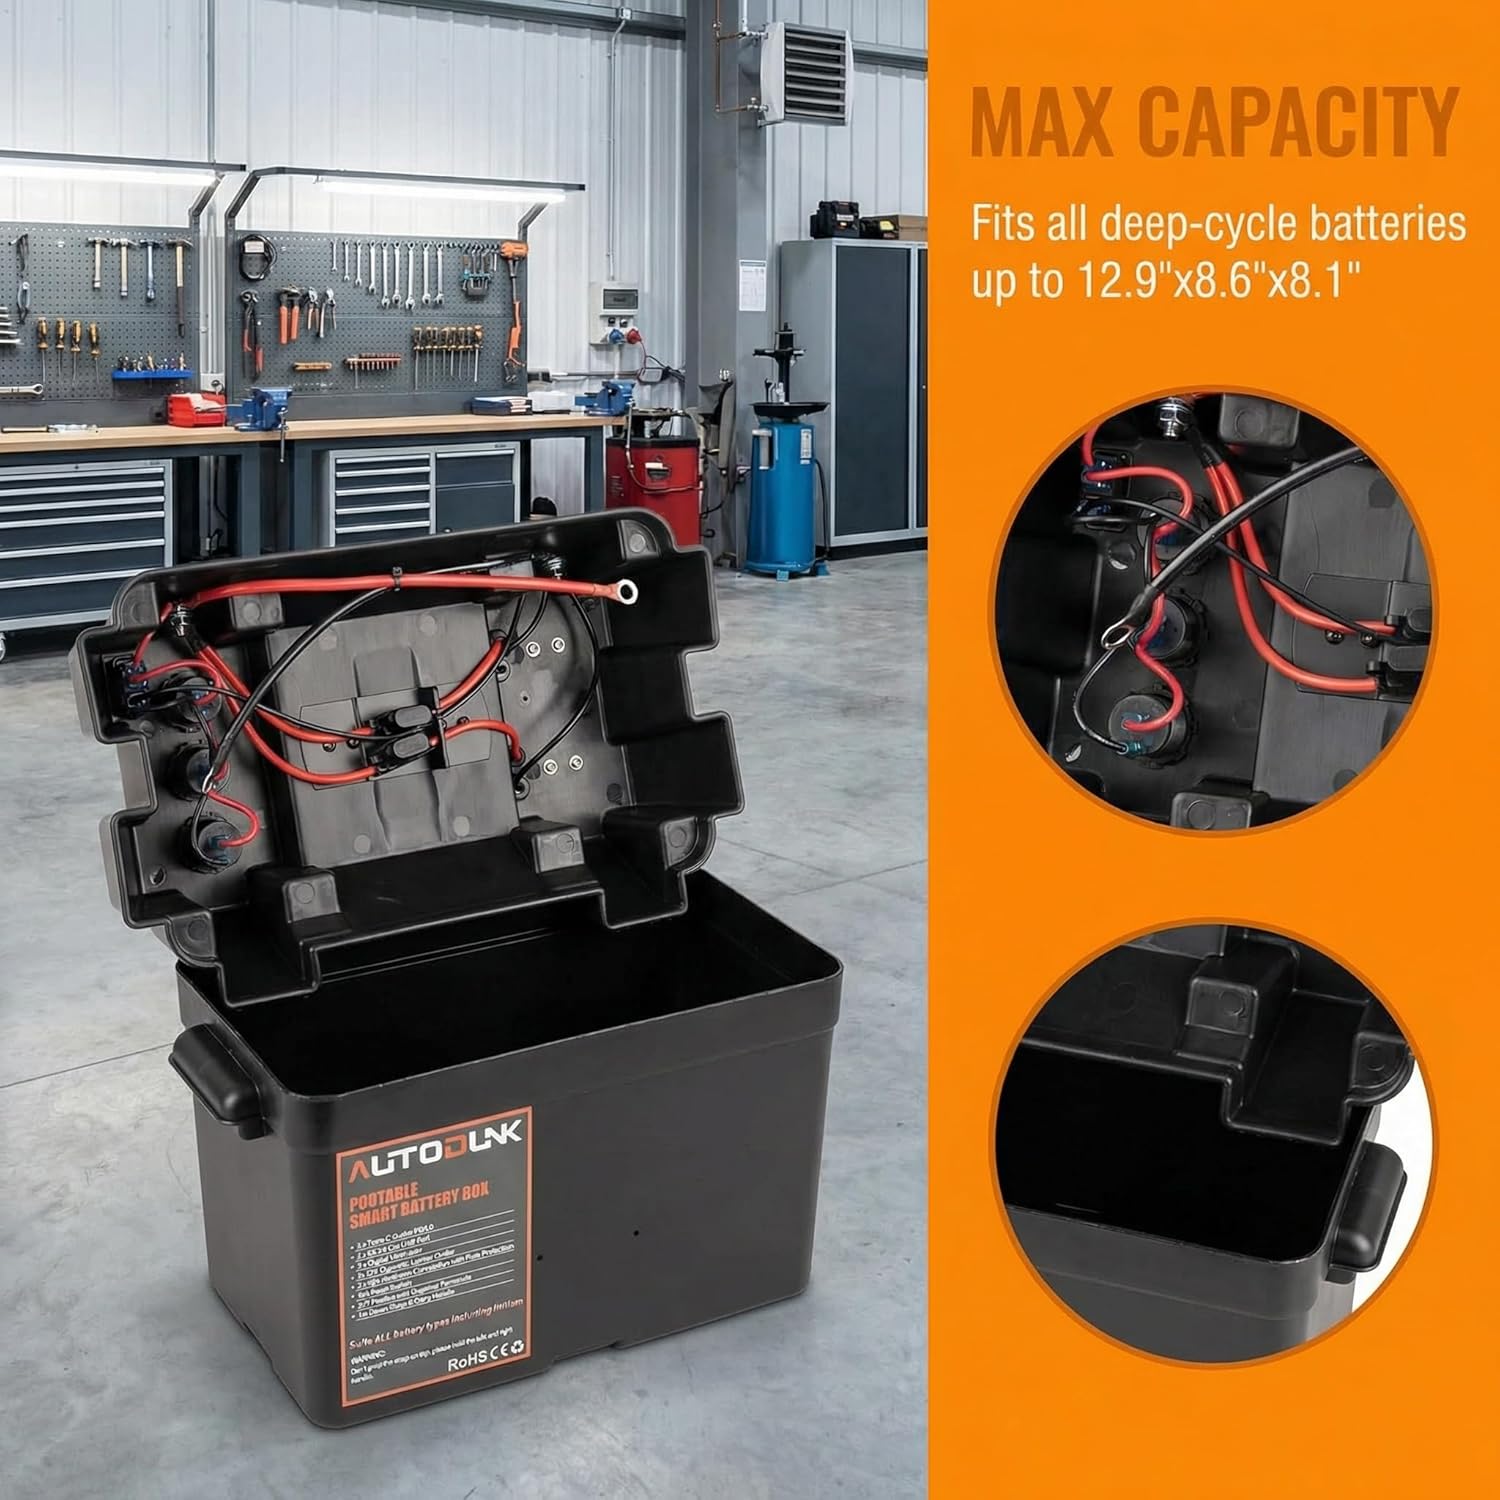
Image: The interior of the battery box, illustrating the wiring and the maximum capacity for a deep-cycle battery.
Setup Video Guide
Video: An overview of a similar RV Battery Box with Power Center, demonstrating general setup and features. This video is provided by FIVEPLUS.
Video: A demonstration of the ALL-TOP Portable Battery Box, showcasing its use in an outdoor setting and highlighting its features. This video is provided by ALL-TOP.
Operating Instructions
Powering On/Off
Locate the ON/OFF switch on the top panel. Flip the switch to the "ON" position to activate the integrated ports and digital voltmeter. Flip to "OFF" when not in use to conserve battery power.
Using the Digital Voltmeter
The digital voltmeter displays the current voltage of the installed battery. This allows you to monitor the battery's charge level. A fully charged 12V battery typically reads around 12.6V to 12.8V. Consult your battery's specifications for optimal voltage ranges.
Charging Devices via USB (QC3.0 & PD Type-C)
Connect your mobile phones, tablets, or other USB-powered devices to the QC3.0 or PD Type-C ports. These ports provide fast charging capabilities for compatible devices.

Image: A detailed view of the USB charging ports (QC3.0 and Type-C) and the digital voltage indicator.
Powering 12V Appliances (Cigarette Connector)
Plug your 12V appliances (e.g., portable refrigerators, air pumps) into the 12V cigarette connector. Ensure the total power draw of connected appliances does not exceed 100W to prevent overloading.
Using Anderson Connectors
The two 50 Amp Anderson-style ports can be used for high-current applications, such as charging the battery from a solar panel or vehicle alternator, or powering high-draw 12V equipment. These ports are protected by a 60A fuse.
To charge the internal battery using solar panels, connect the solar panel's Anderson connector to one of the battery box's Anderson ports. Ensure your solar panel has a compatible charge controller.

Image: The battery box in a camping scenario, powering string lights, demonstrating its portable power capabilities.
Operation Video Guide
Video: A brief demonstration of a battery box, potentially showing battery insertion or port usage. This video is provided by POWO Carlife.
Video: A feature overview of the SUNAPEX All-In-One Smart Battery Box, highlighting various ports and functionalities. This video is provided by SUNAPEX.
Maintenance
- Regular Cleaning: Keep the exterior of the battery box clean and free from dust and debris. Use a damp cloth for cleaning. Avoid harsh chemicals.
- Terminal Inspection: Periodically check all external and internal connections for tightness and corrosion. Clean any corrosion with a wire brush and battery terminal cleaner.
- Storage: When not in use for extended periods, store the battery box in a cool, dry place. Ensure the internal battery is fully charged before storage and periodically recharged to prevent deep discharge.
- Circuit Breaker: If the 16 Amp resettable circuit breaker trips, disconnect some loads and press the reset button. If it continues to trip, reduce the load or investigate for a short circuit.
Troubleshooting
| Problem | Possible Cause | Solution |
|---|---|---|
| No power from ports |
|
|
| Digital voltmeter not displaying |
|
|
| Devices not charging via USB |
|
|
Specifications
- Model: Smart Battery Box 12V
- Brand: AUTODUNK
- Voltage: 12 Volts
- Max Battery Dimensions: 12.9 inches x 8.6 inches x 8.1 inches (32.77 cm x 21.84 cm x 20.57 cm)
- Product Dimensions (External): 20.1D x 34W x 32.8H Centimetres (7.9D x 13.4W x 12.9H inches)
- Item Weight: 2.59 Kilograms (5.71 lbs)
- Ports:
- 1x QC3.0 USB Port
- 1x PD Type-C Port
- 1x 12V Cigarette Connector (Max 100W)
- 2x 50A Anderson Connectors (with 60A fuse)
- Positive (+) and Negative (-) External Terminals
- Protection: 16 Amp Resettable Circuit Breaker
- Display: Digital Voltmeter
- Material: Durable ABS Plastic
- Compatible Vehicle Types: ATV, Passenger Car, SUV, Trailer, Truck, Van

Image: Dimensional drawing of the AUTODUNK Smart Battery Box, indicating its length, width, and height.
Warranty and Support
AUTODUNK products are manufactured using high-quality materials and are designed for reliable service. For warranty information, technical support, or assistance with your Smart Battery Box, please contact AUTODUNK customer service through the retailer where the product was purchased or refer to the official AUTODUNK website for contact details.
Please retain your proof of purchase for warranty claims.